


NOTIFY ME WHEN AVAILABLE
We'll notify you as soon as this product or sample is back in stock / available.
Pair It With

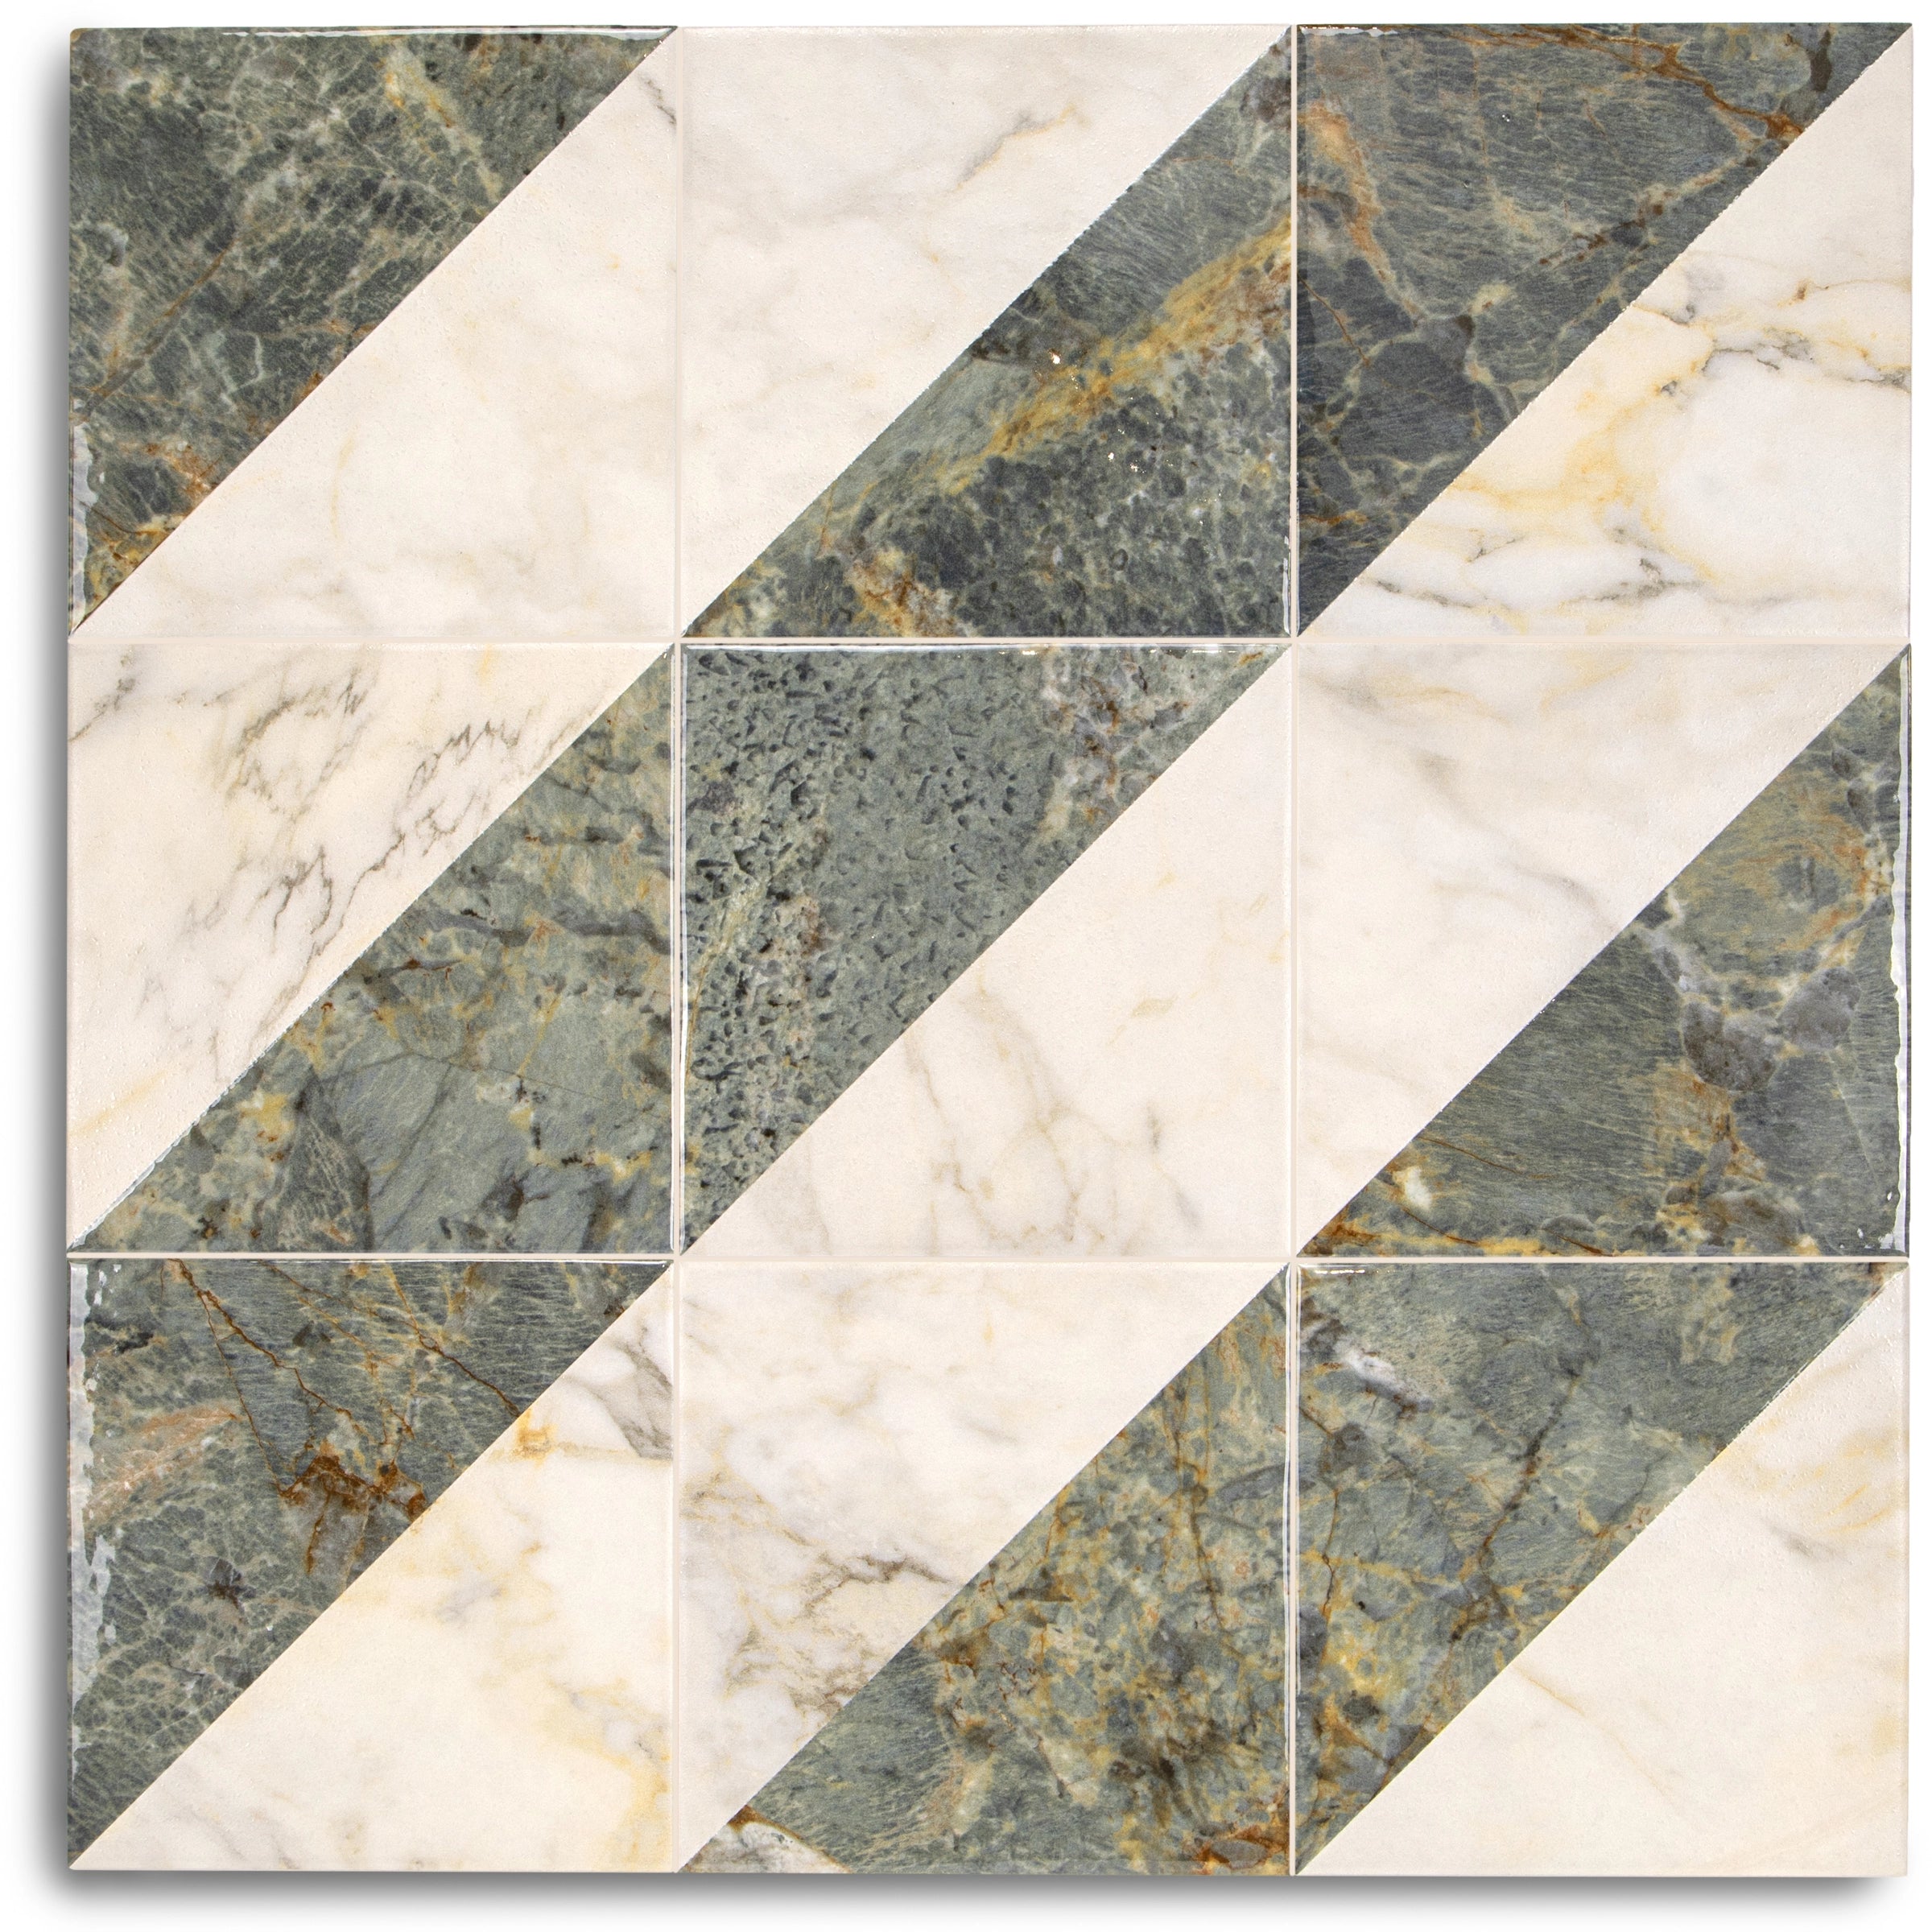
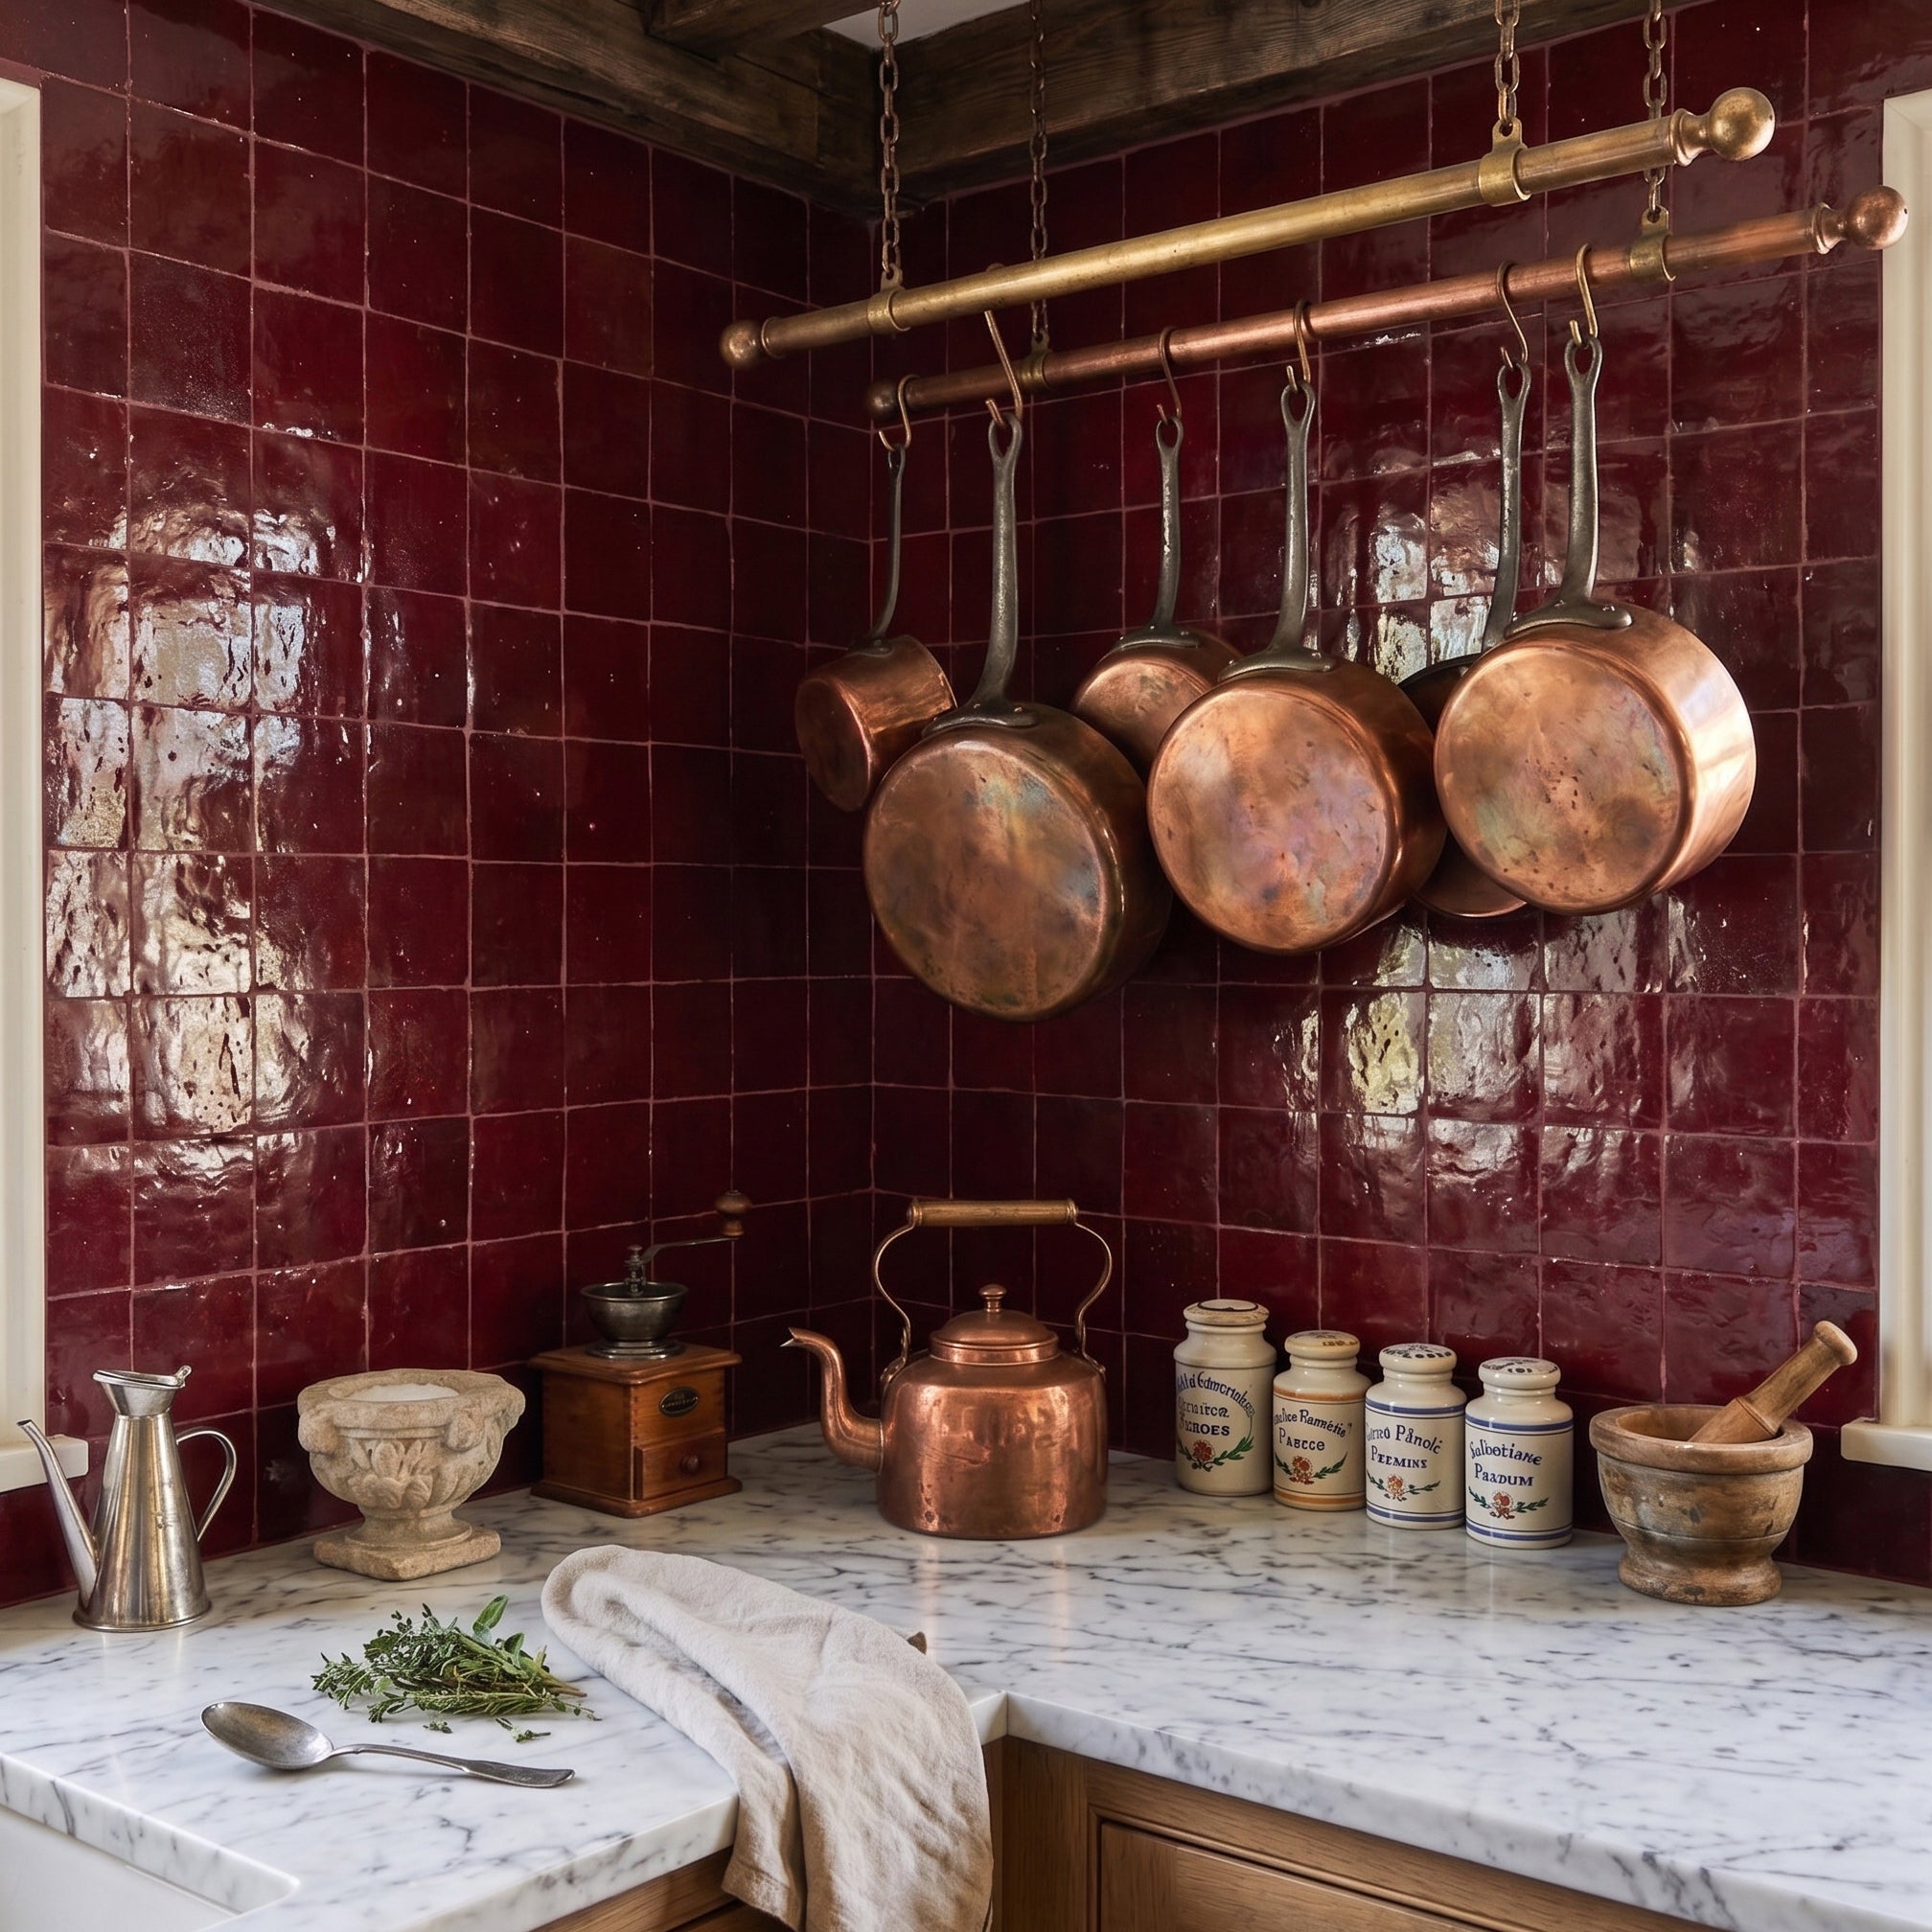
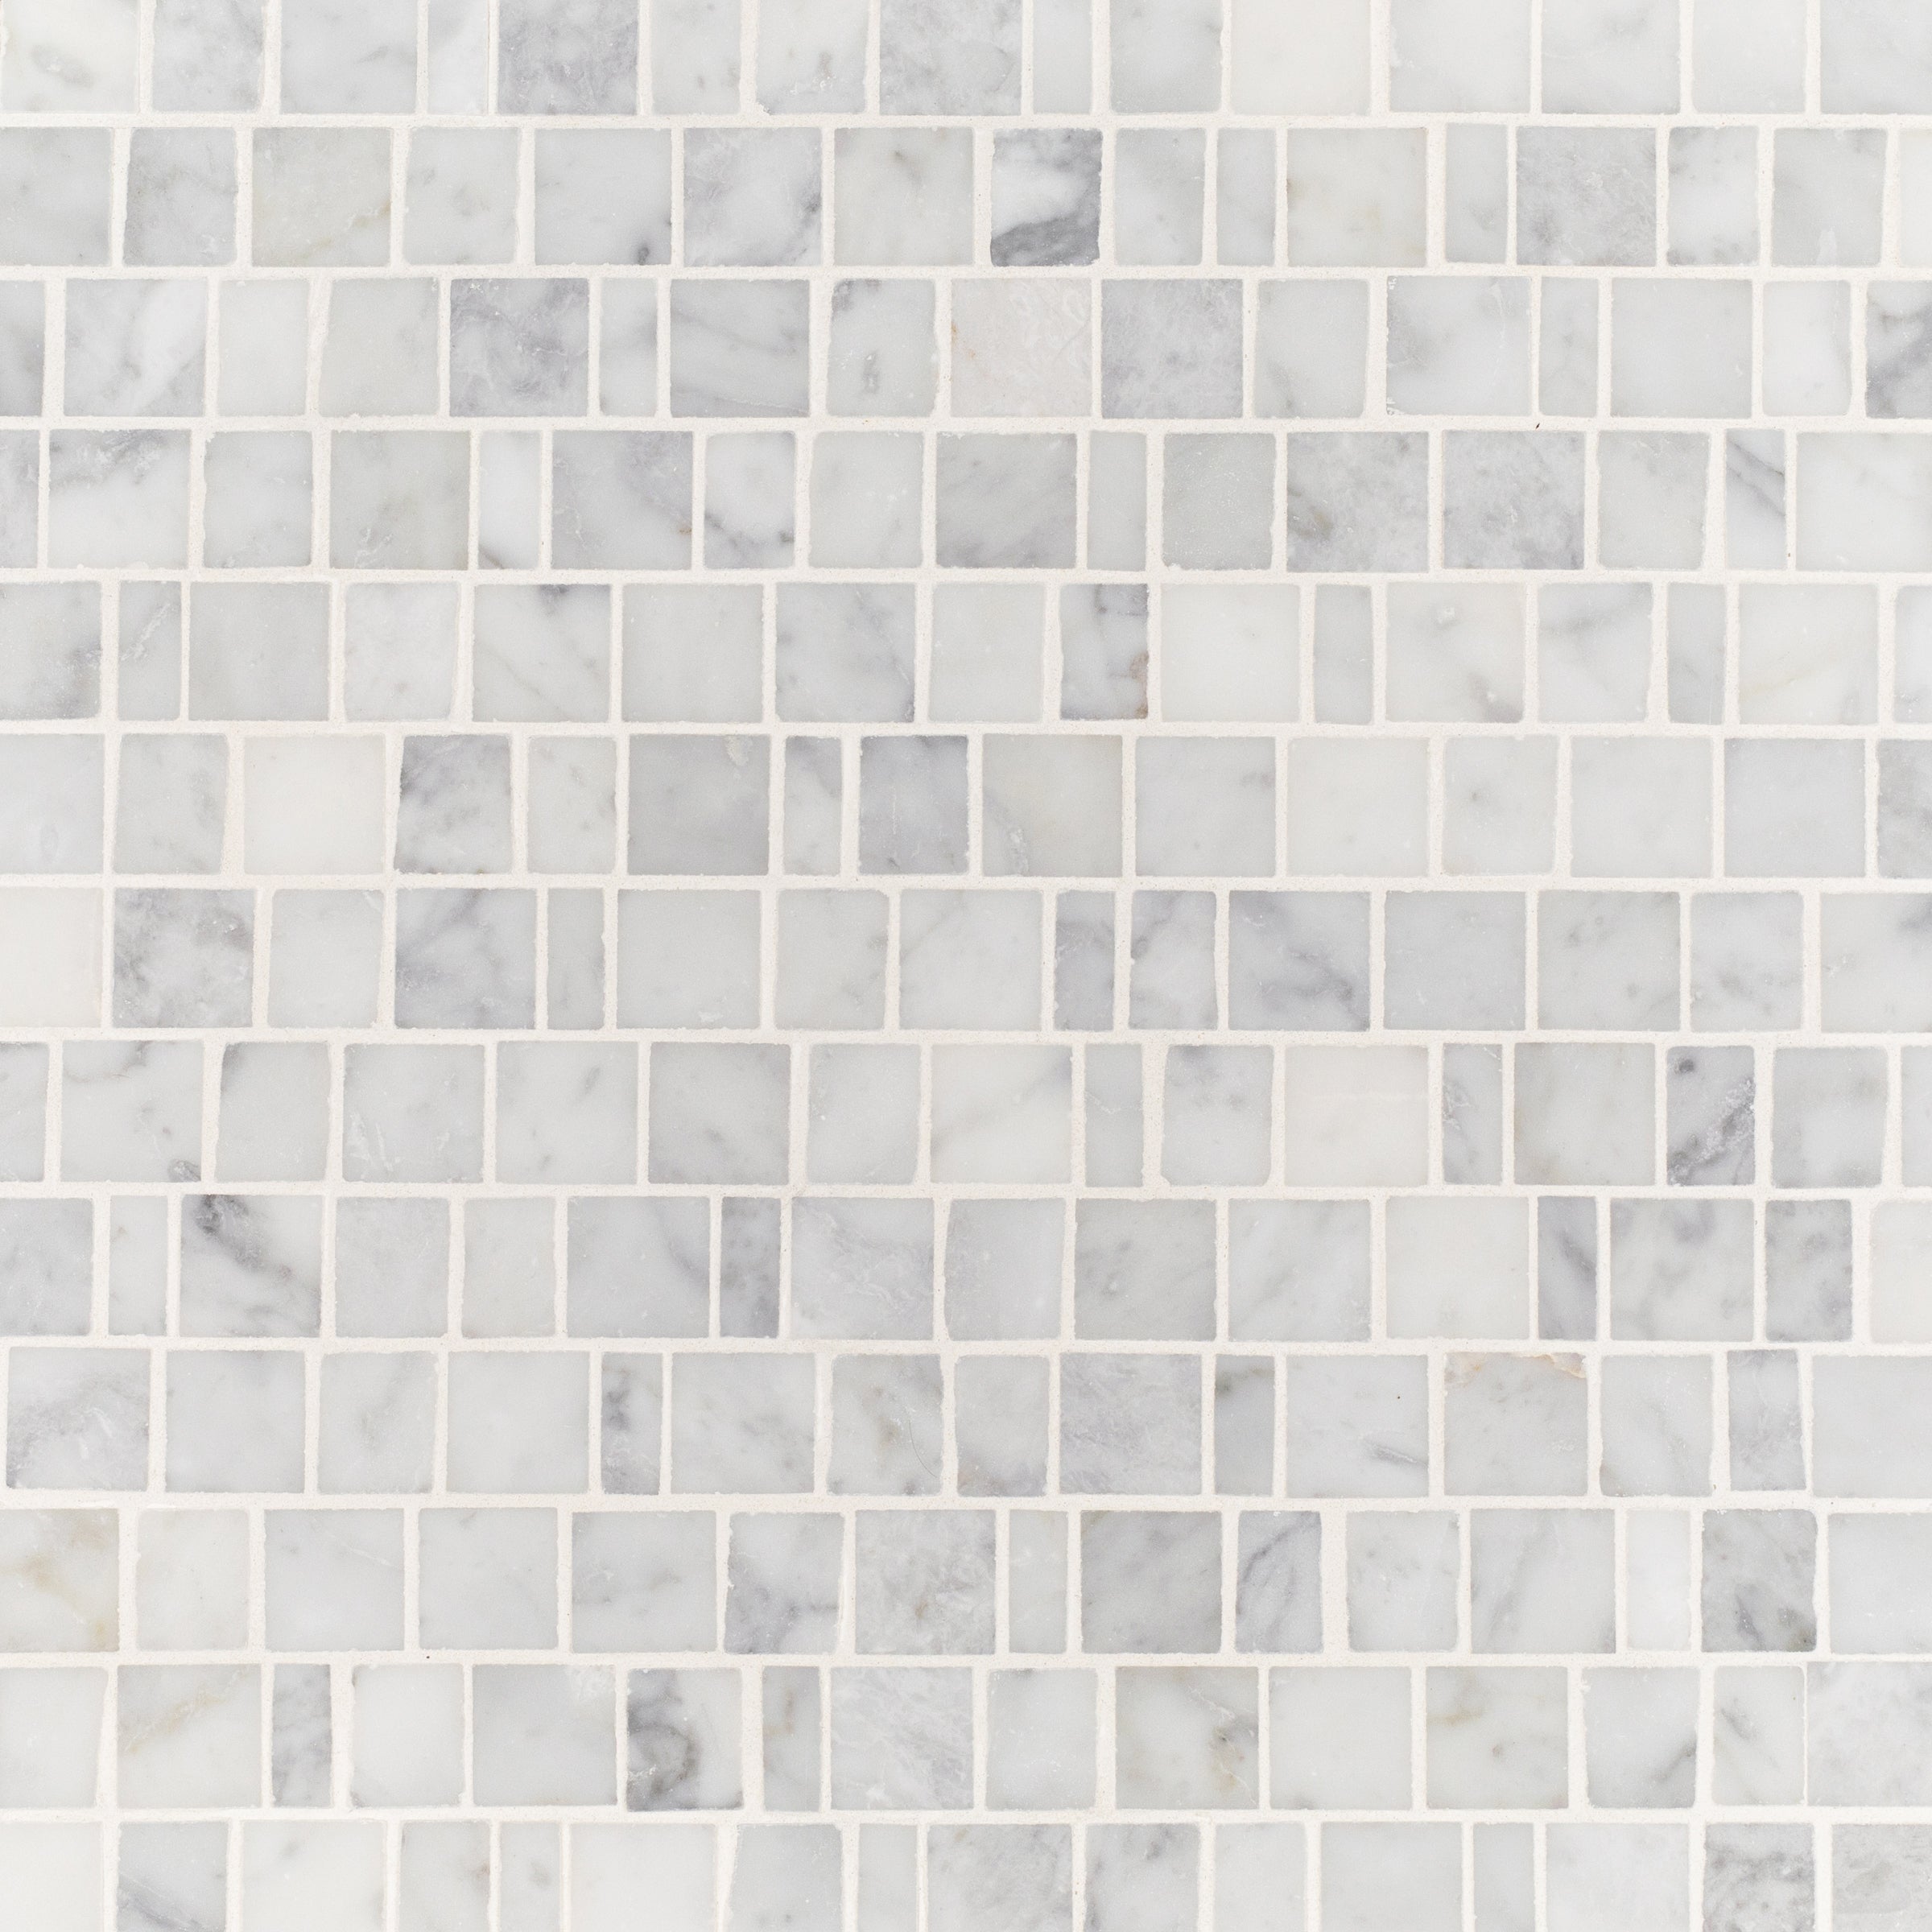
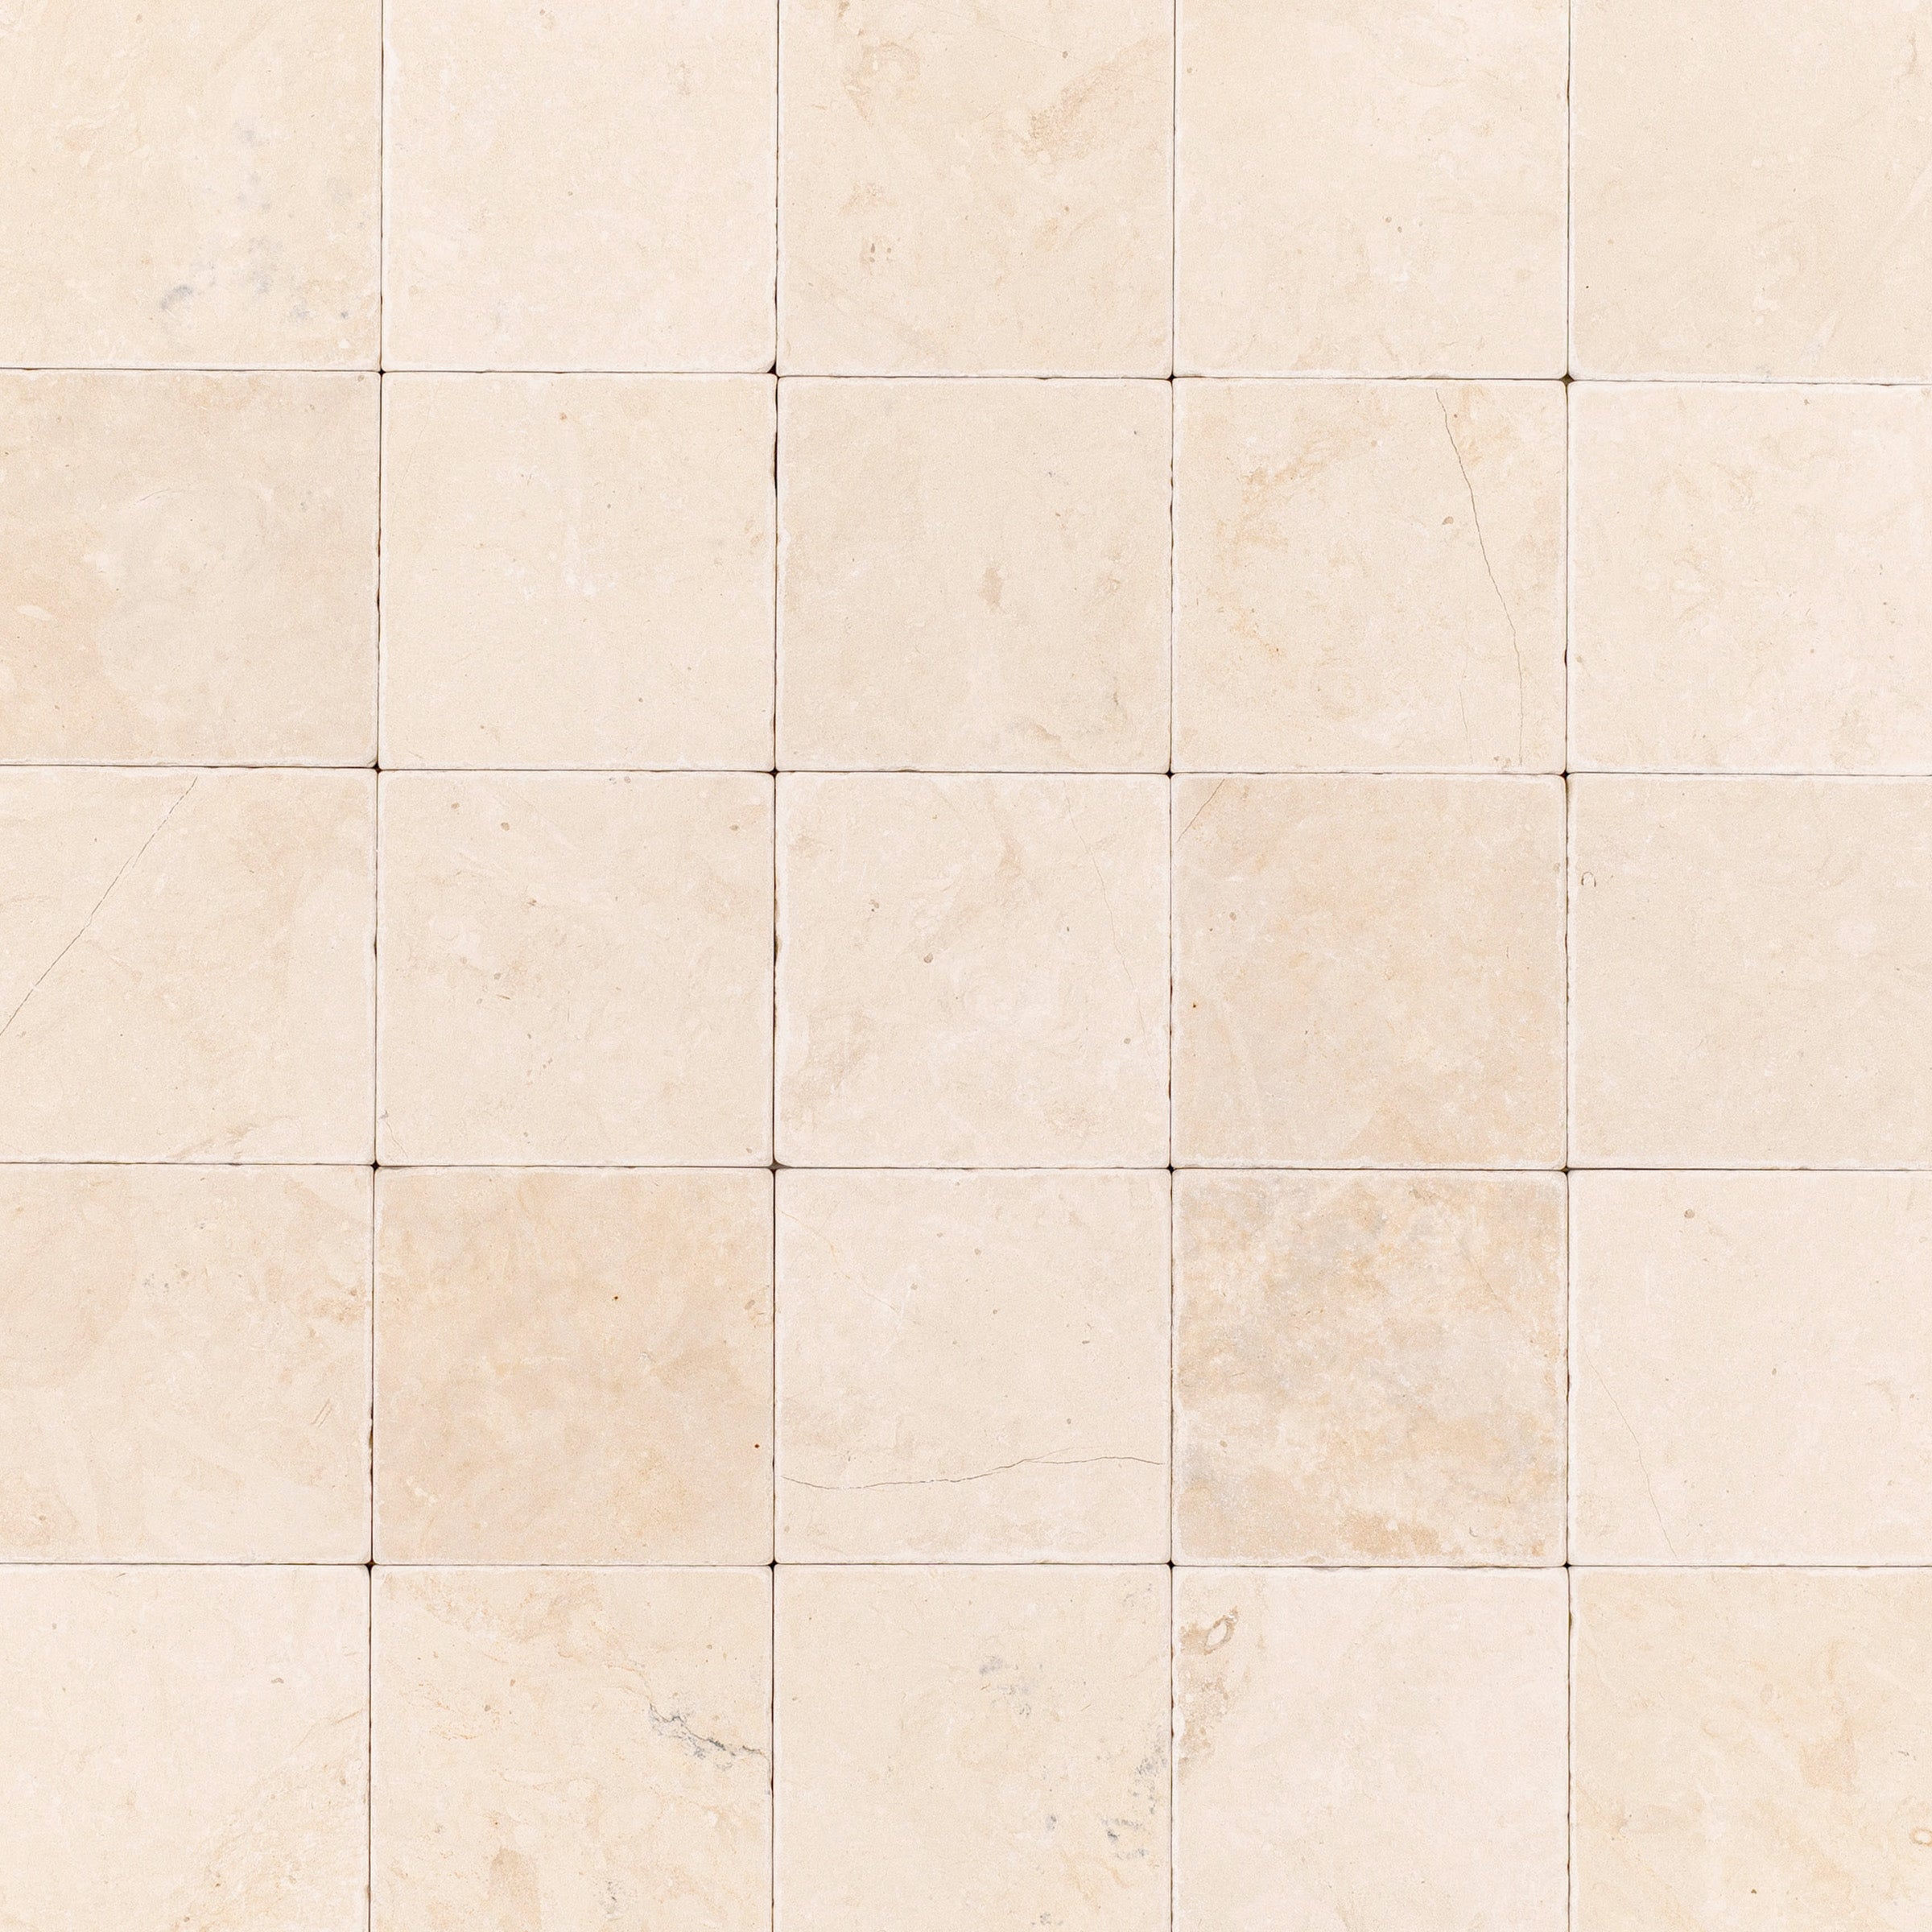
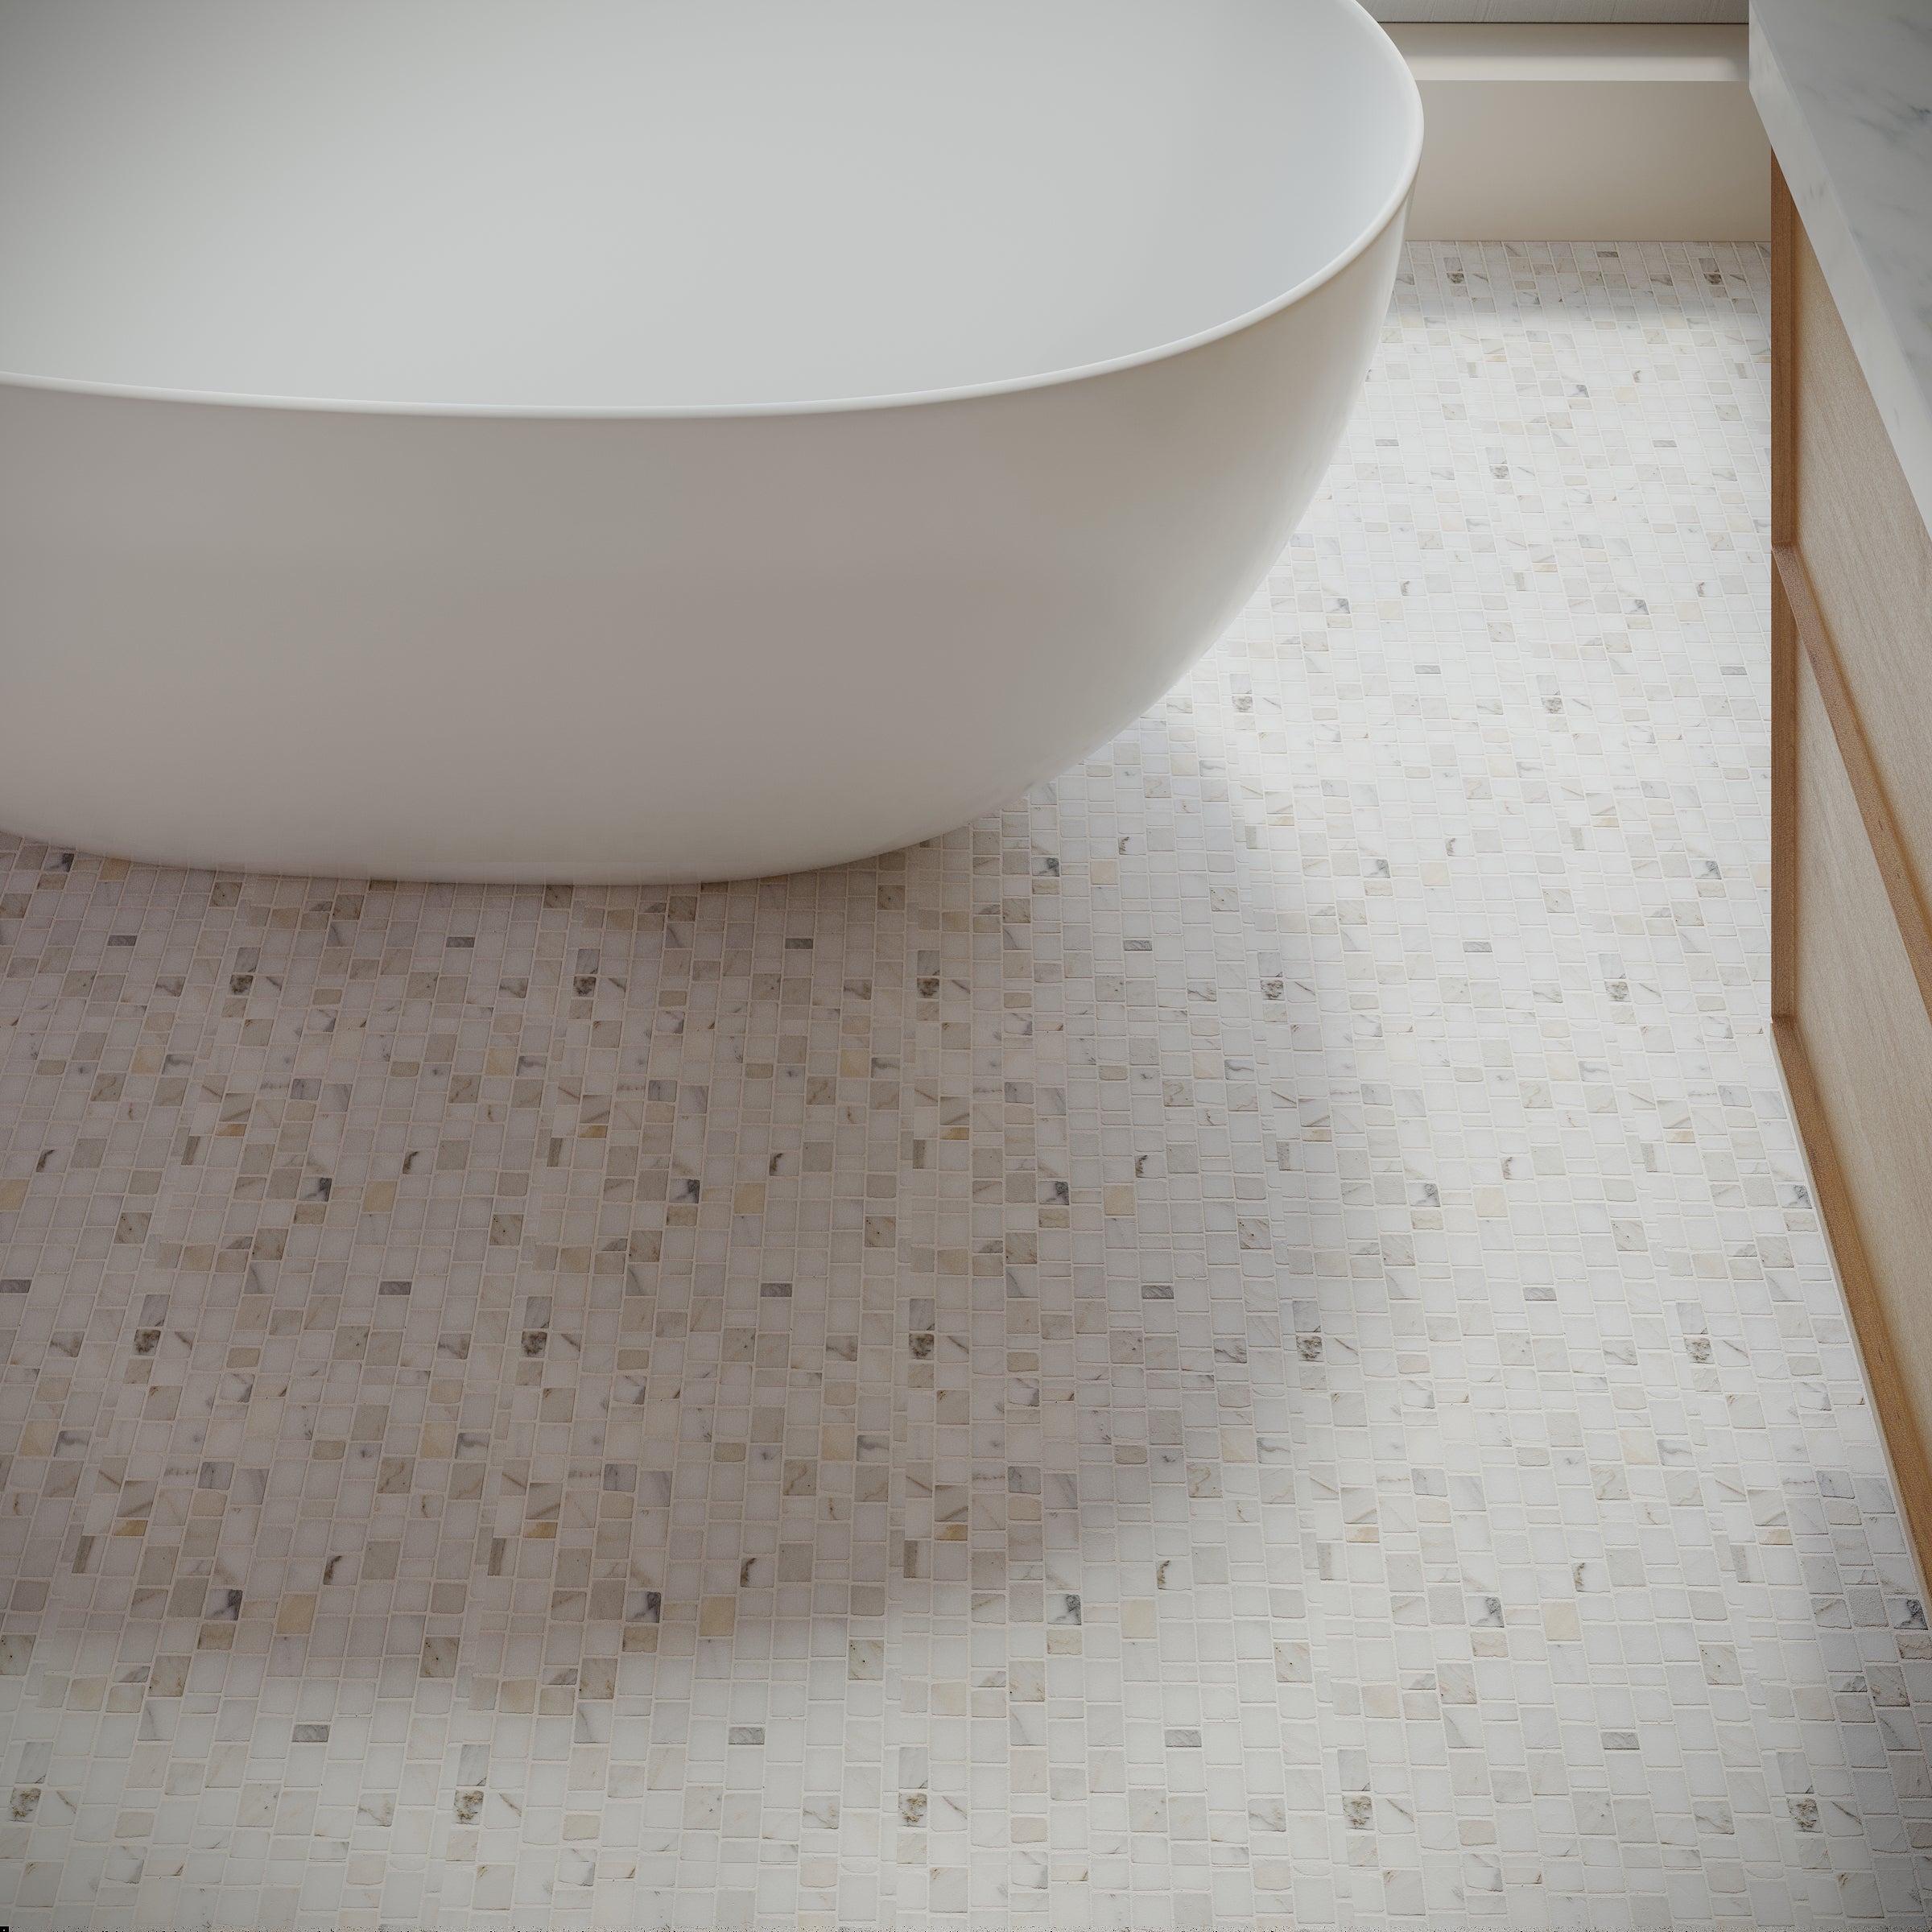
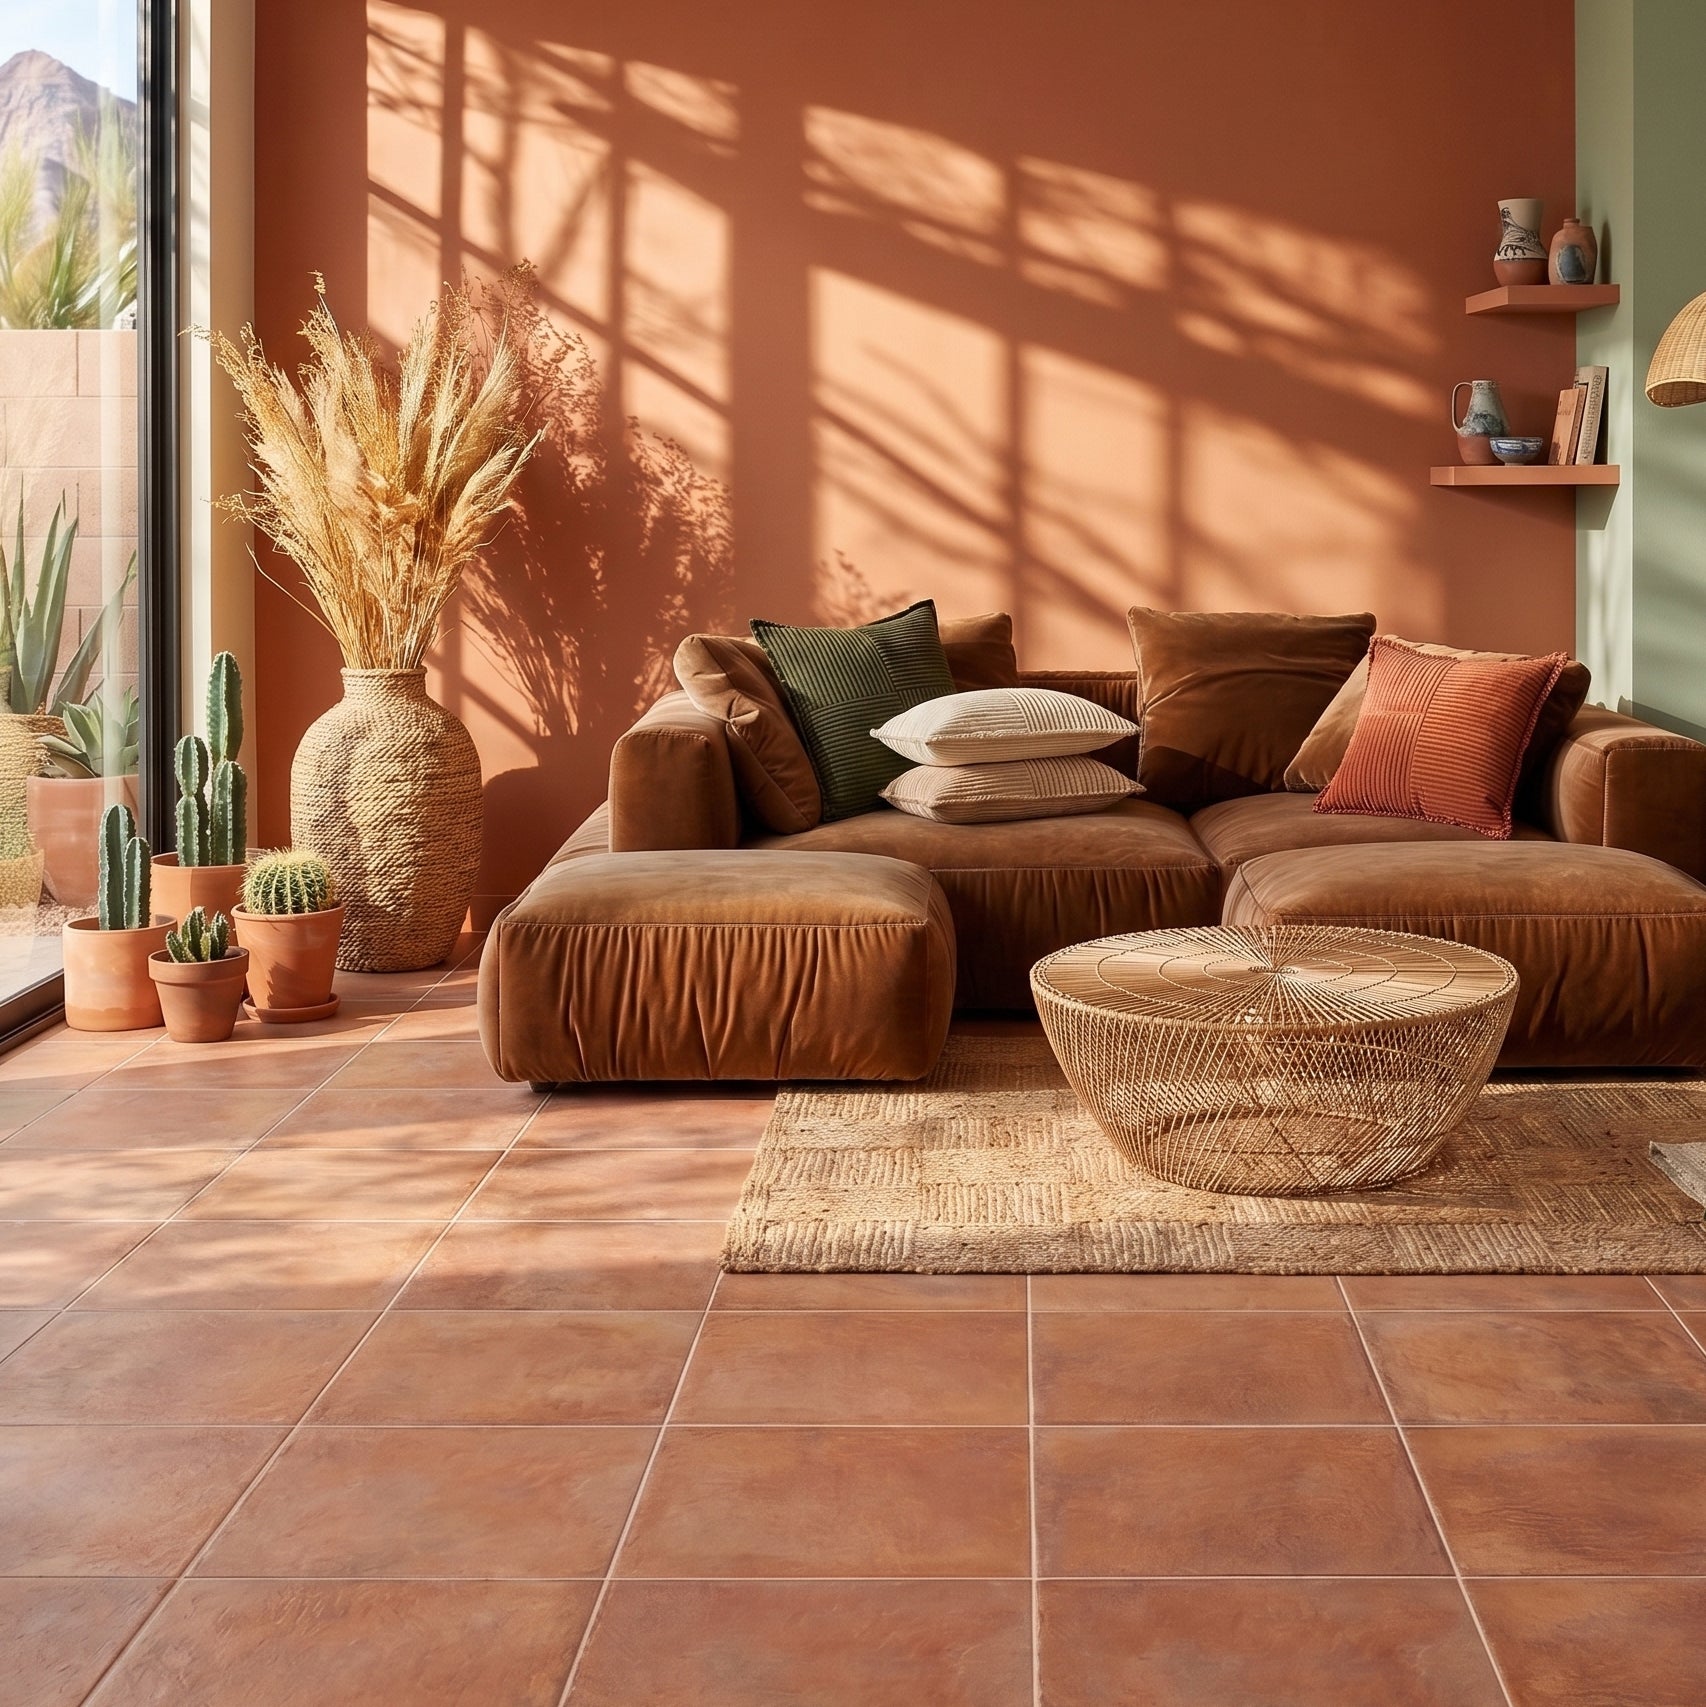
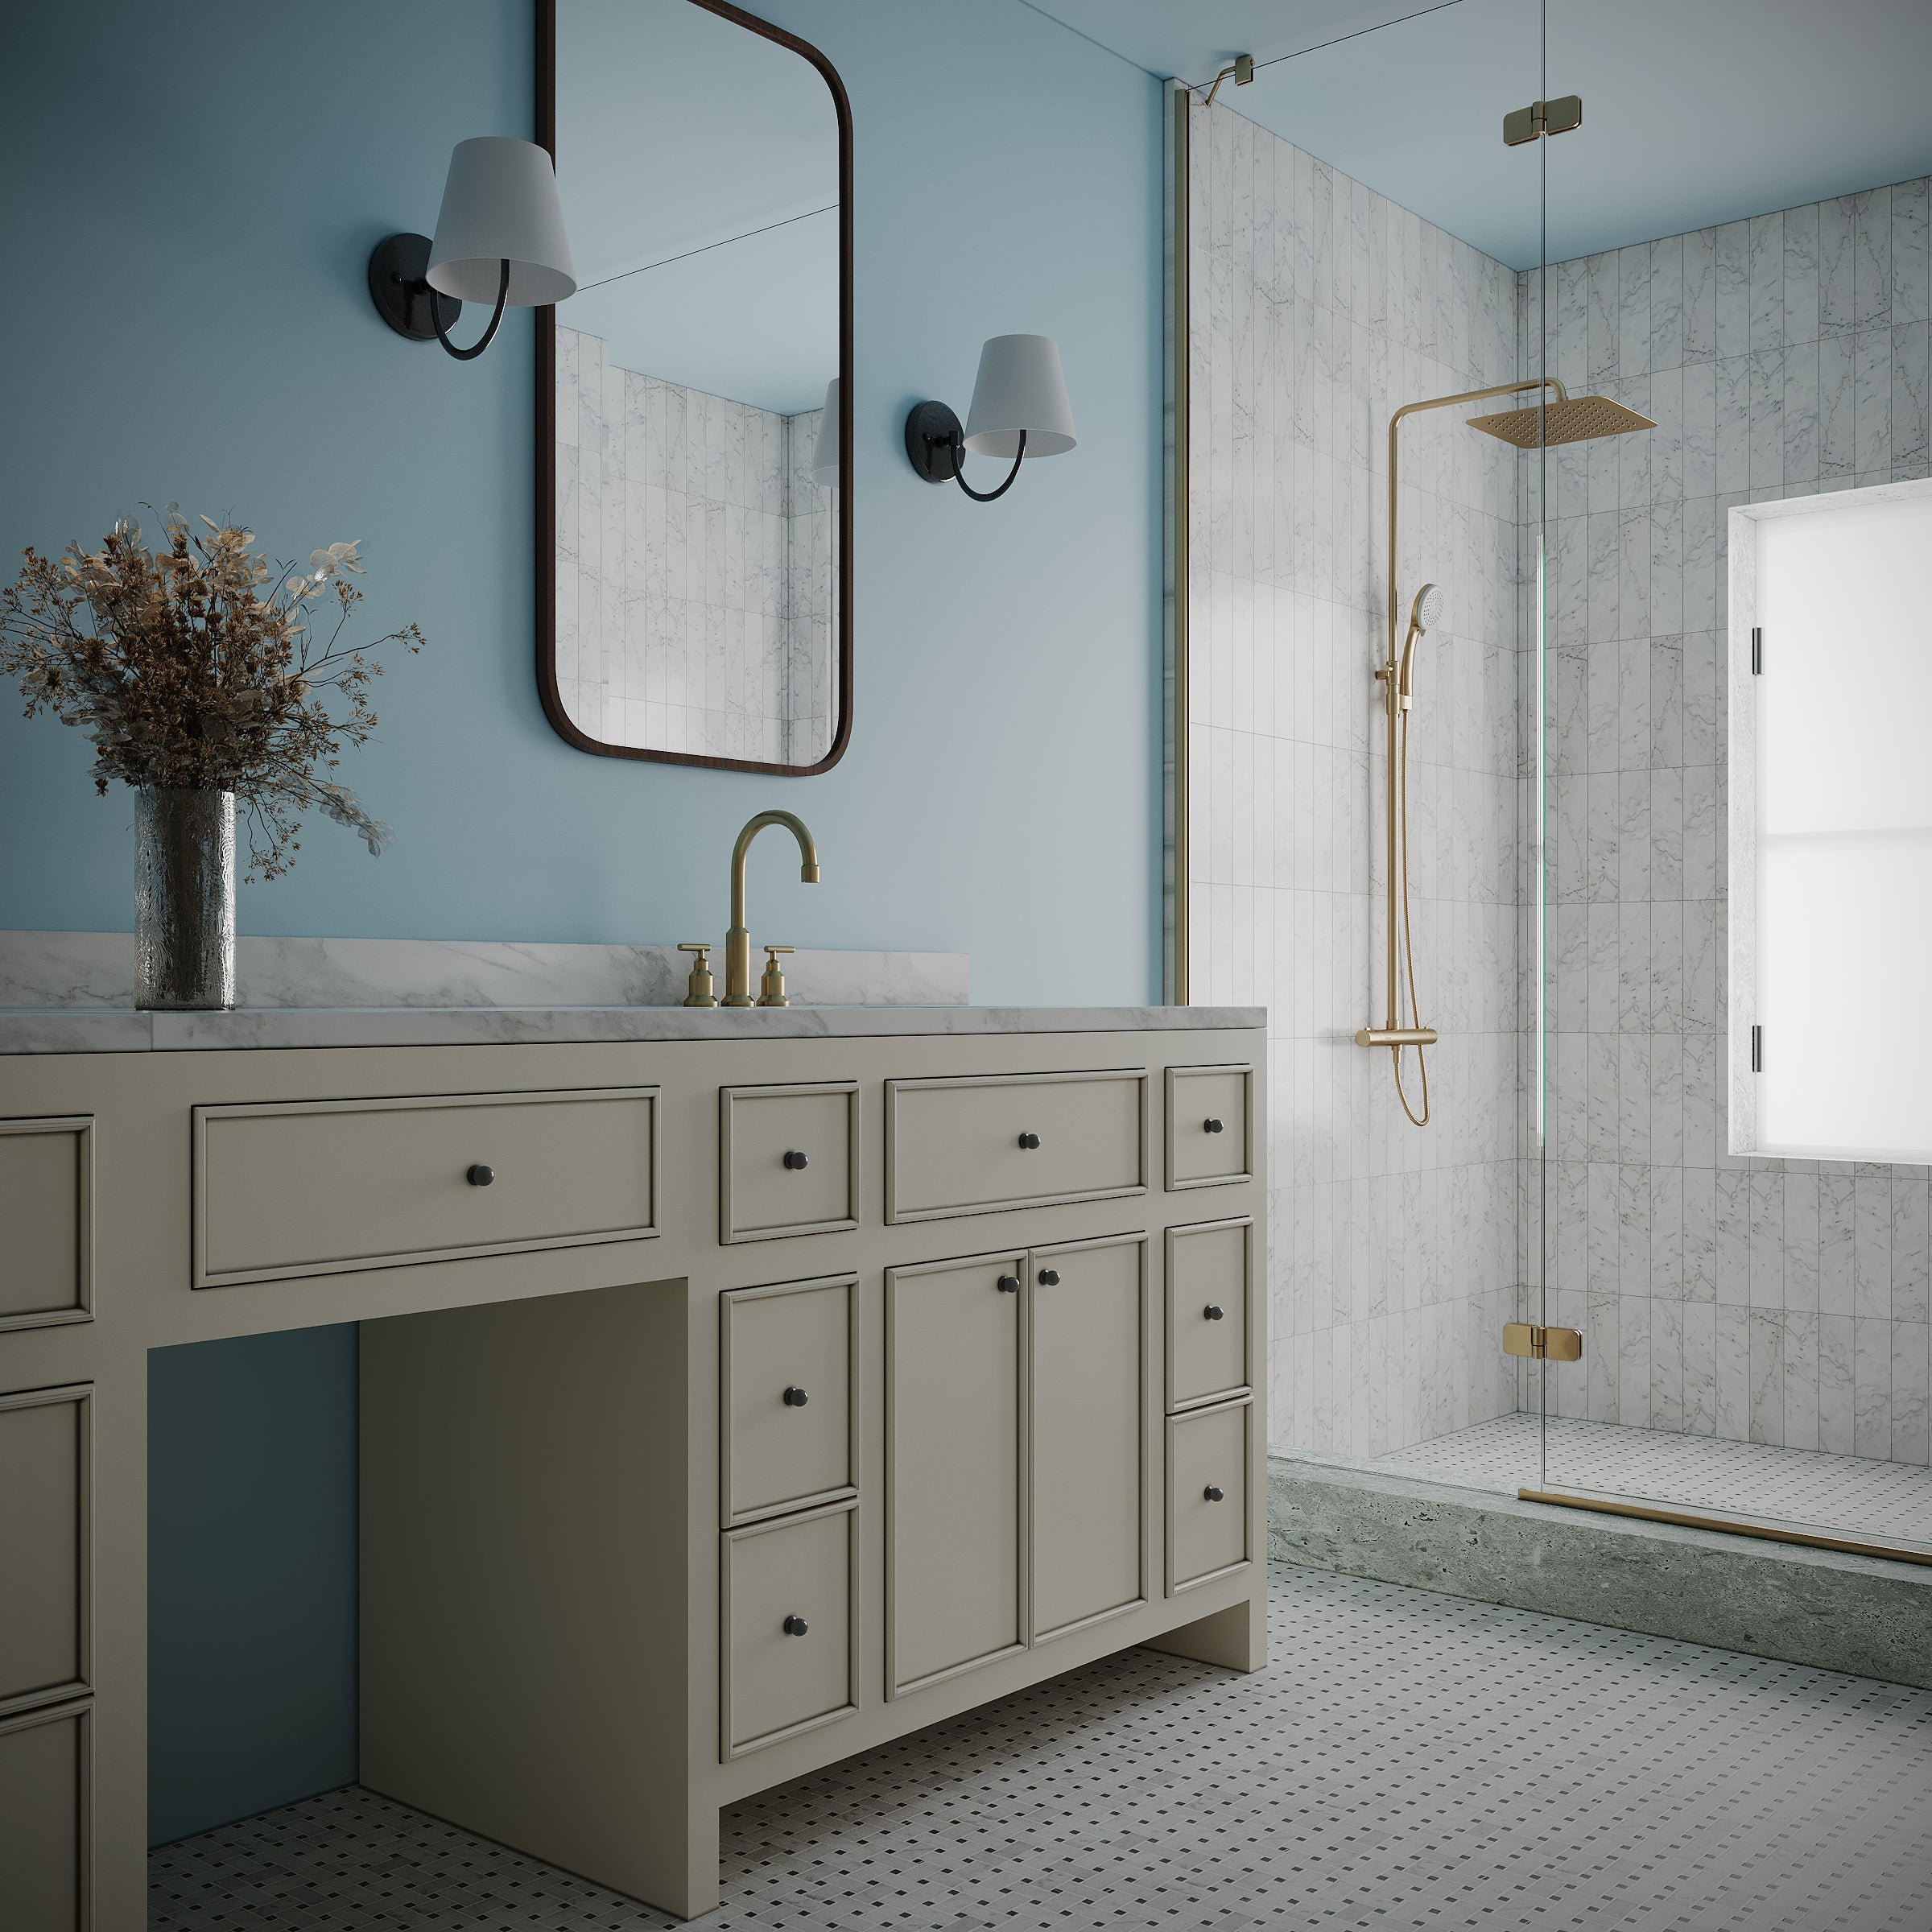
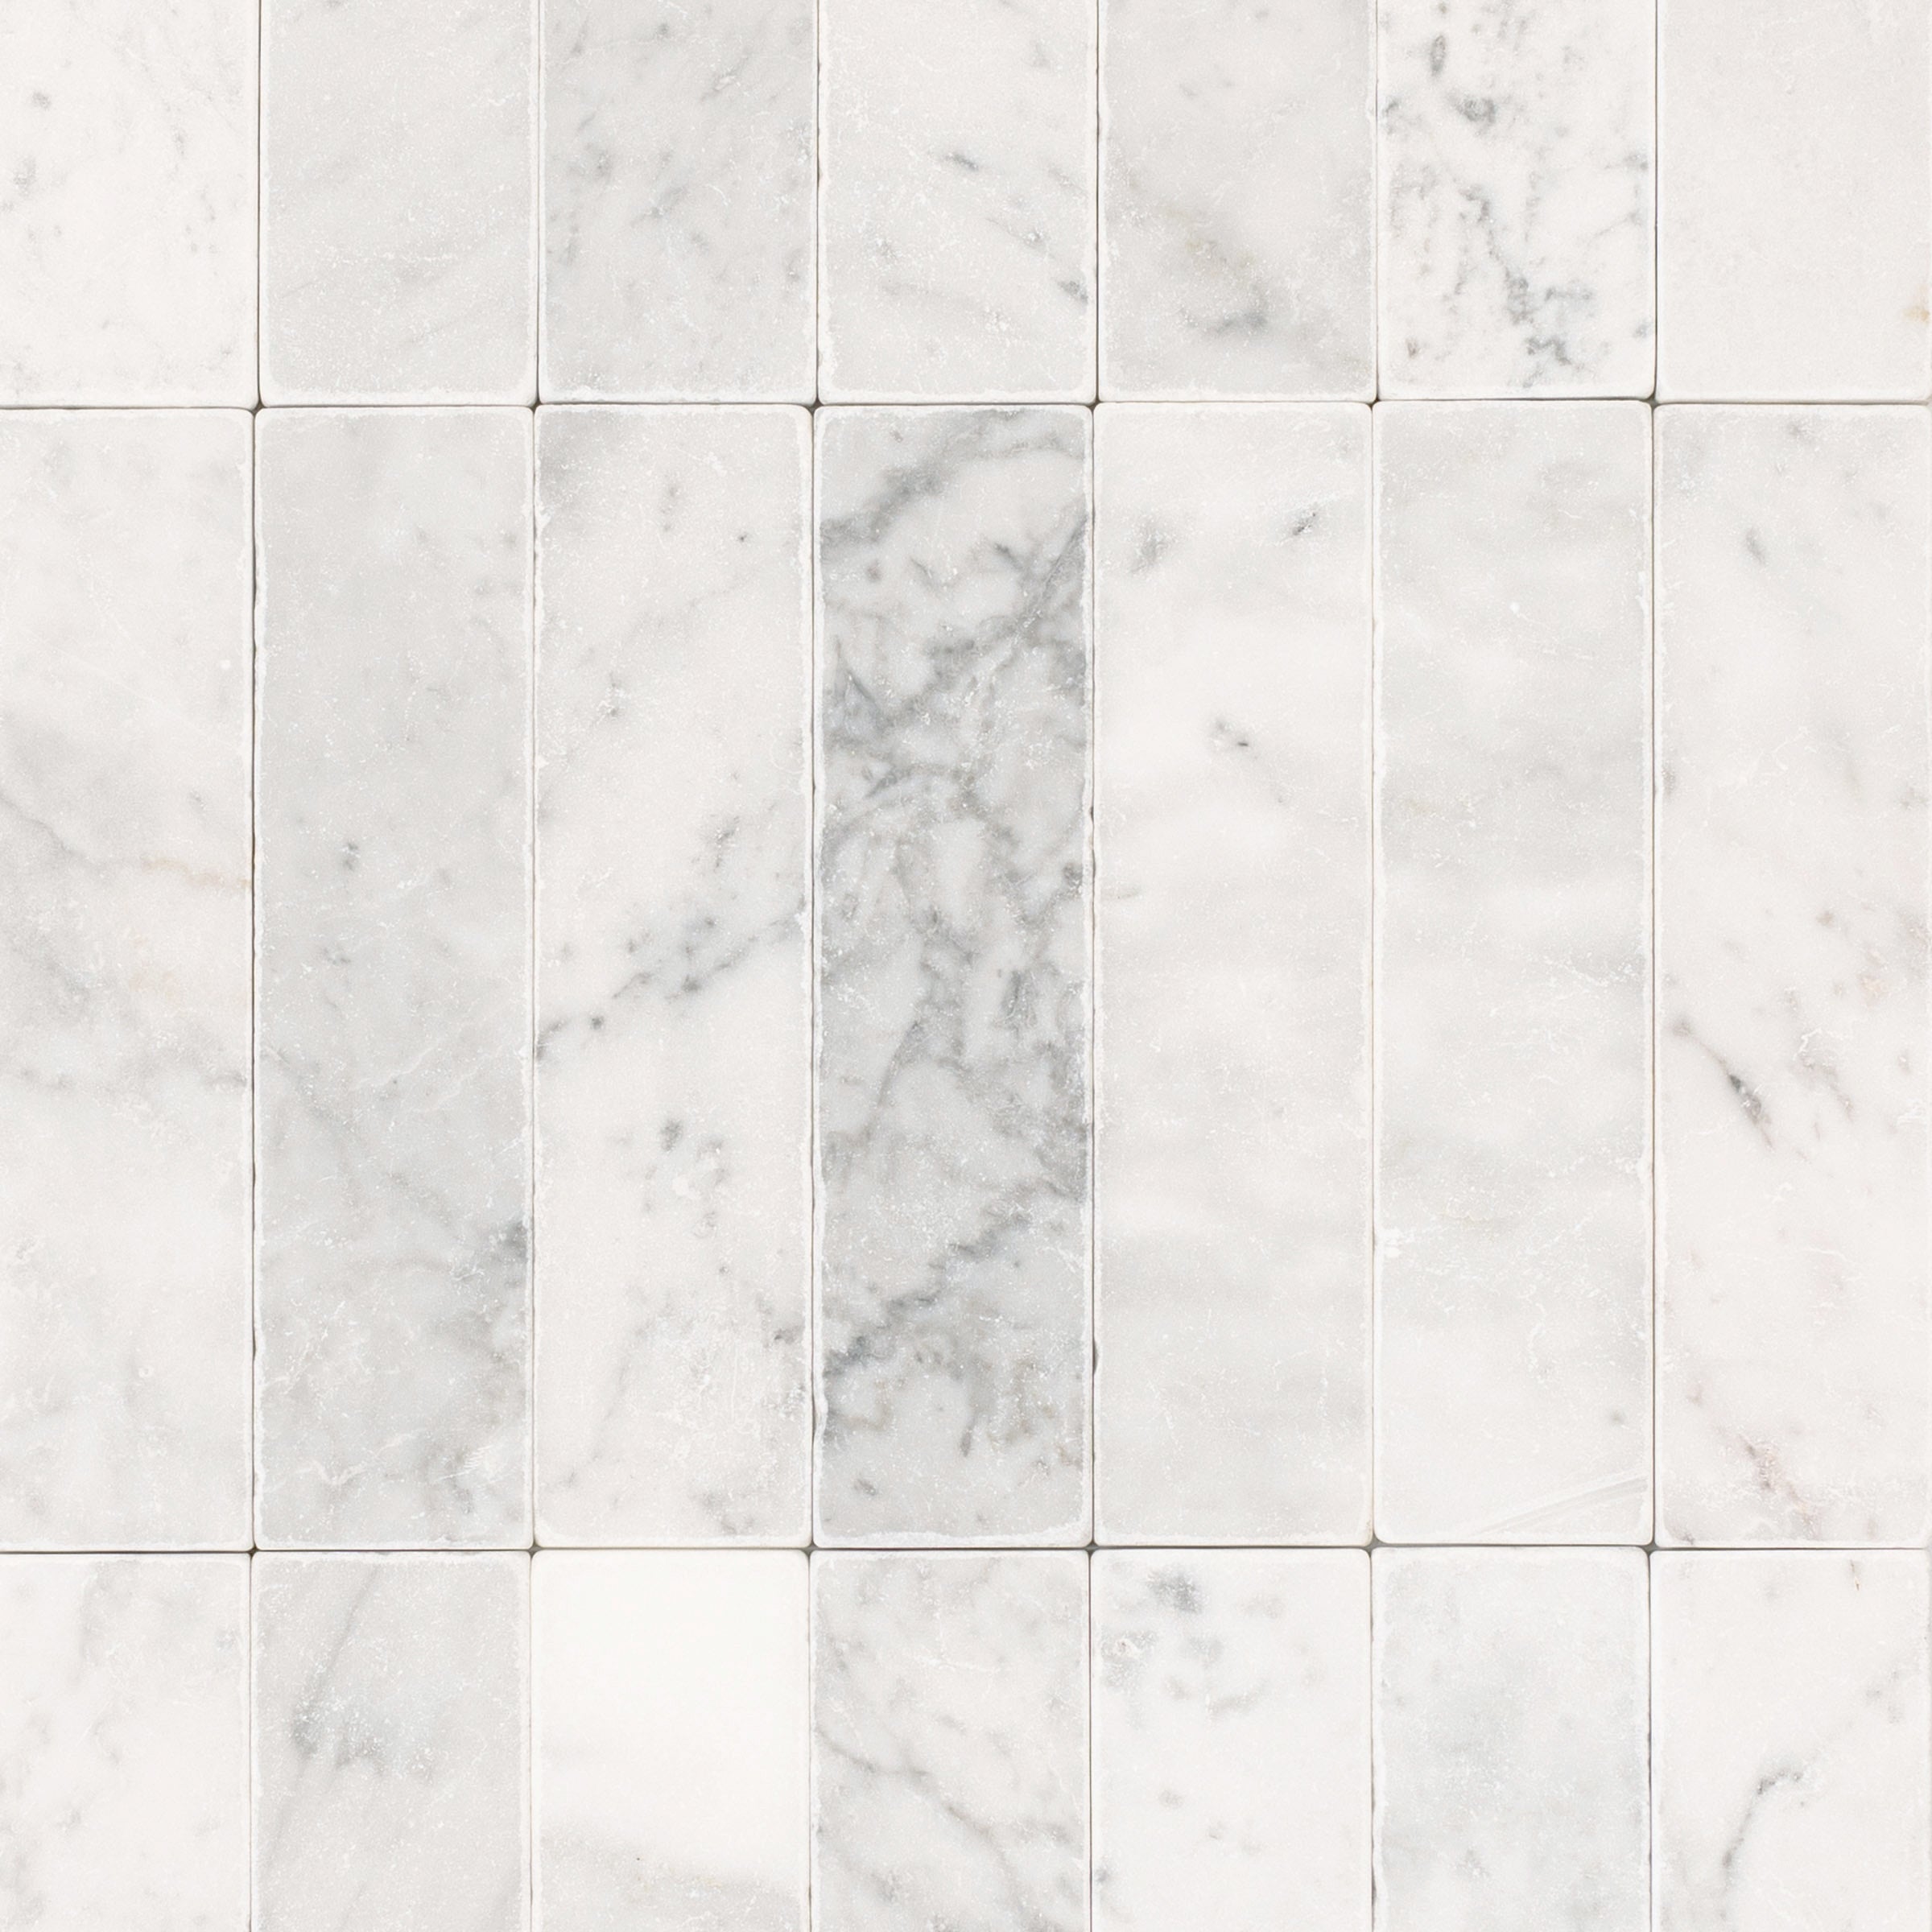
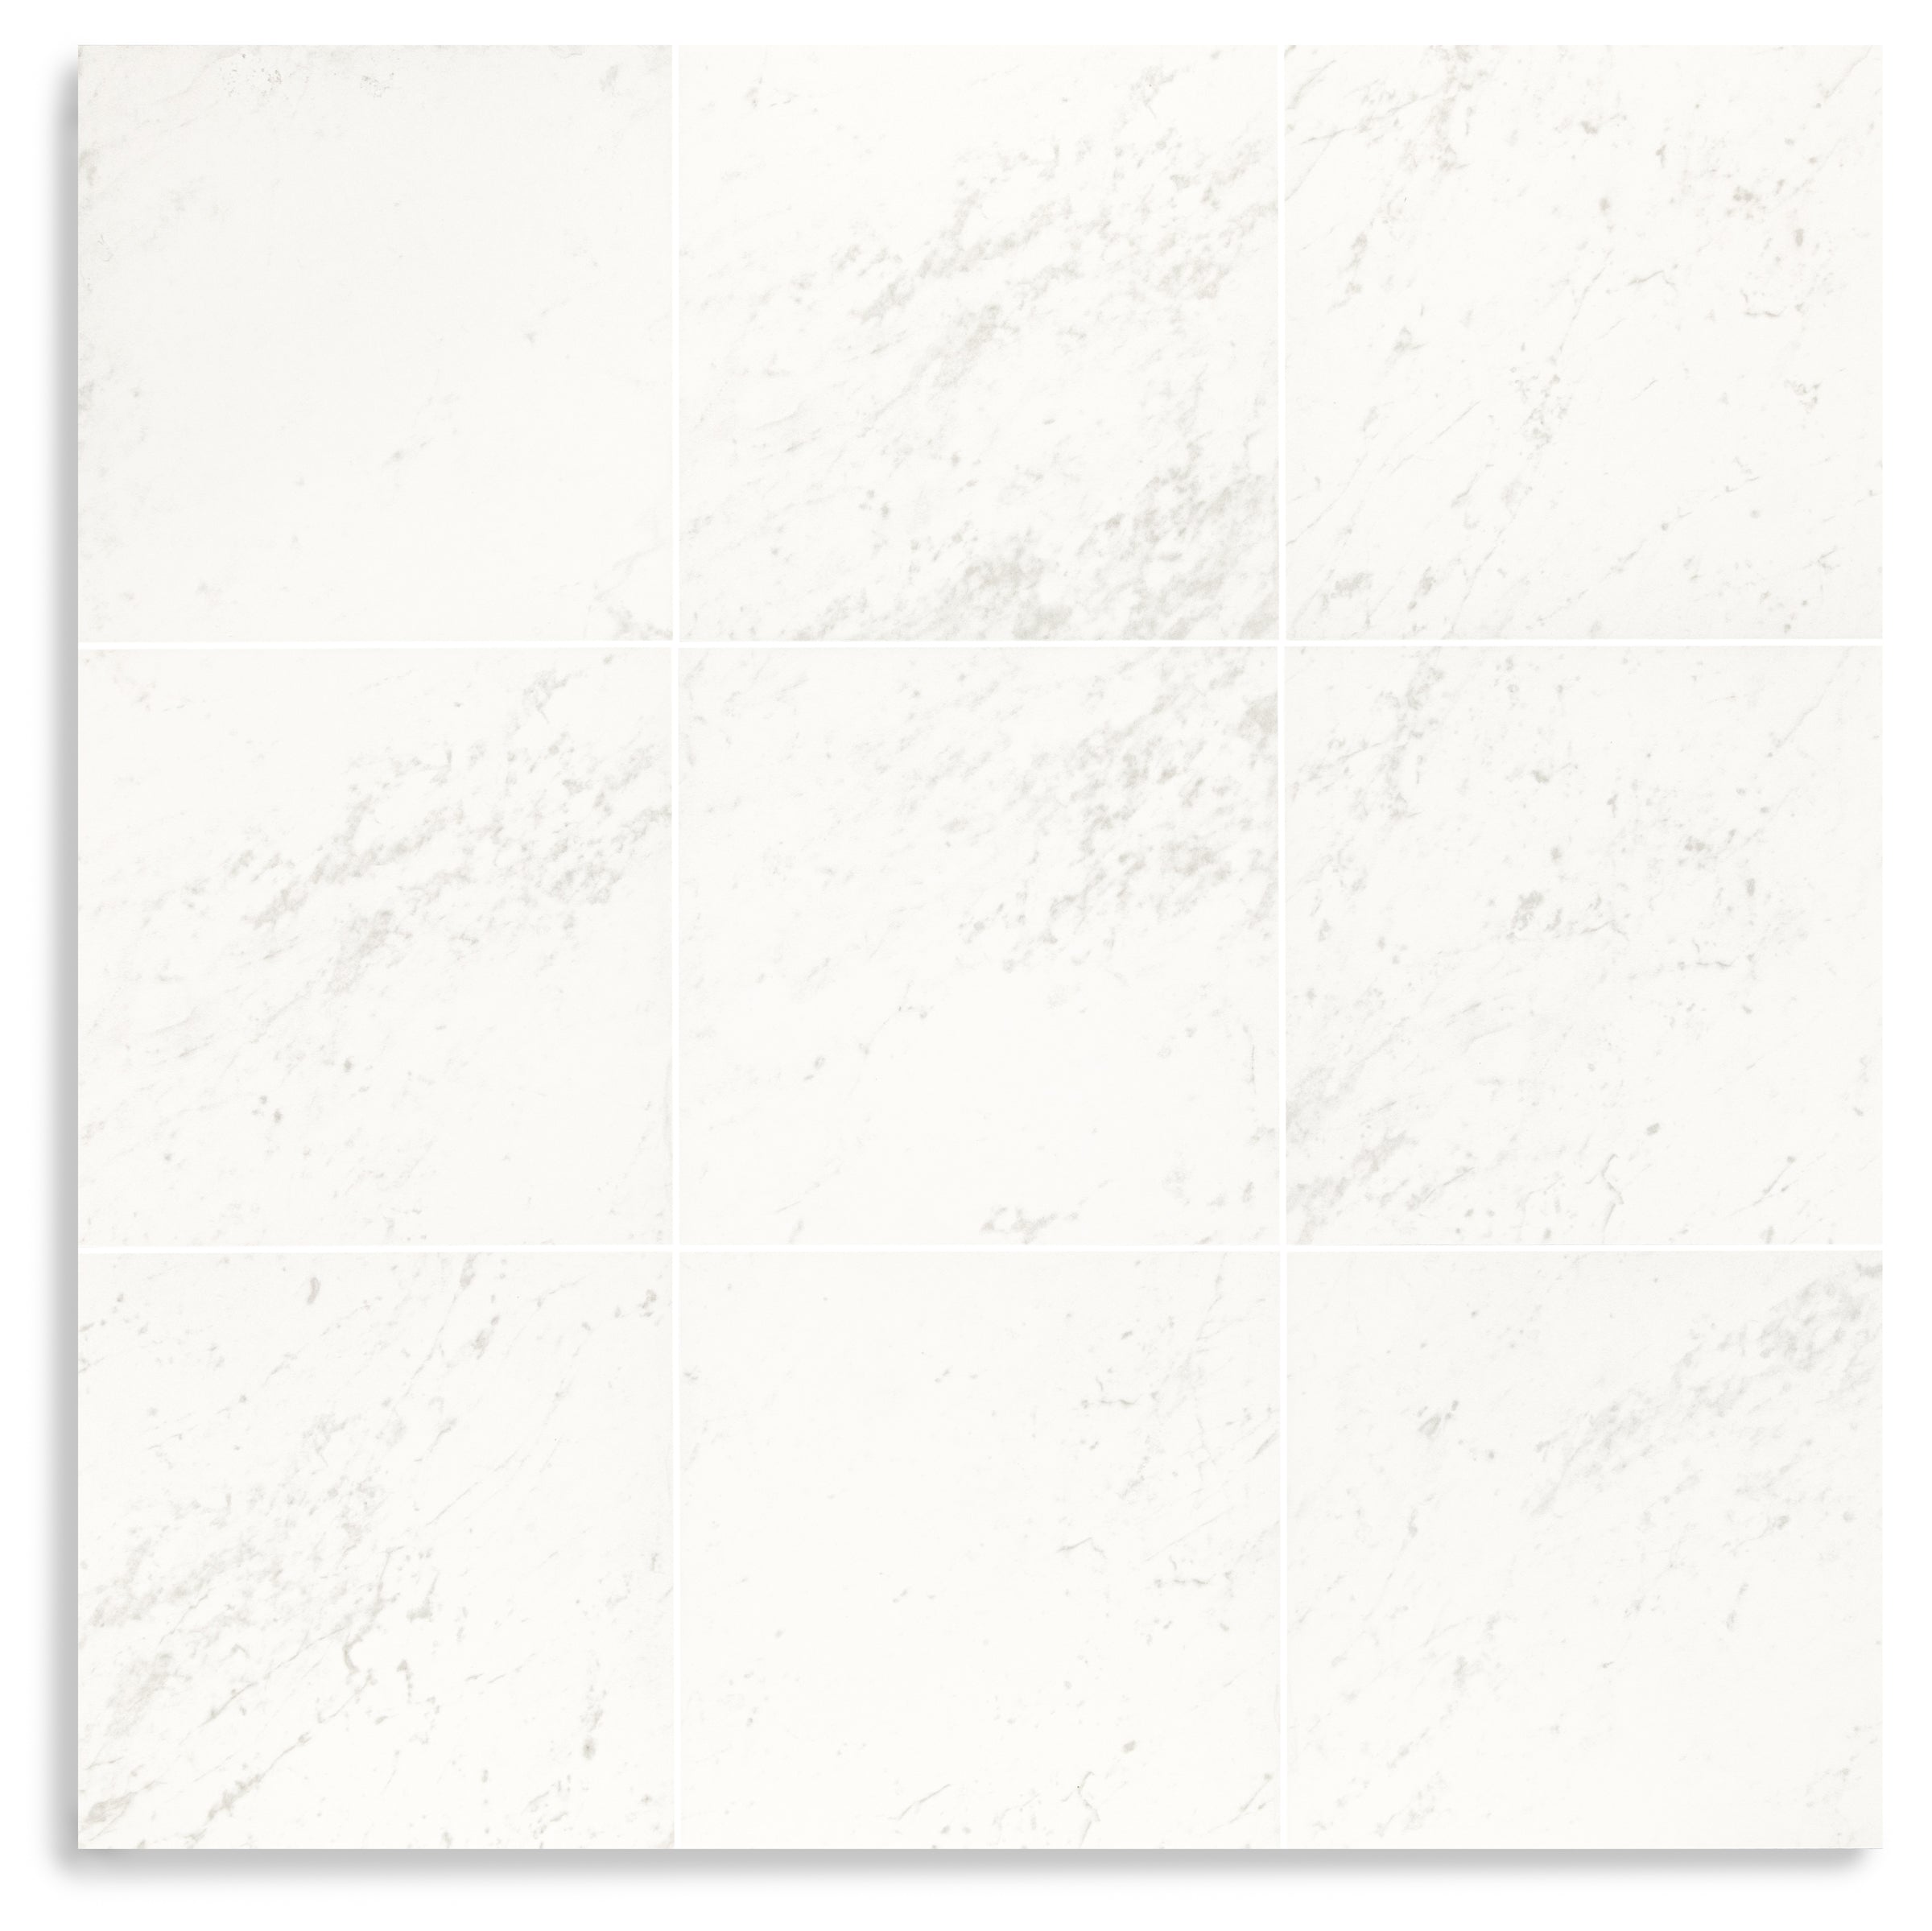
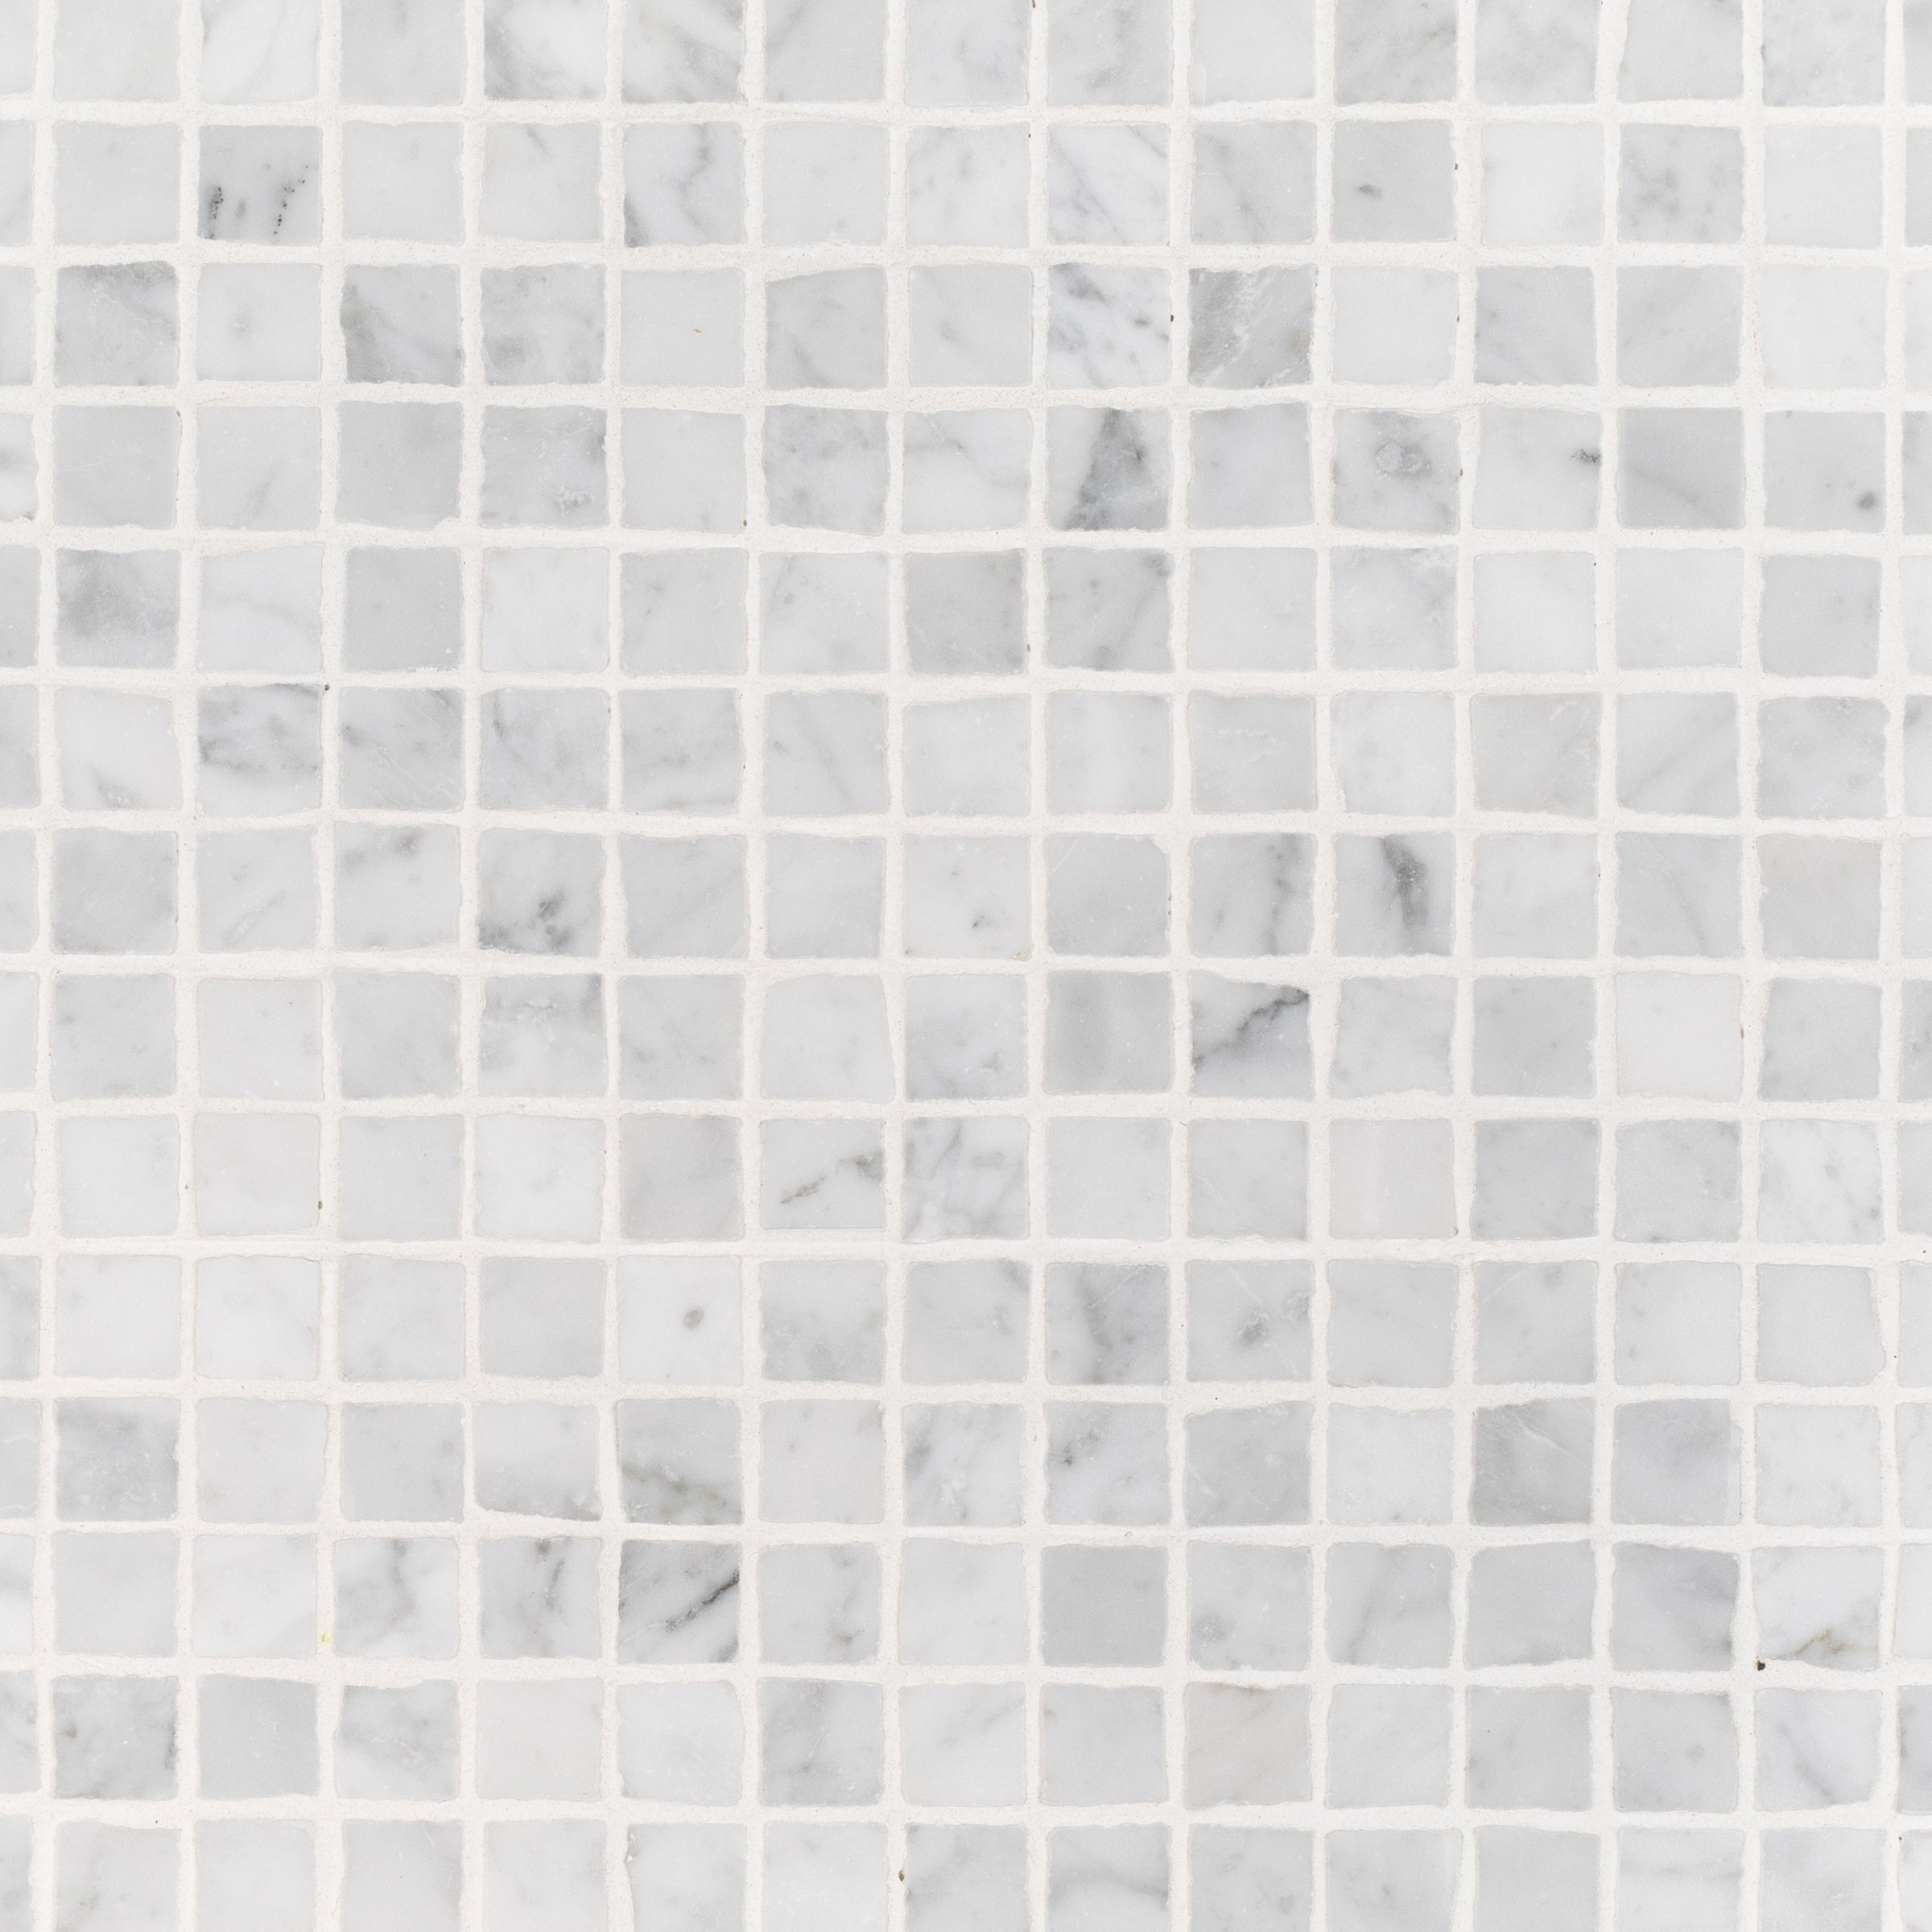
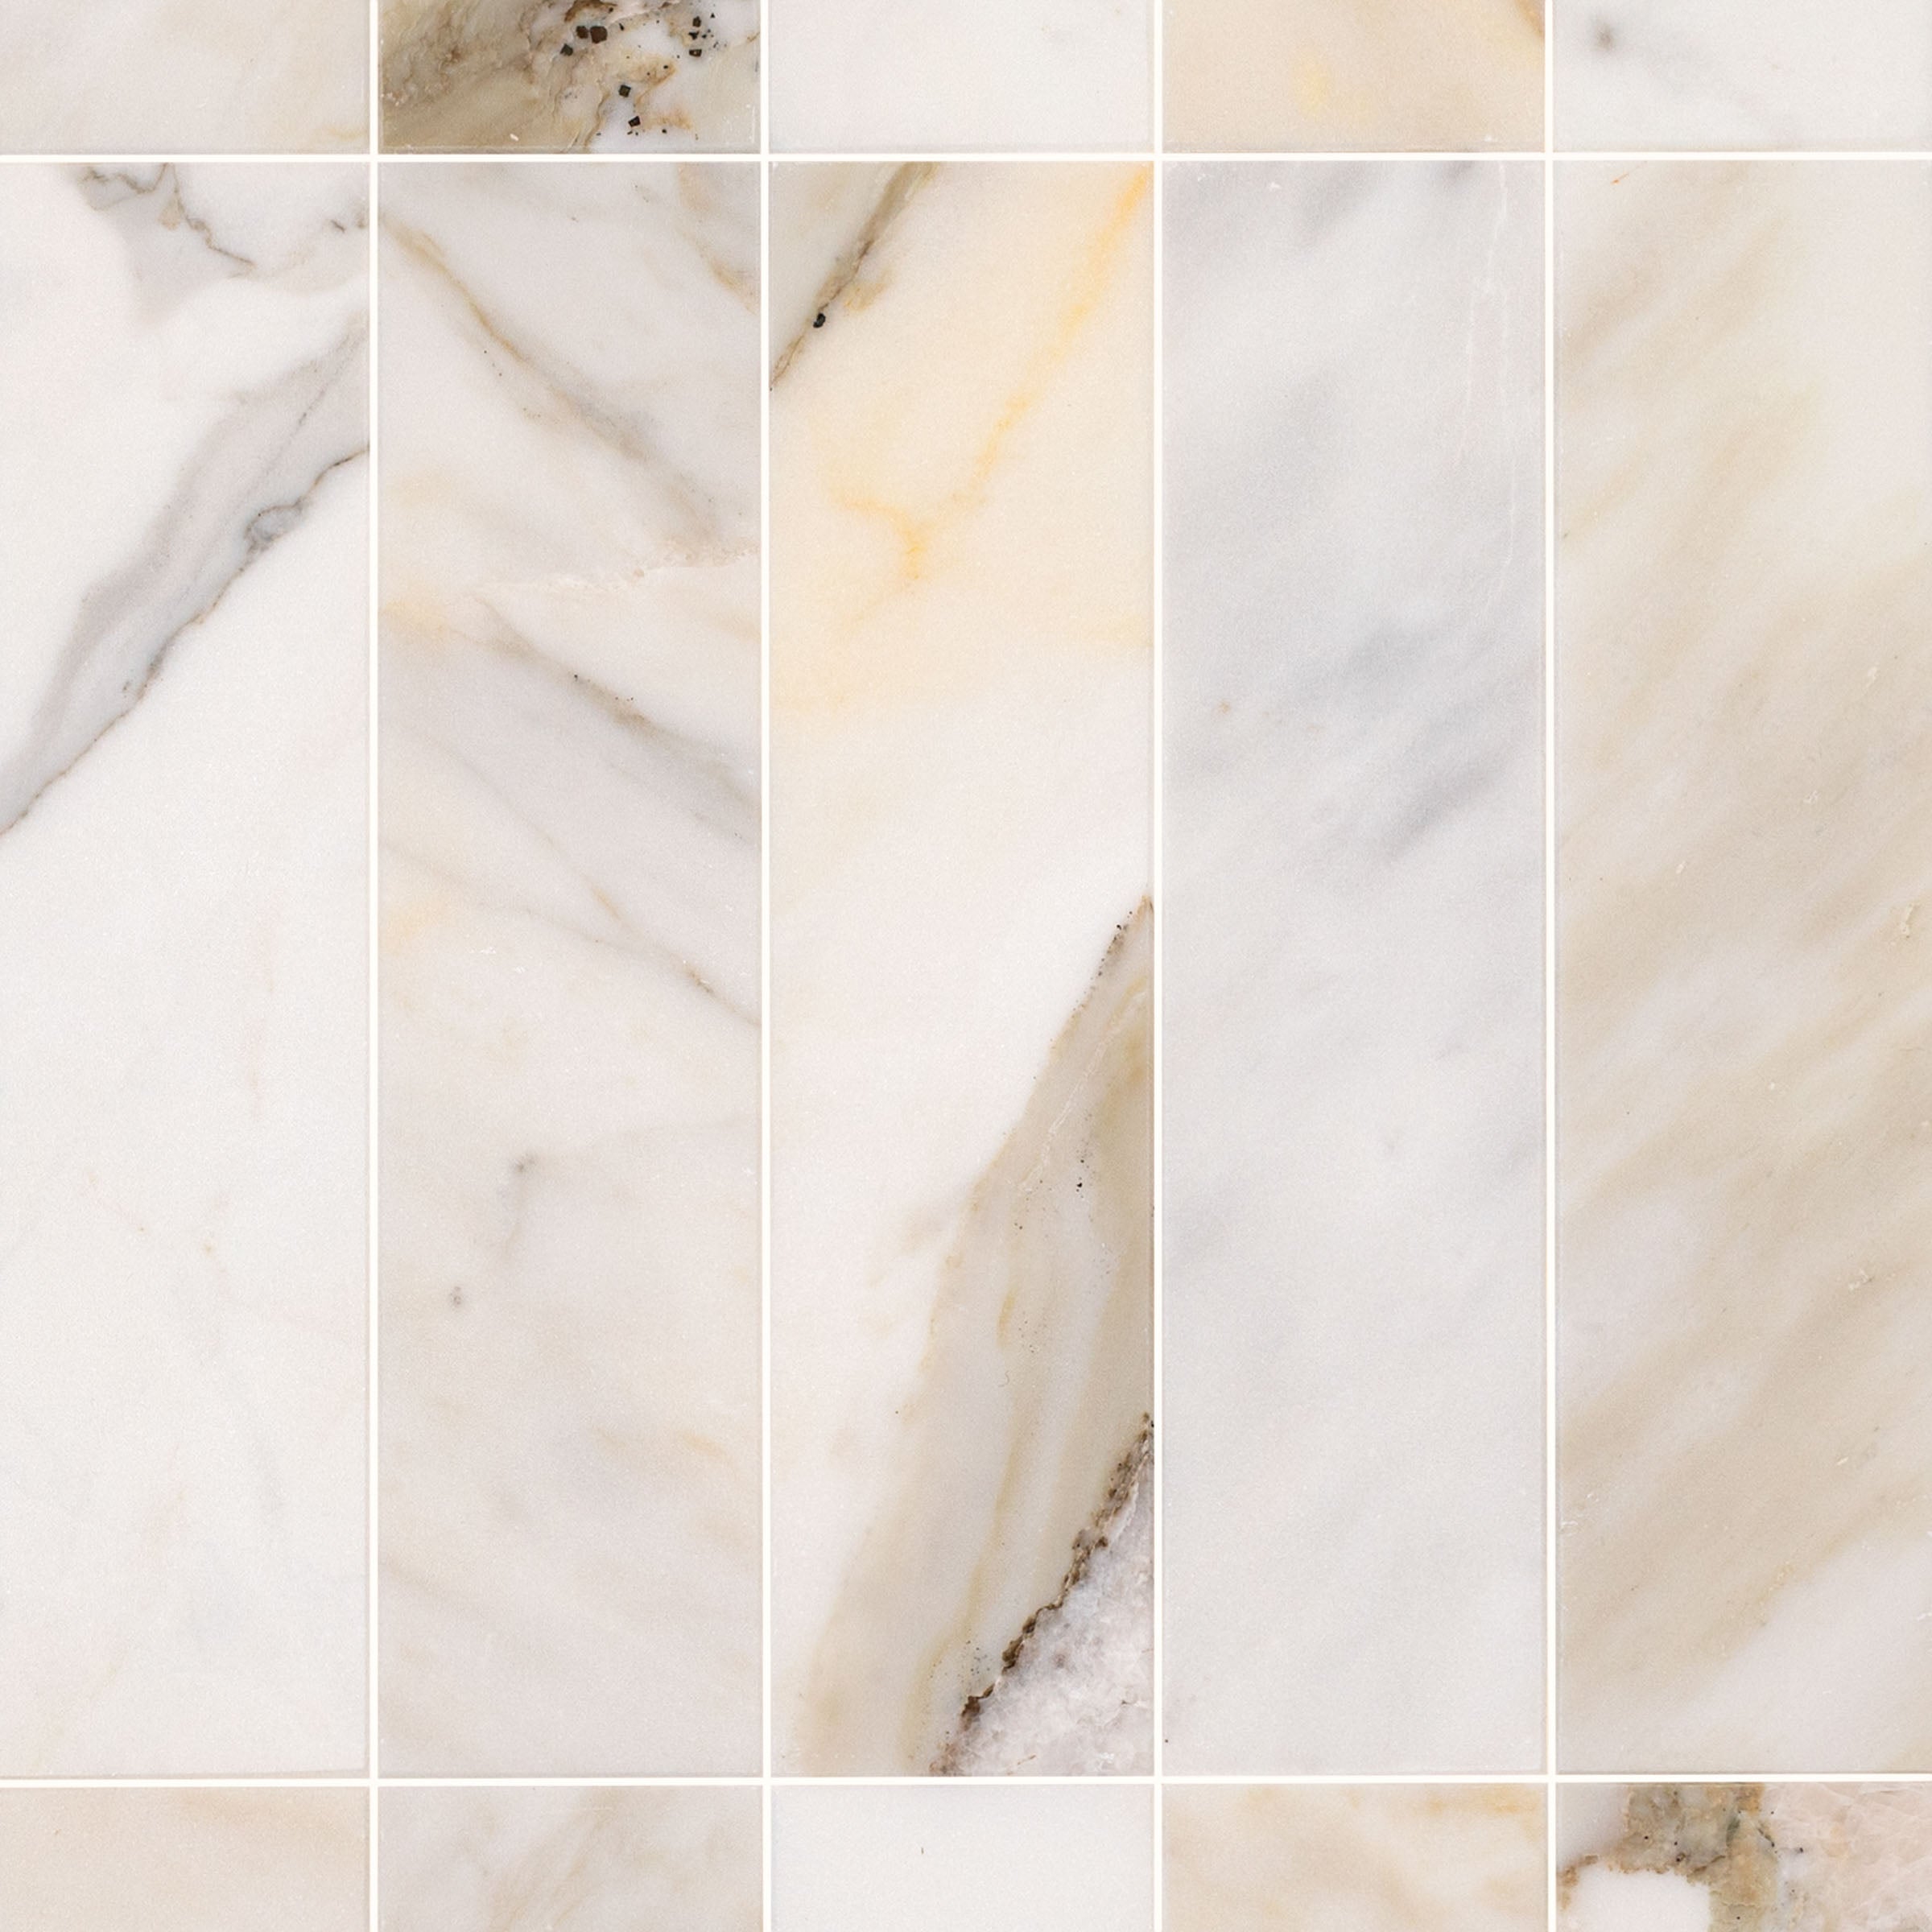
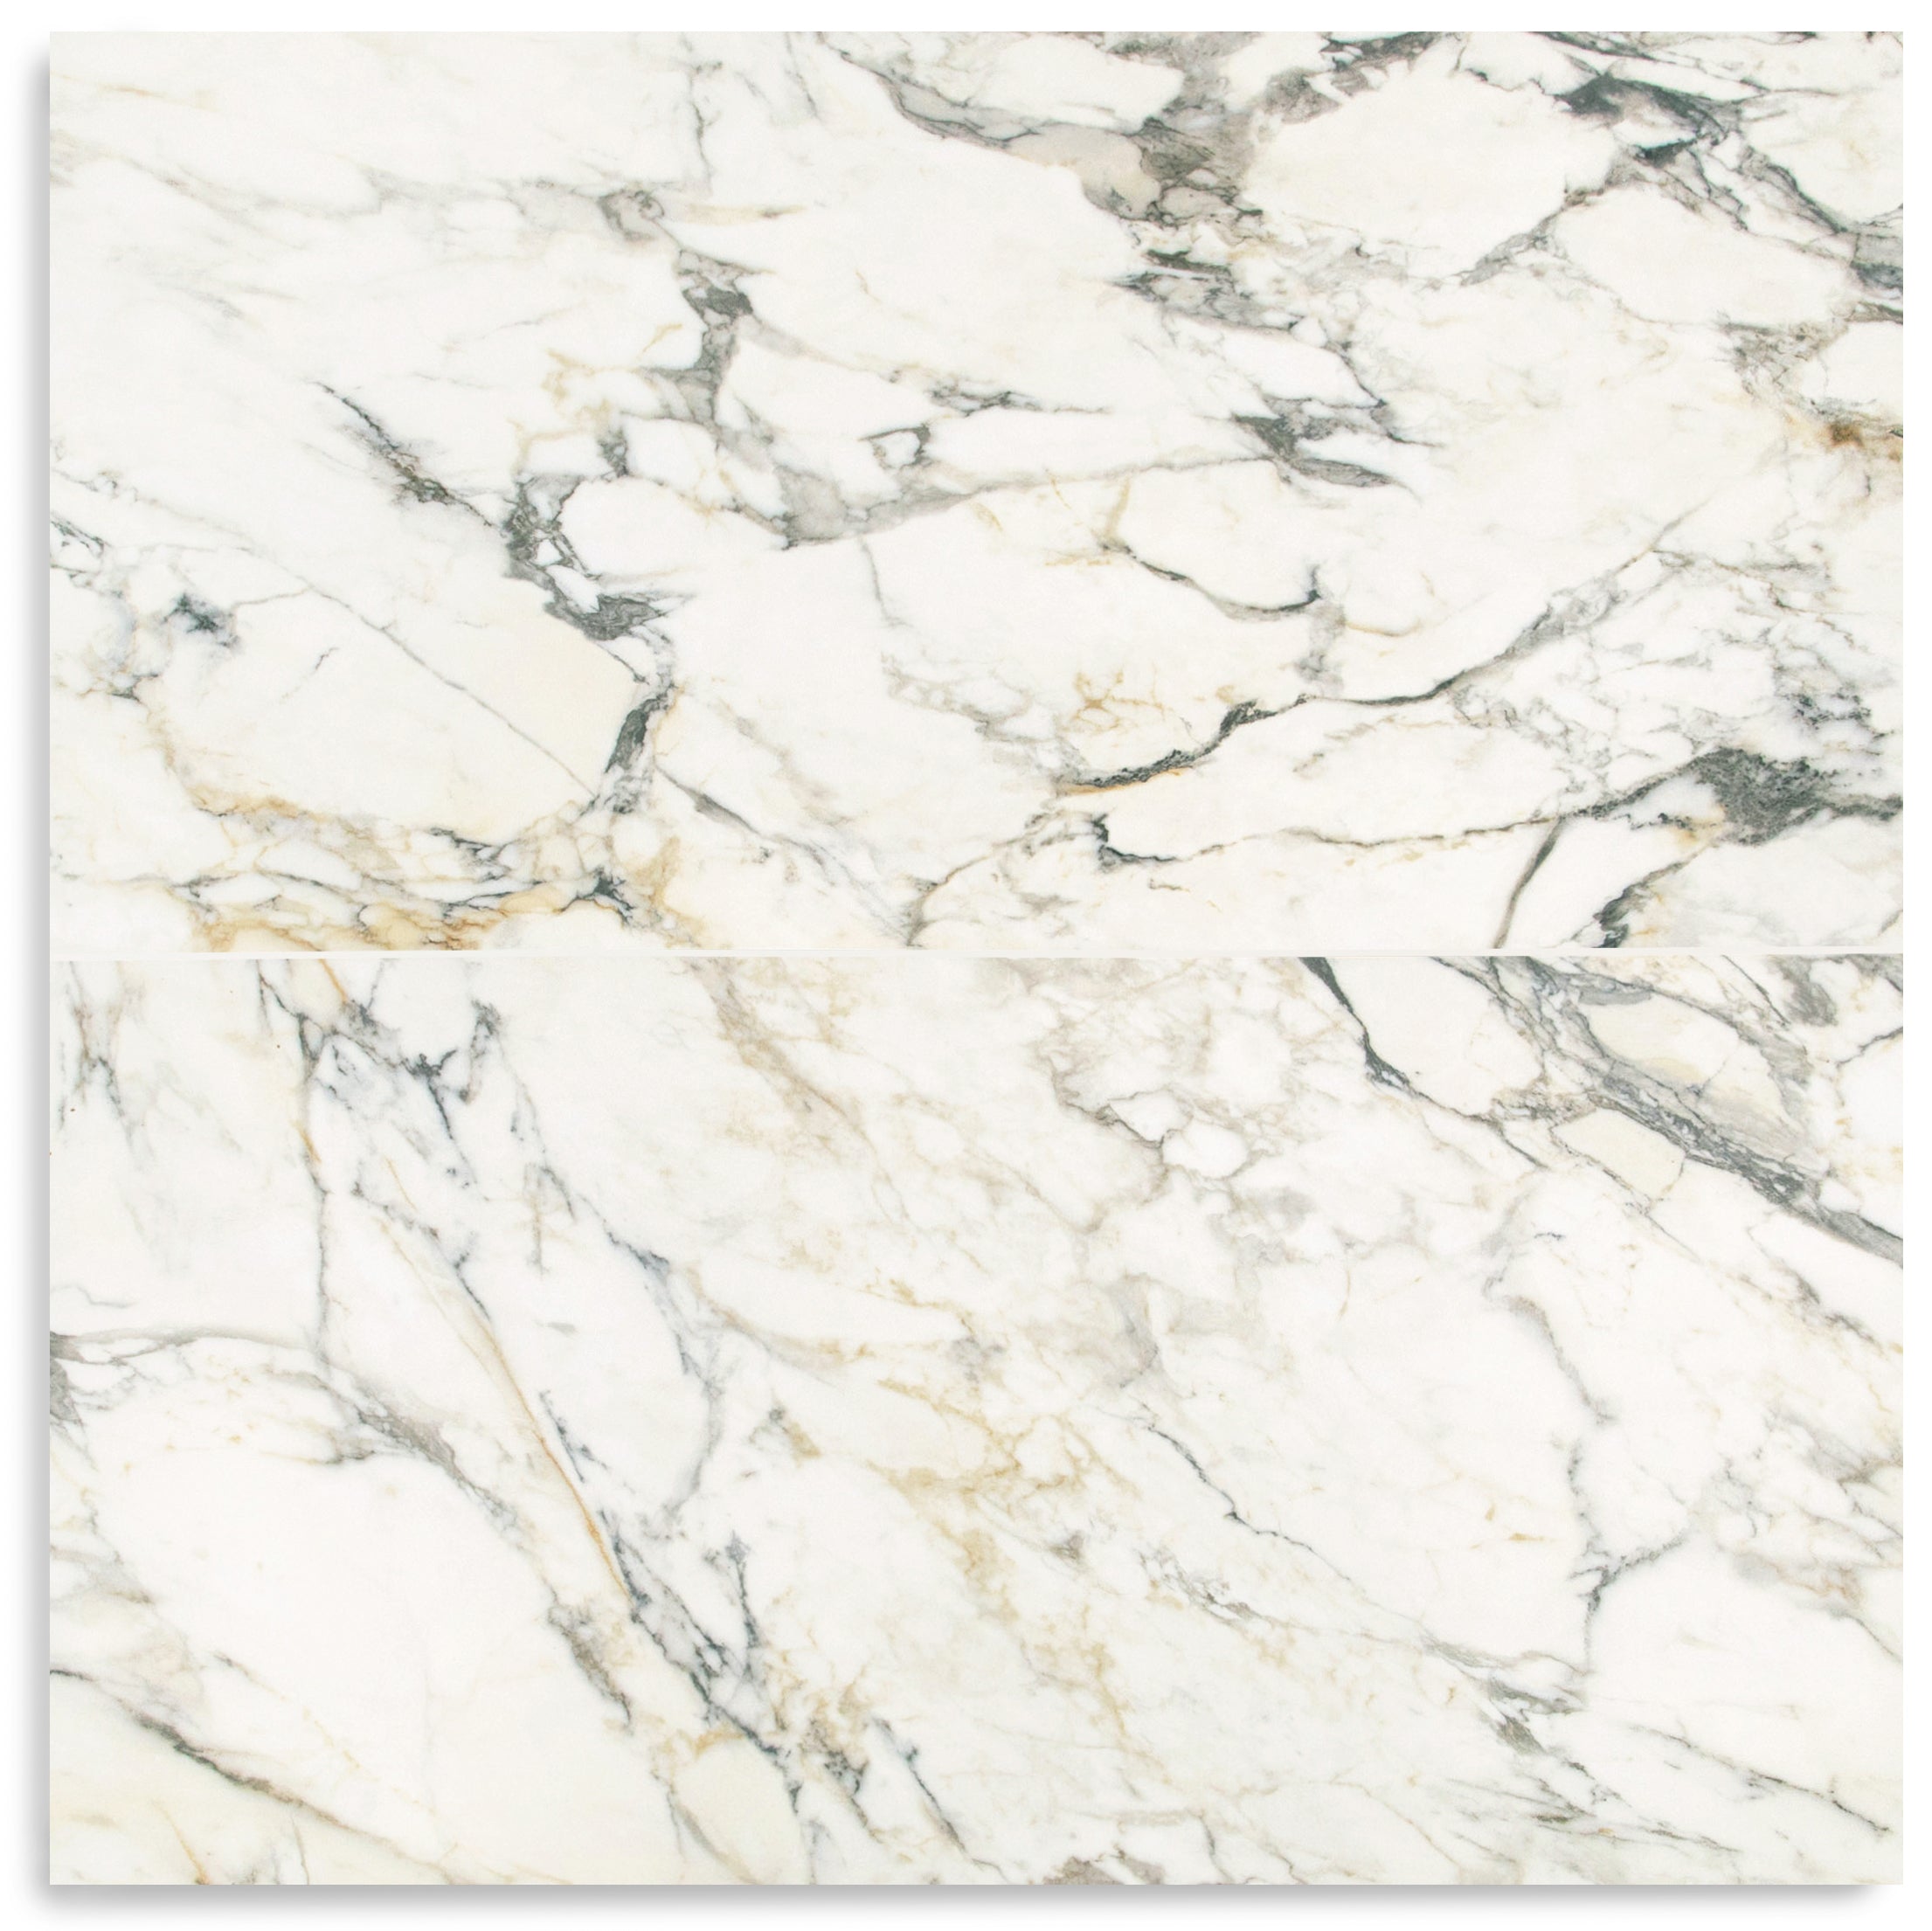
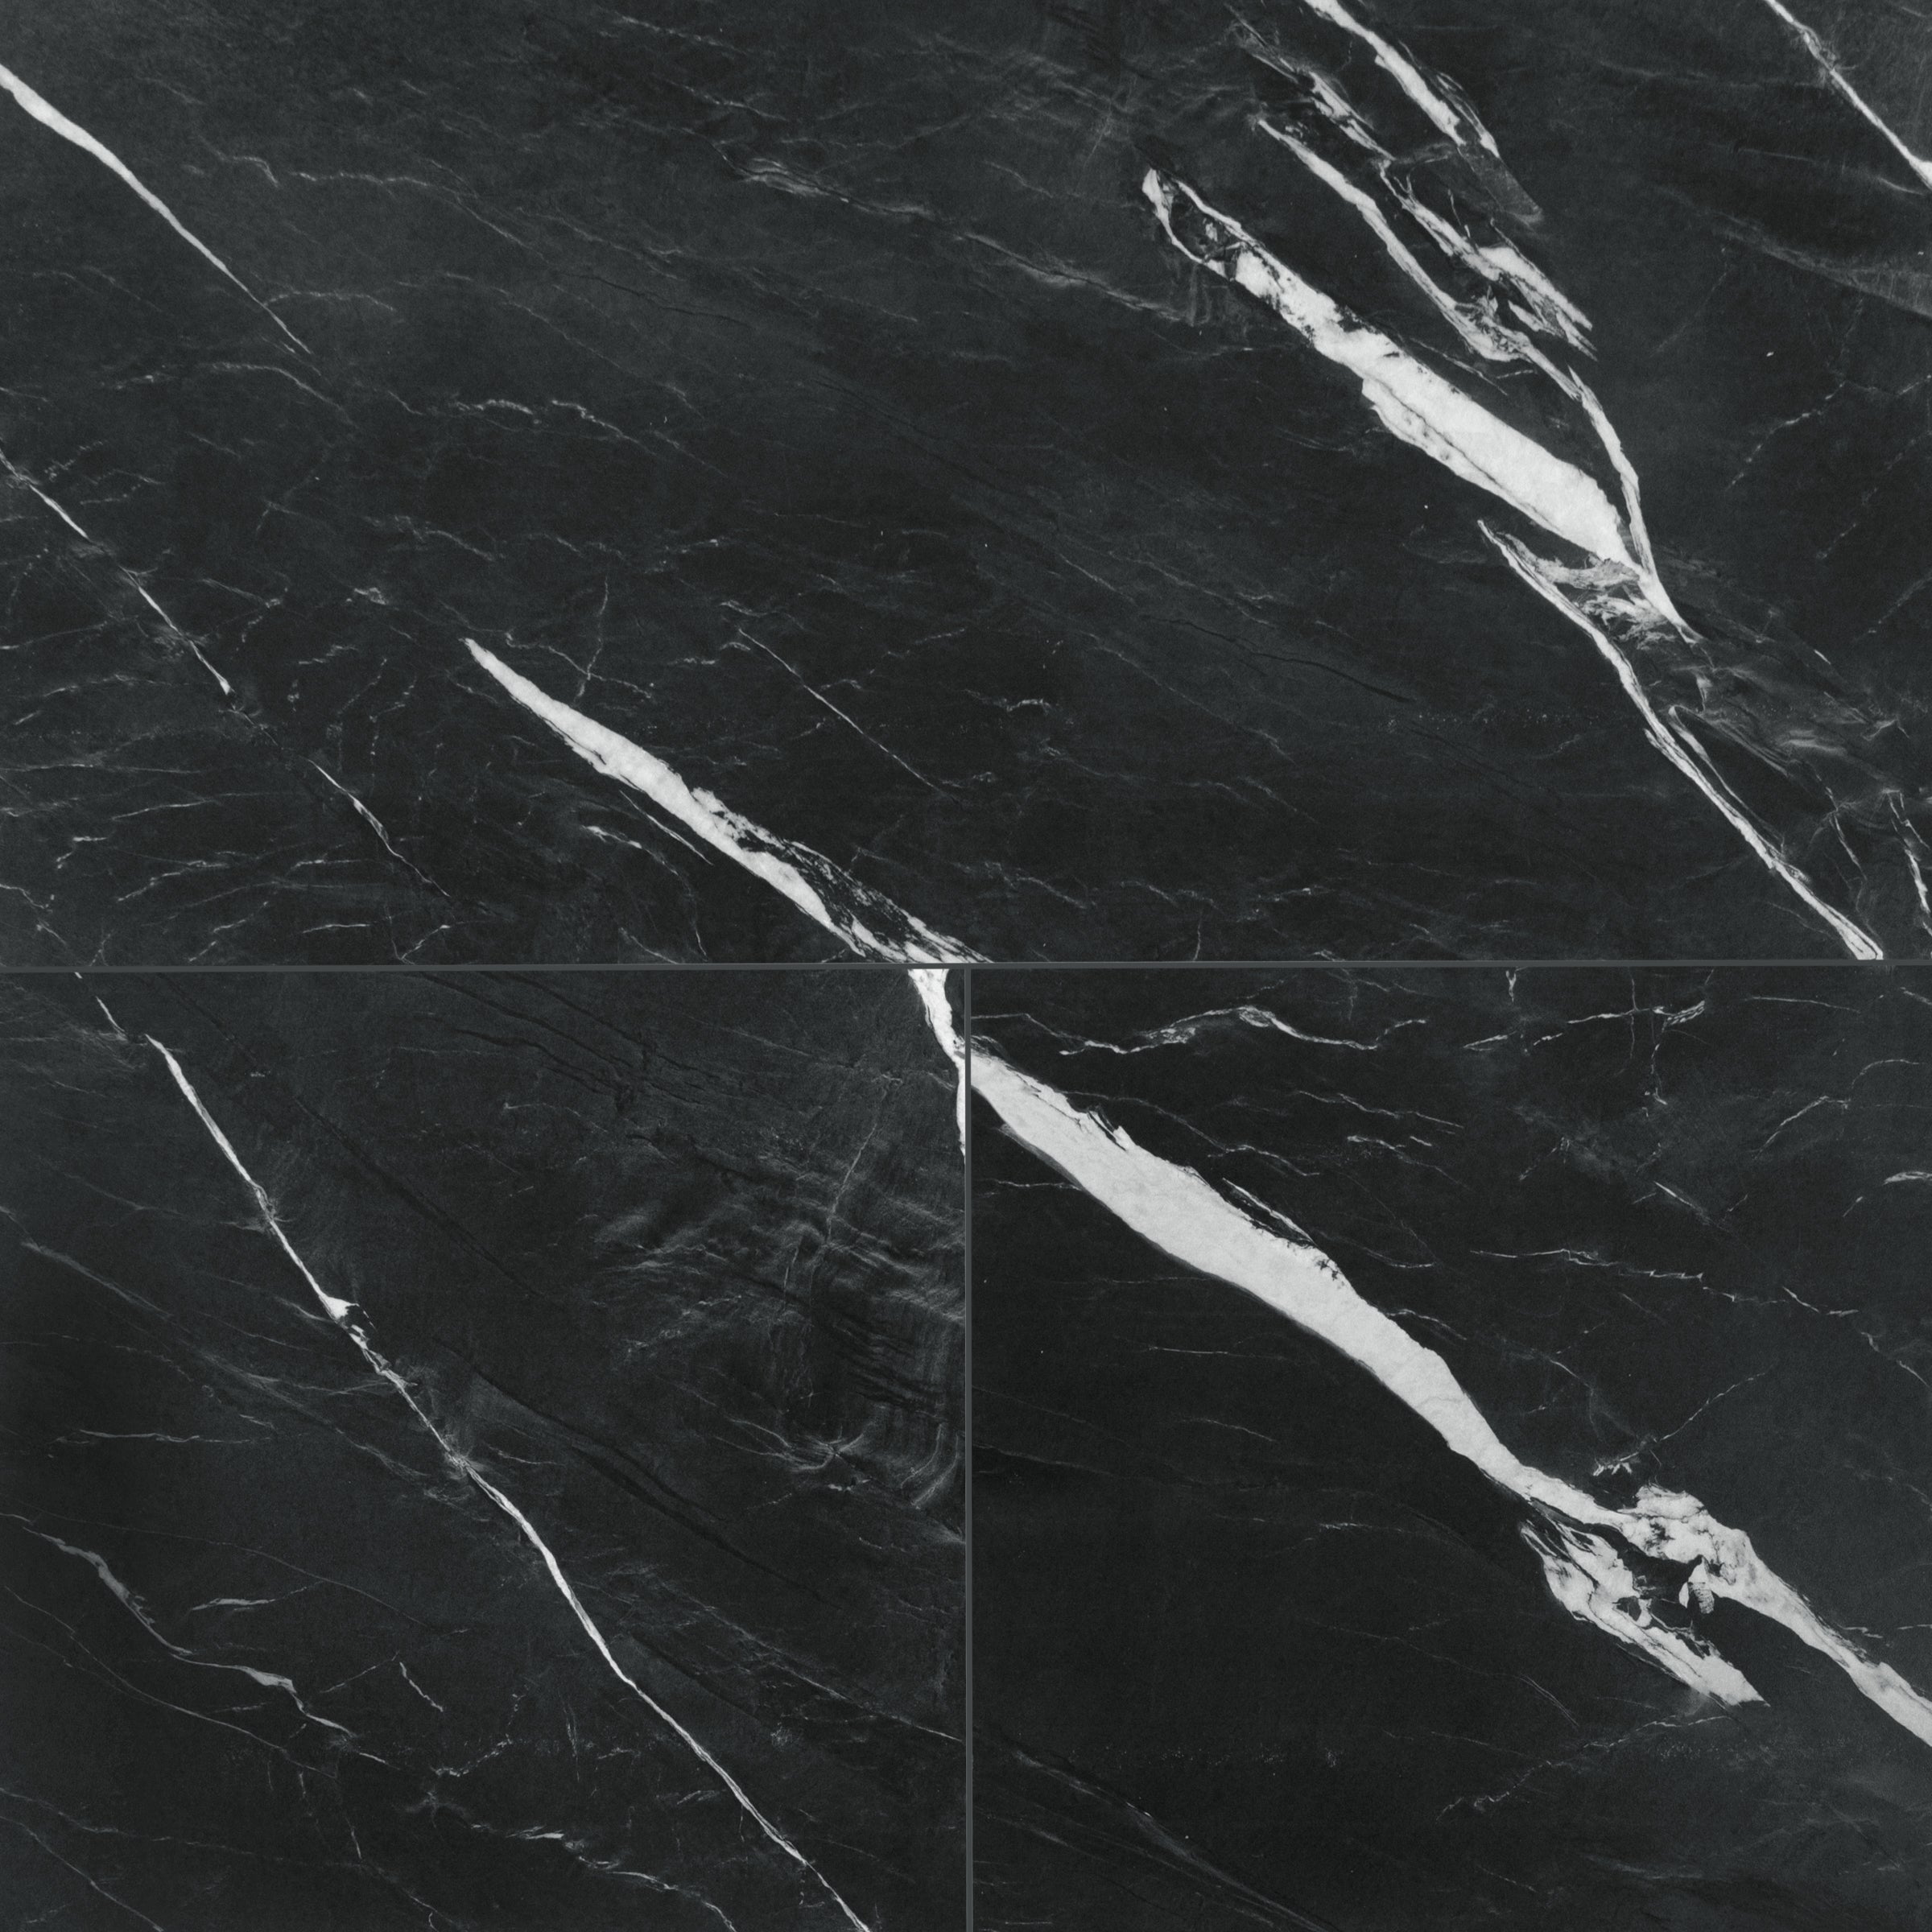
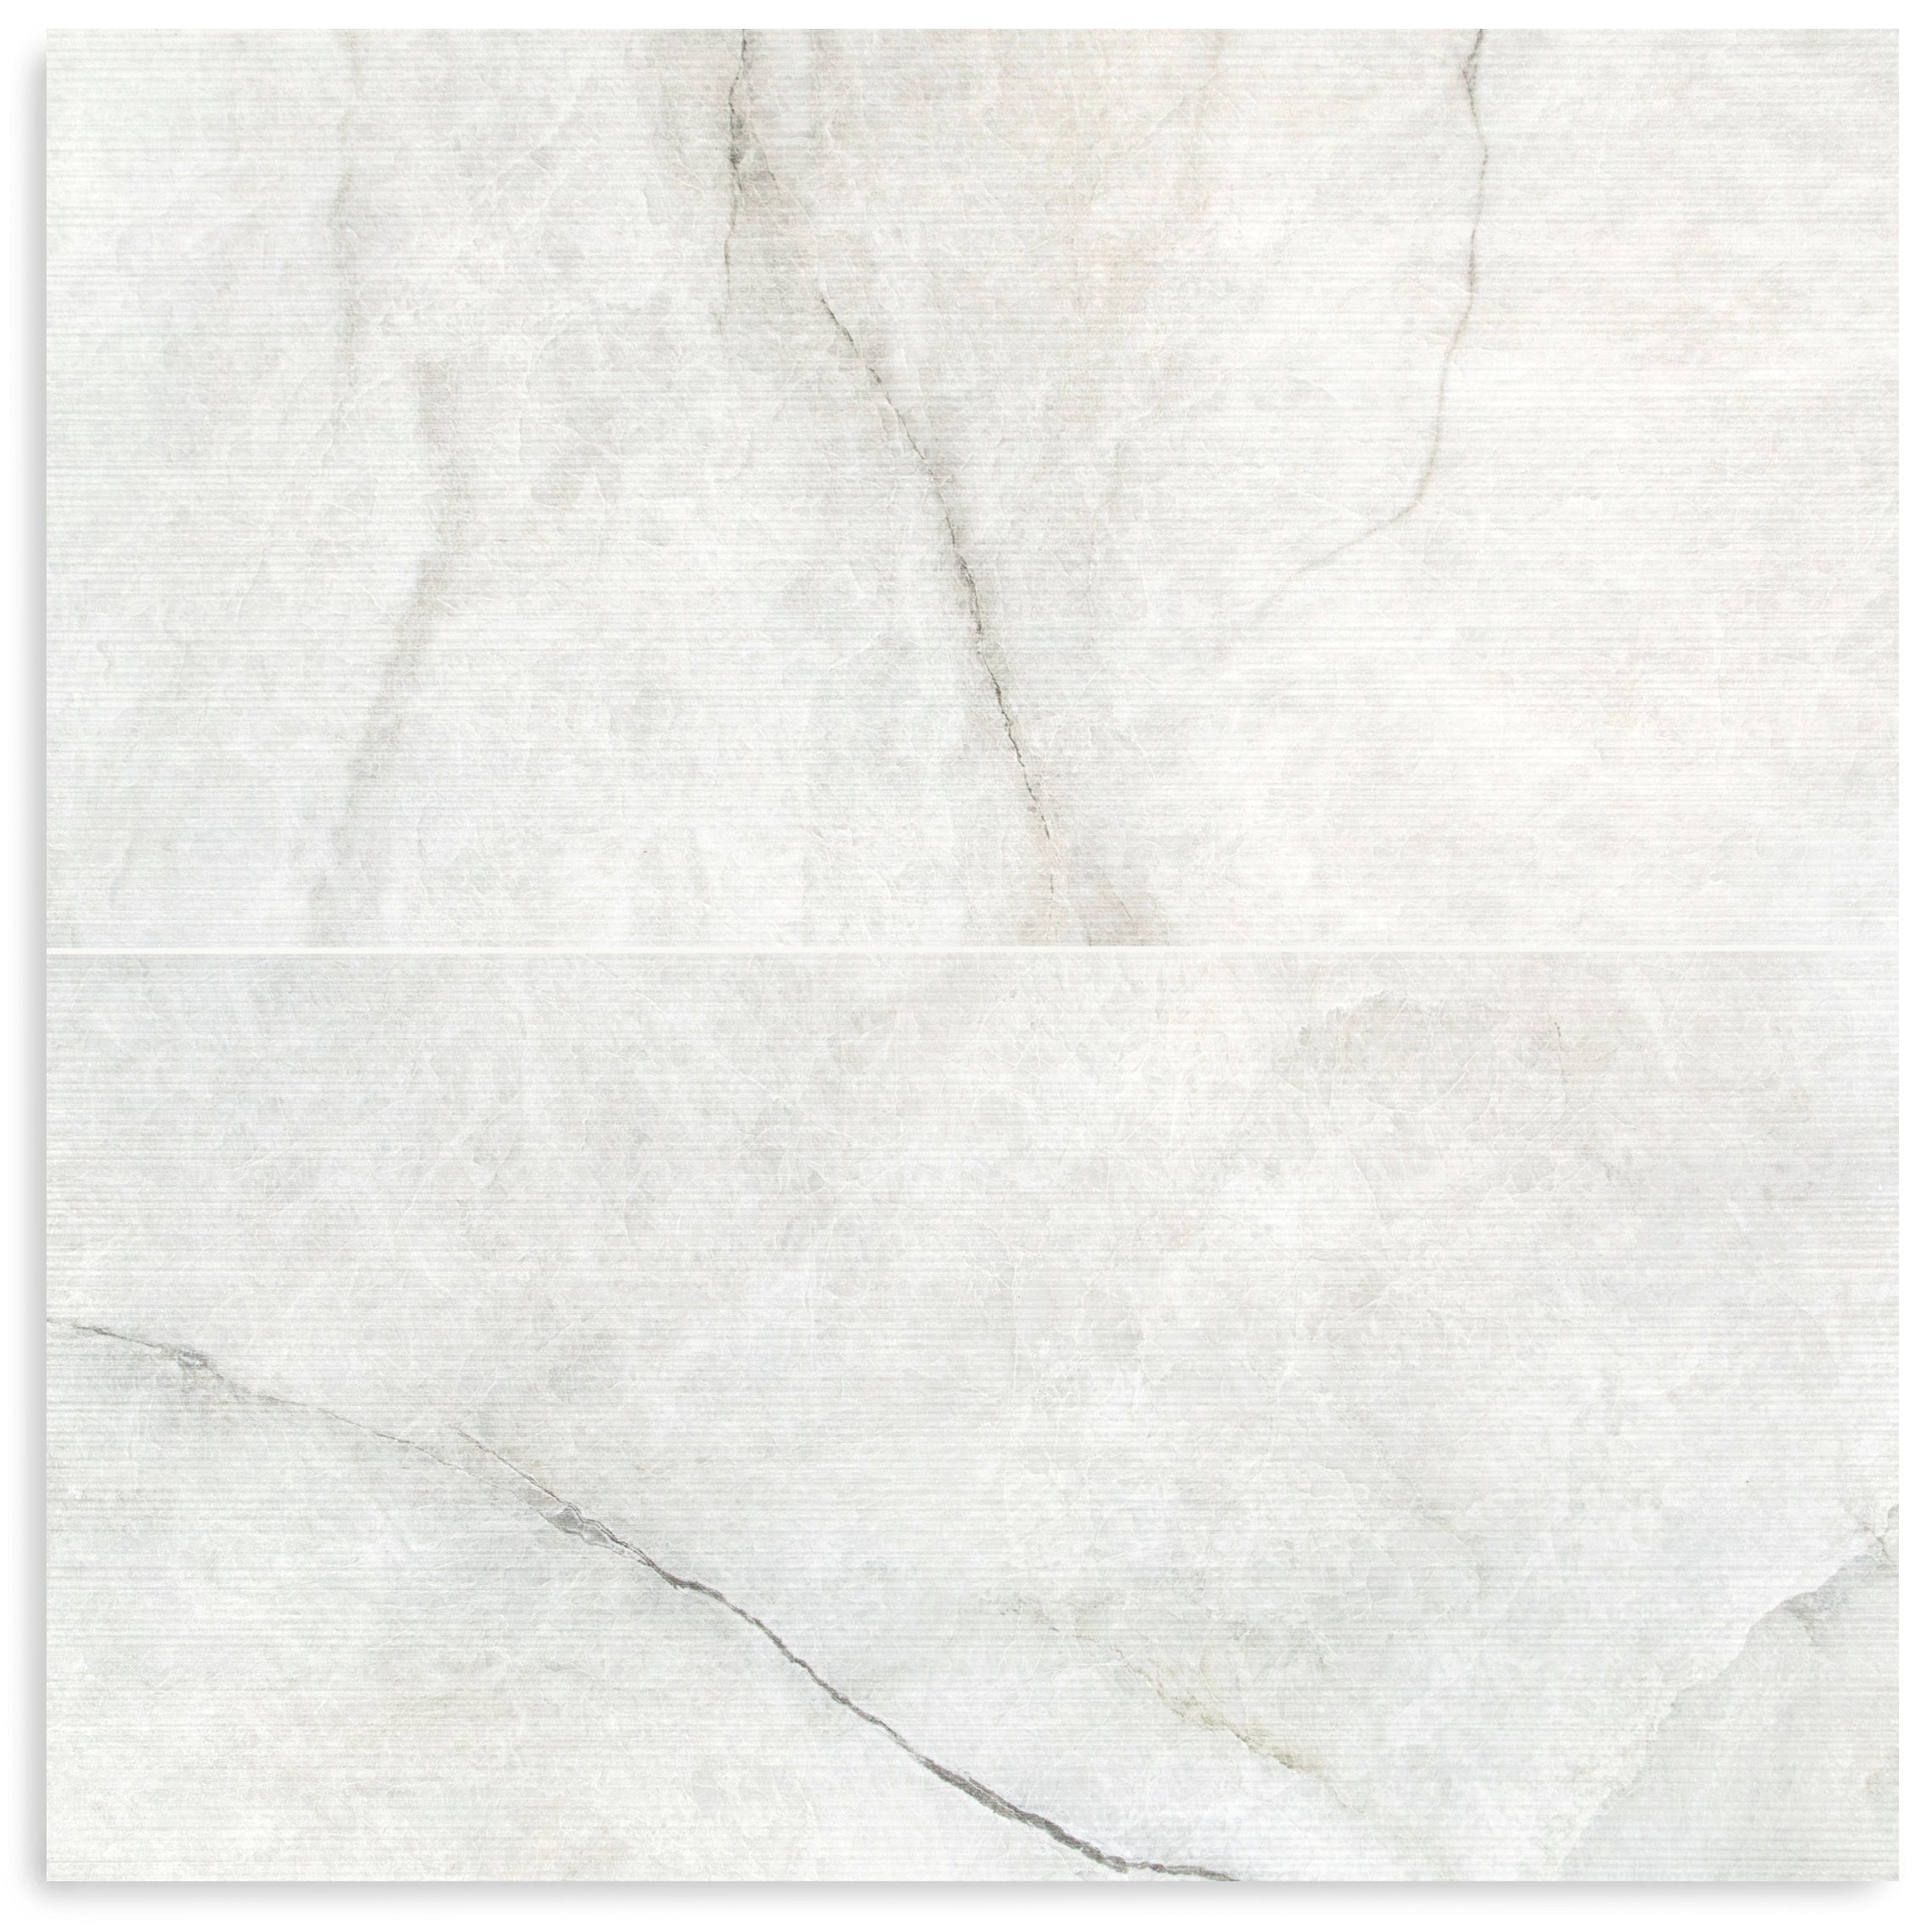
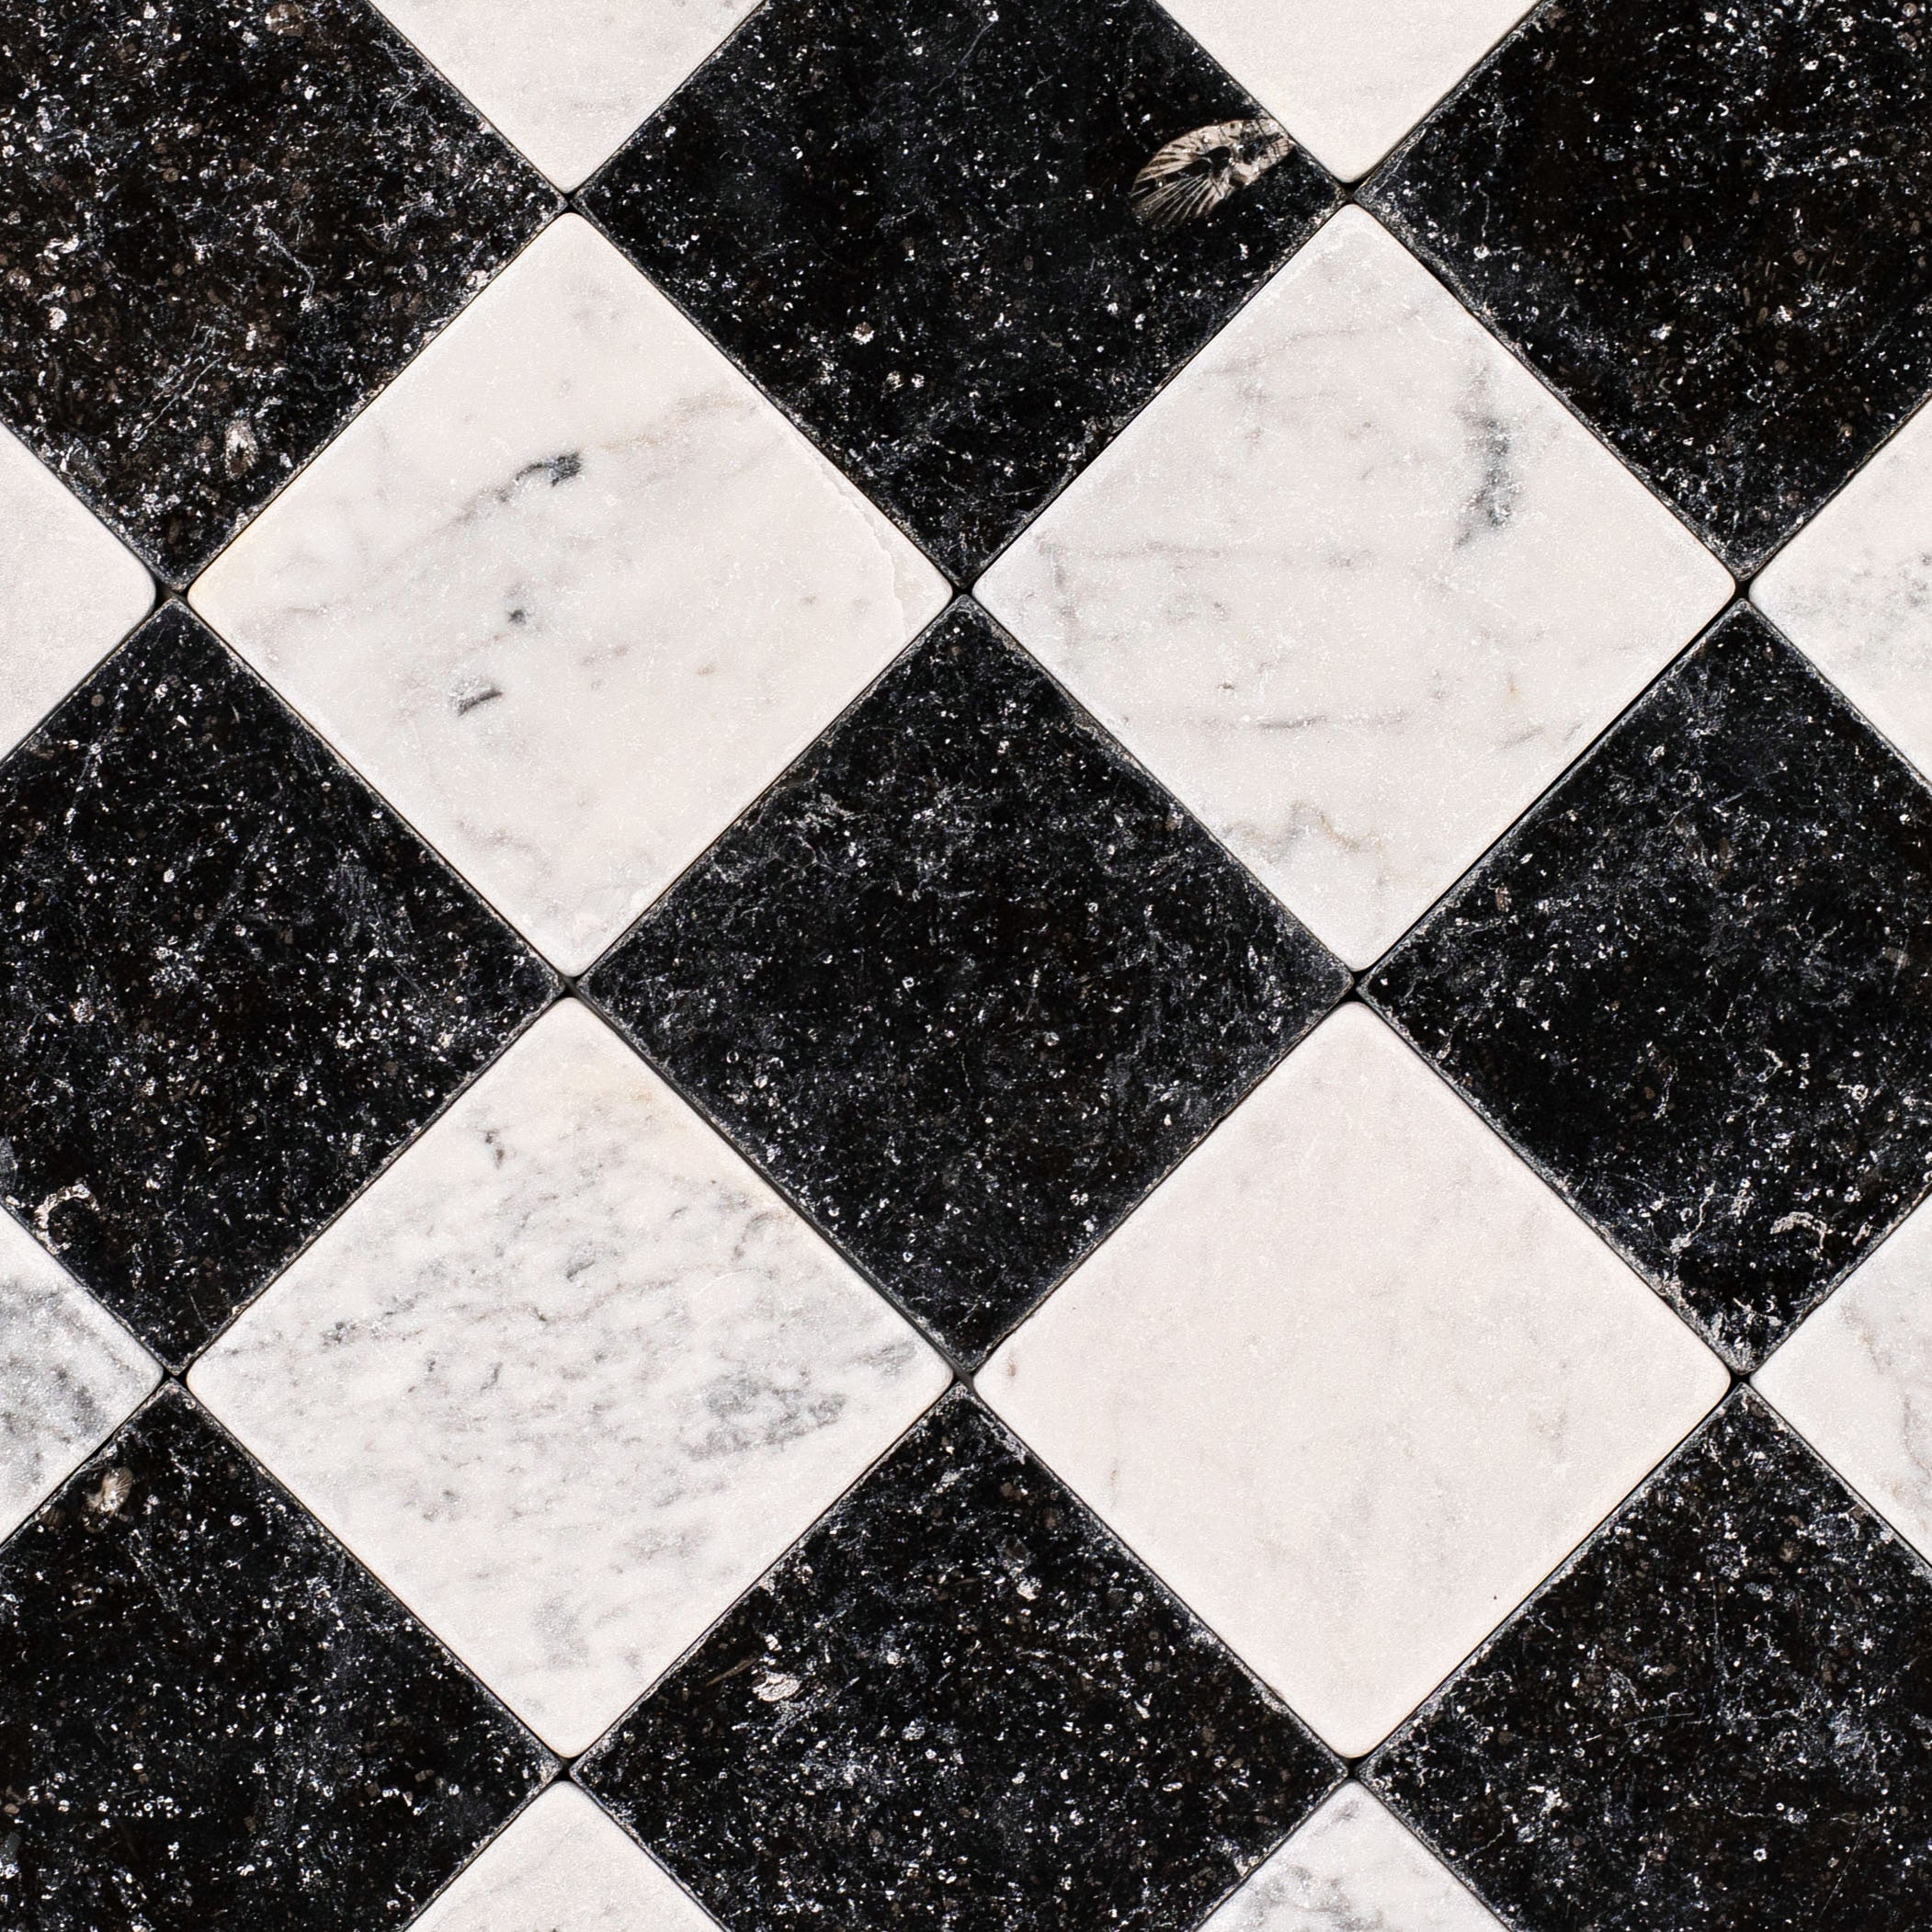
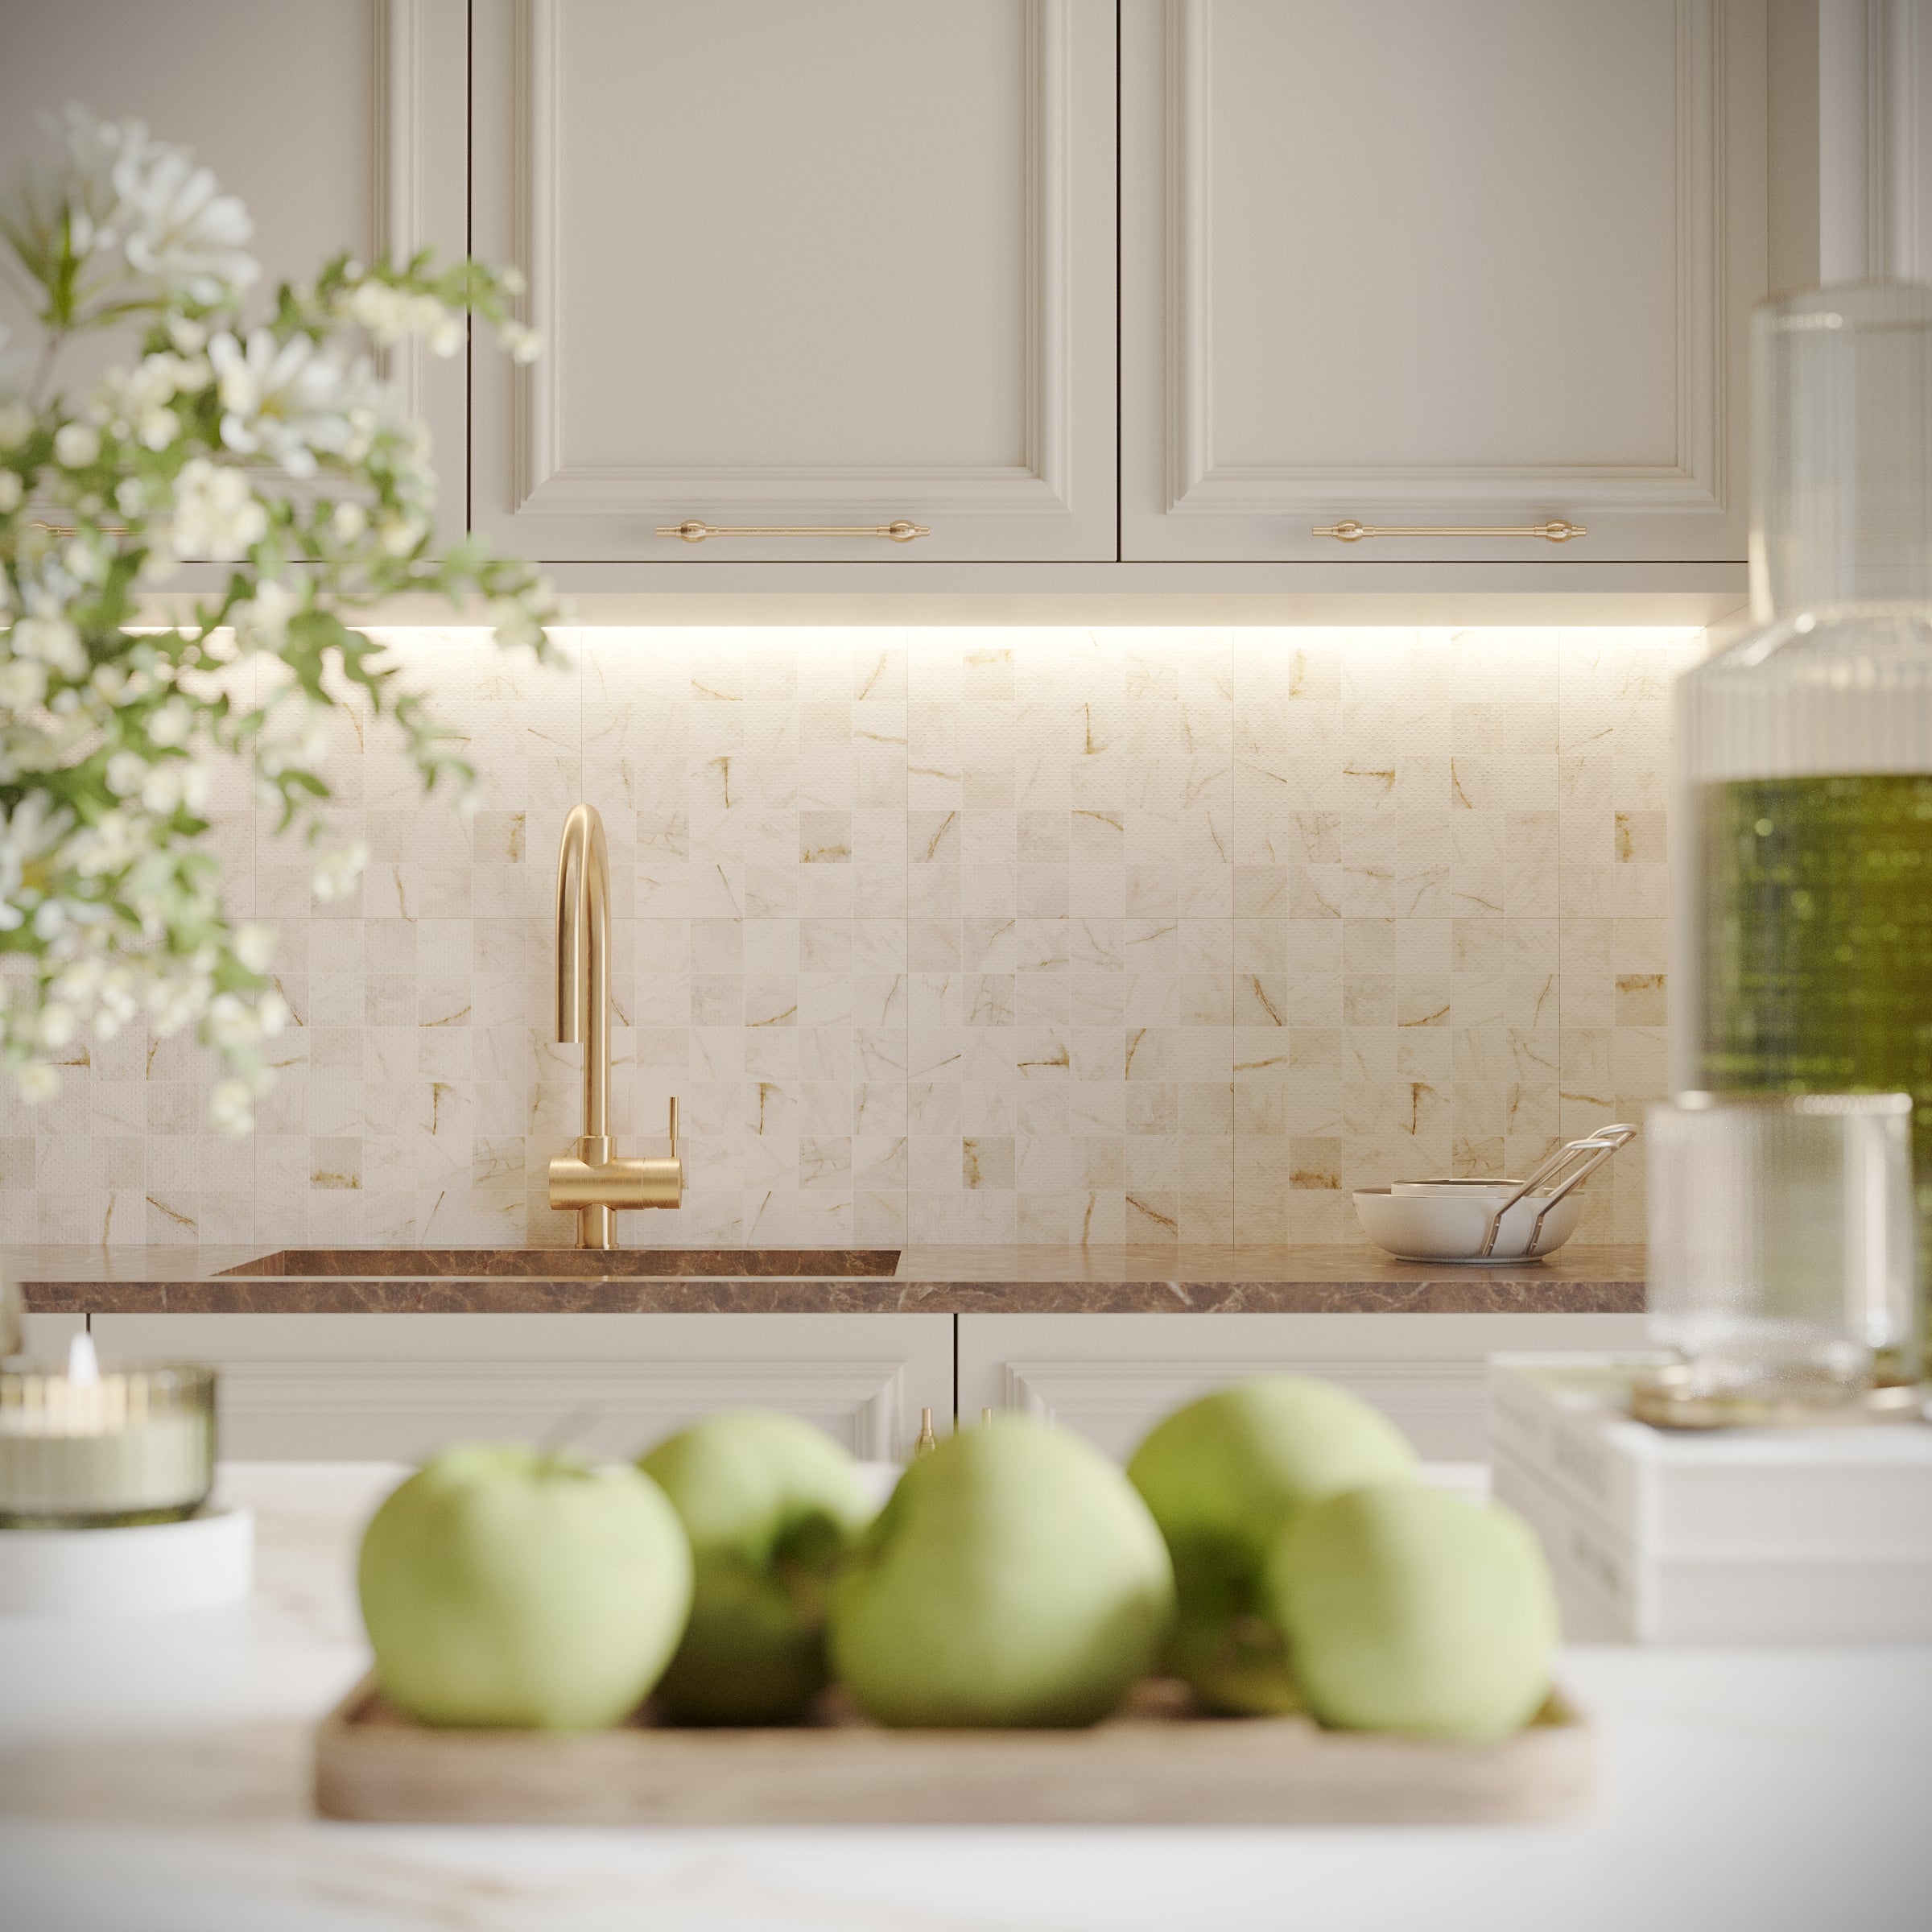
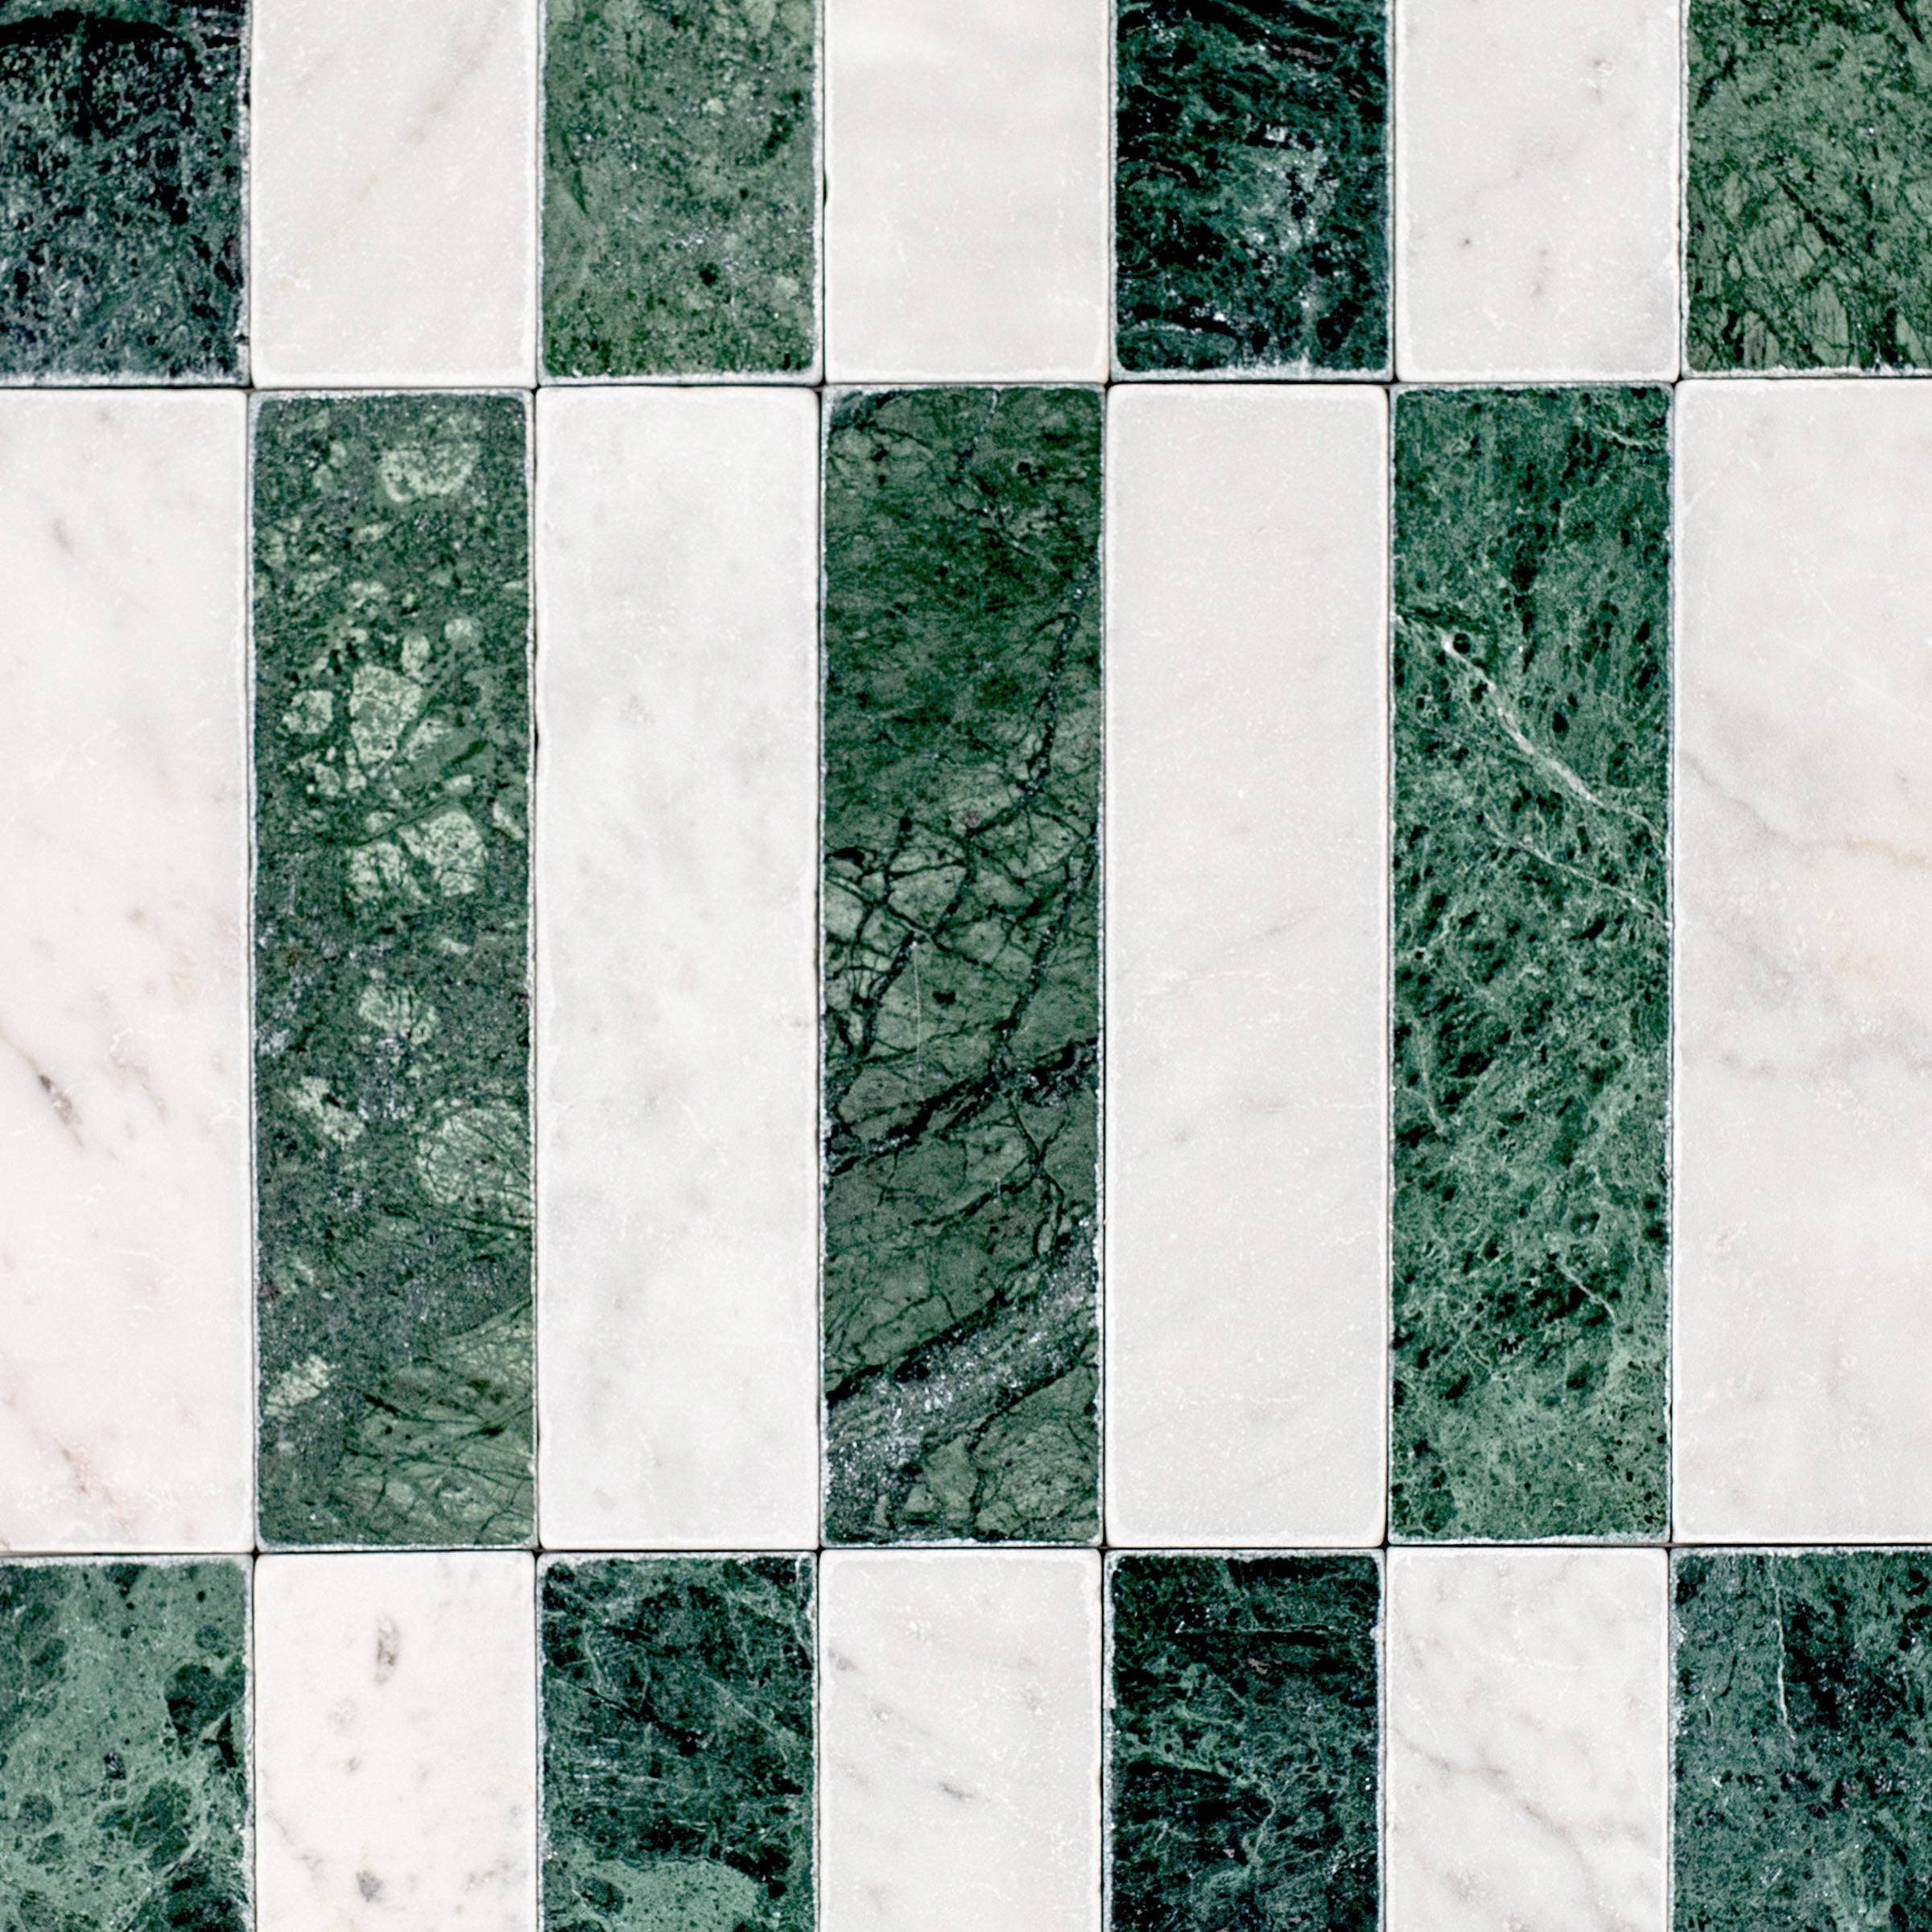
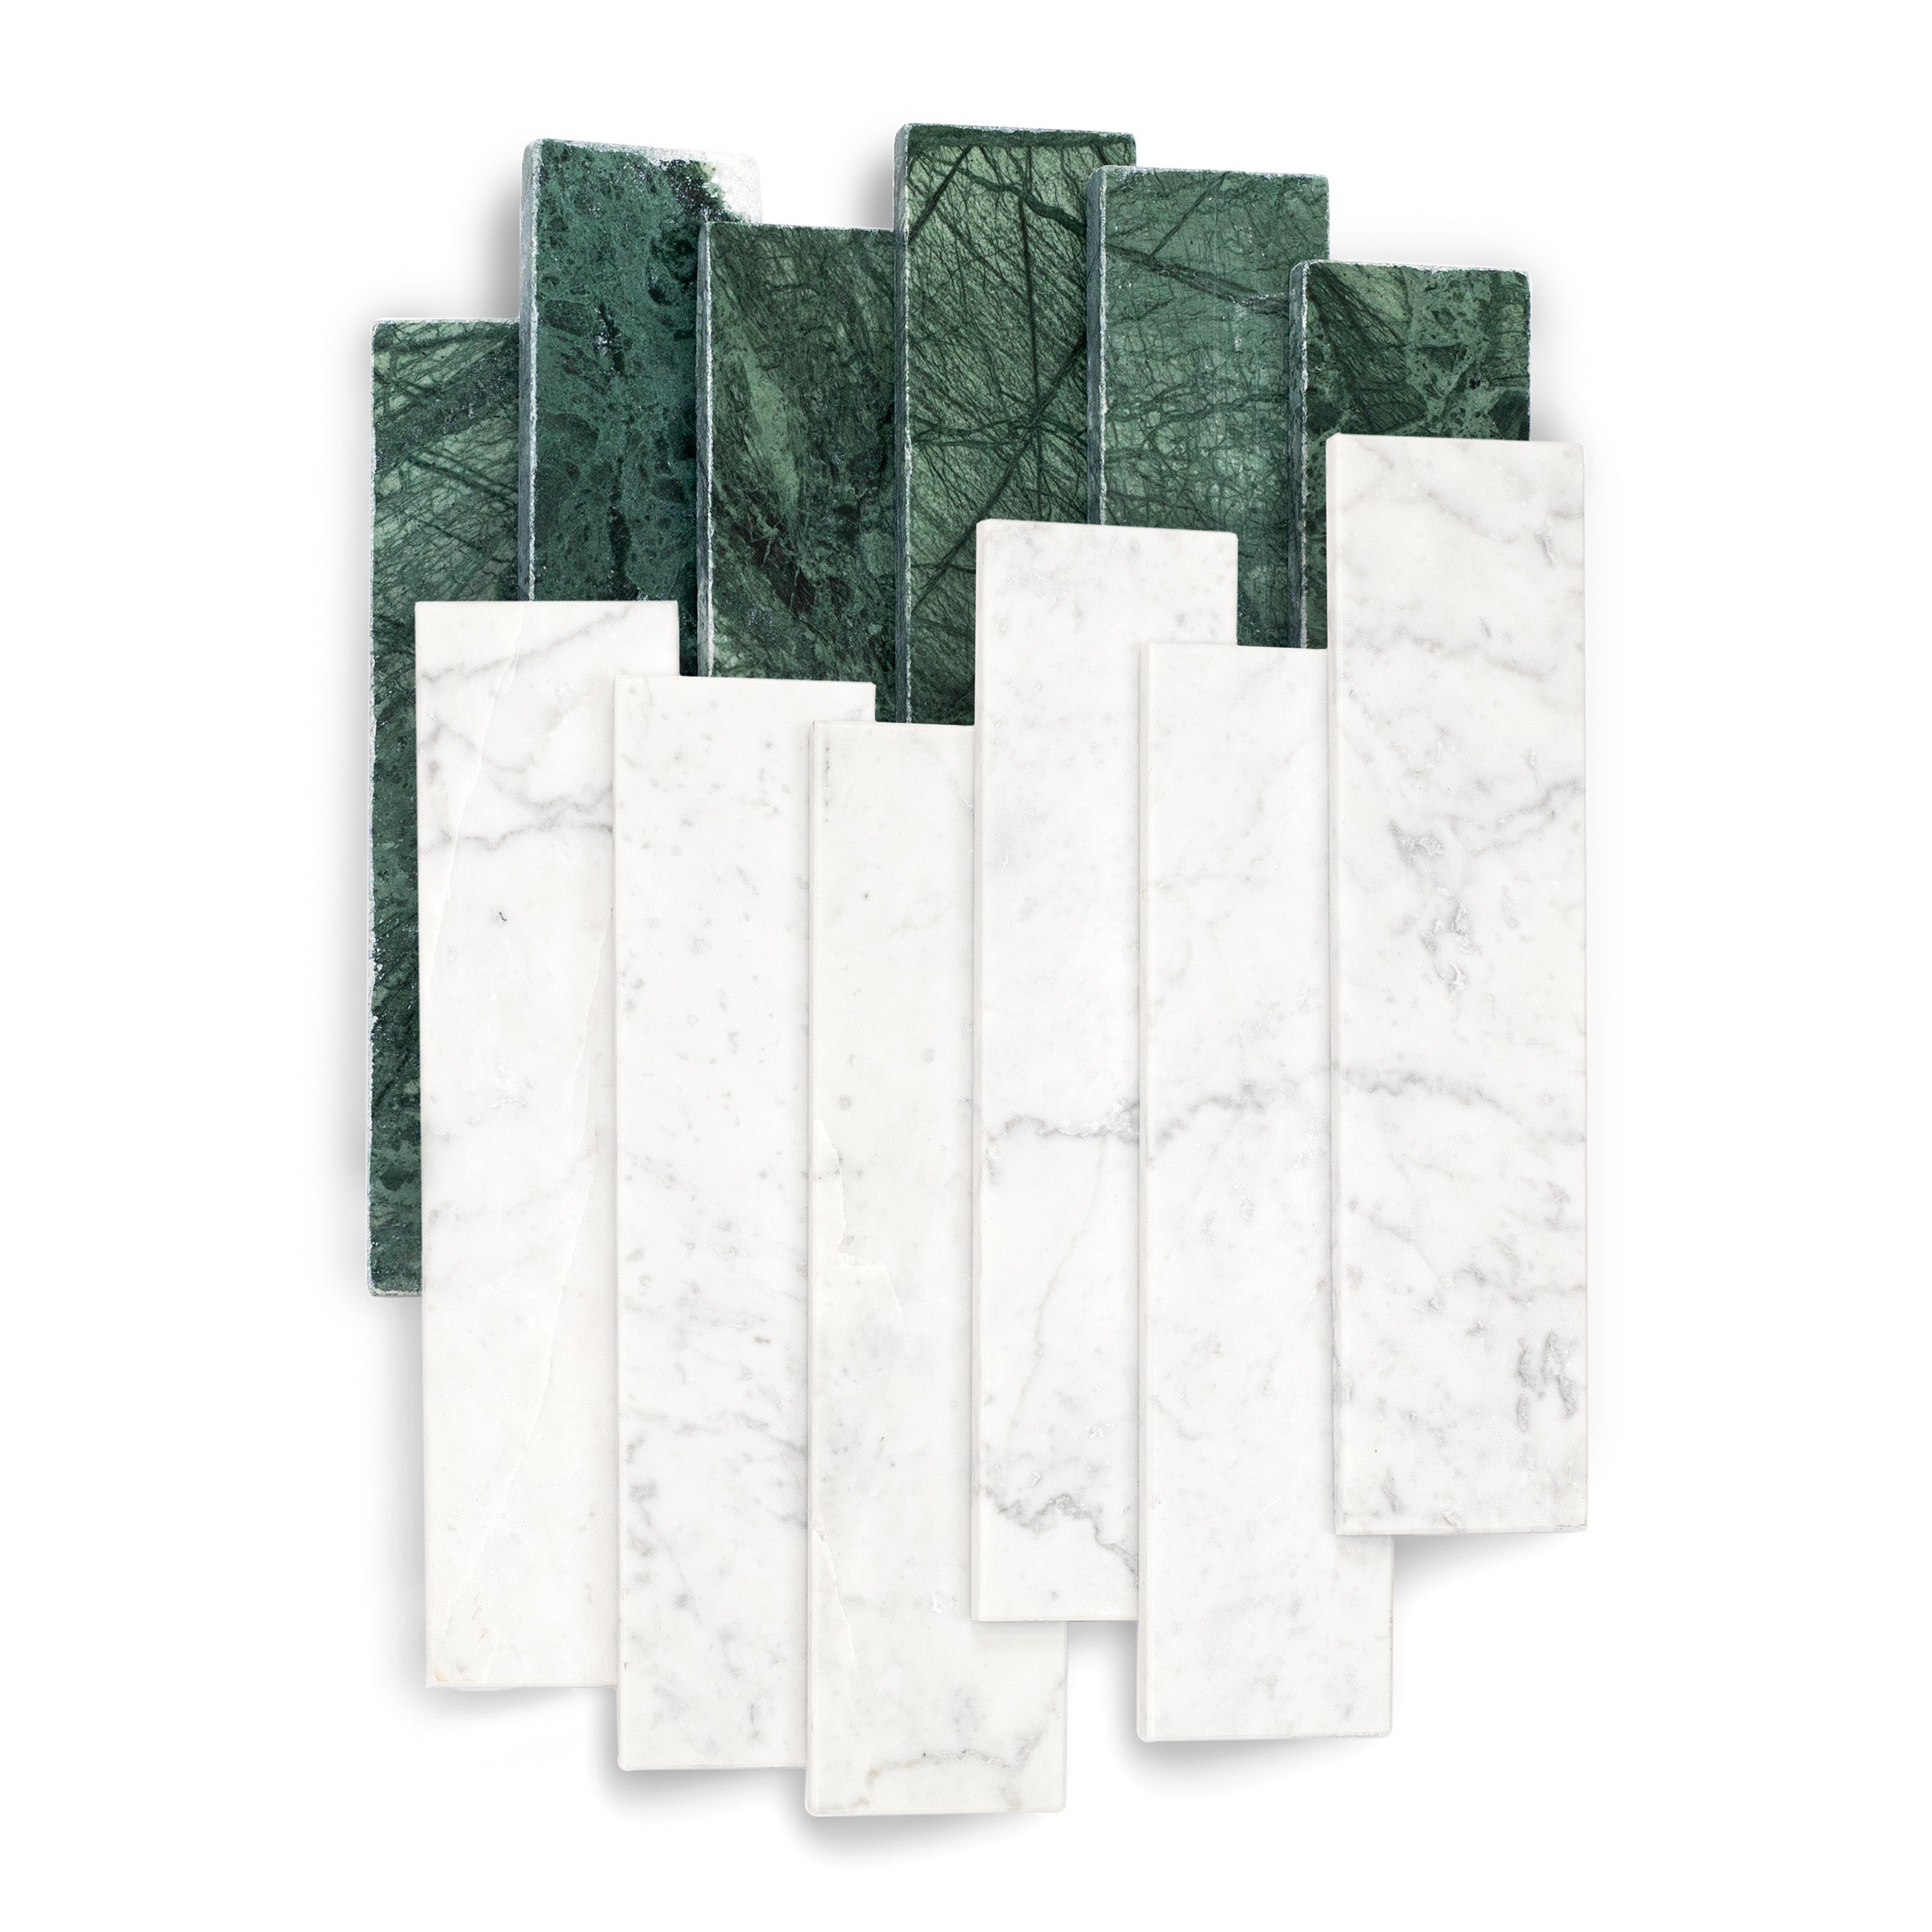
Timeless Marble Luxury
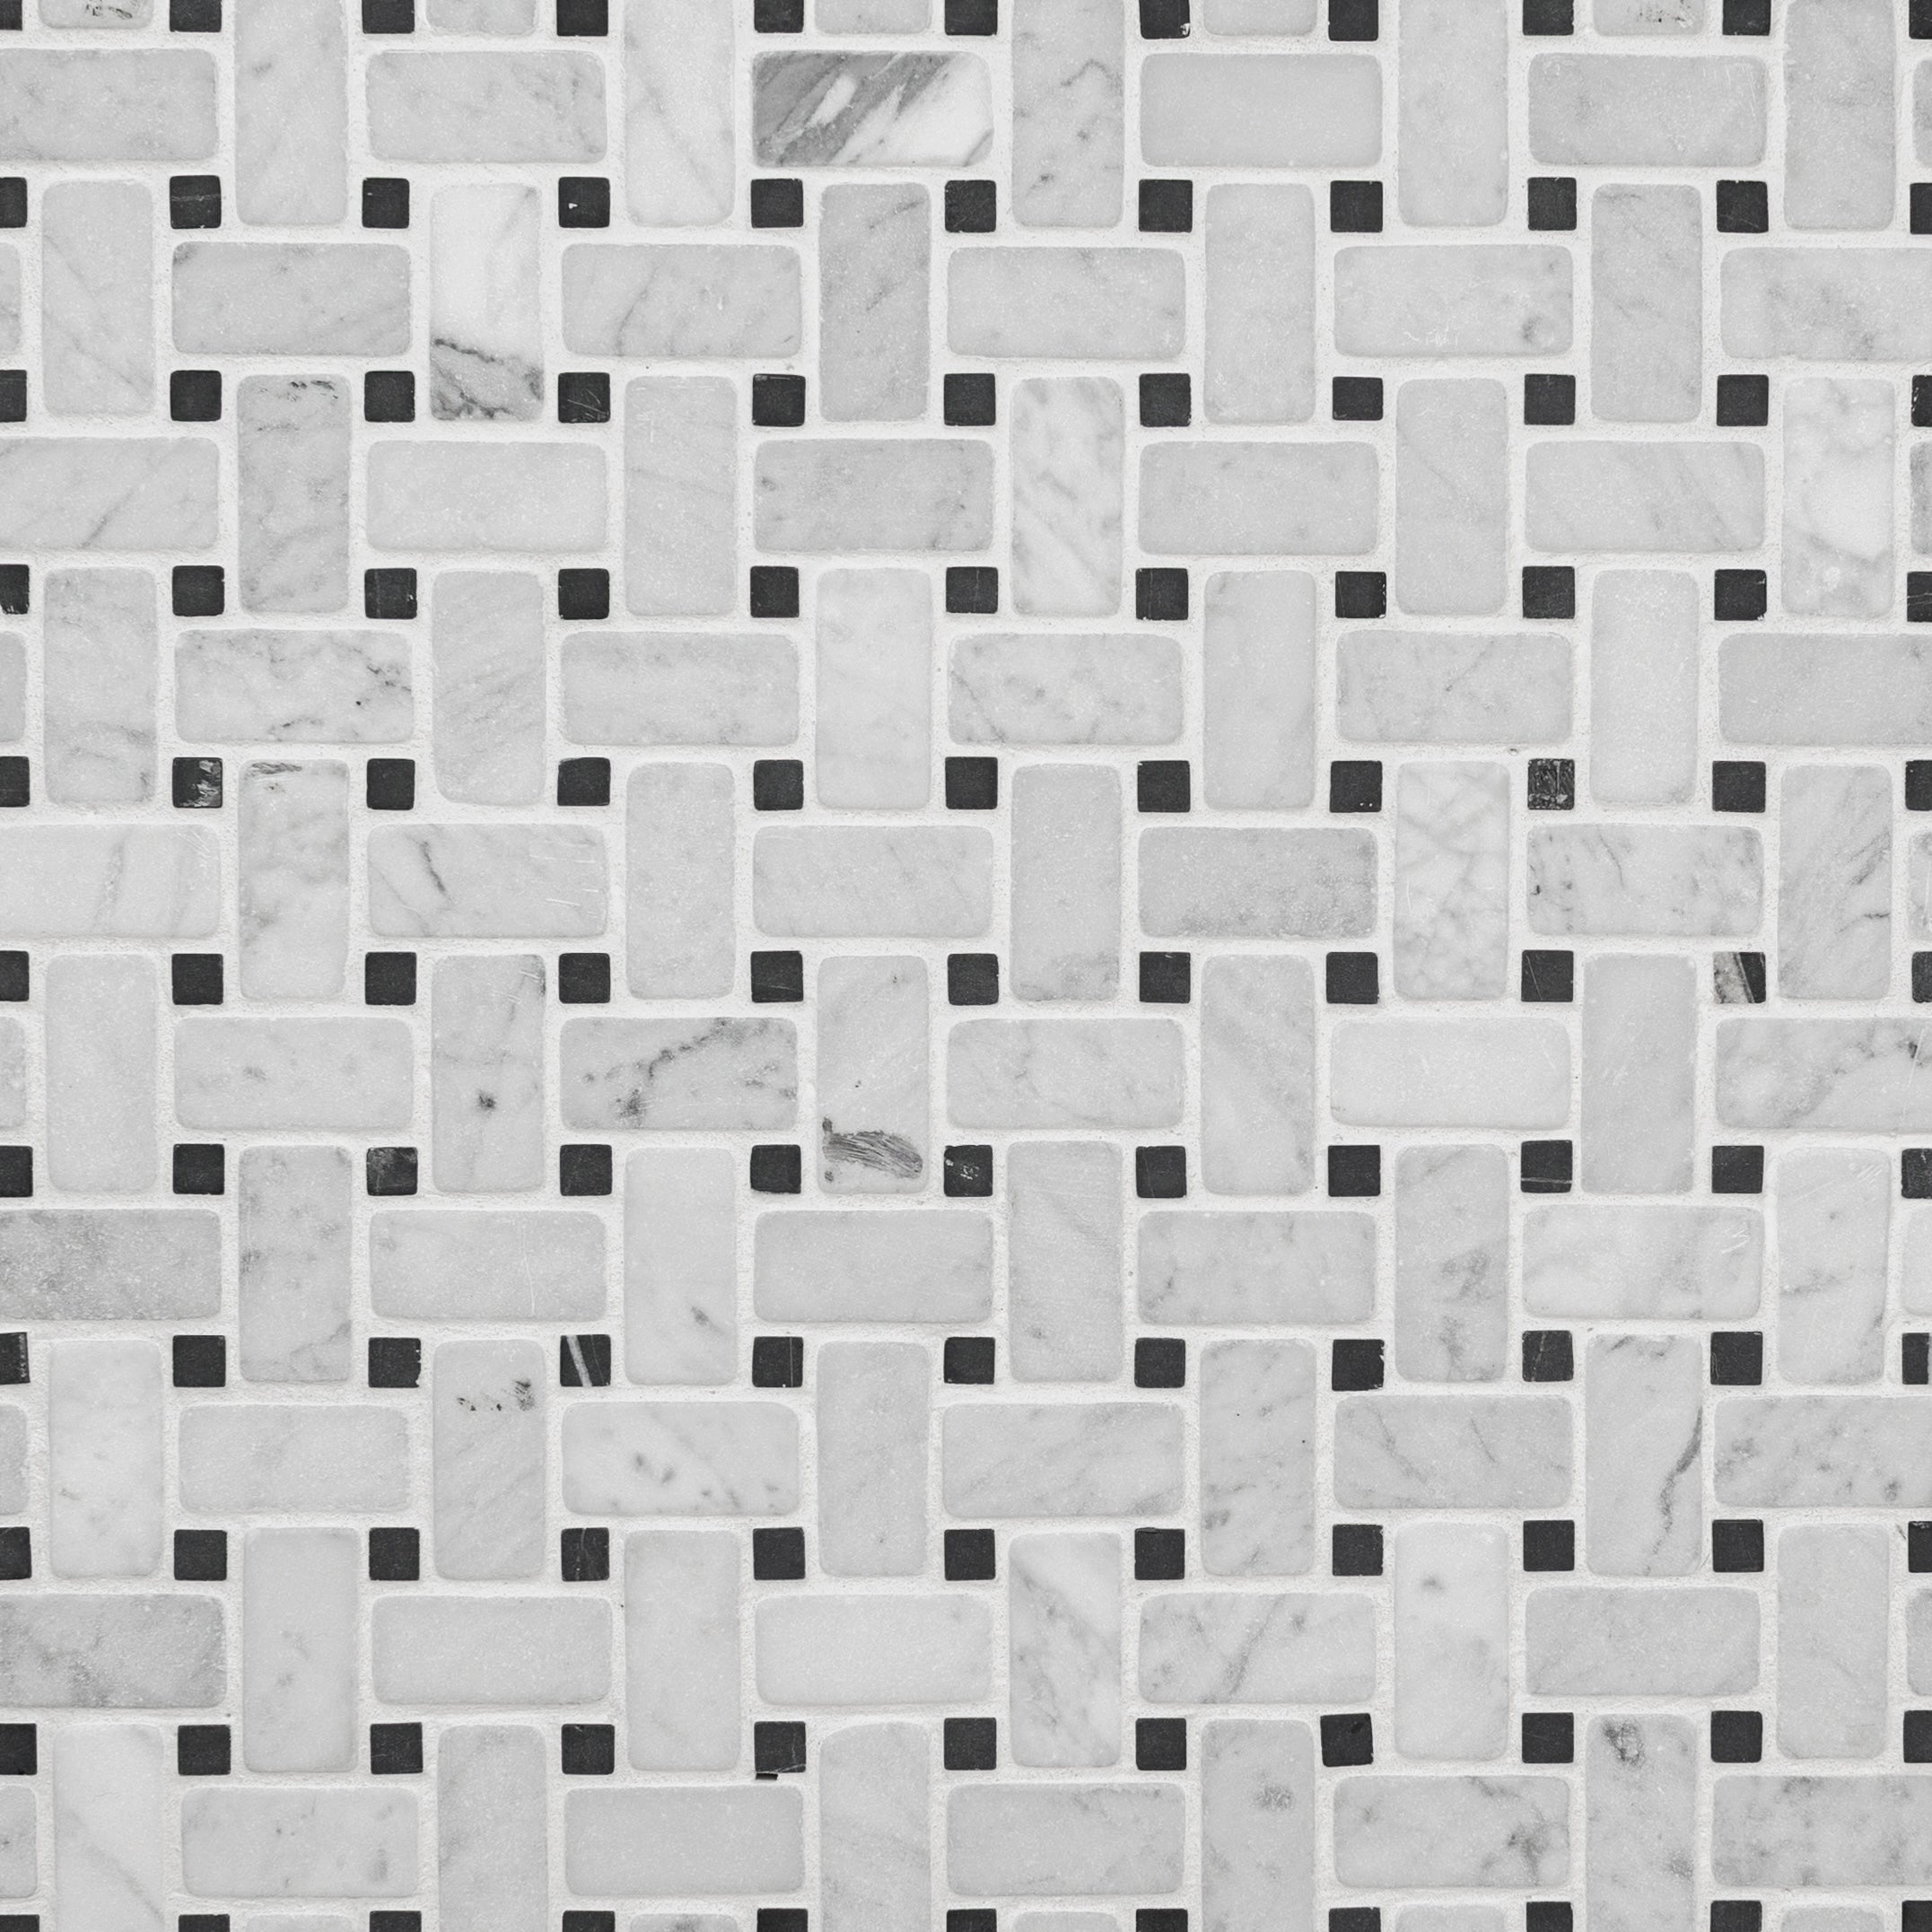
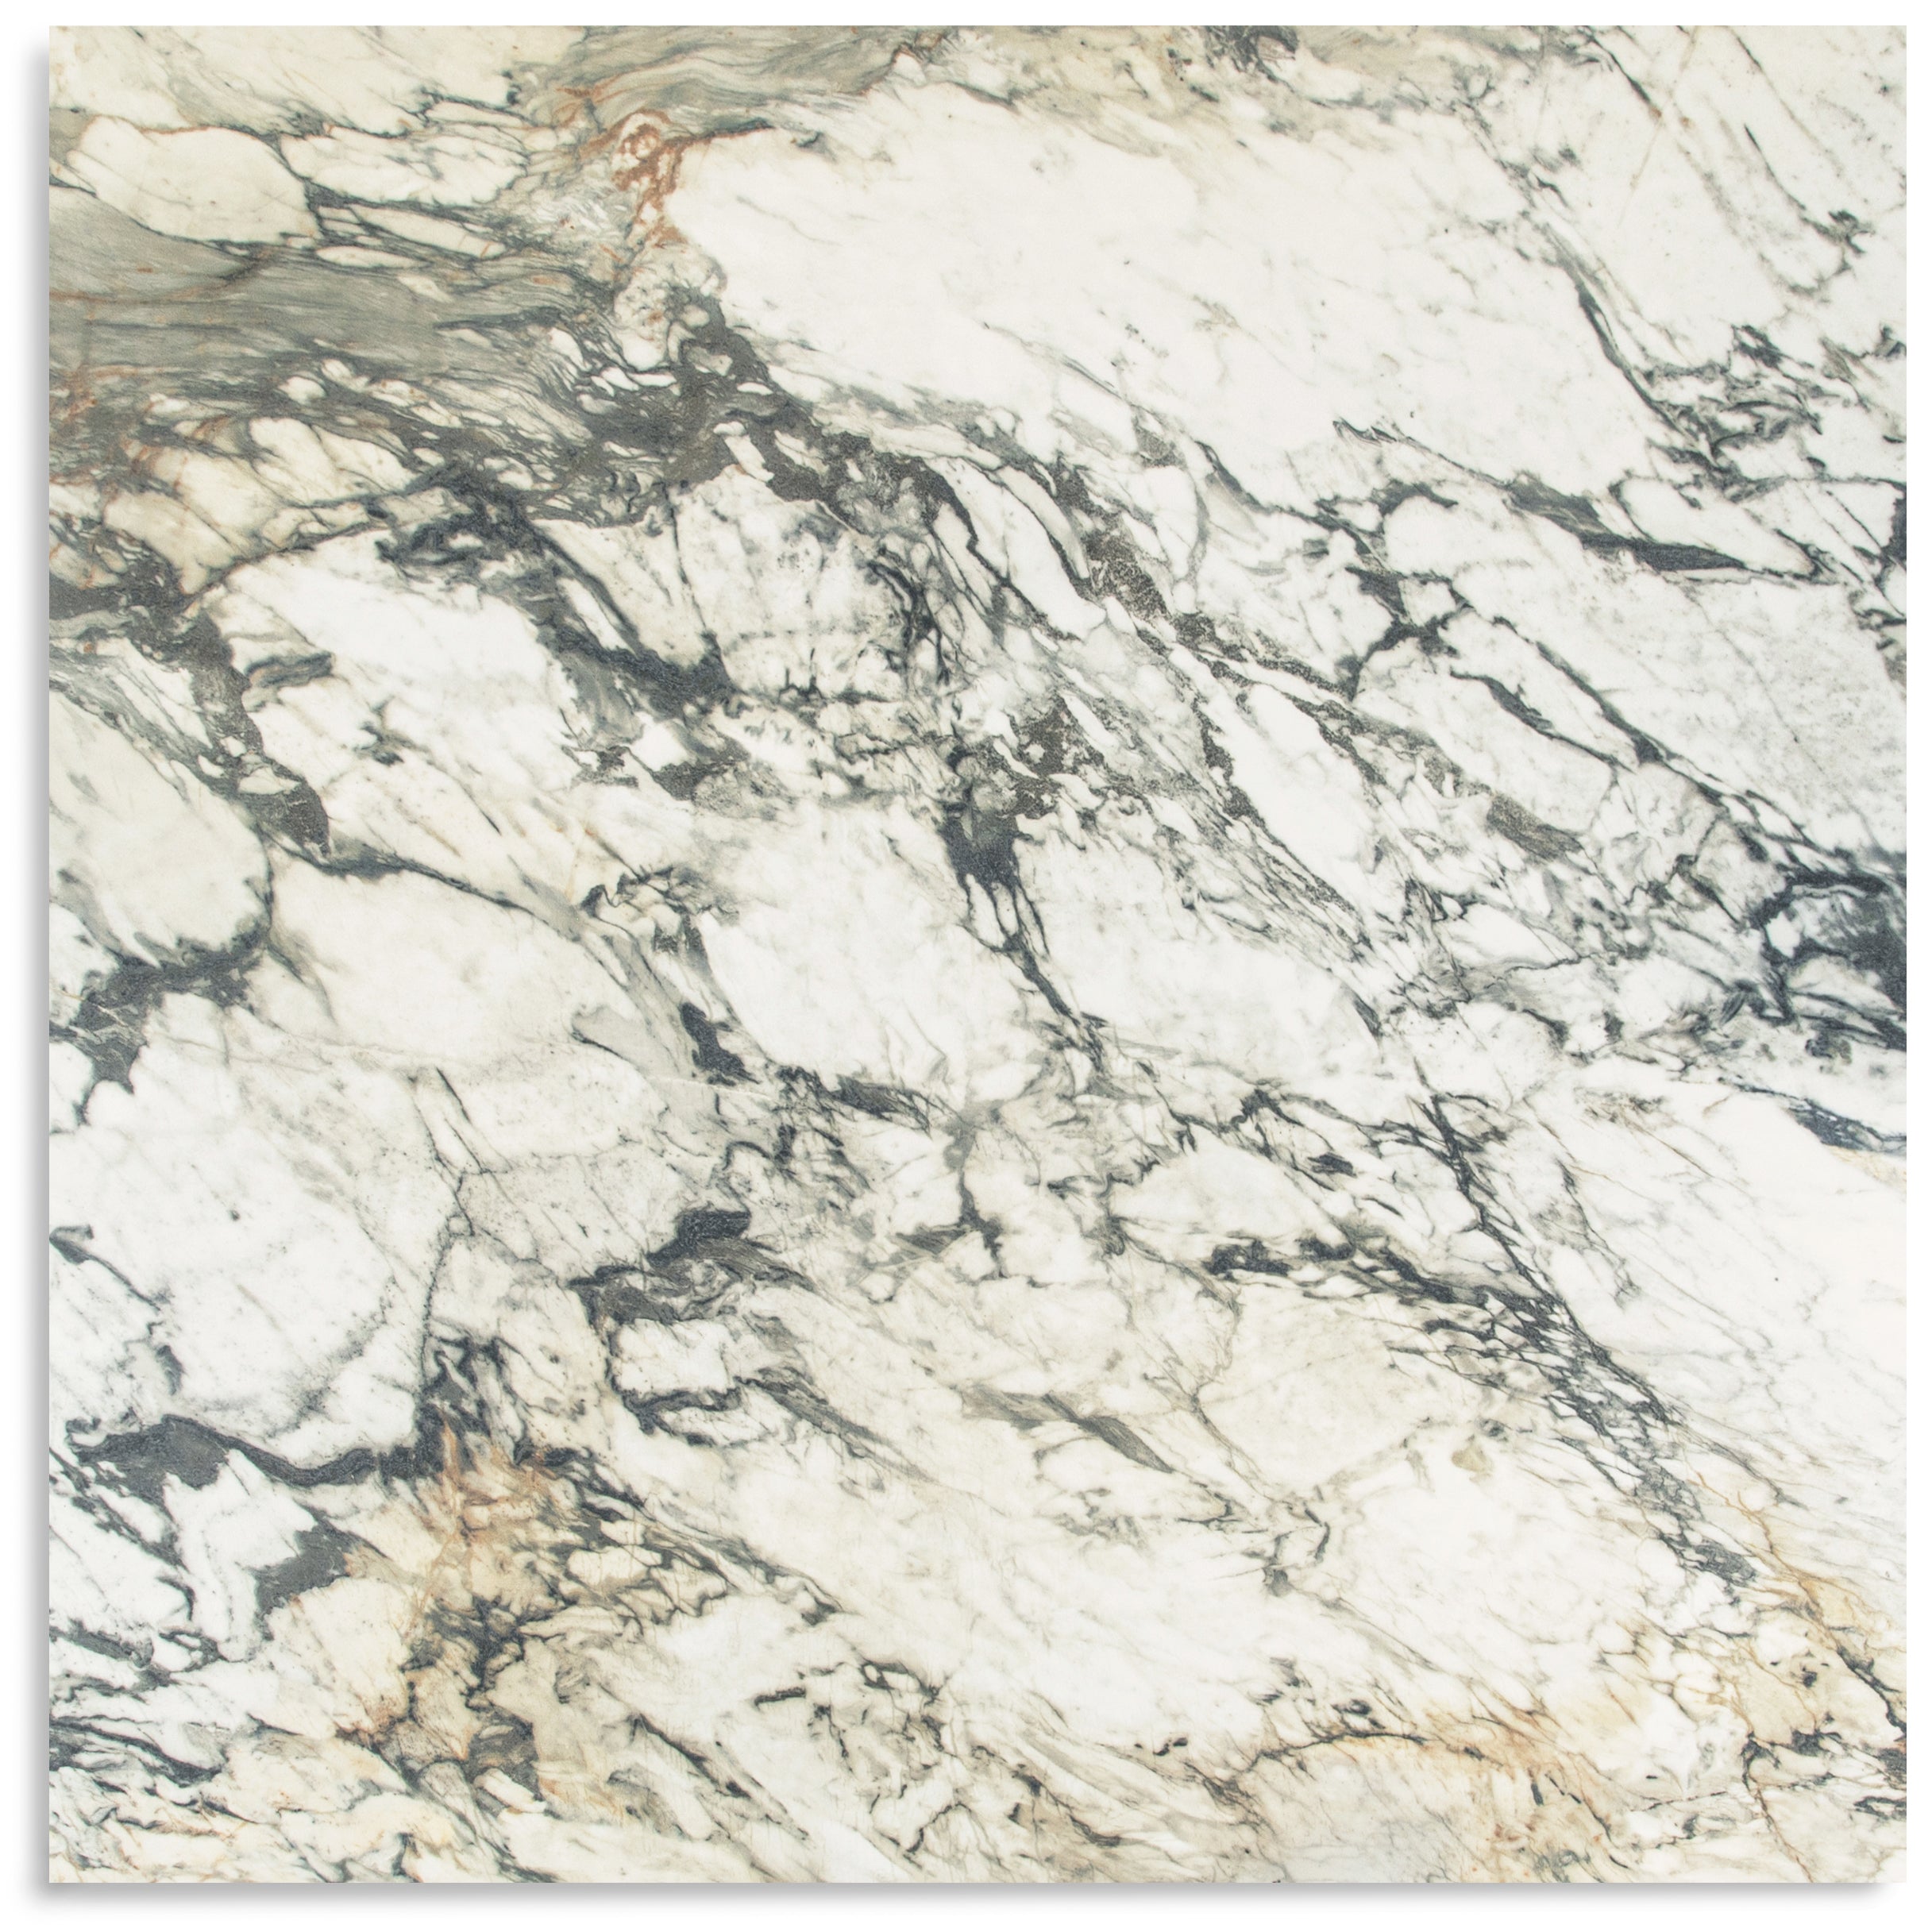
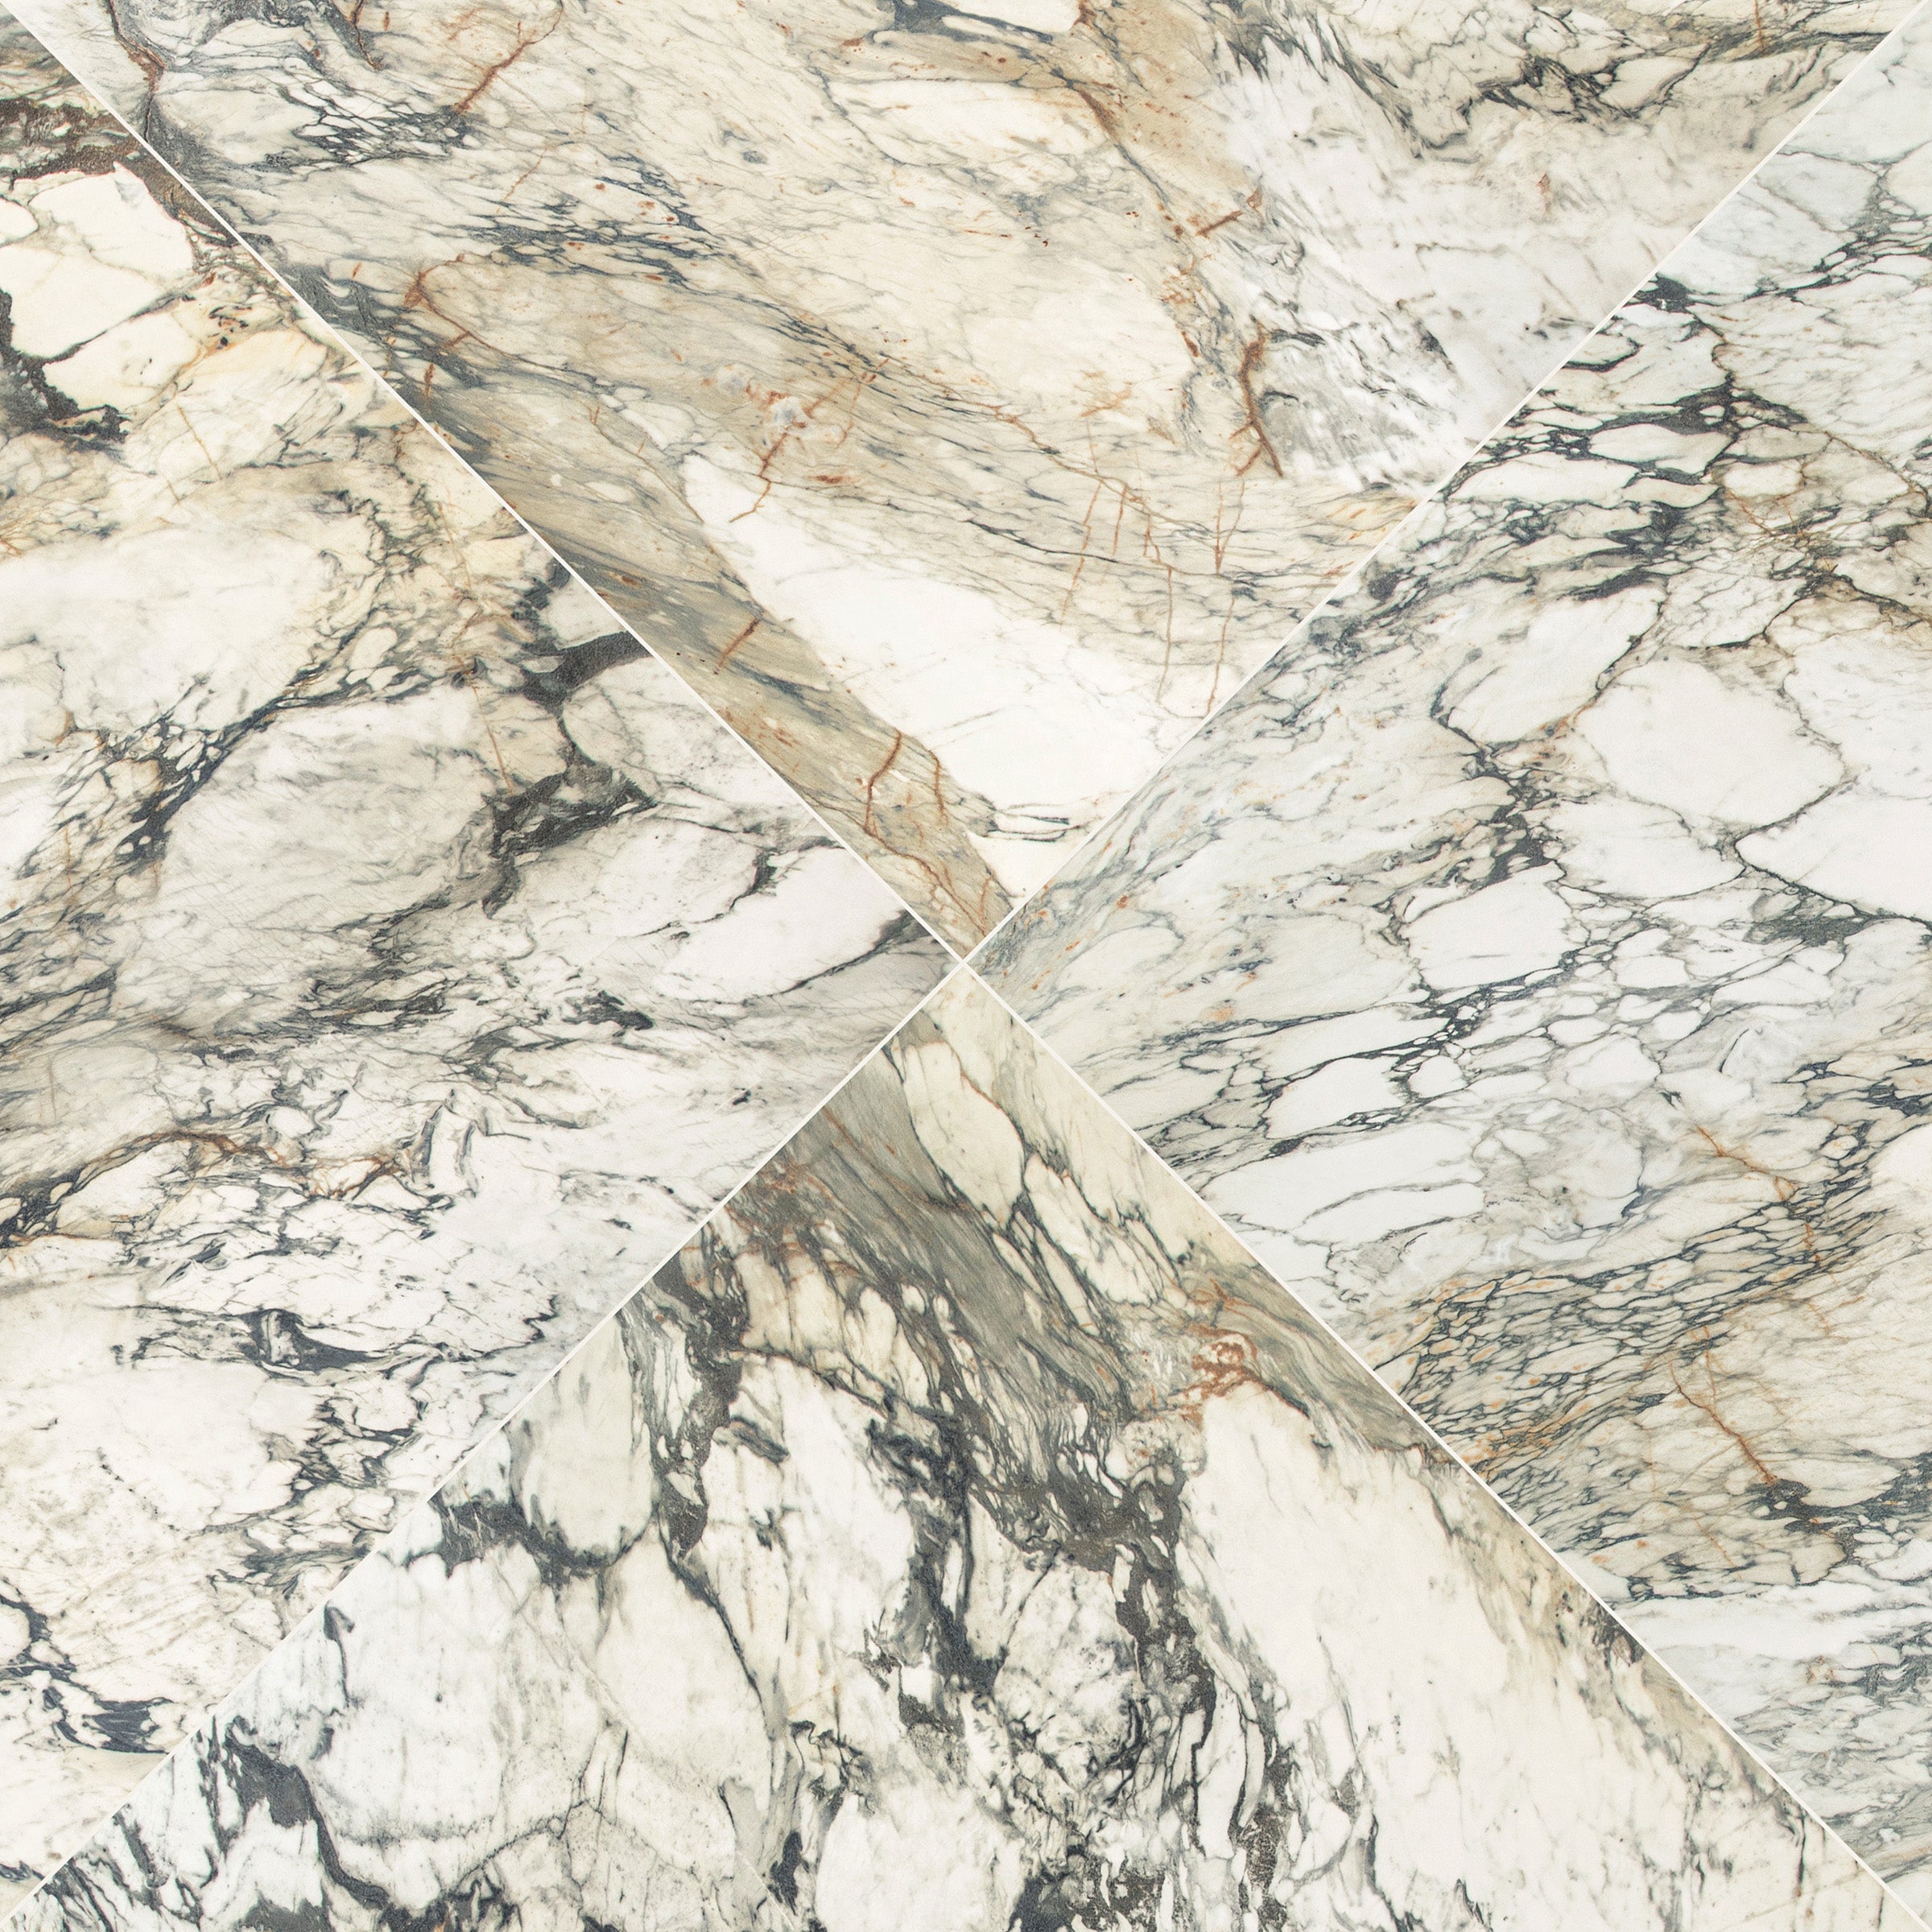
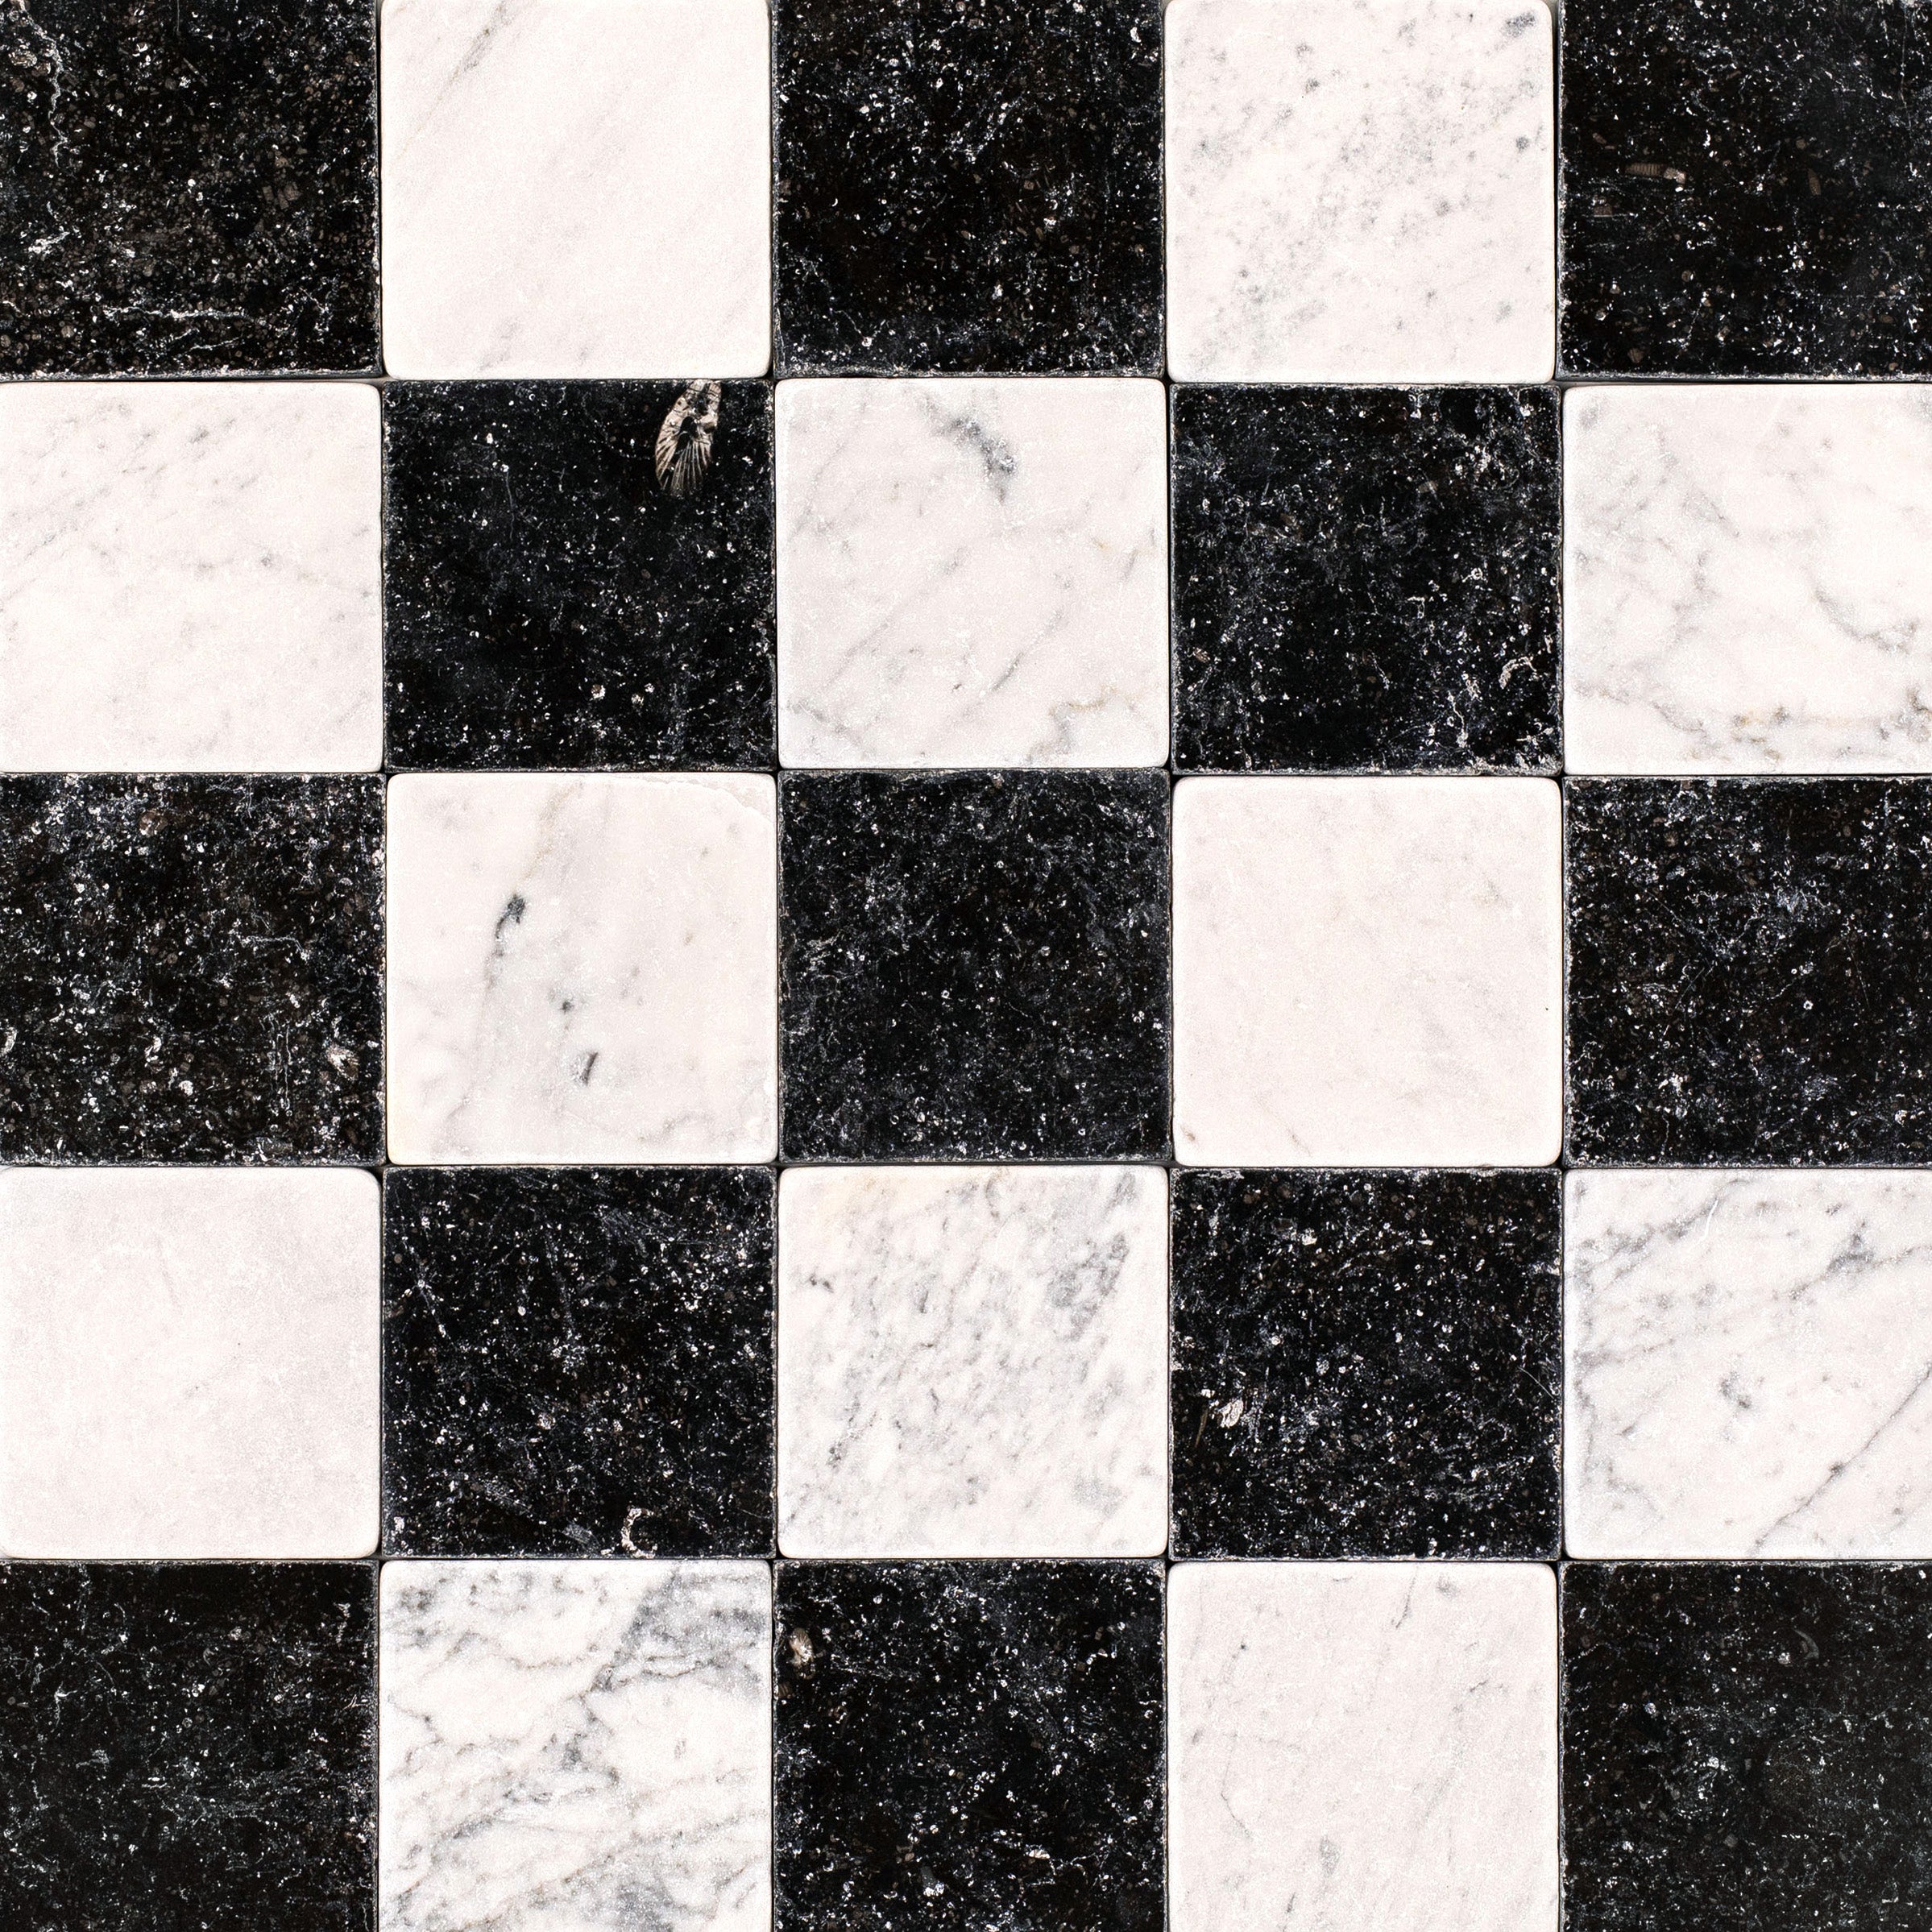
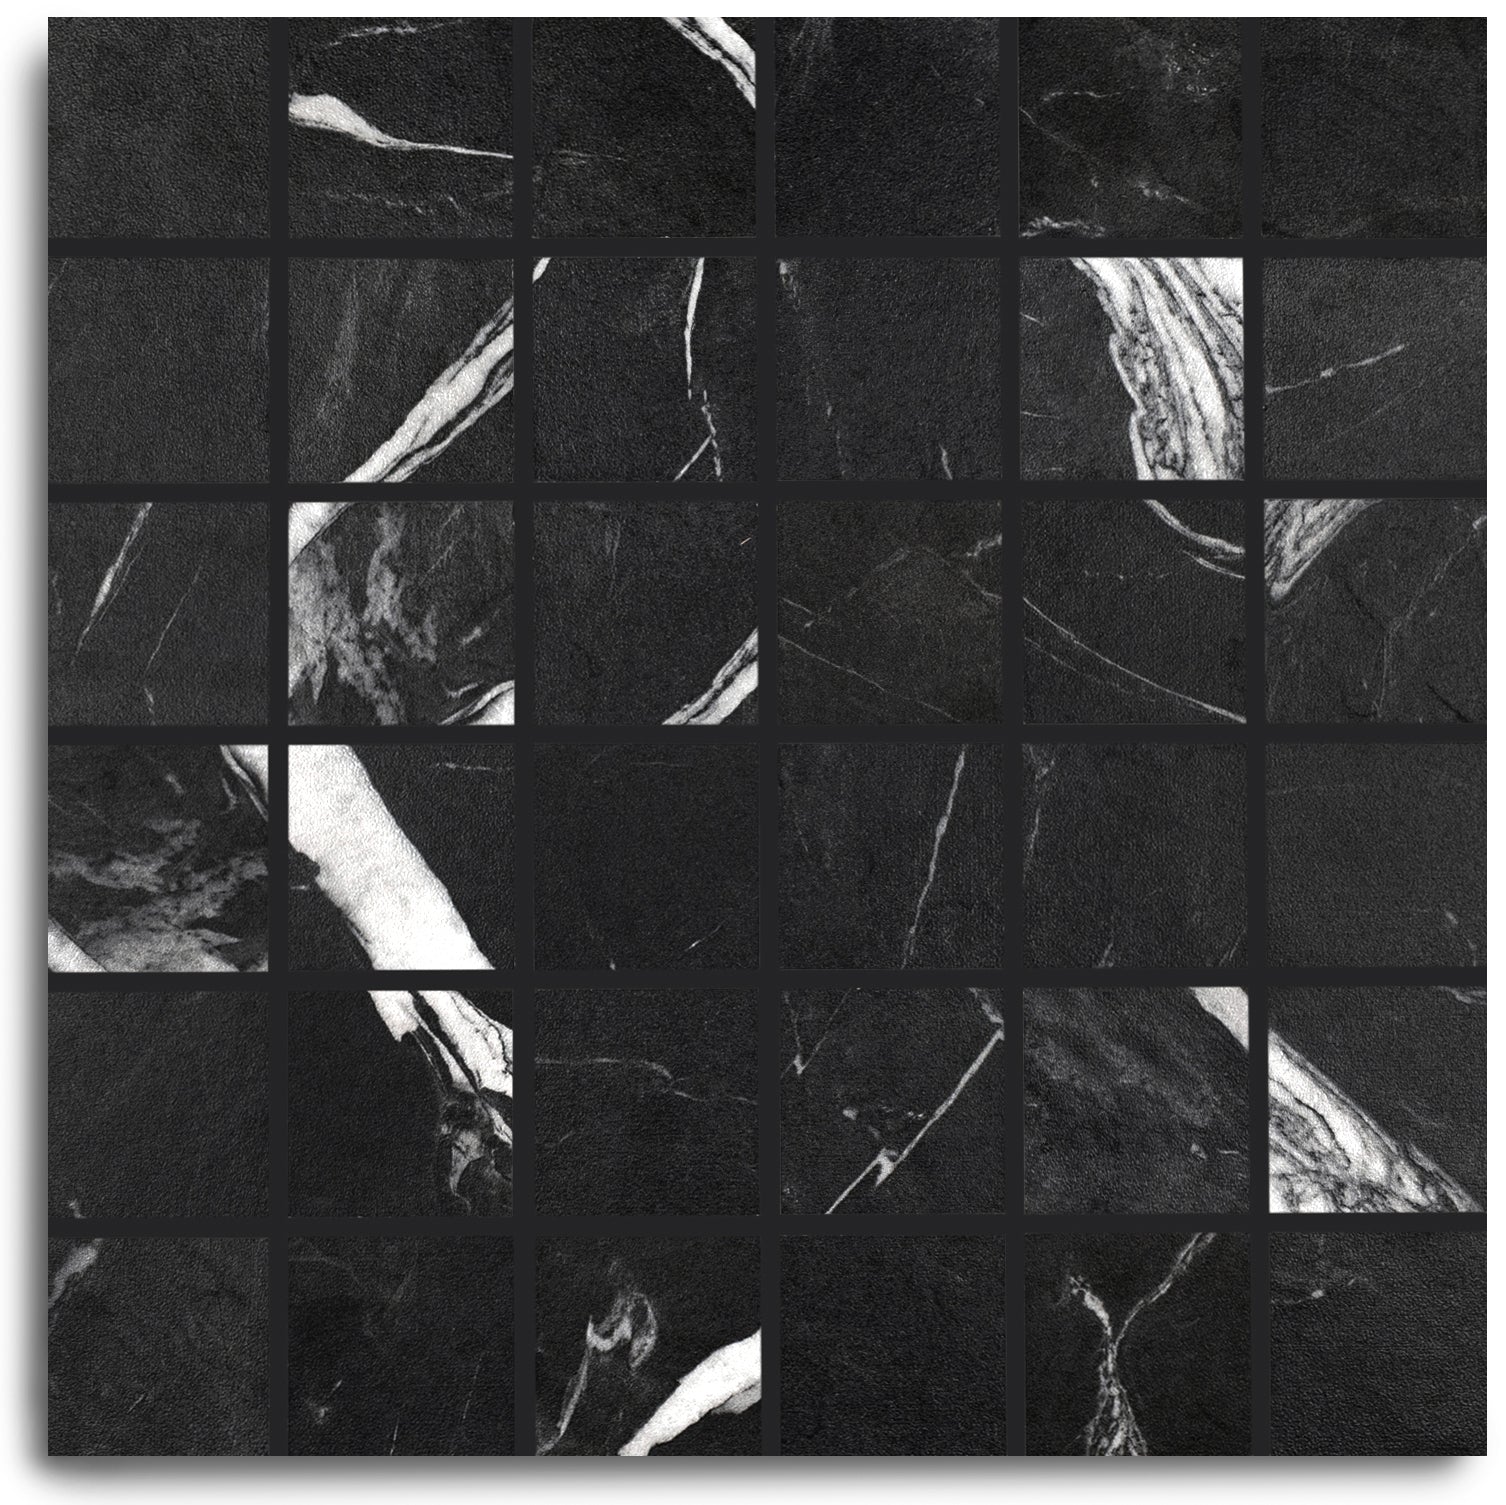
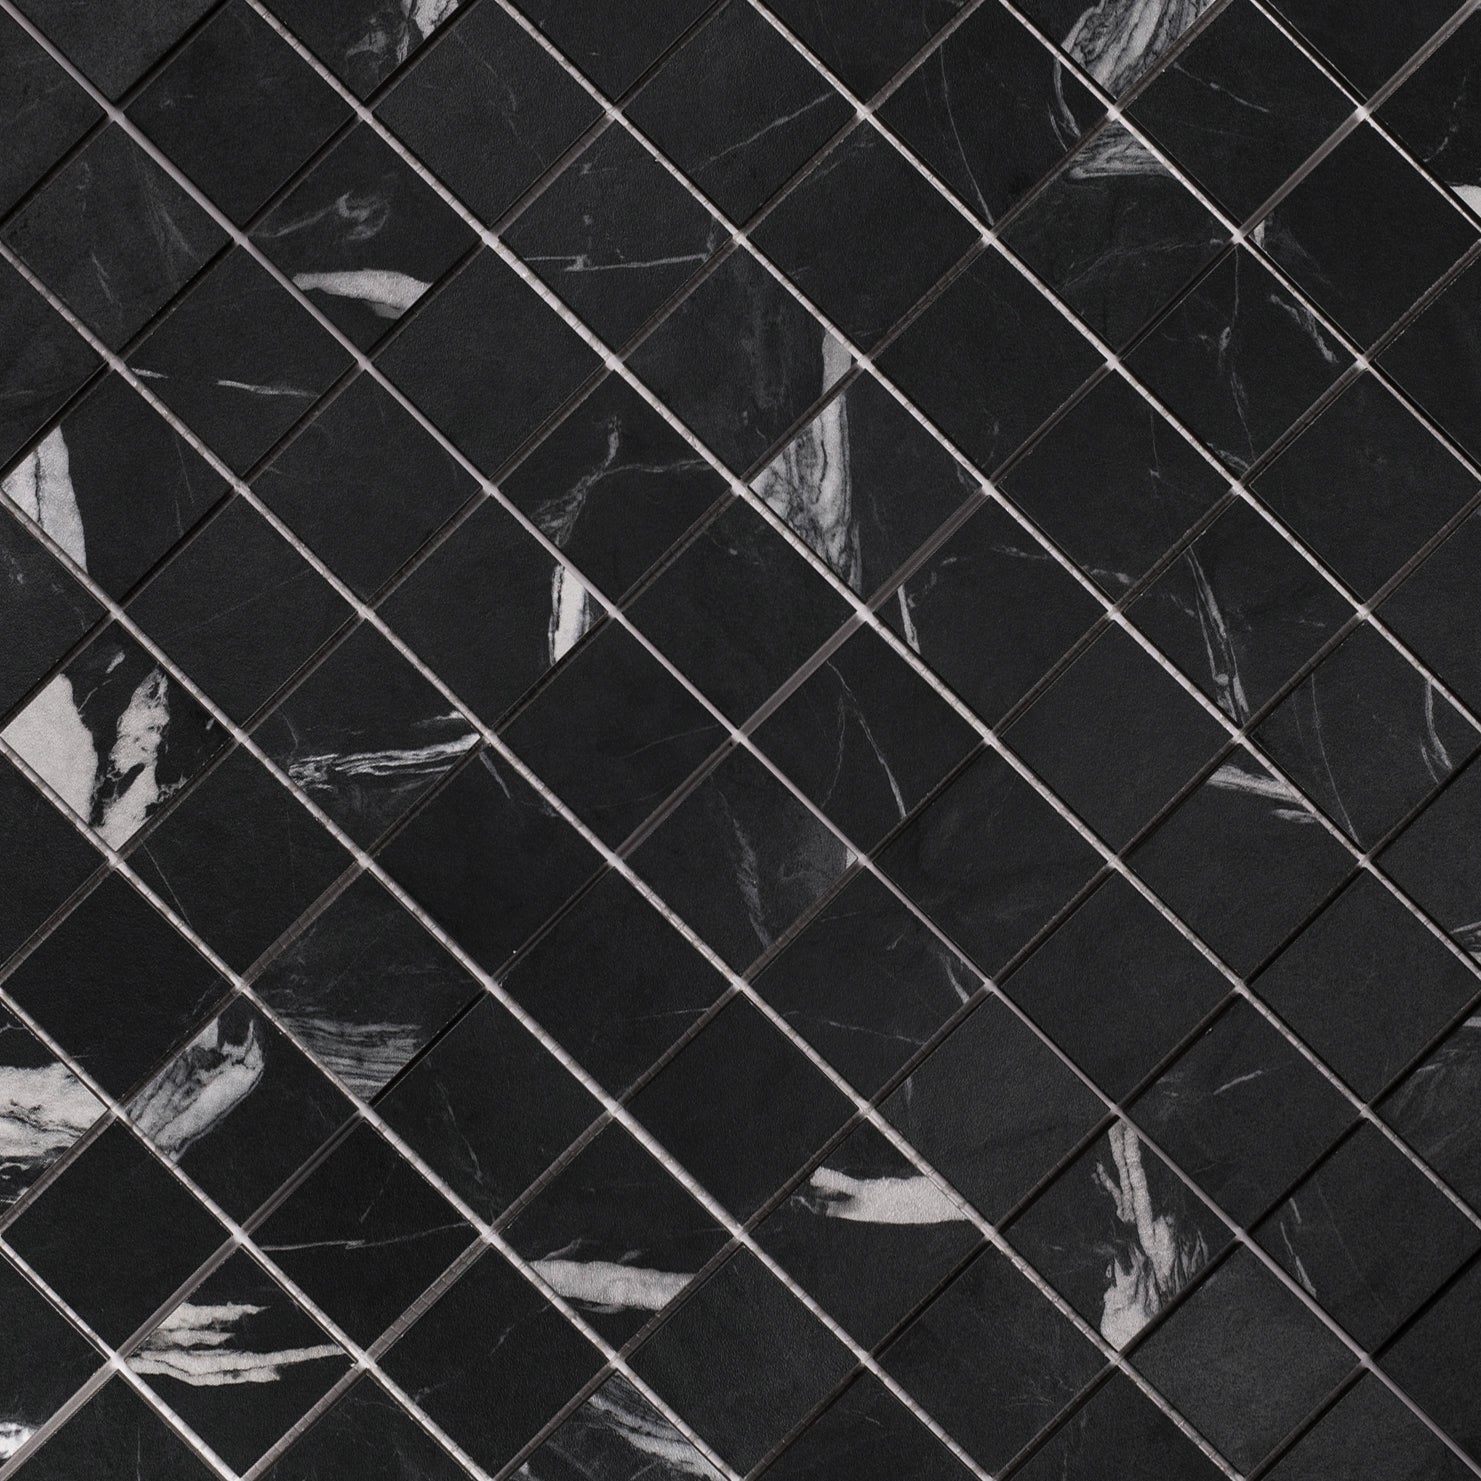
Make a bold statement underfoot with our Carrara and Nero Marquina basketweave mosaic floor tile. Crisp white Carrara marble with its subtle veining weaves seamlessly with the jet-black richness of Nero Marquina, creating a dramatic black-and-white pattern that’s as timeless as it is eye-catching.
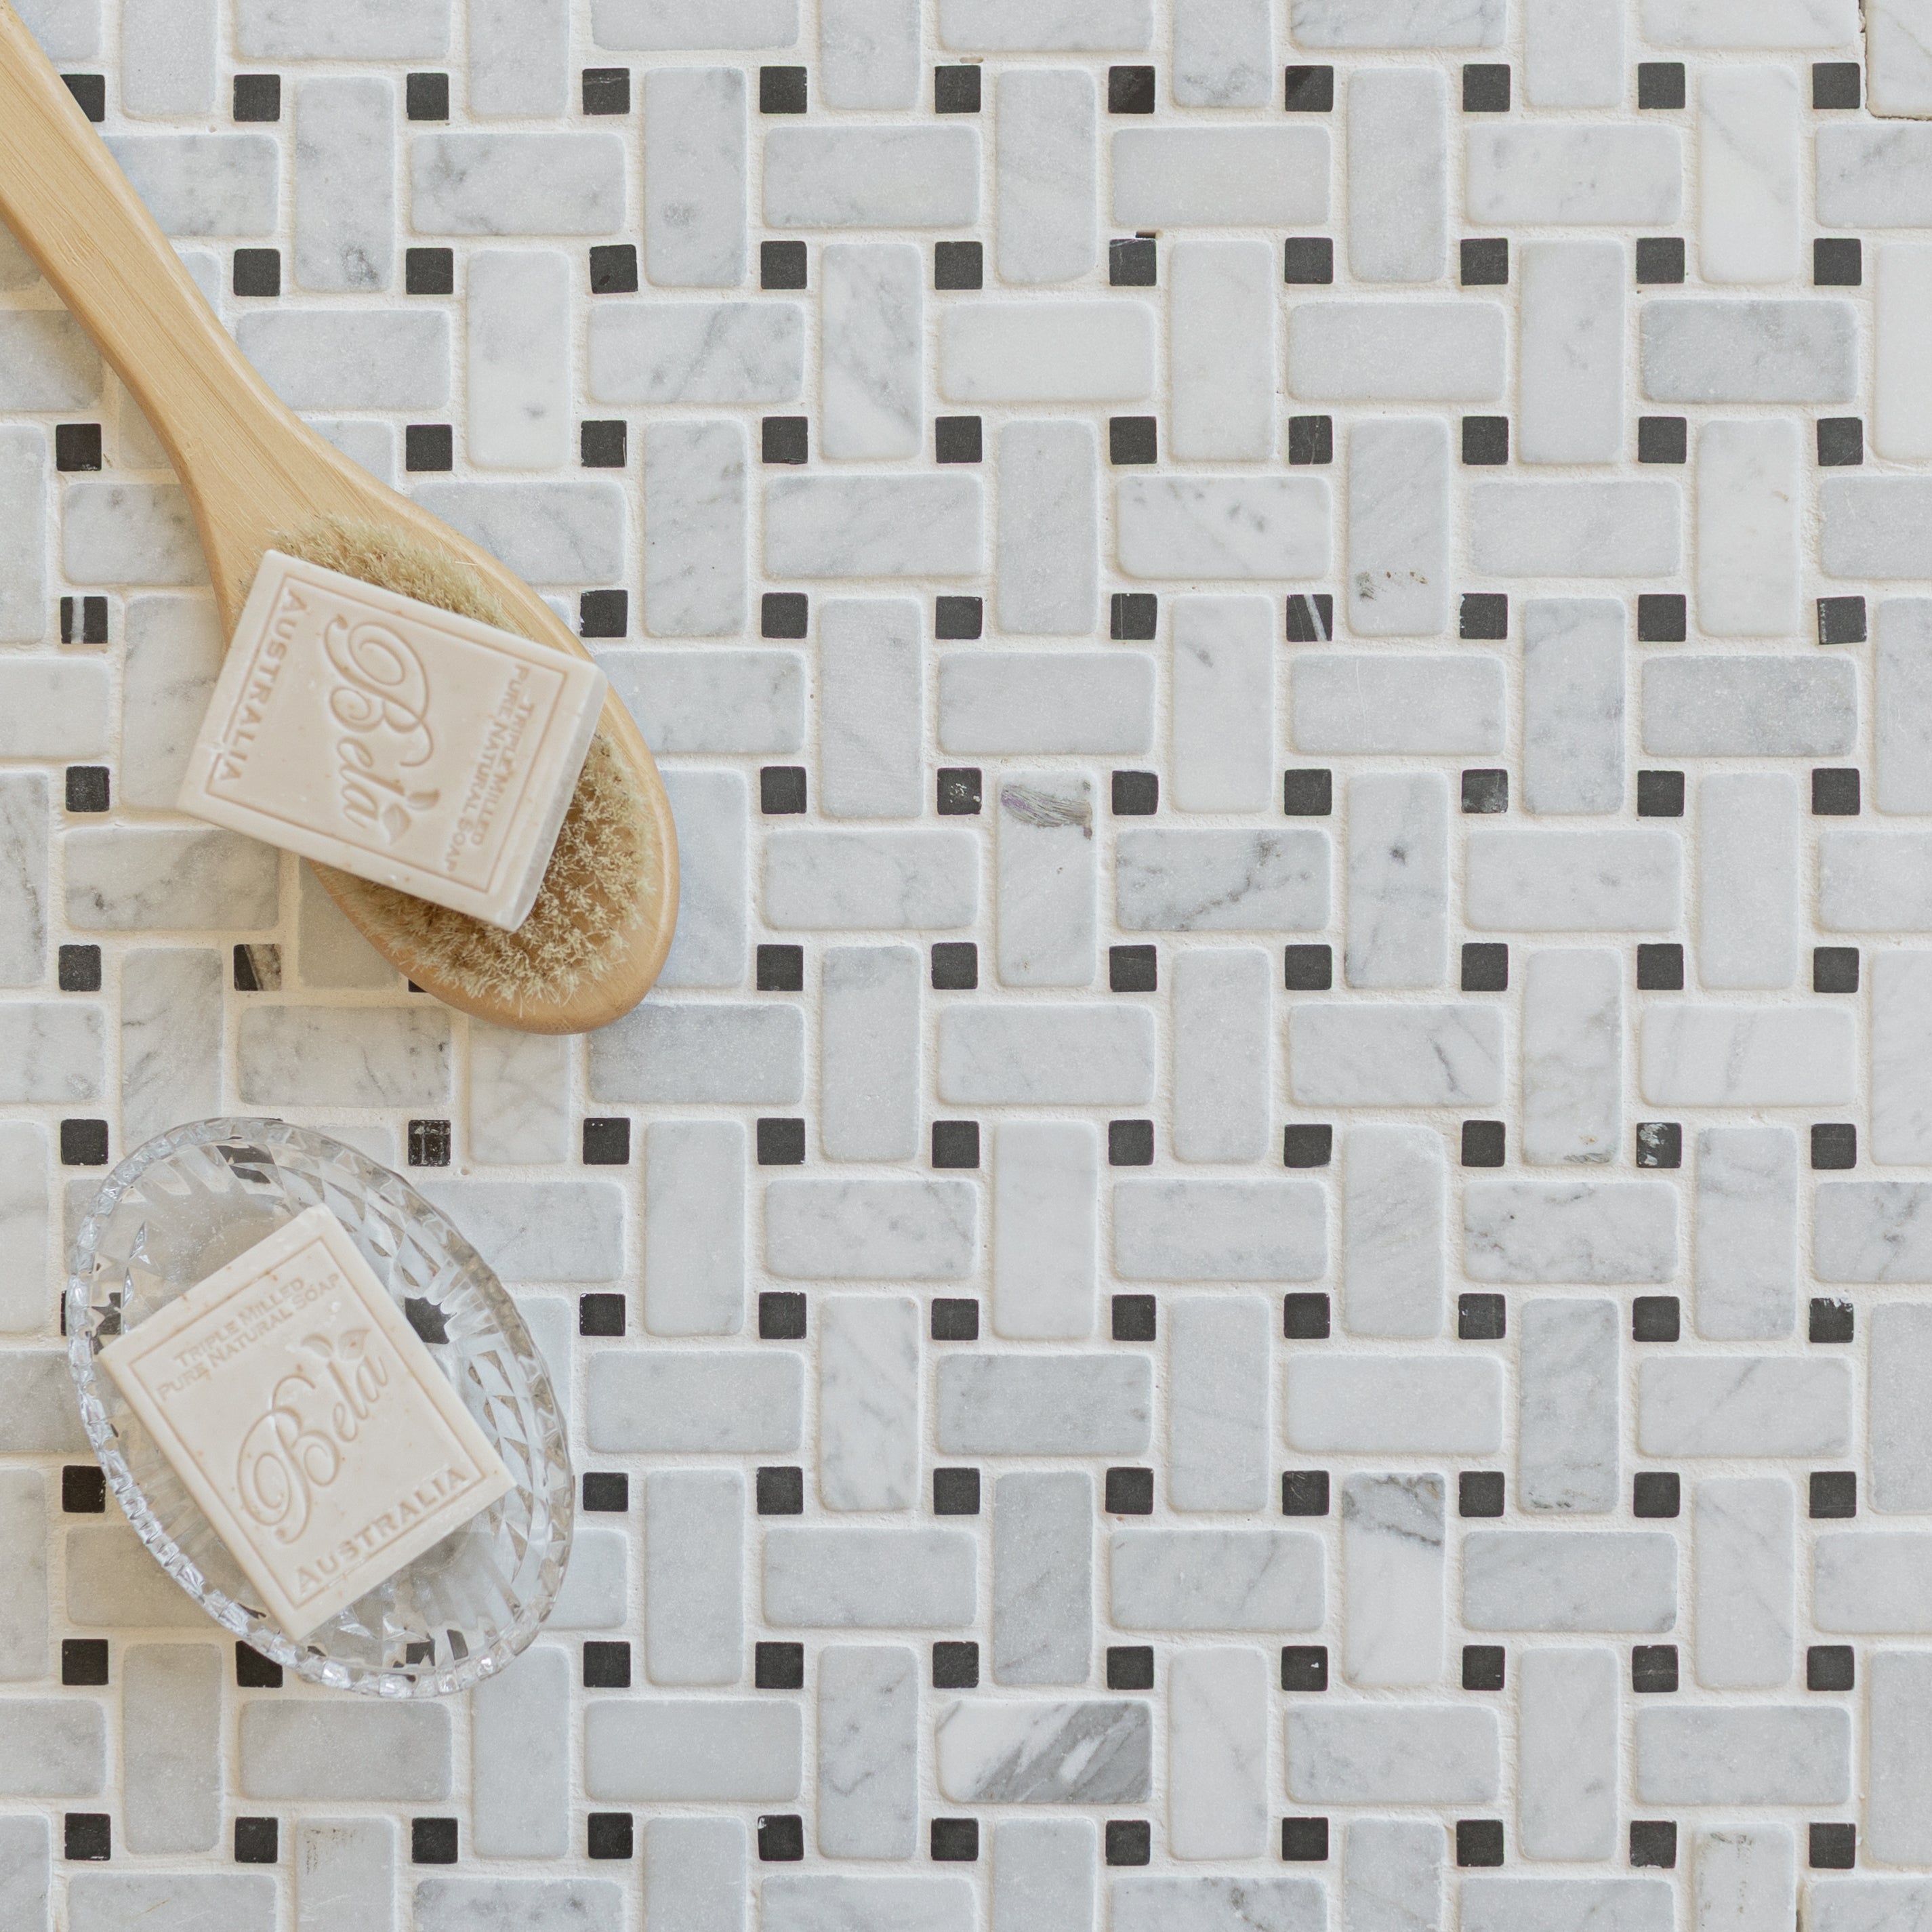
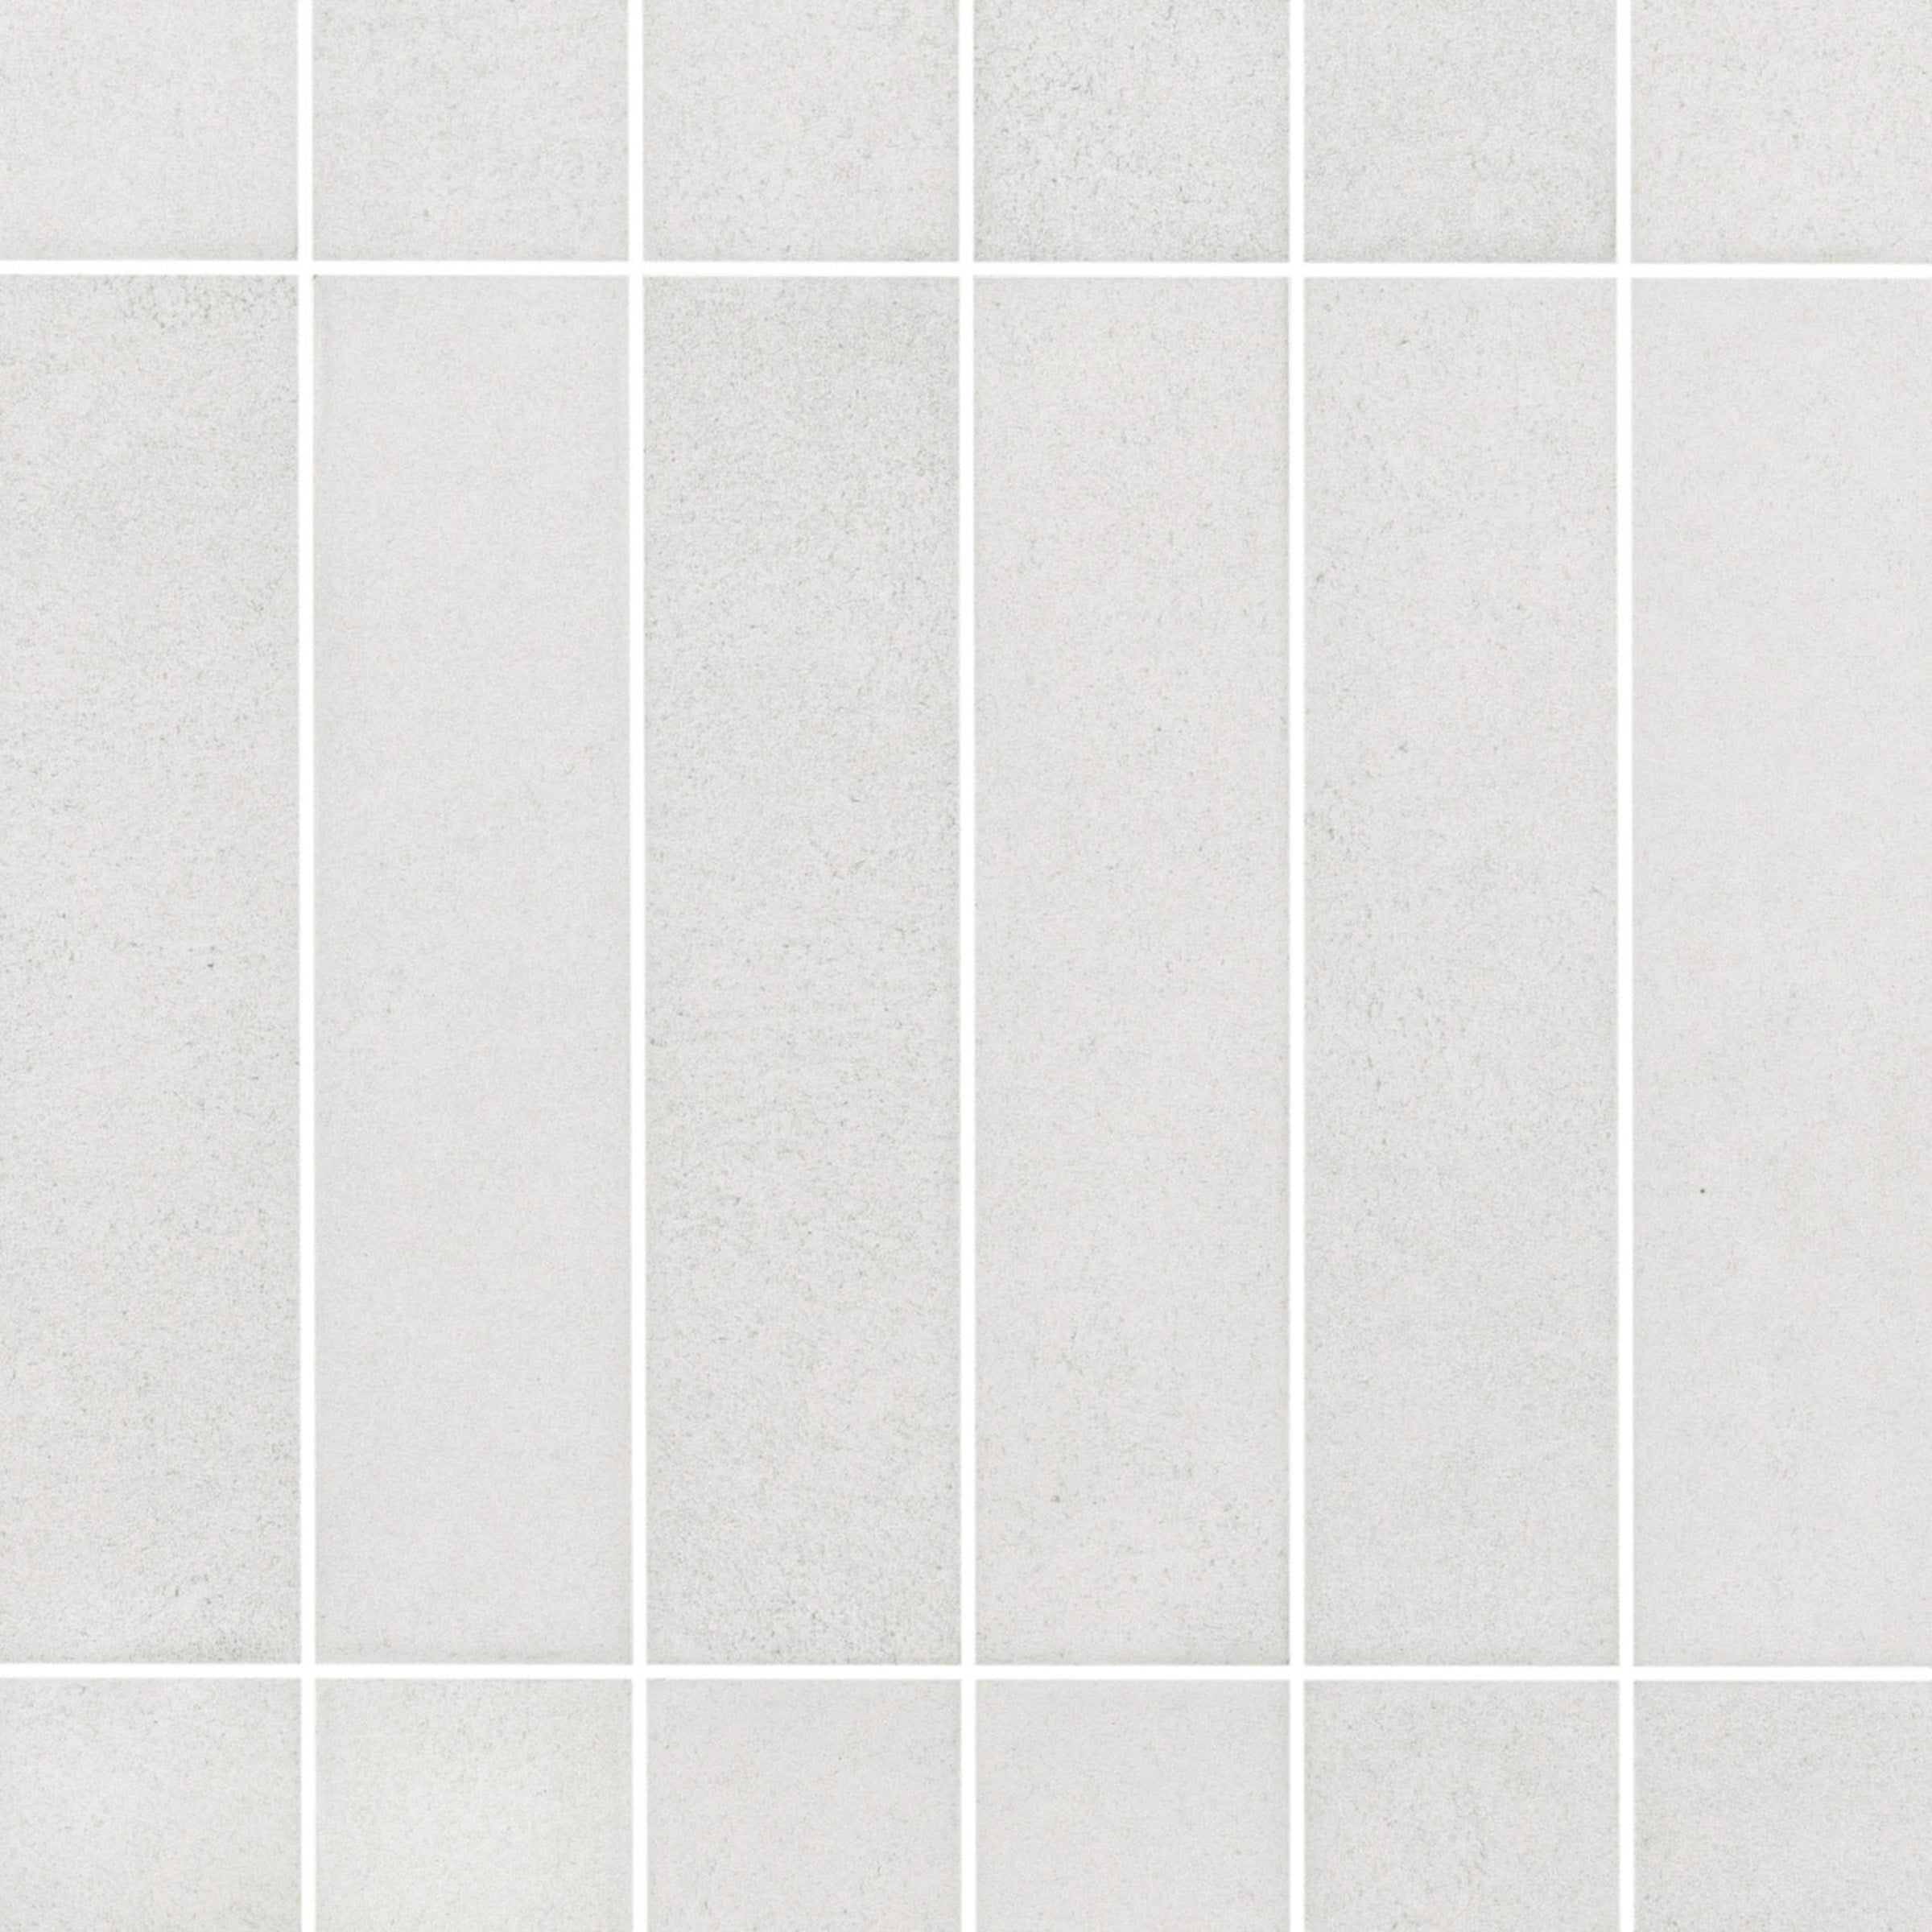
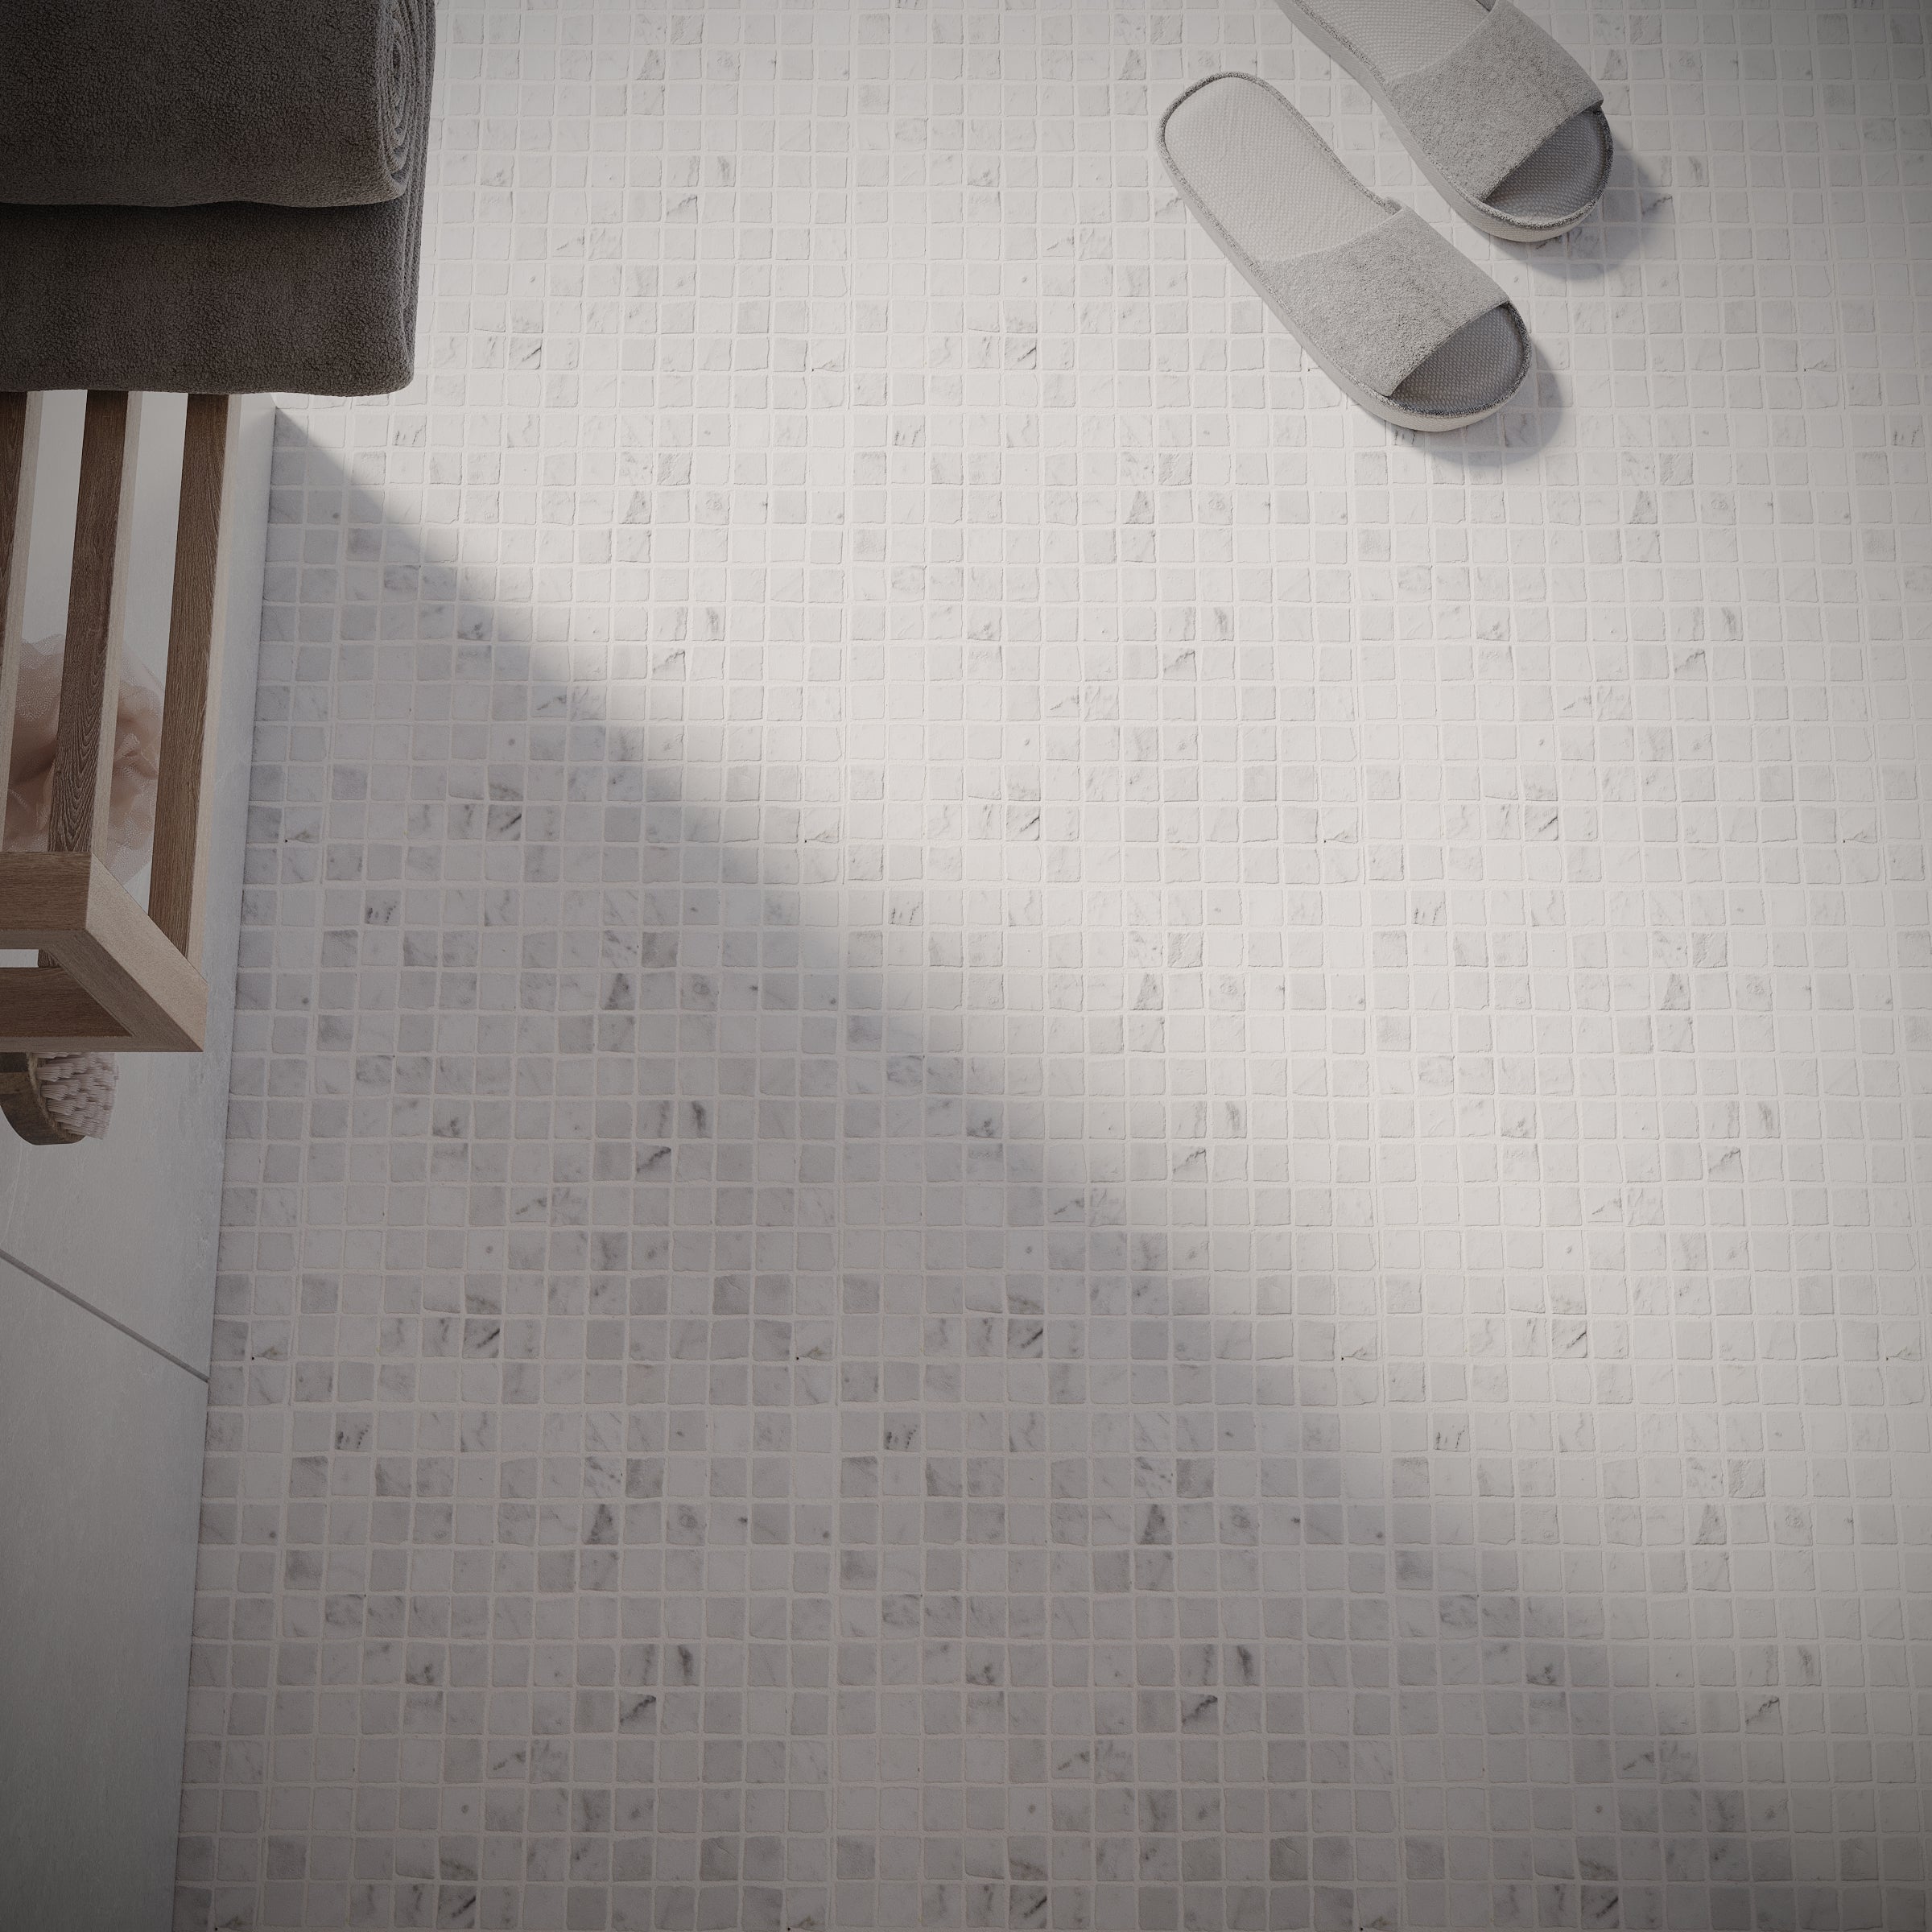
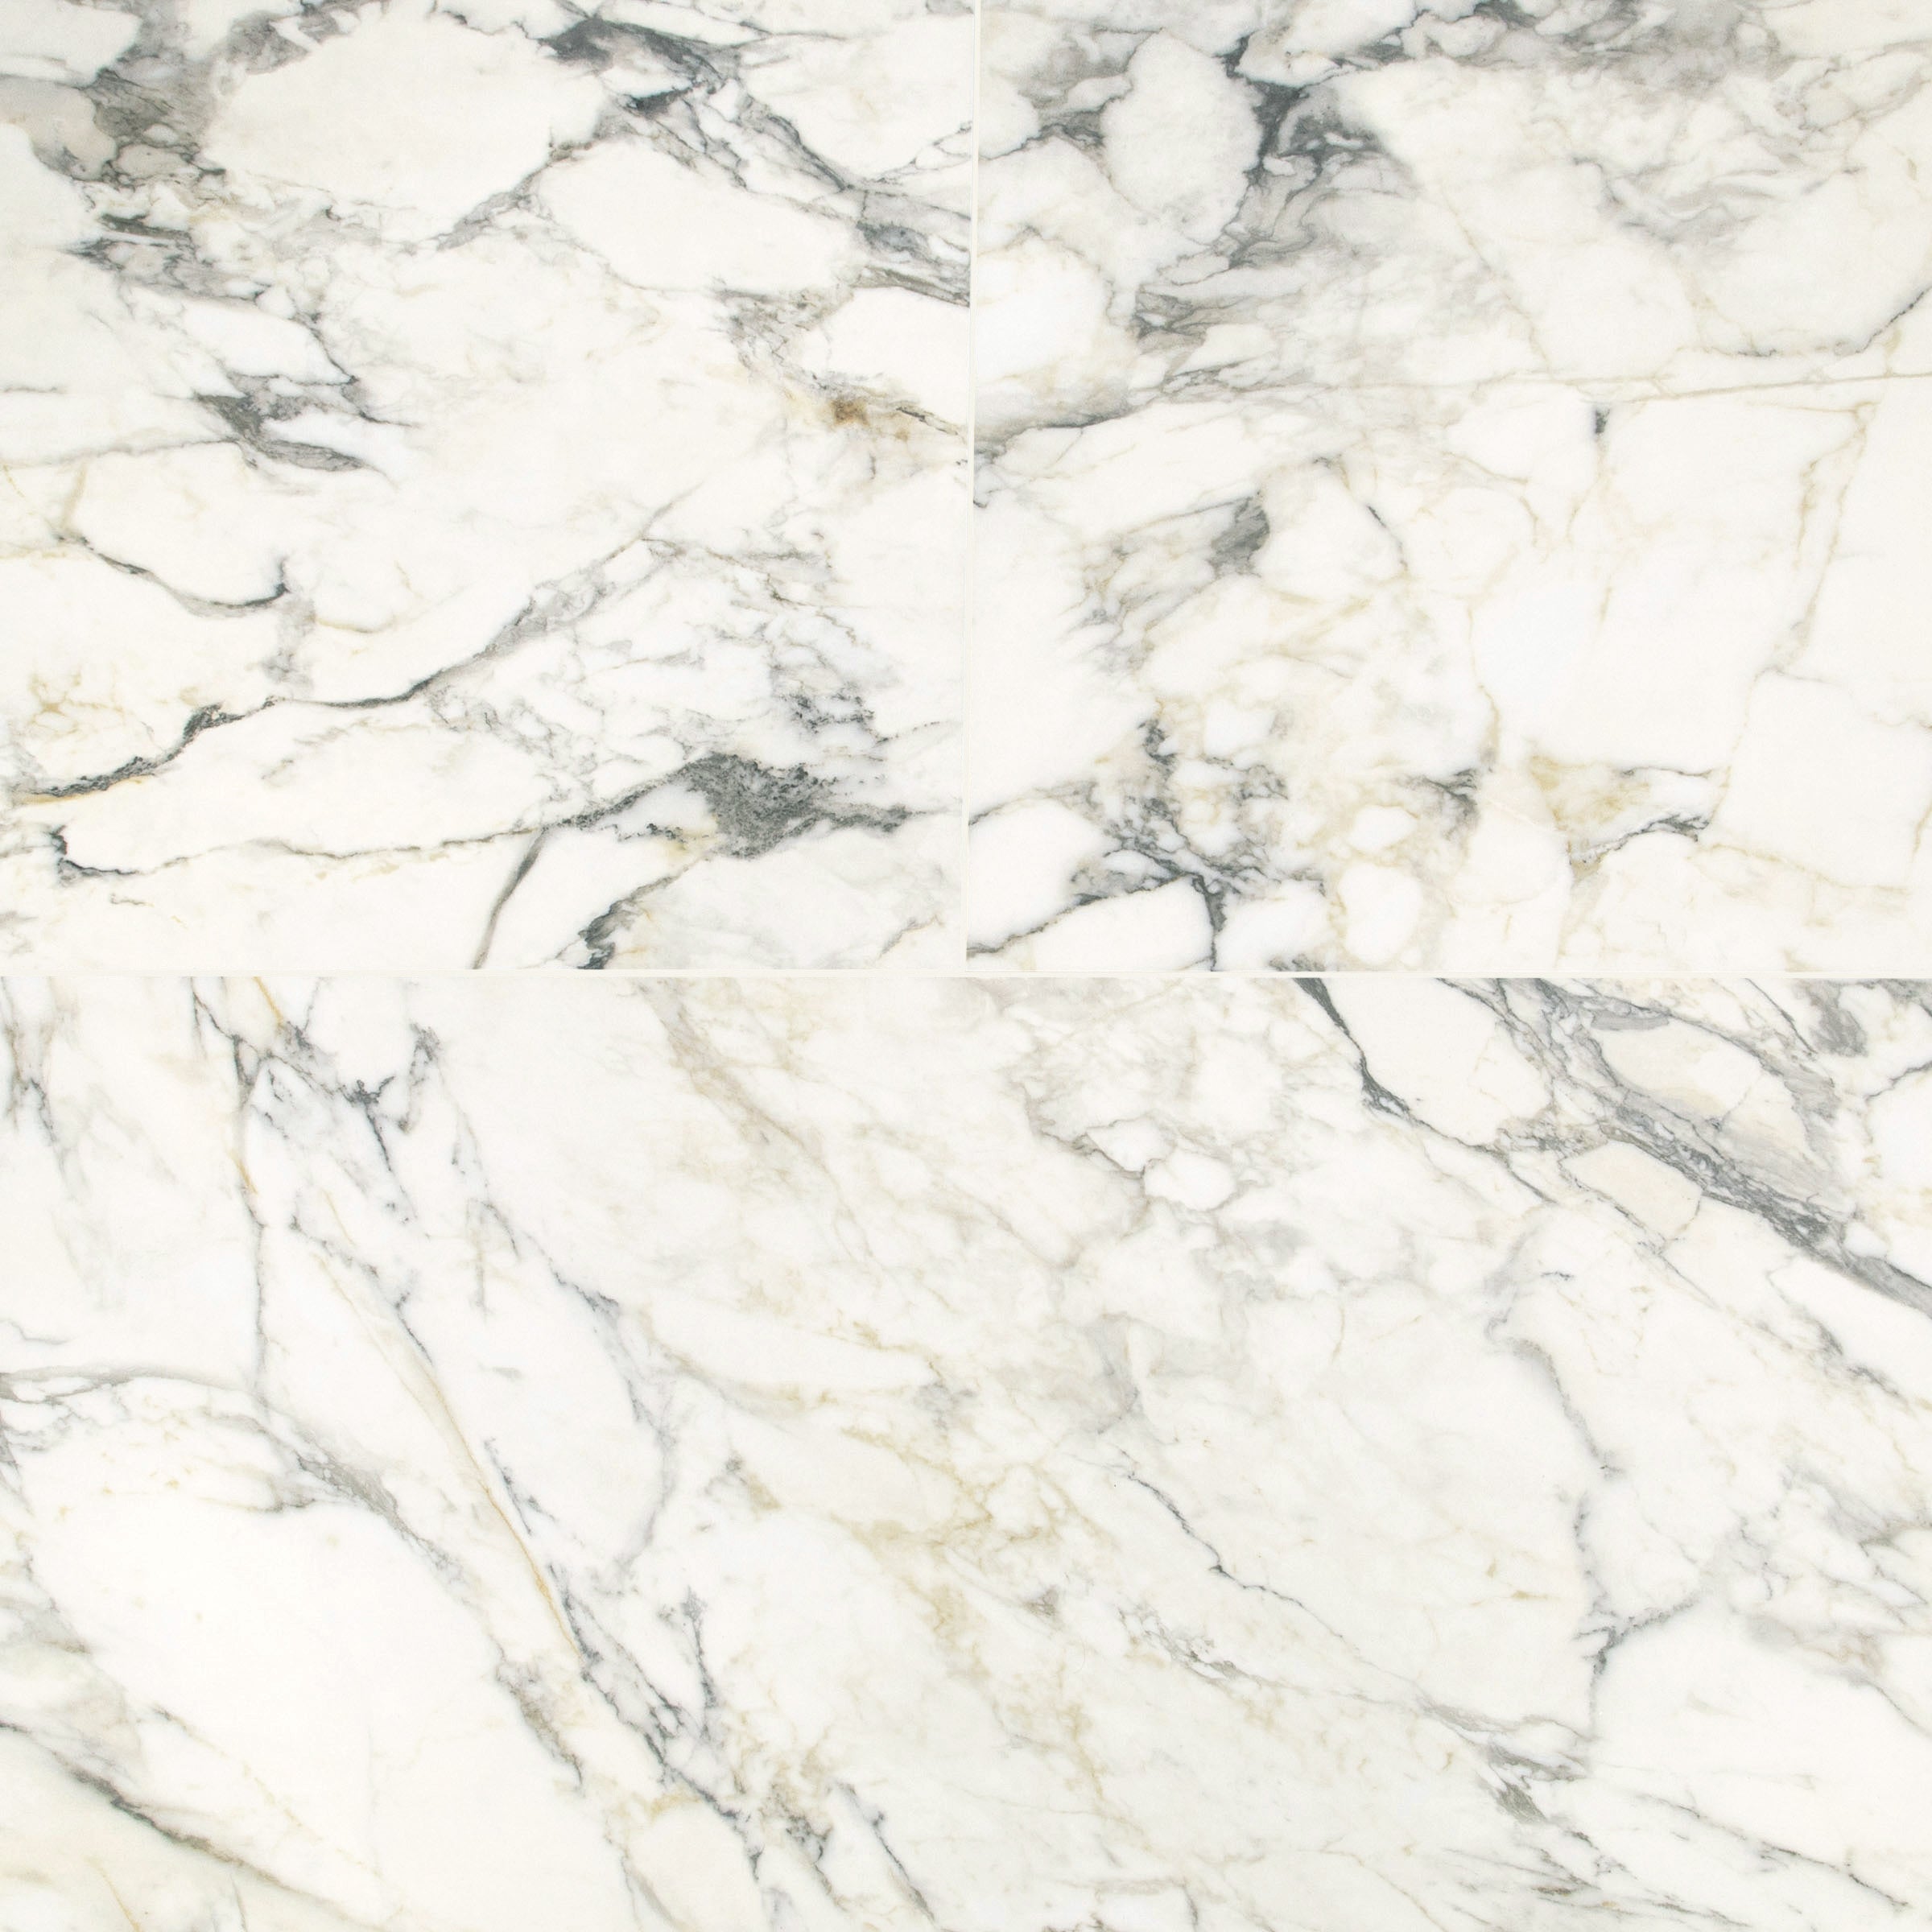
Heritage Basketweave Design
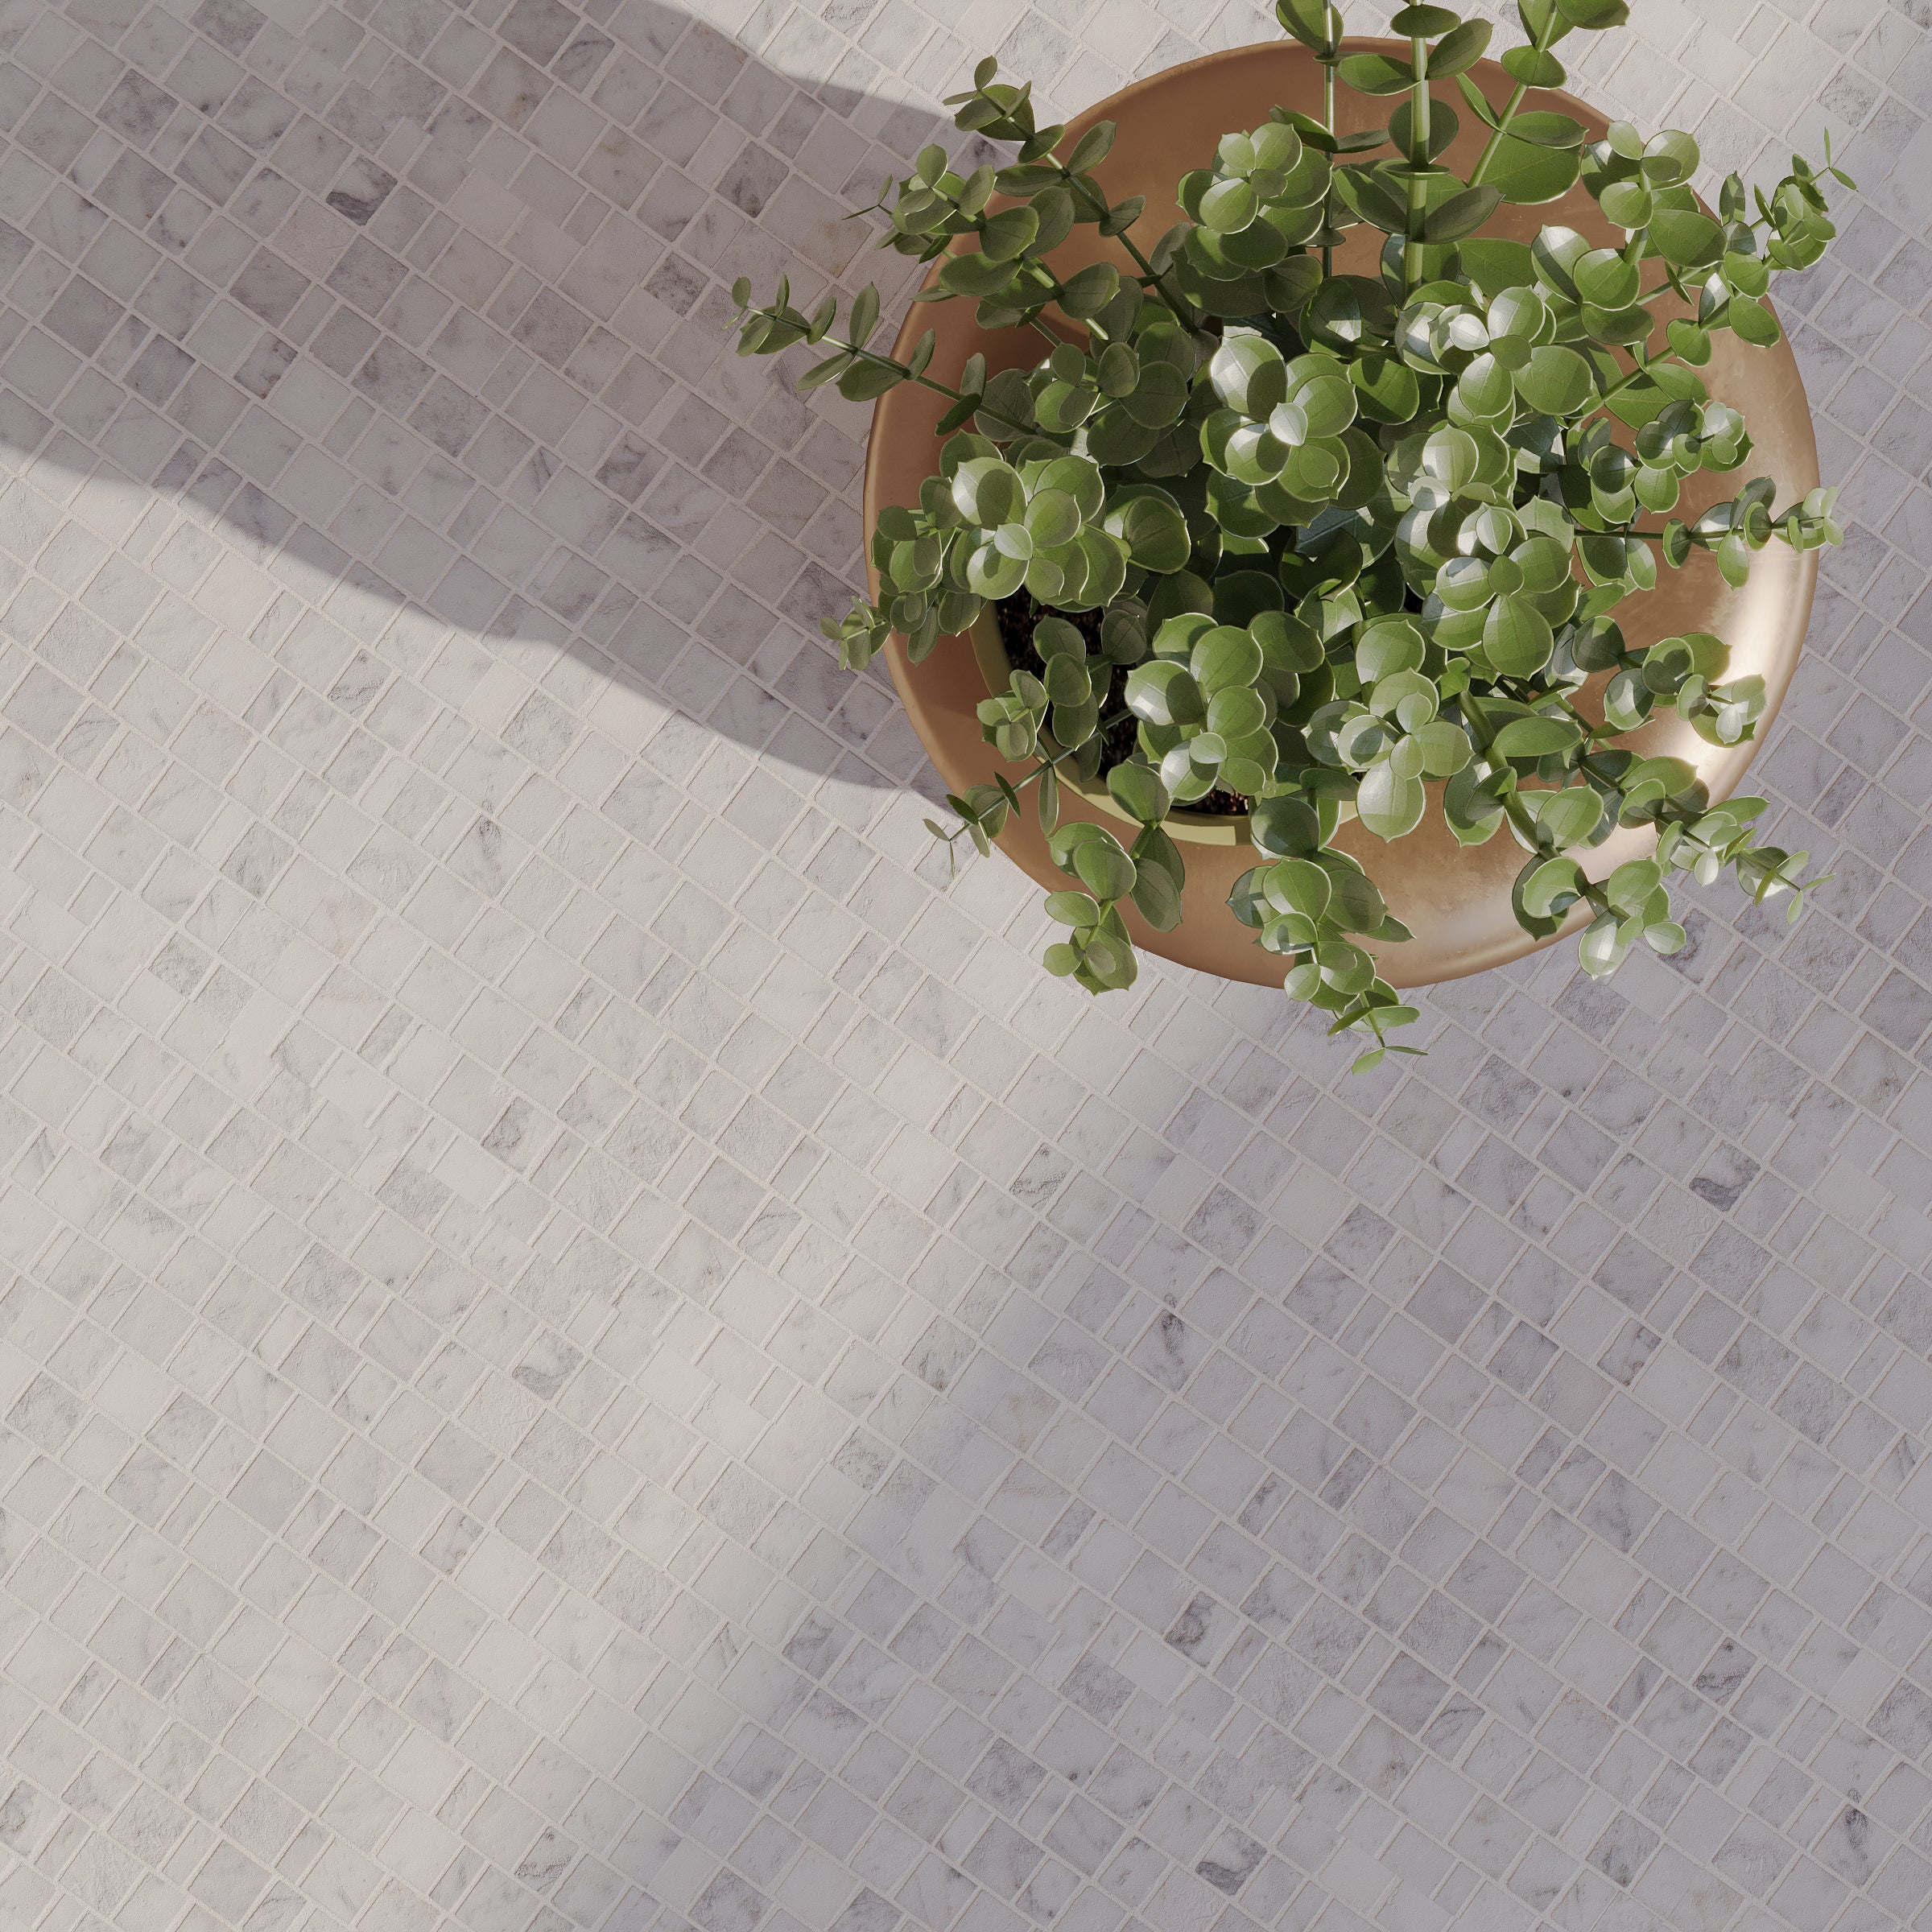
The interwoven pattern delivers a sense of movement and craftsmanship that has been celebrated for centuries. Scaled perfectly for flooring, it offers both visual texture and practical slip resistance, making it especially suited for bathrooms, showers, and entryways where style and function must meet.
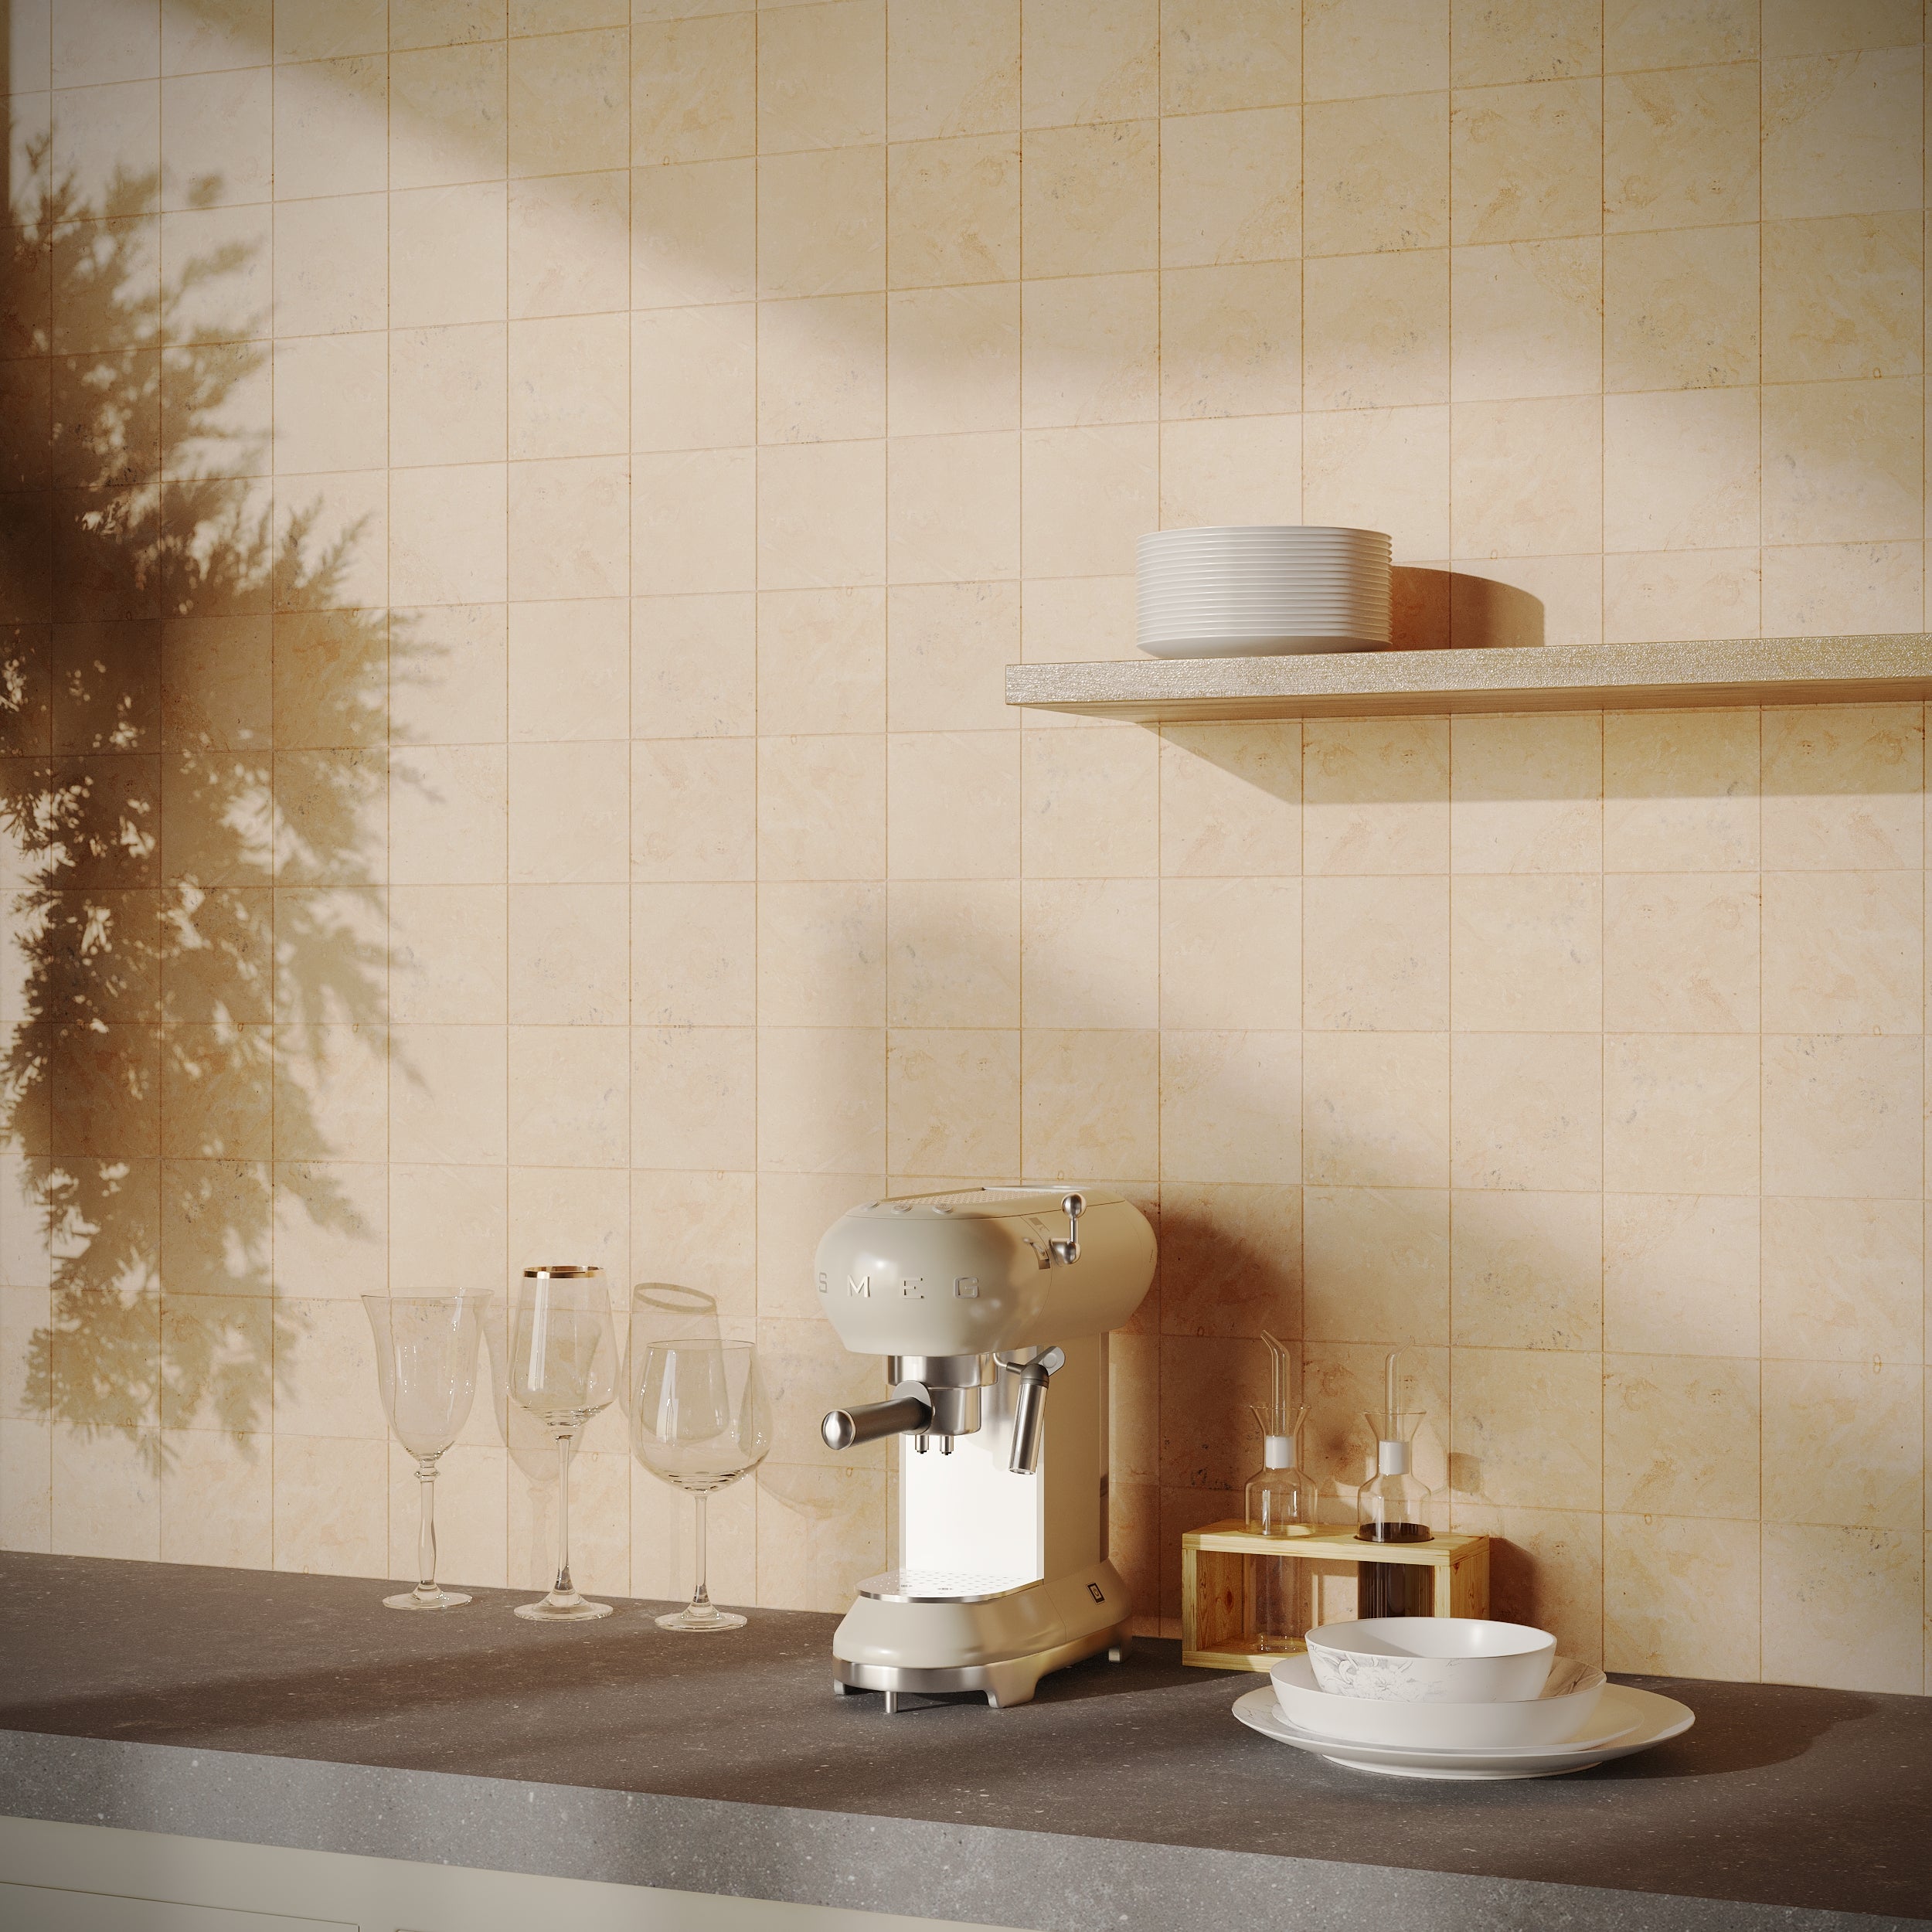
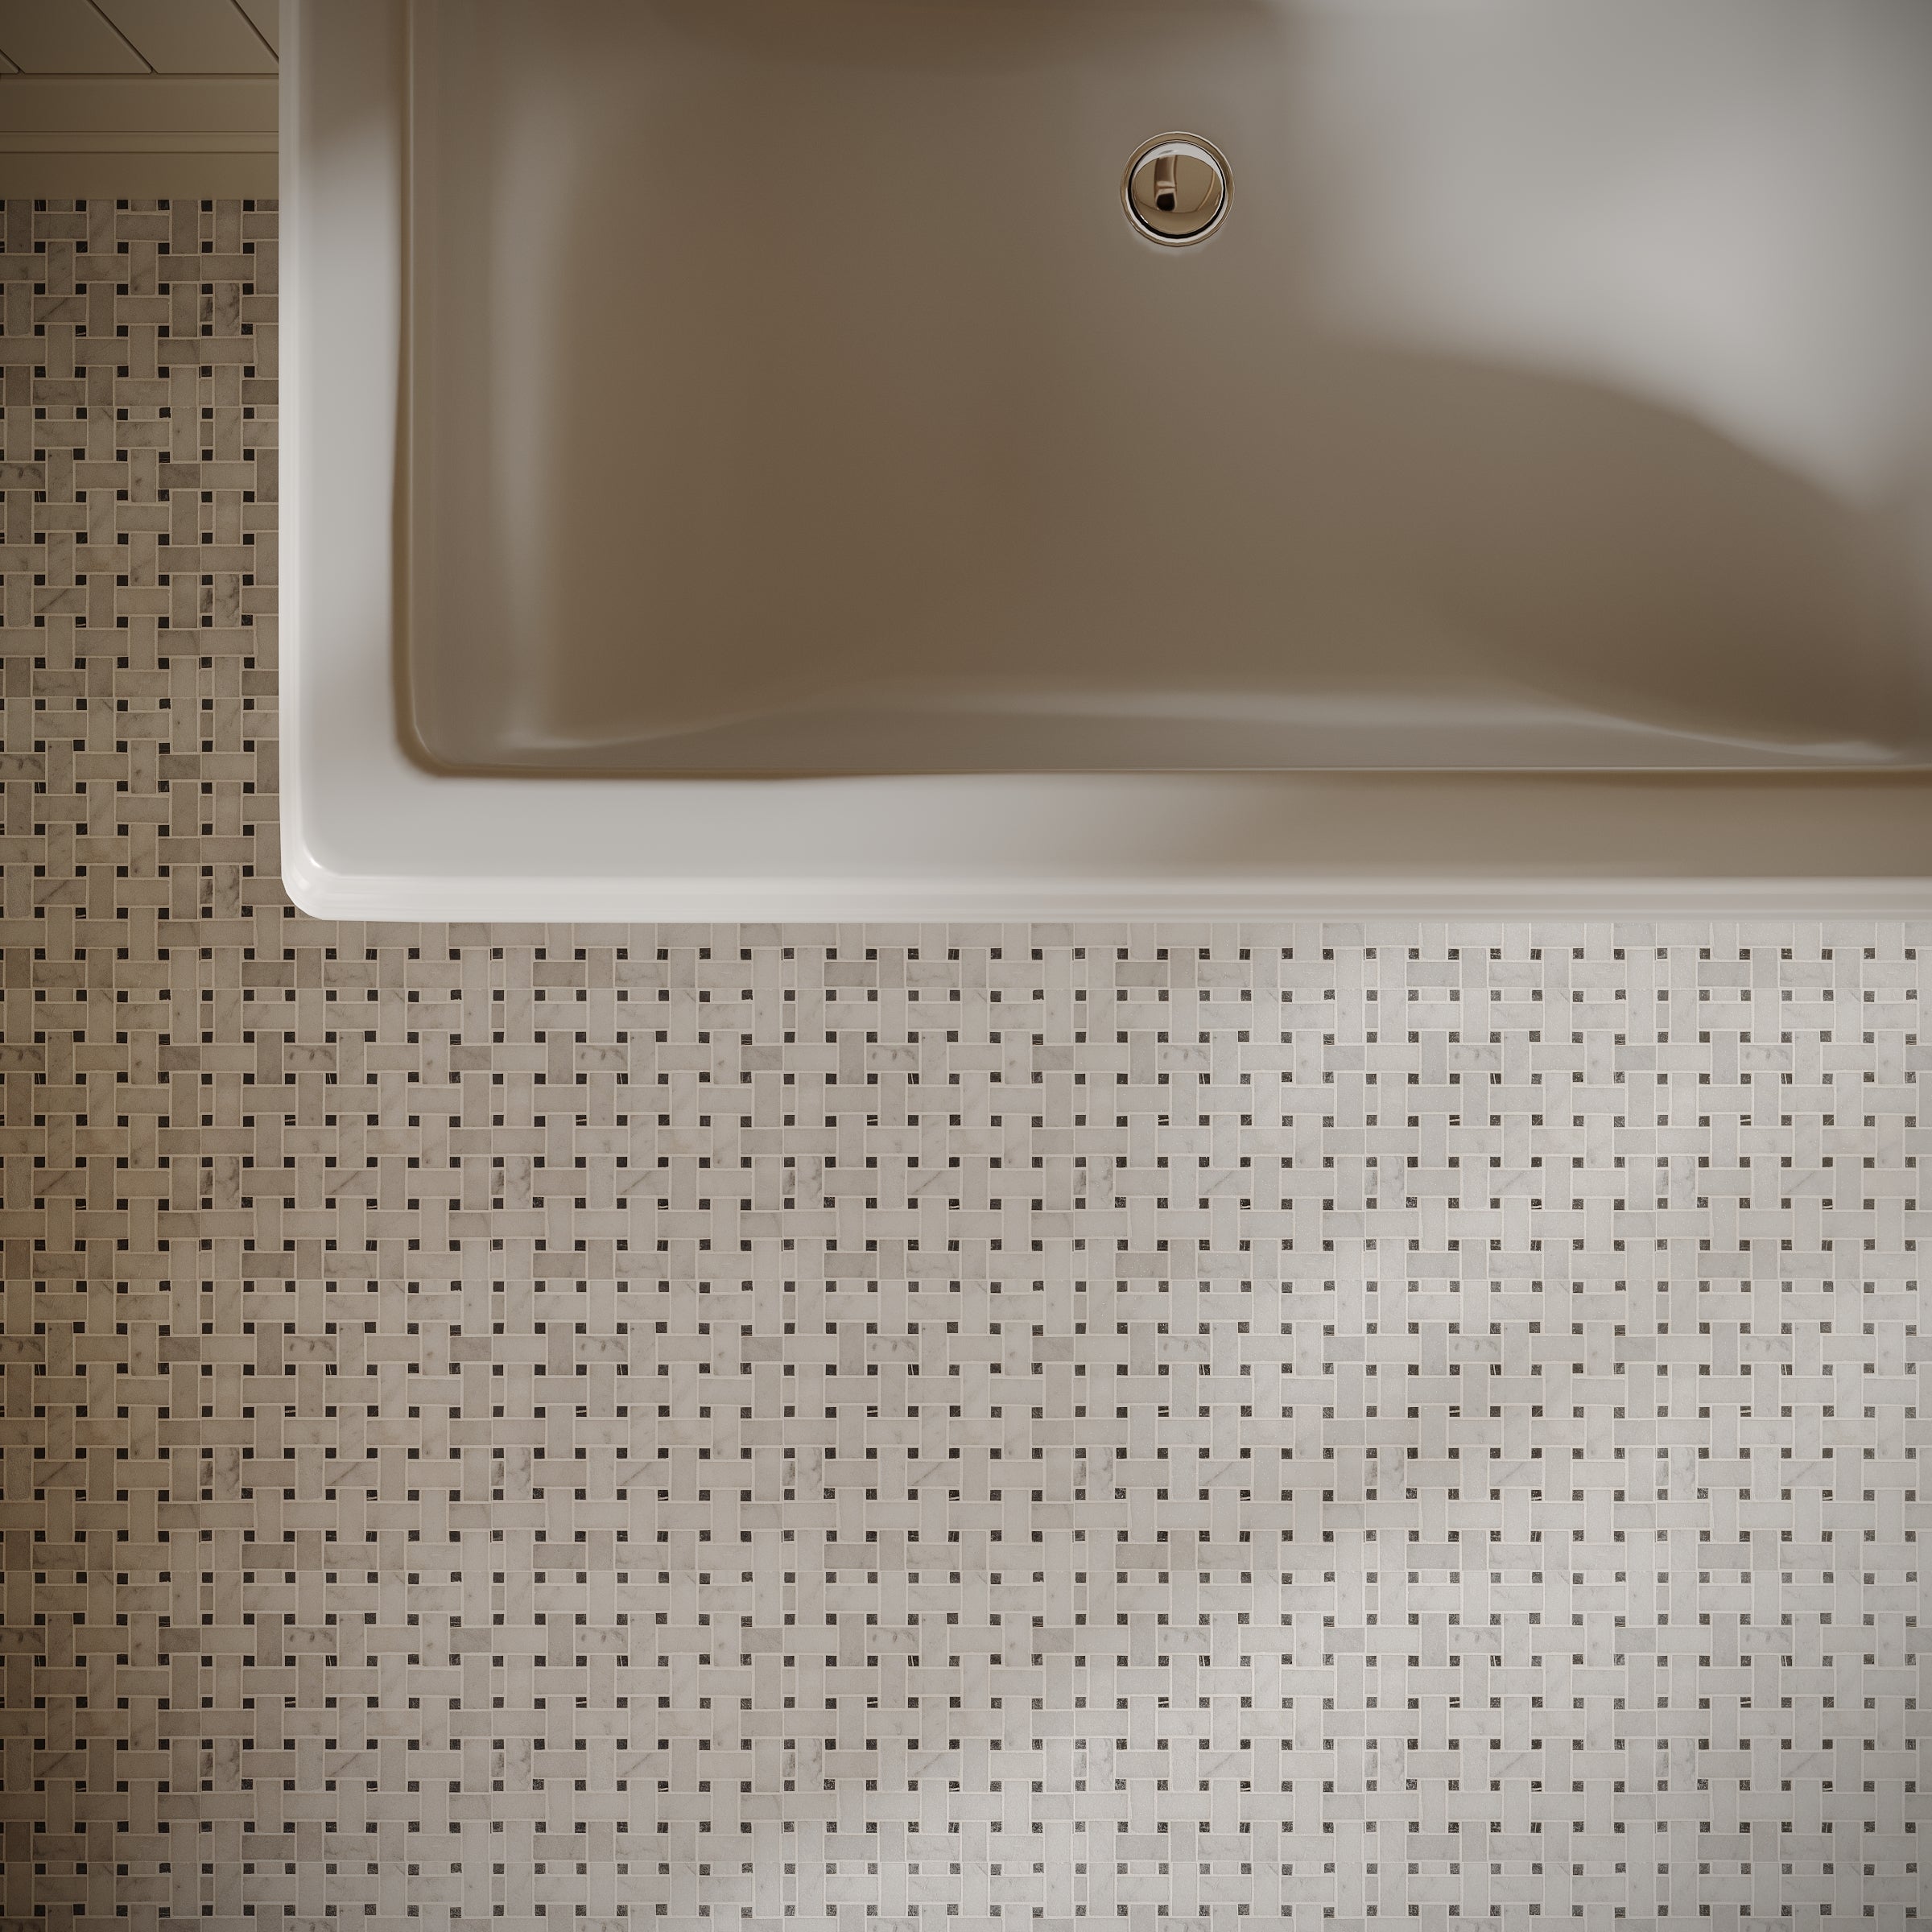
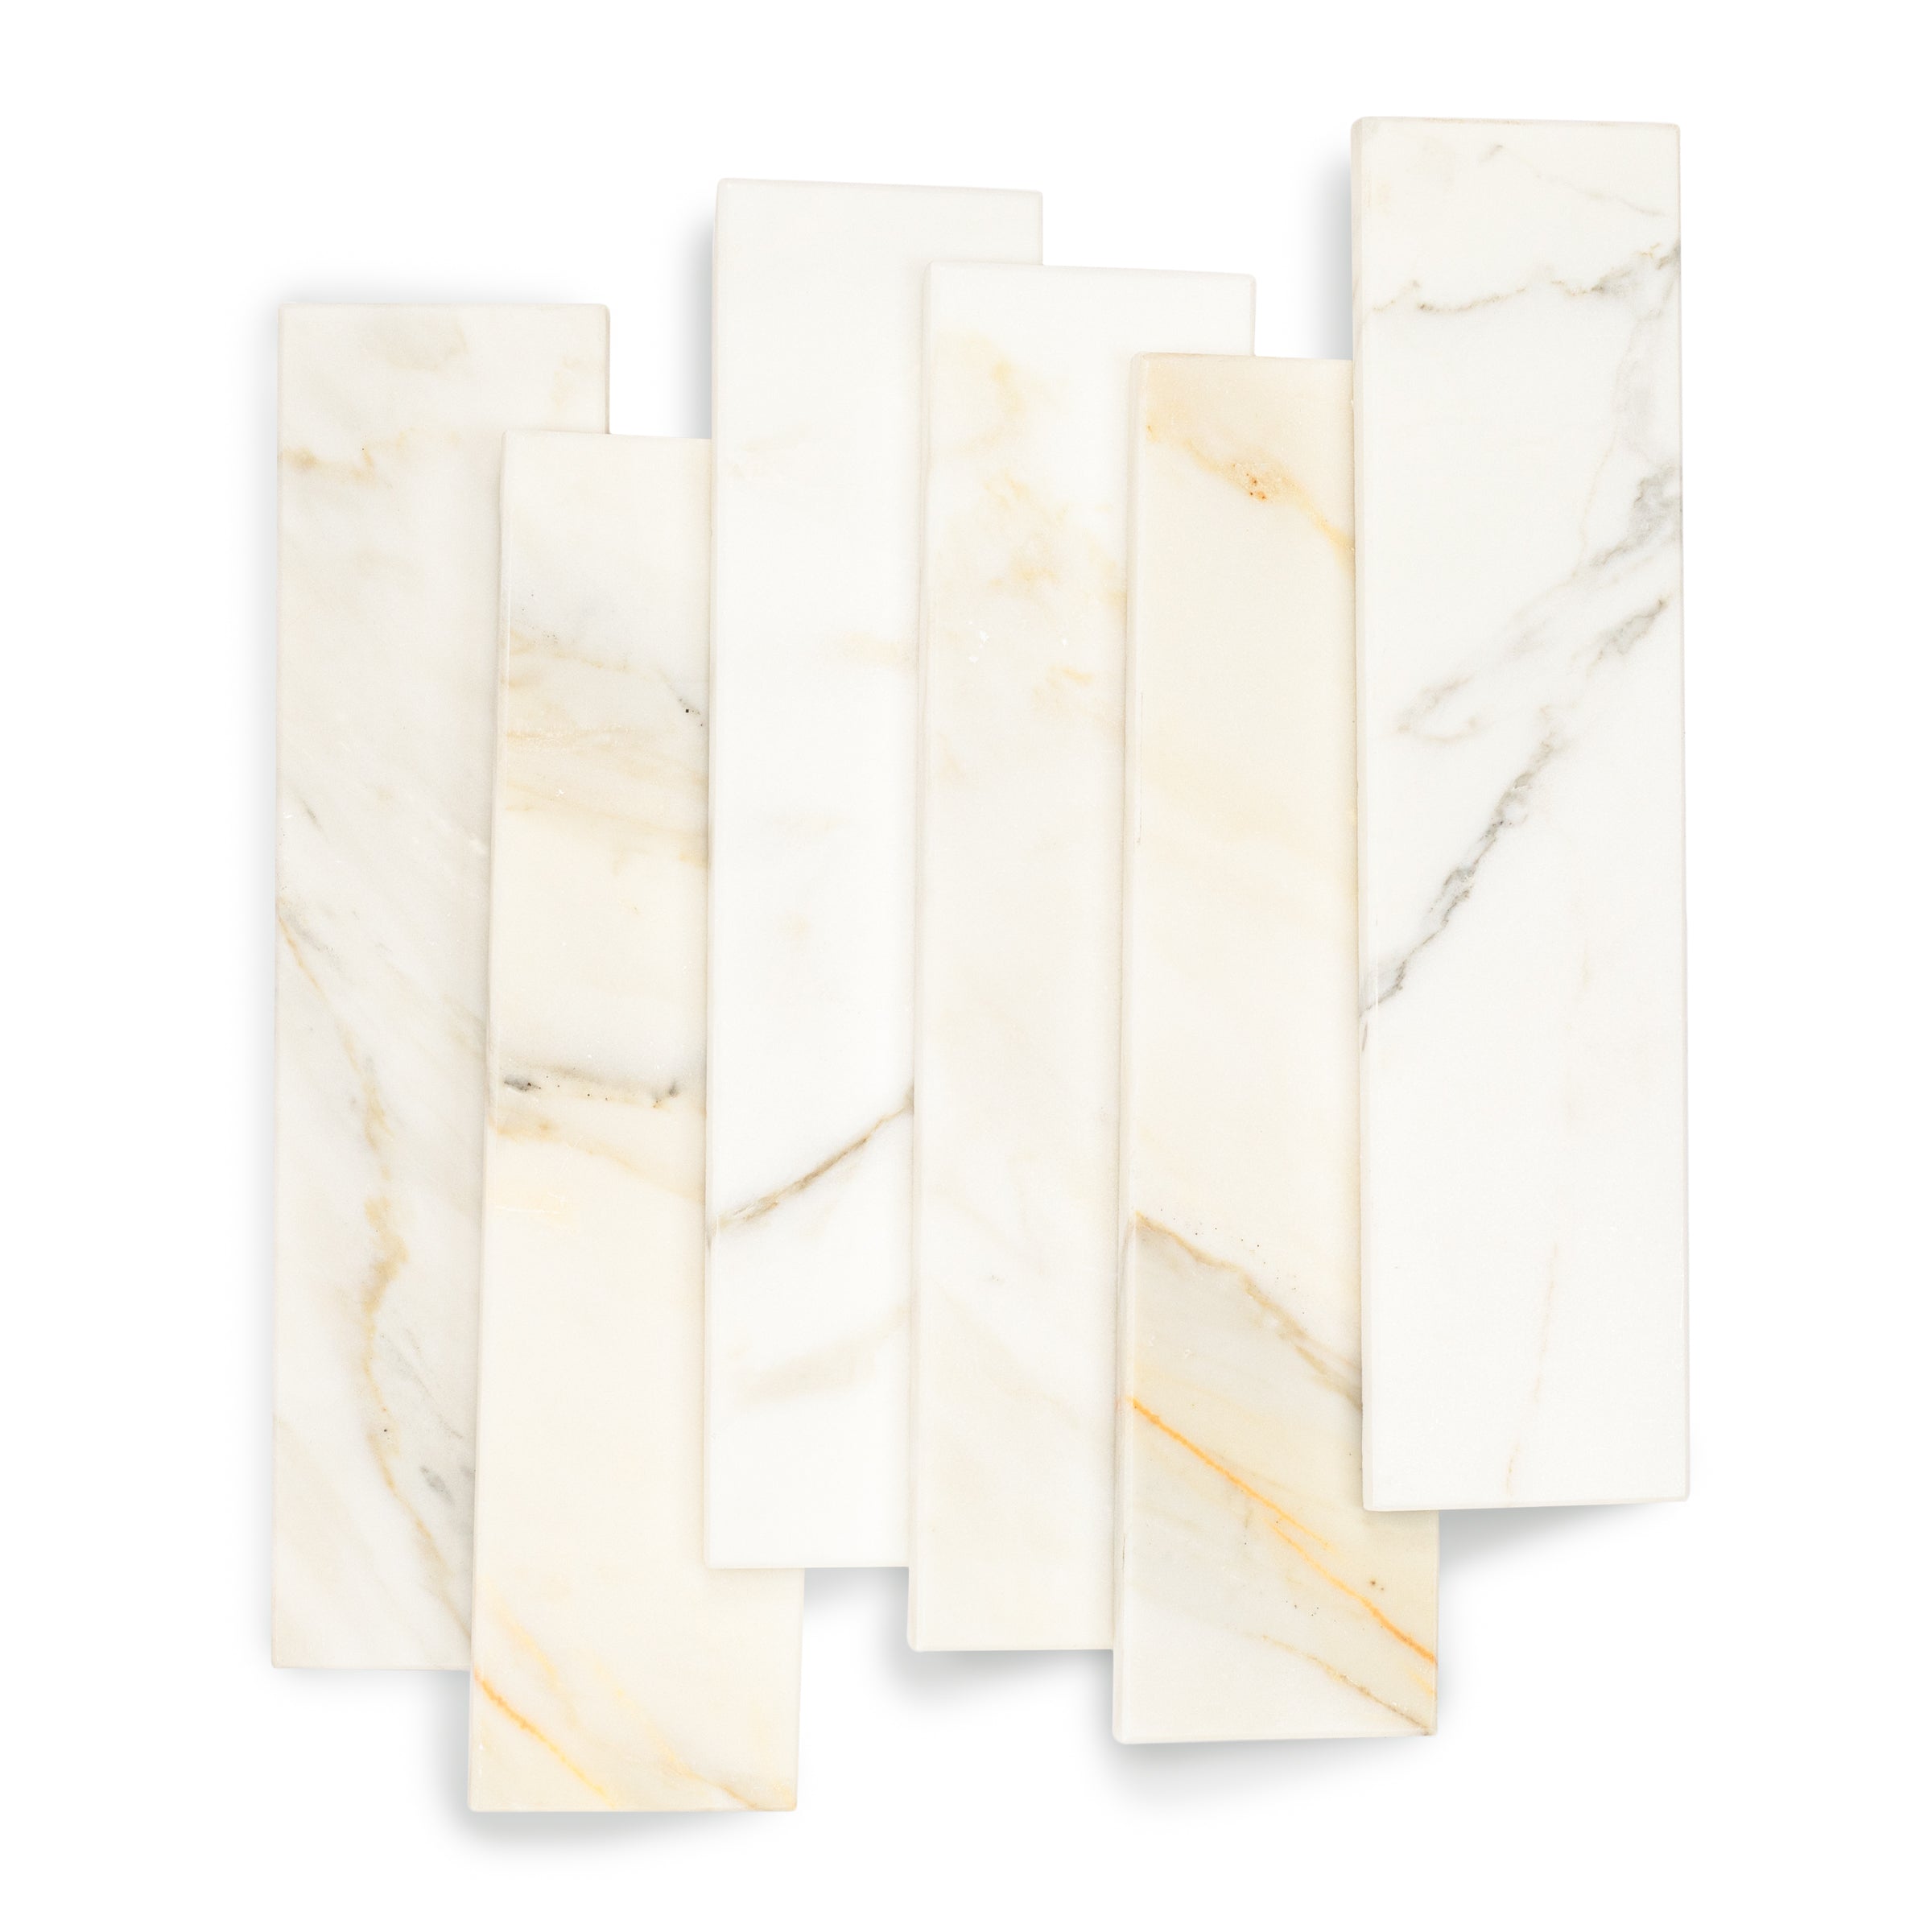
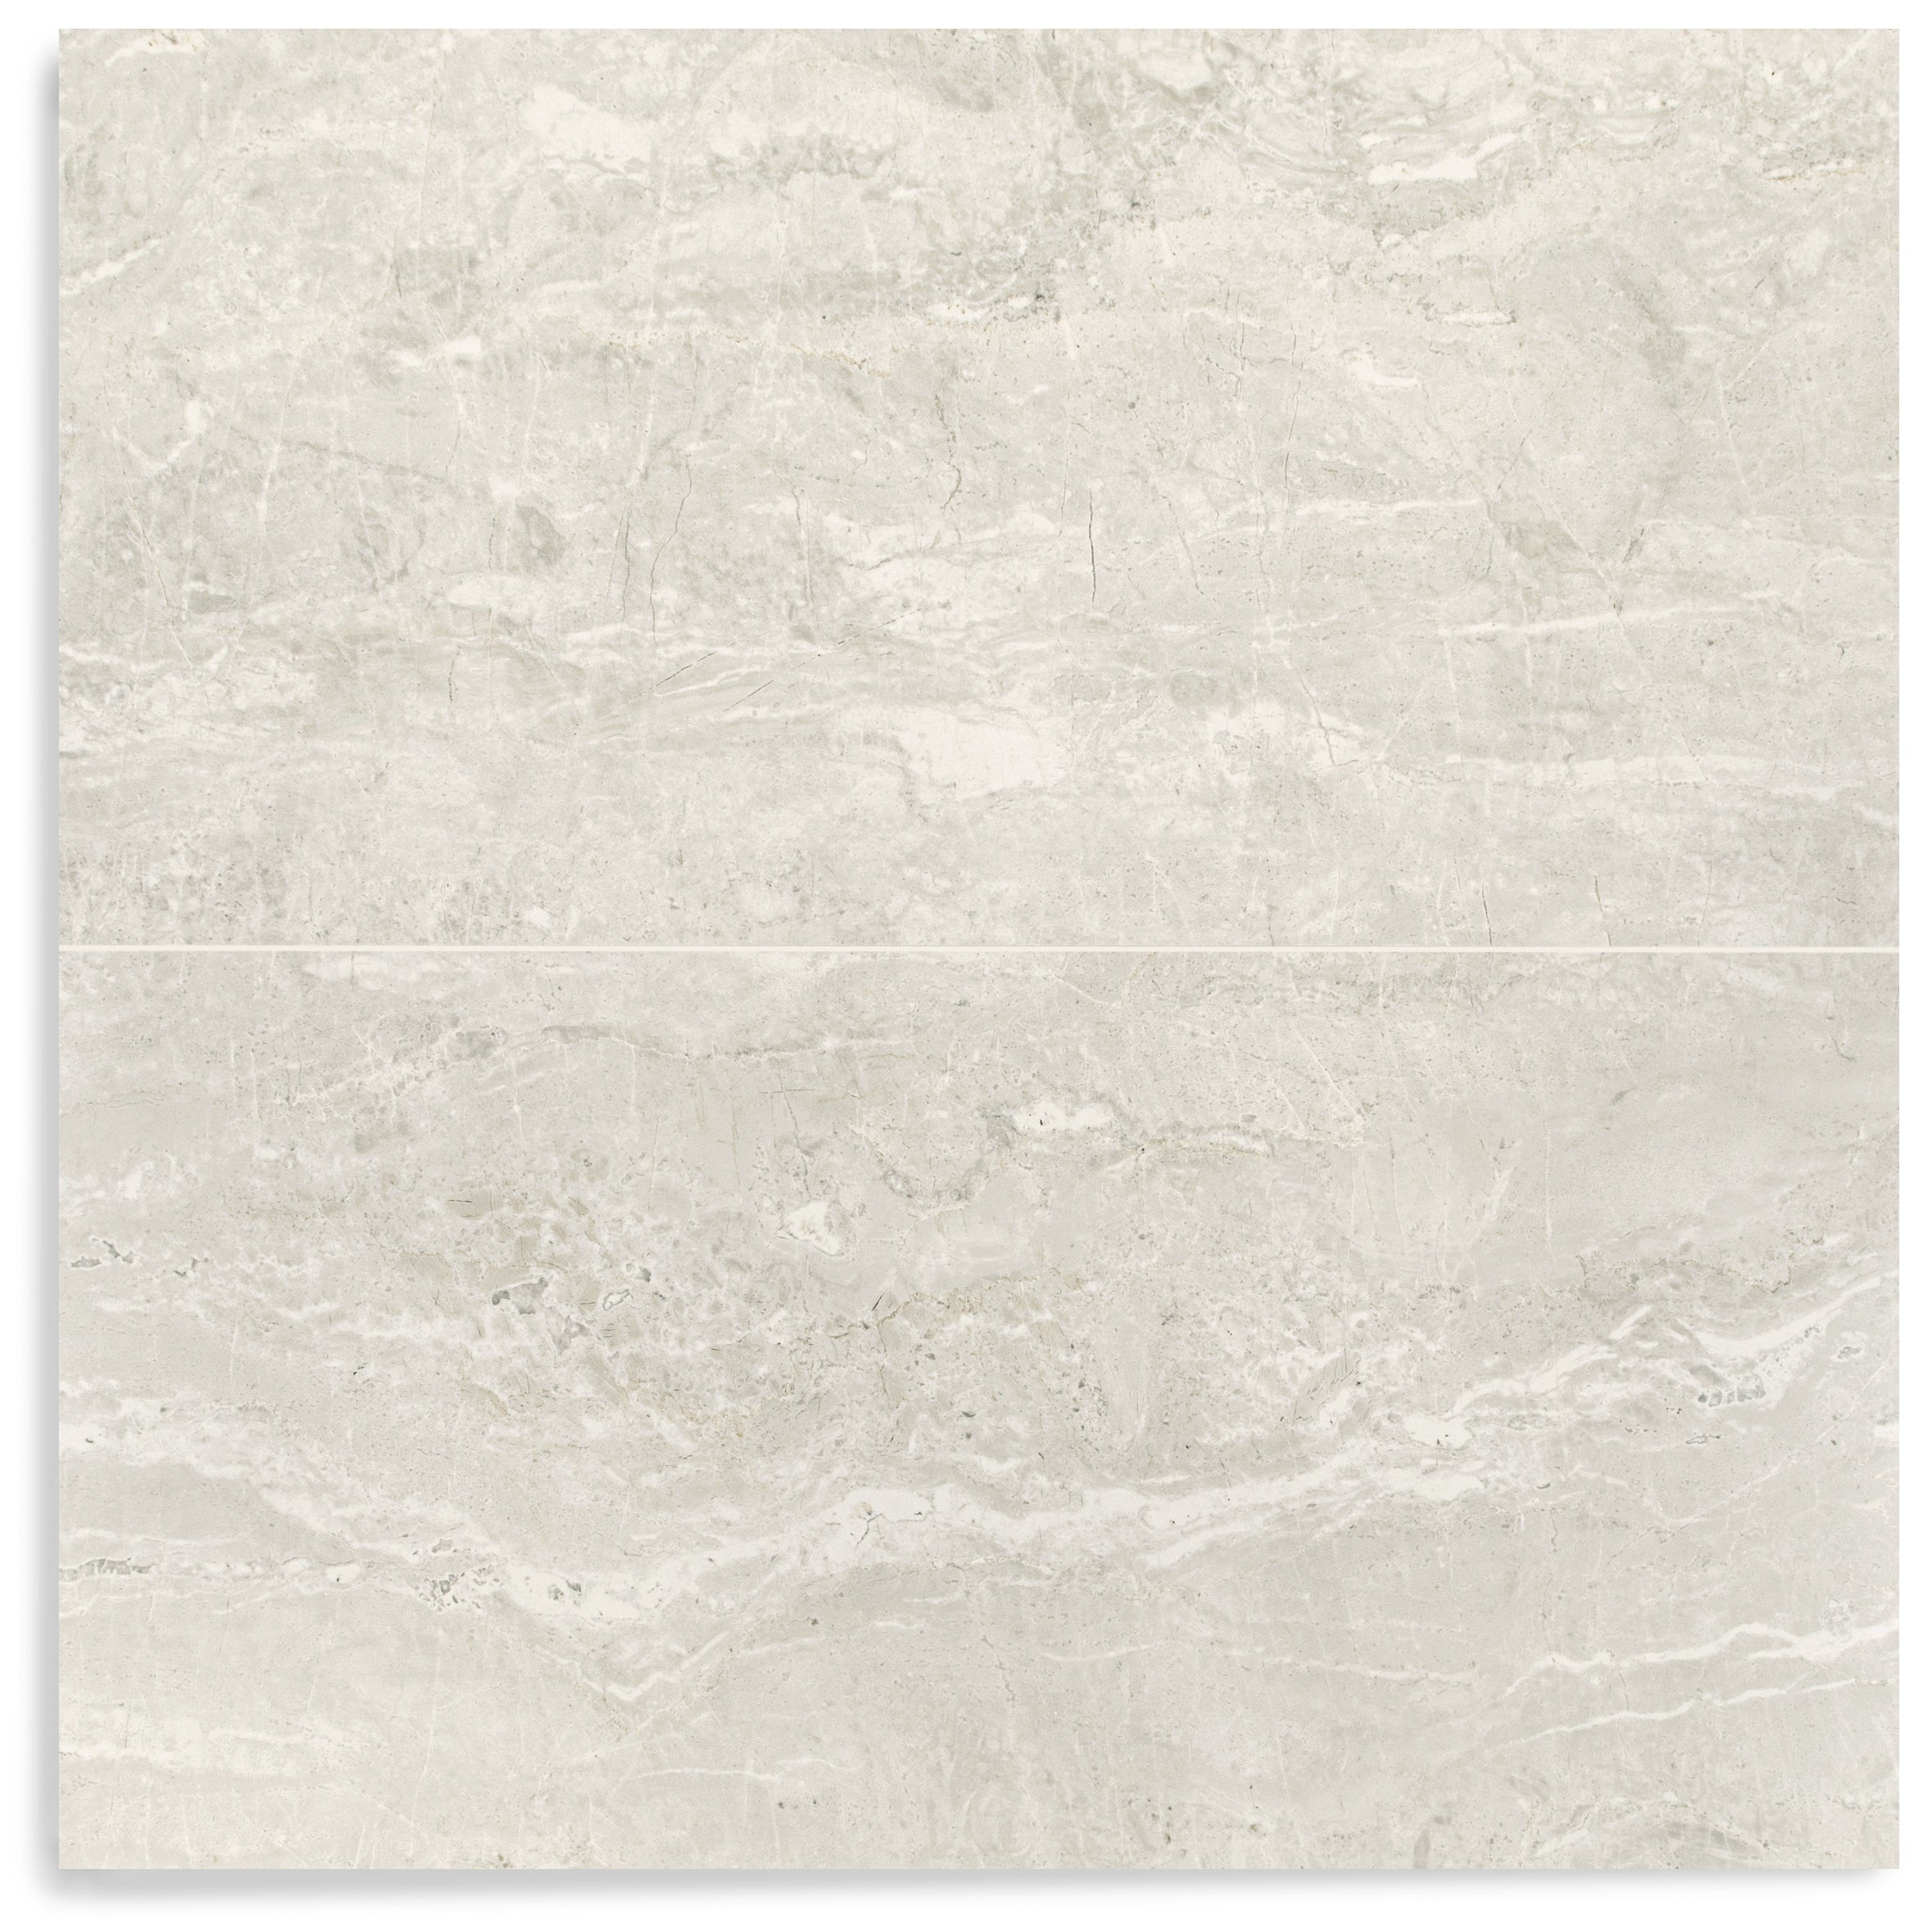
Designed to Pair Beautifully
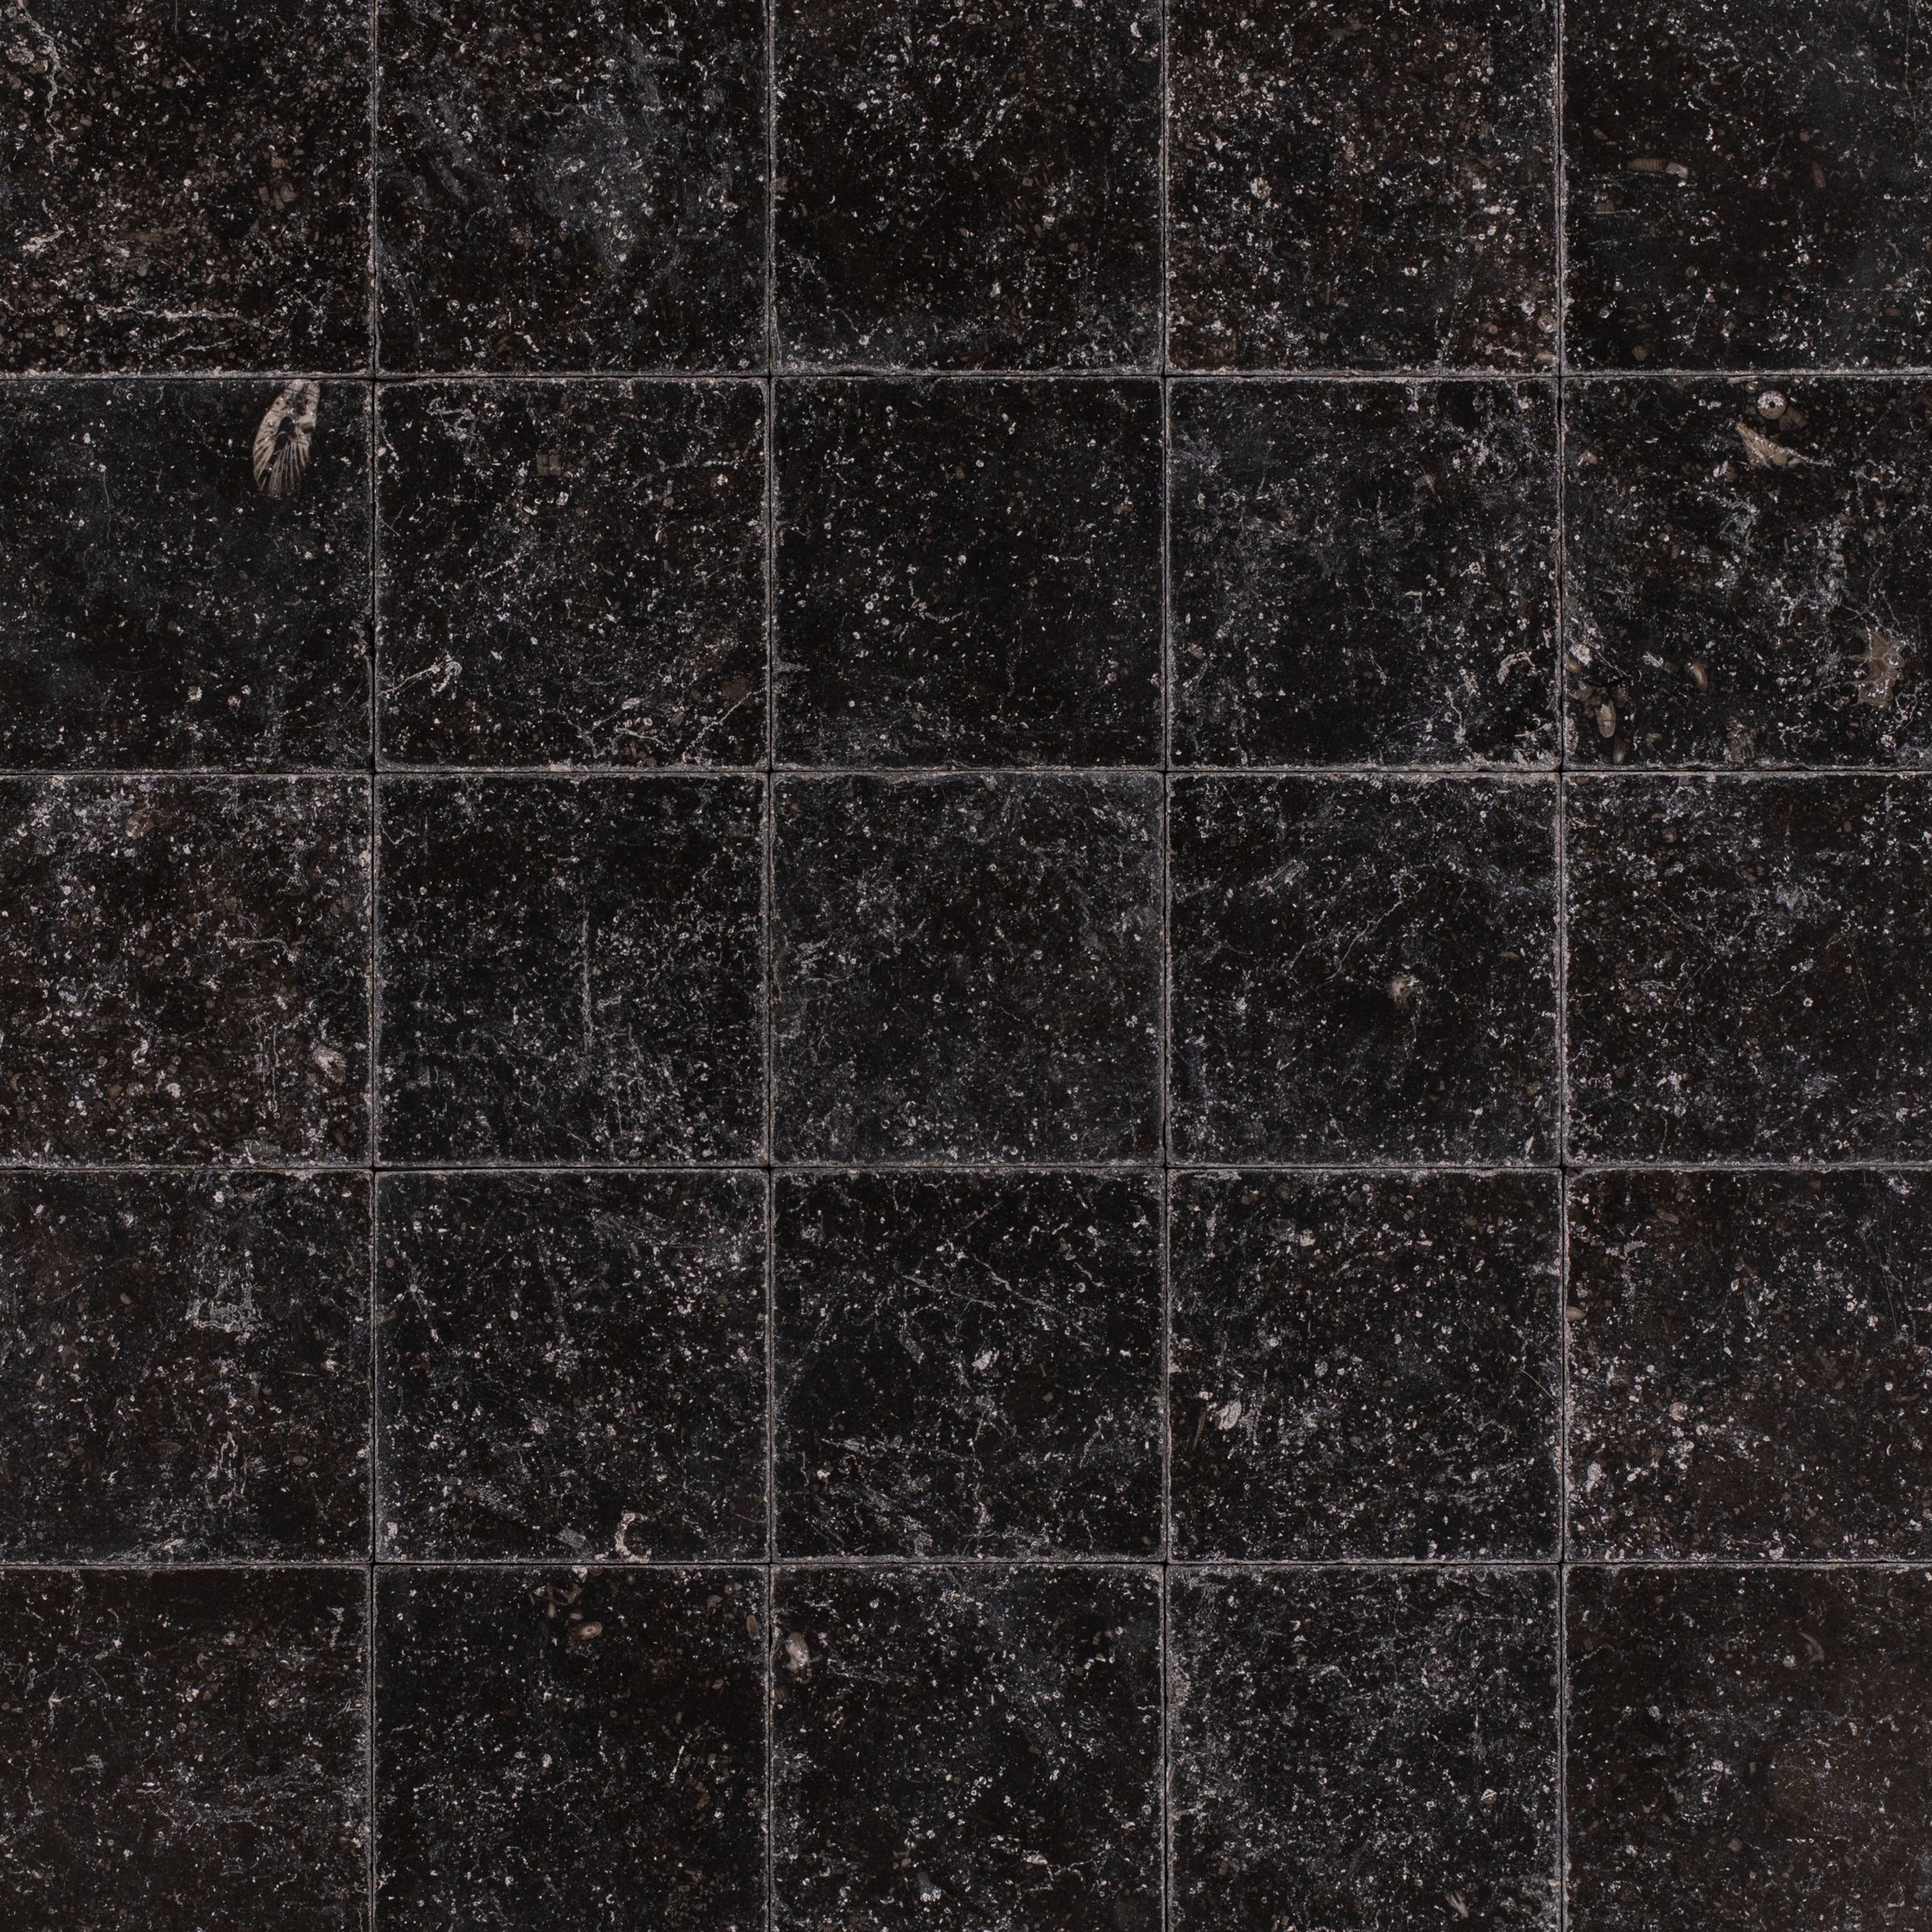
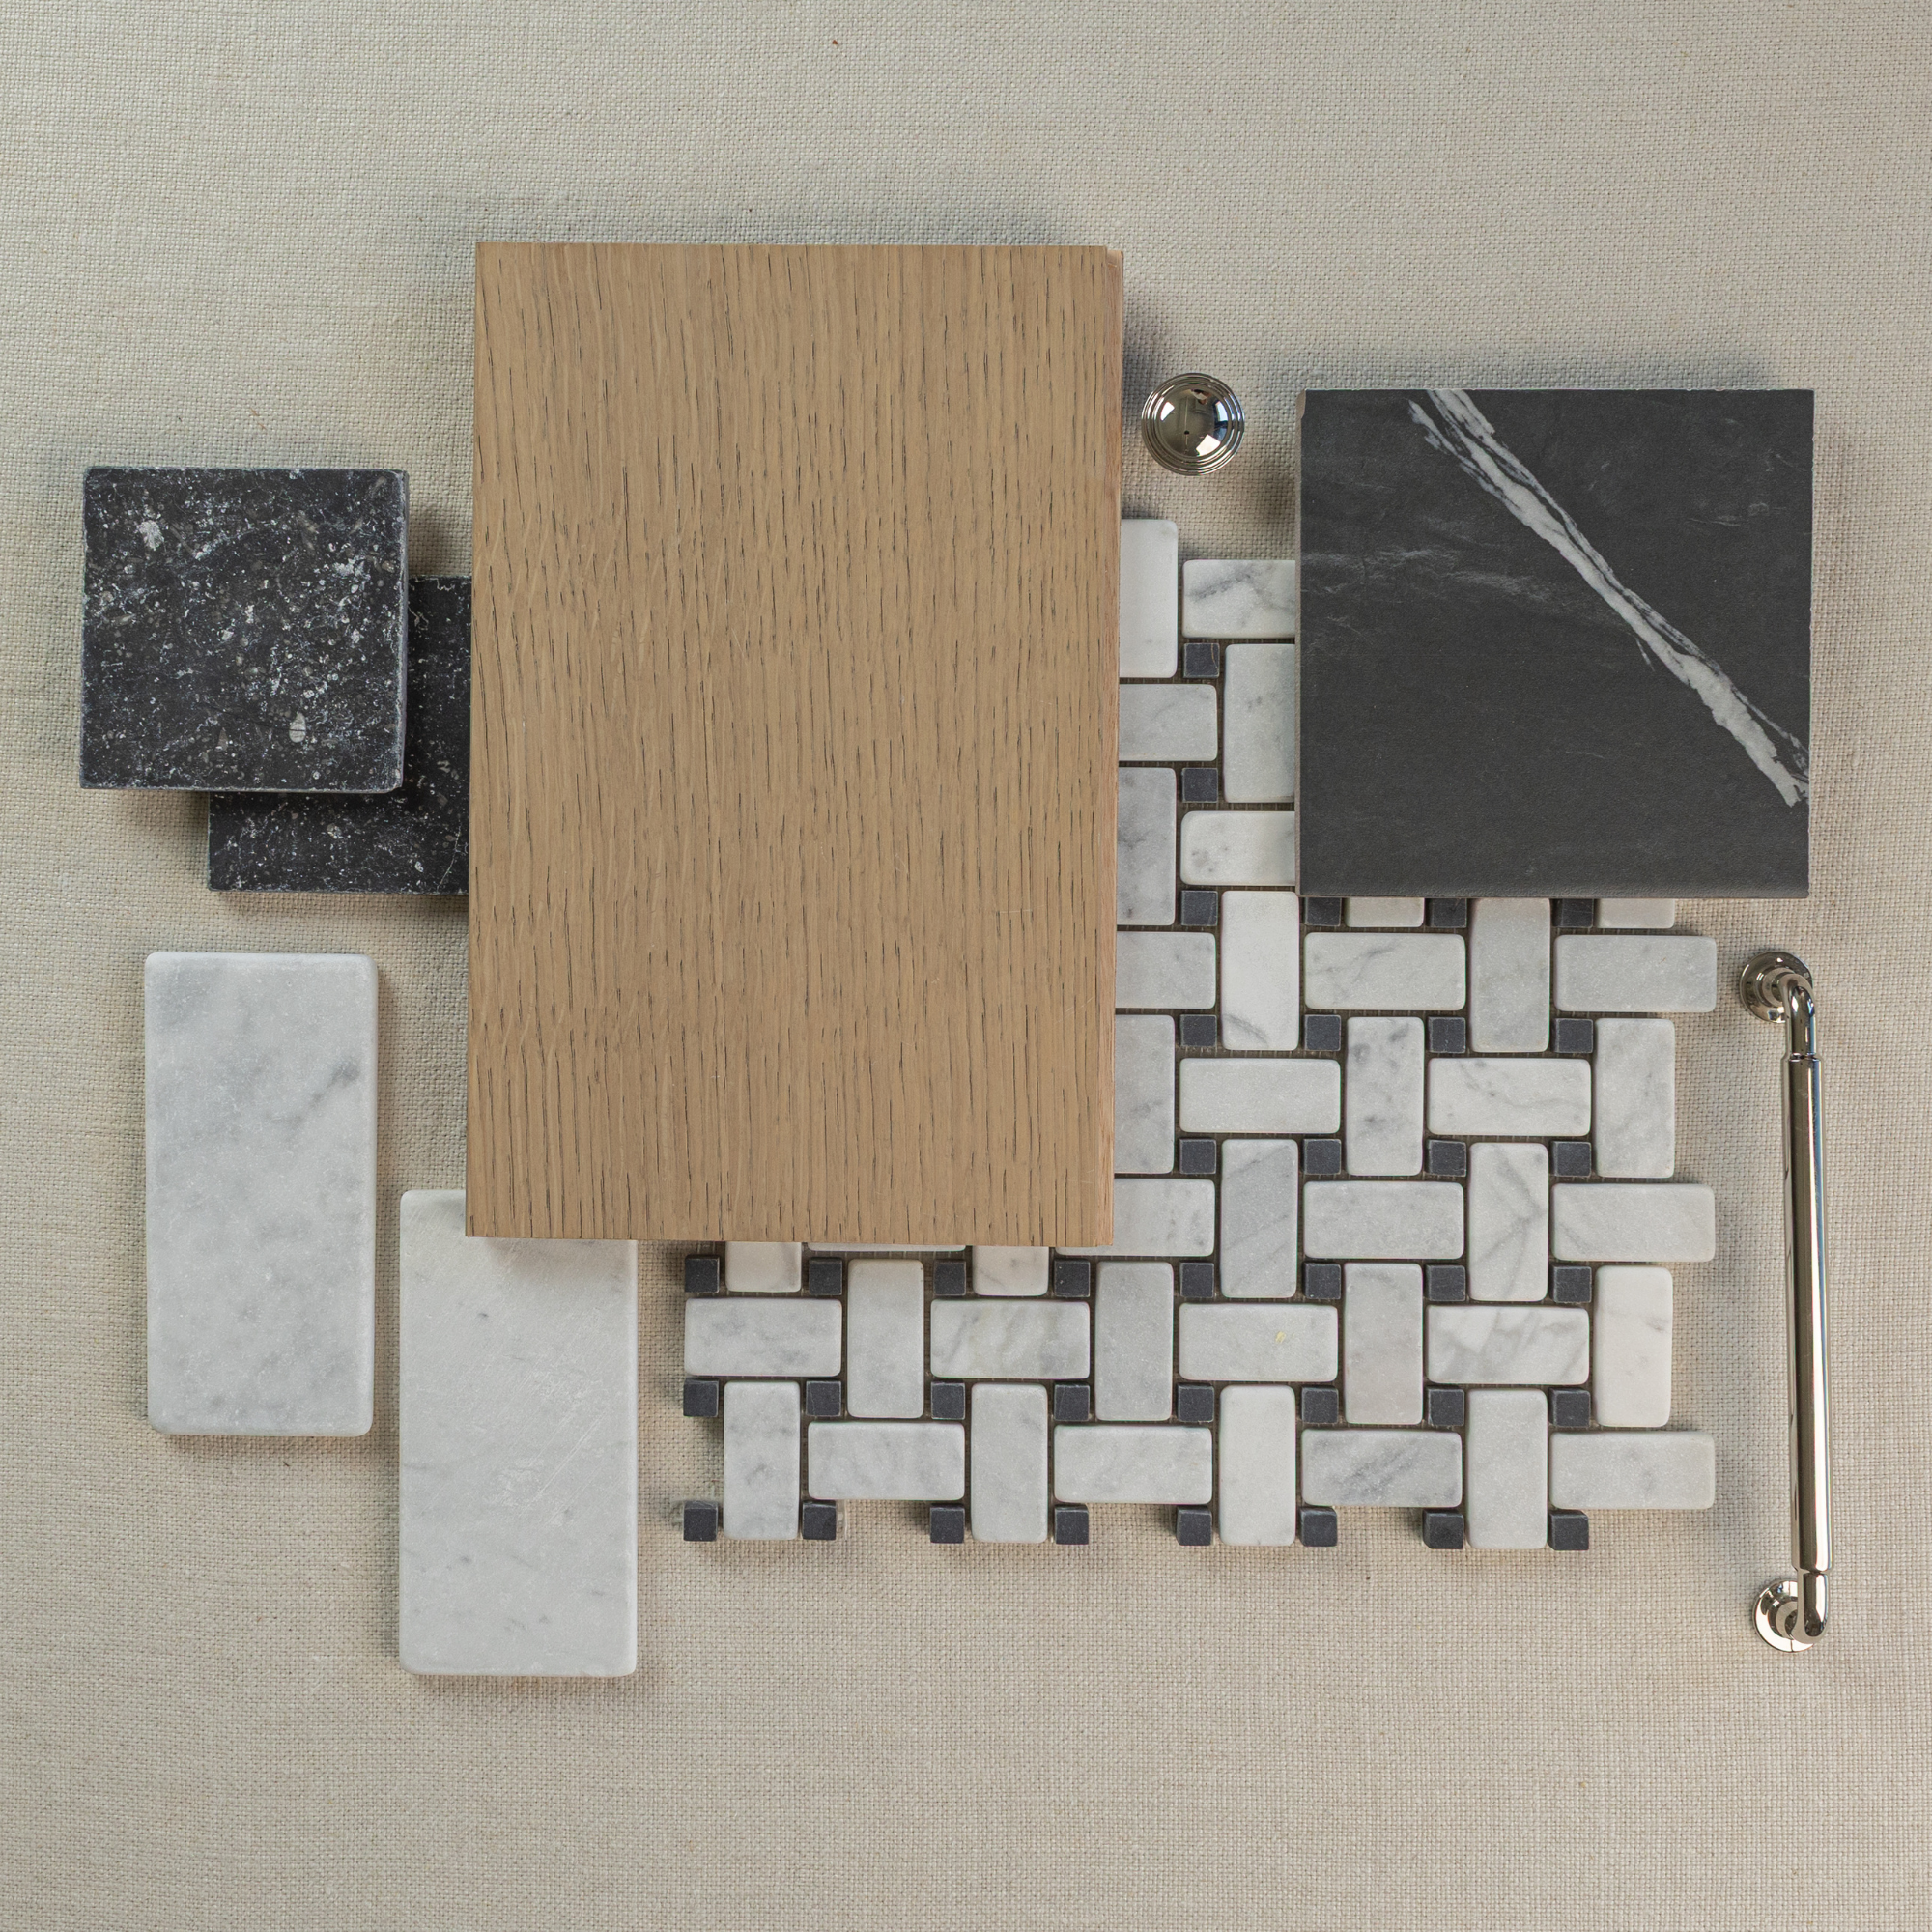
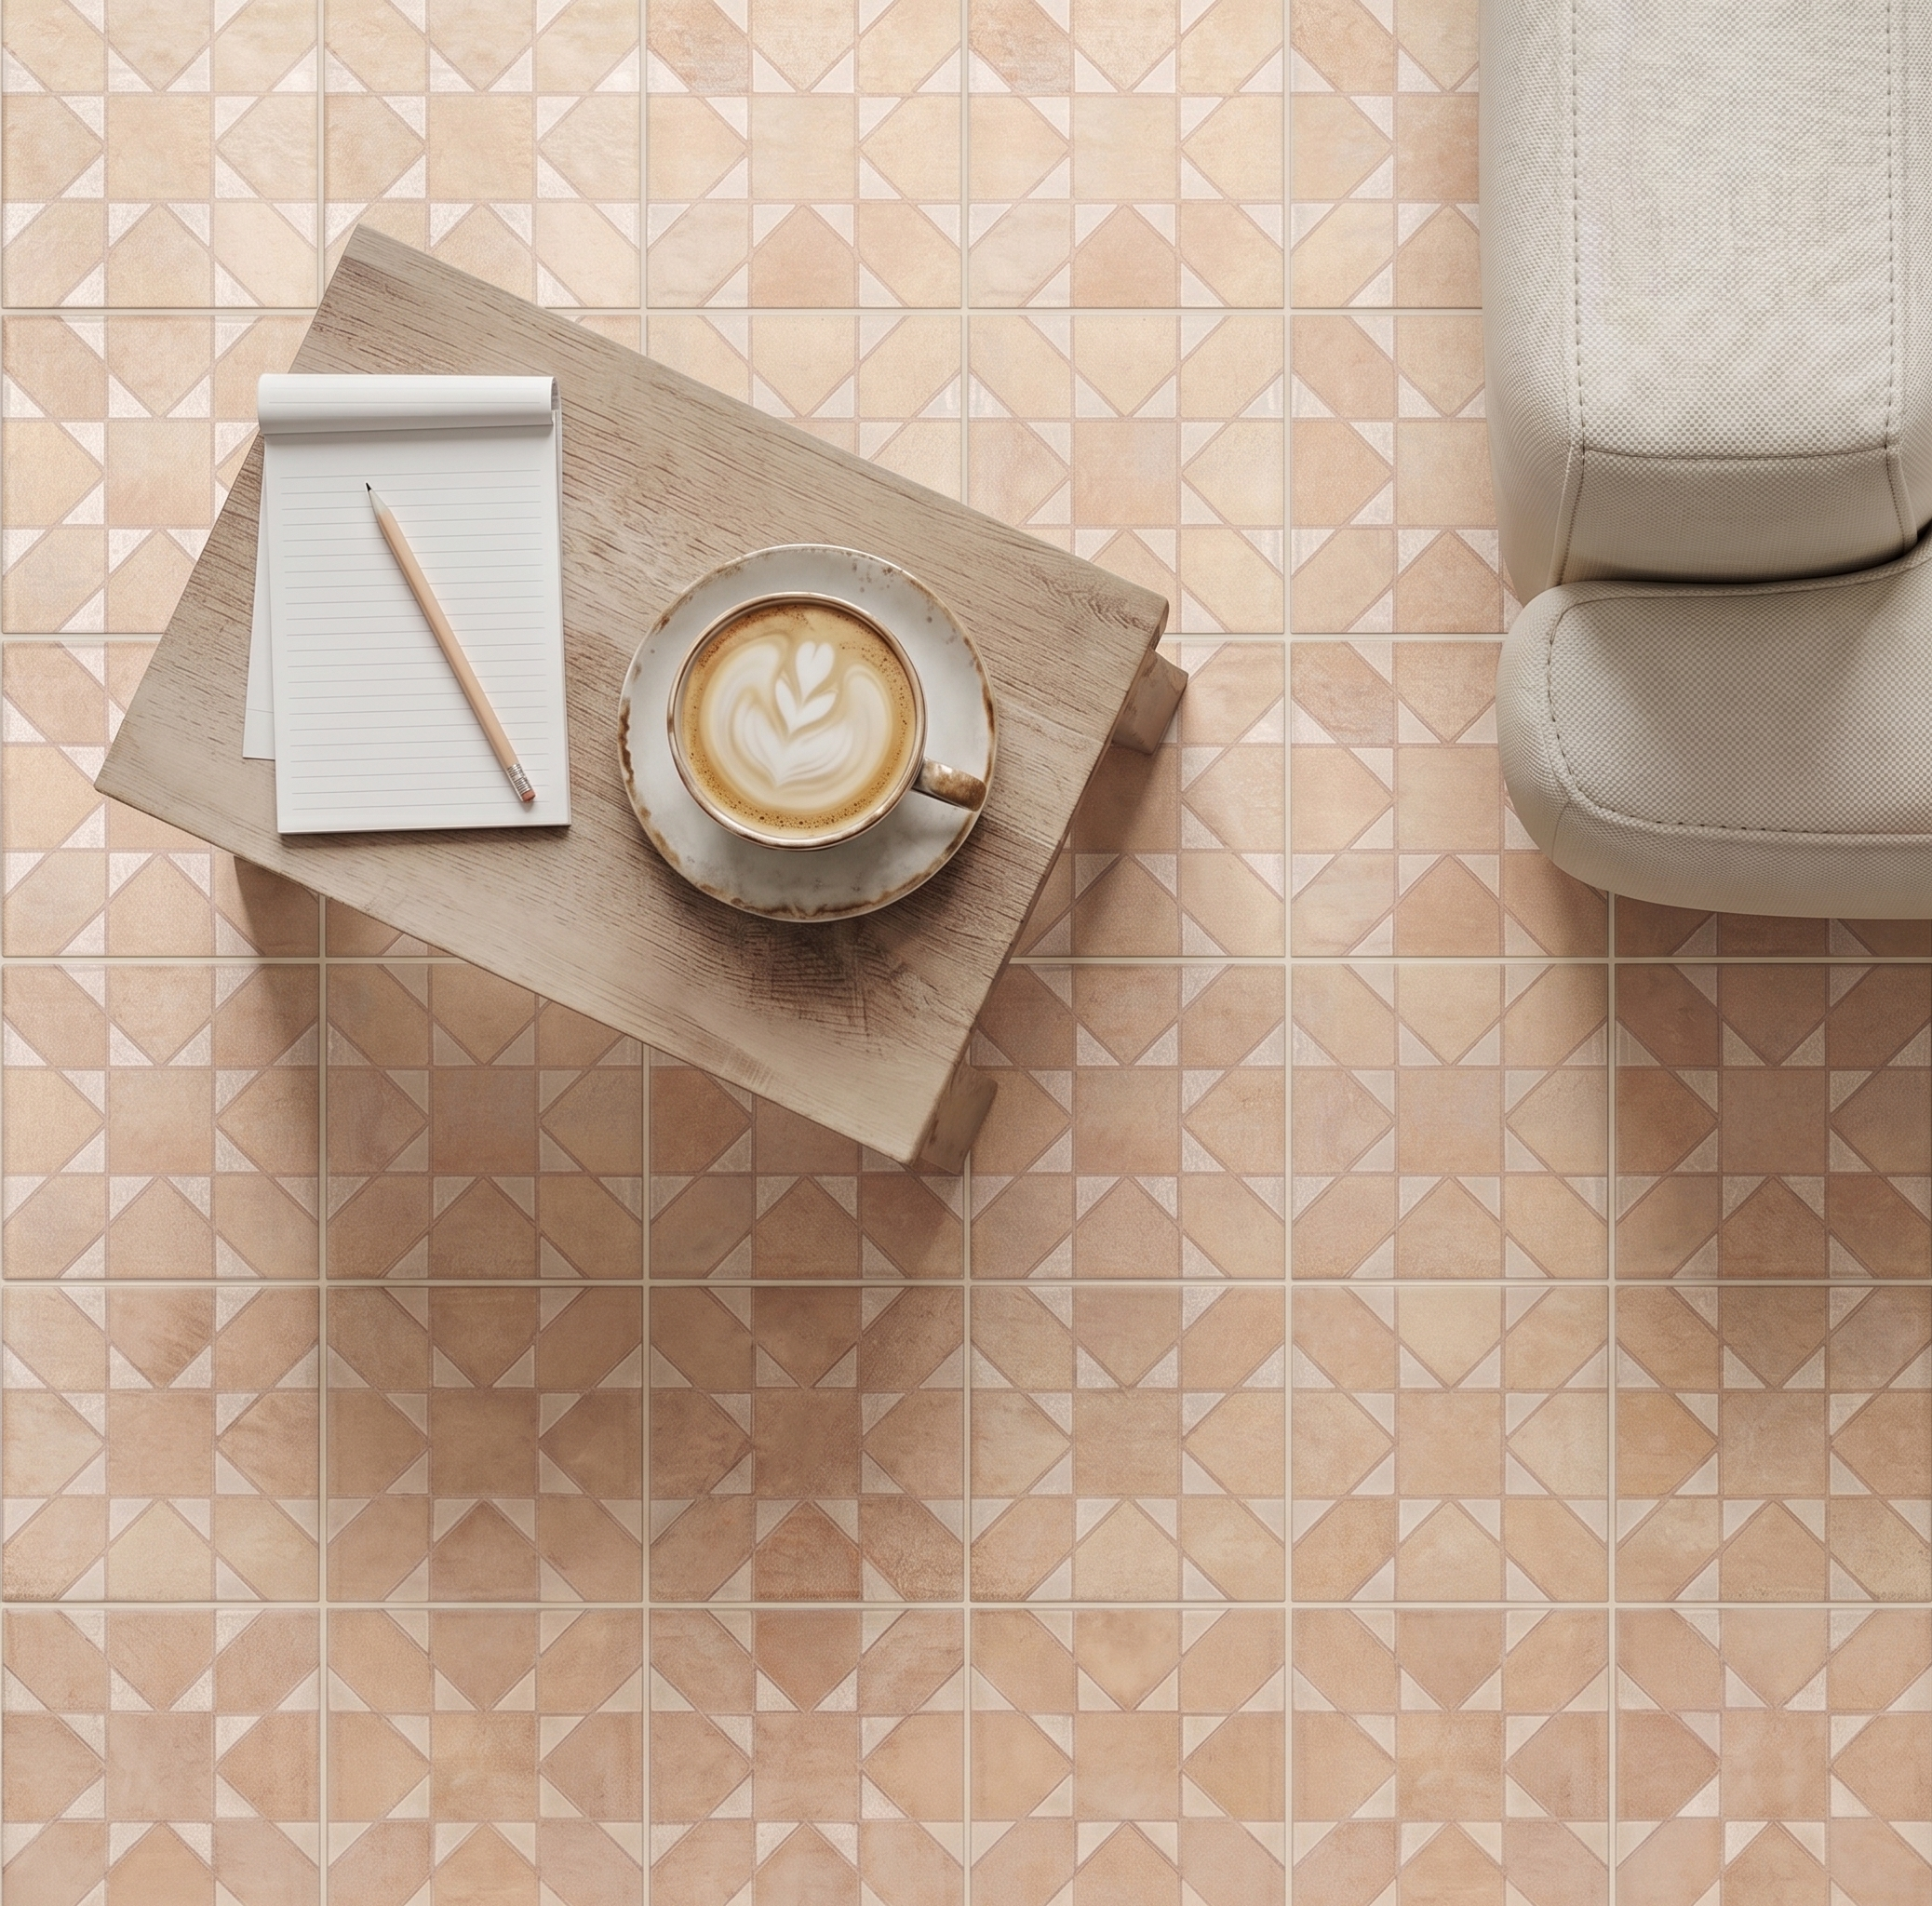
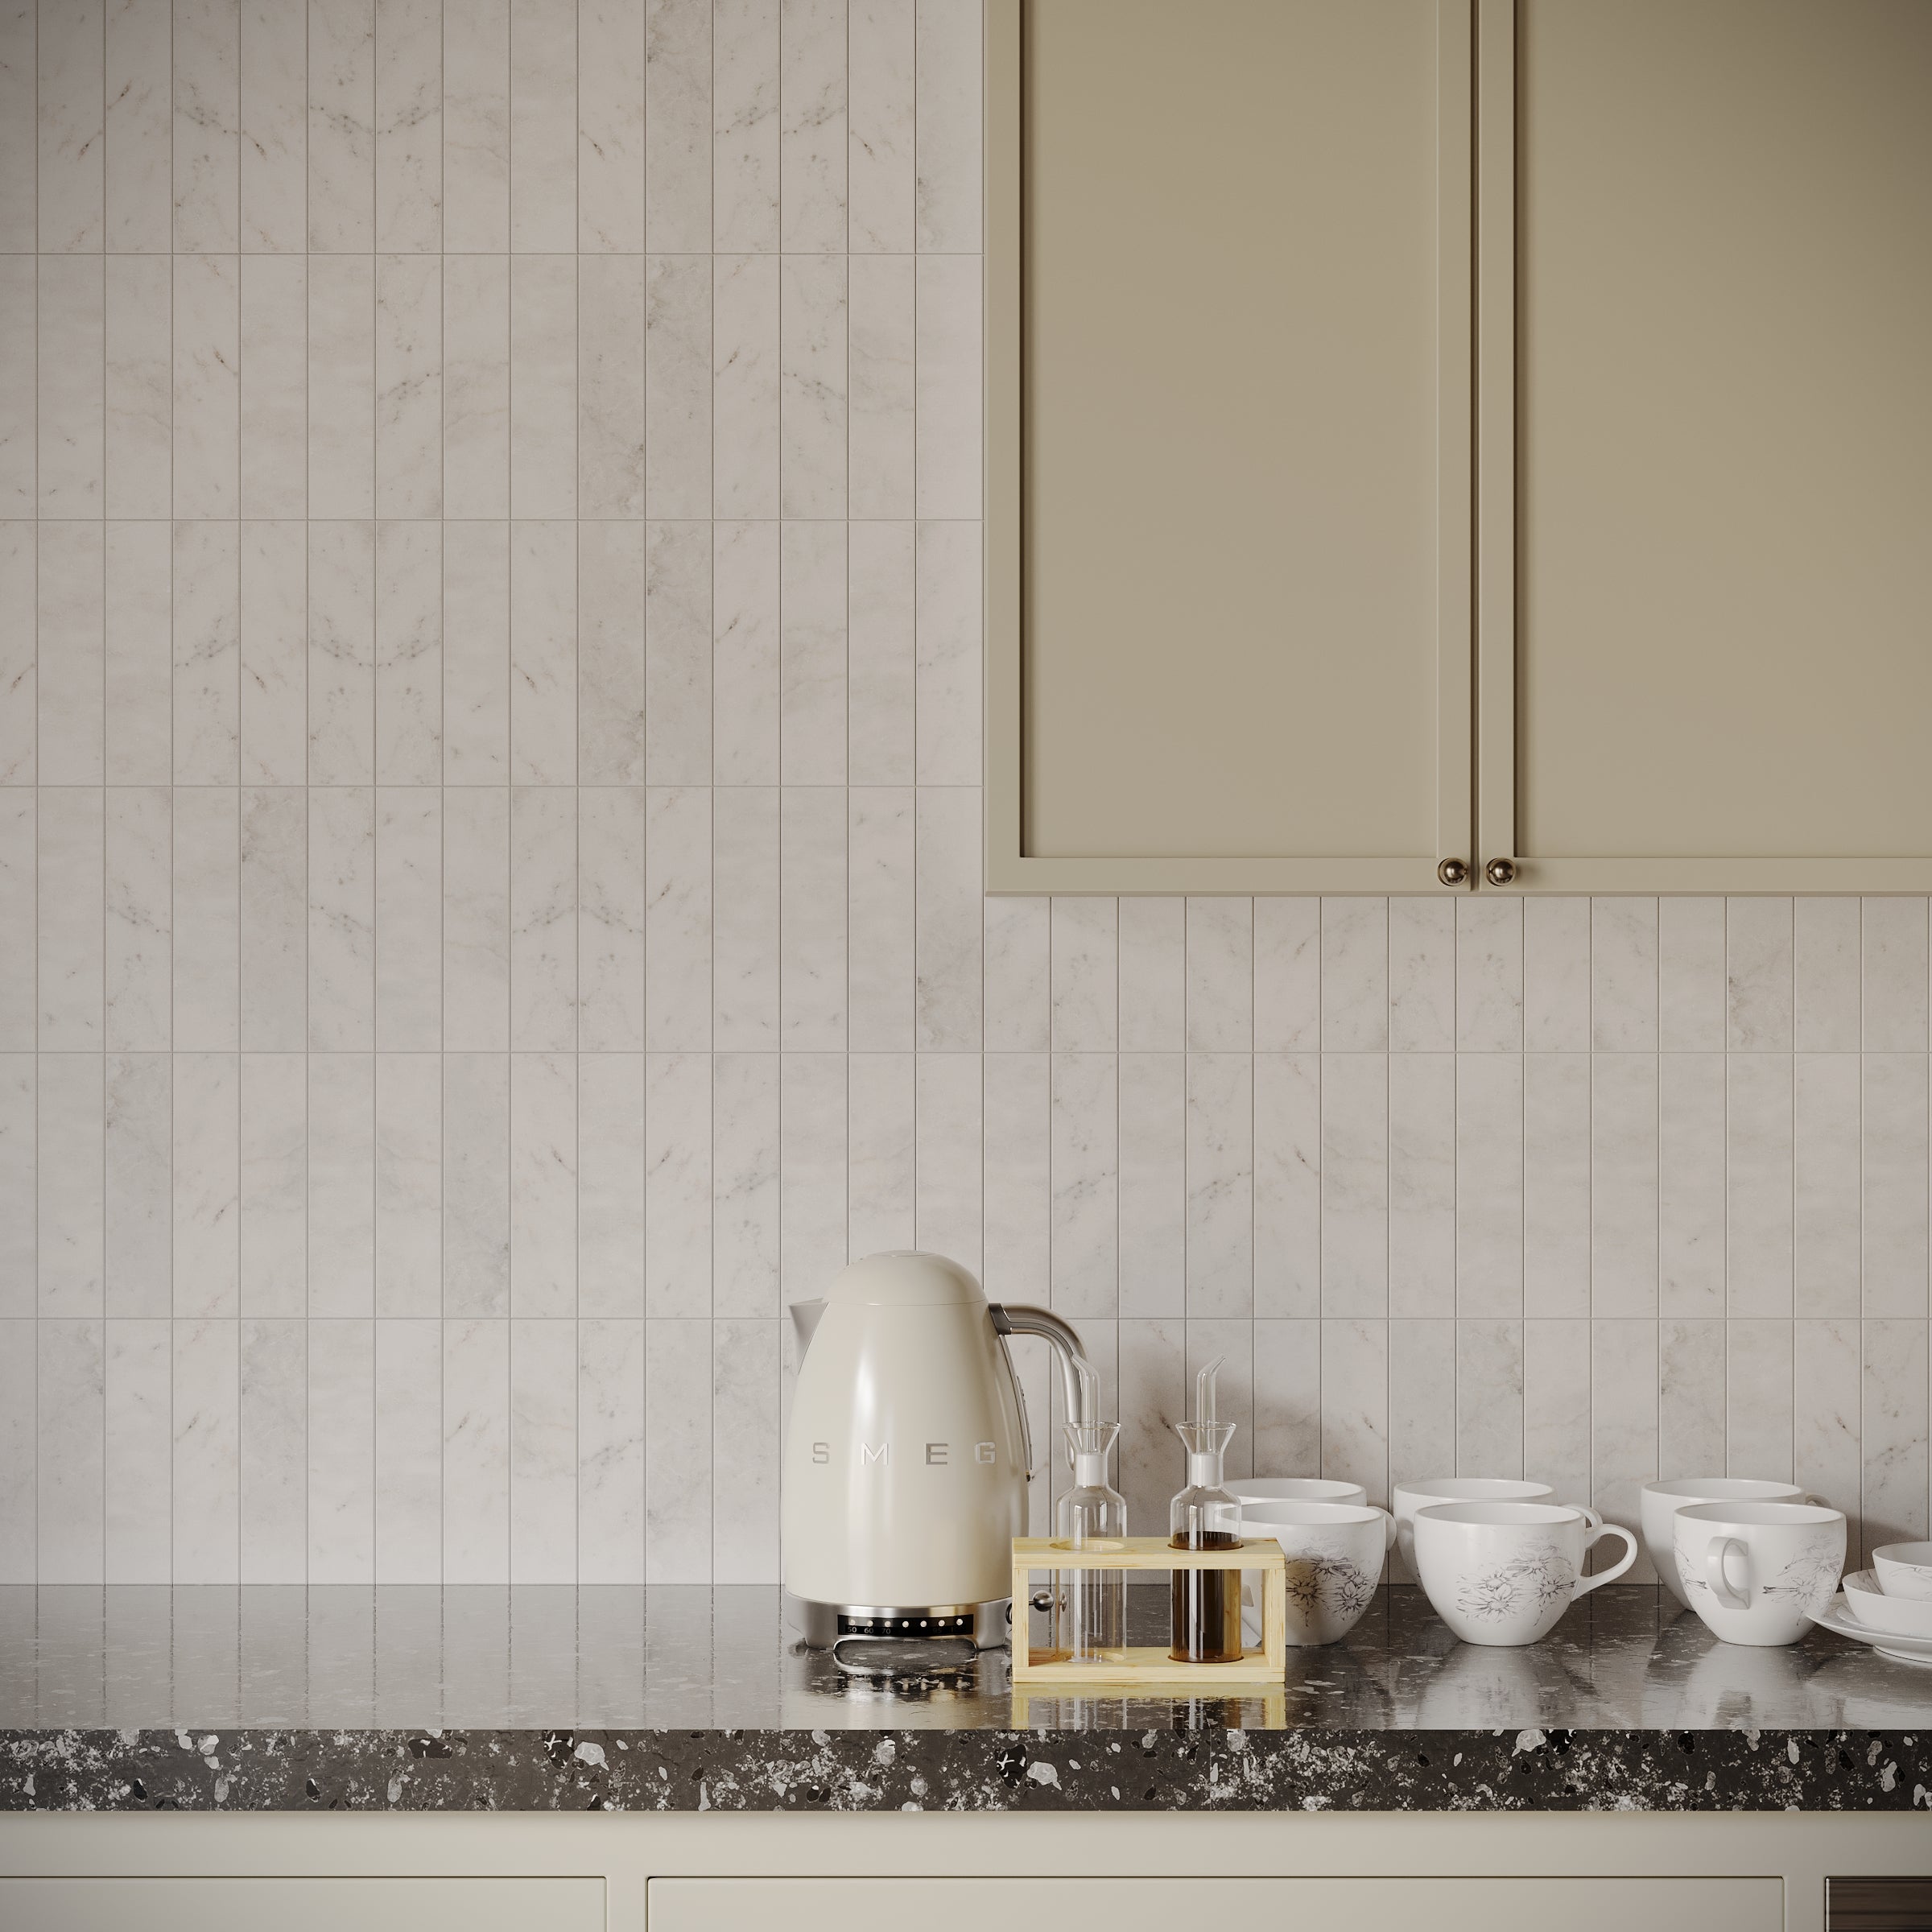
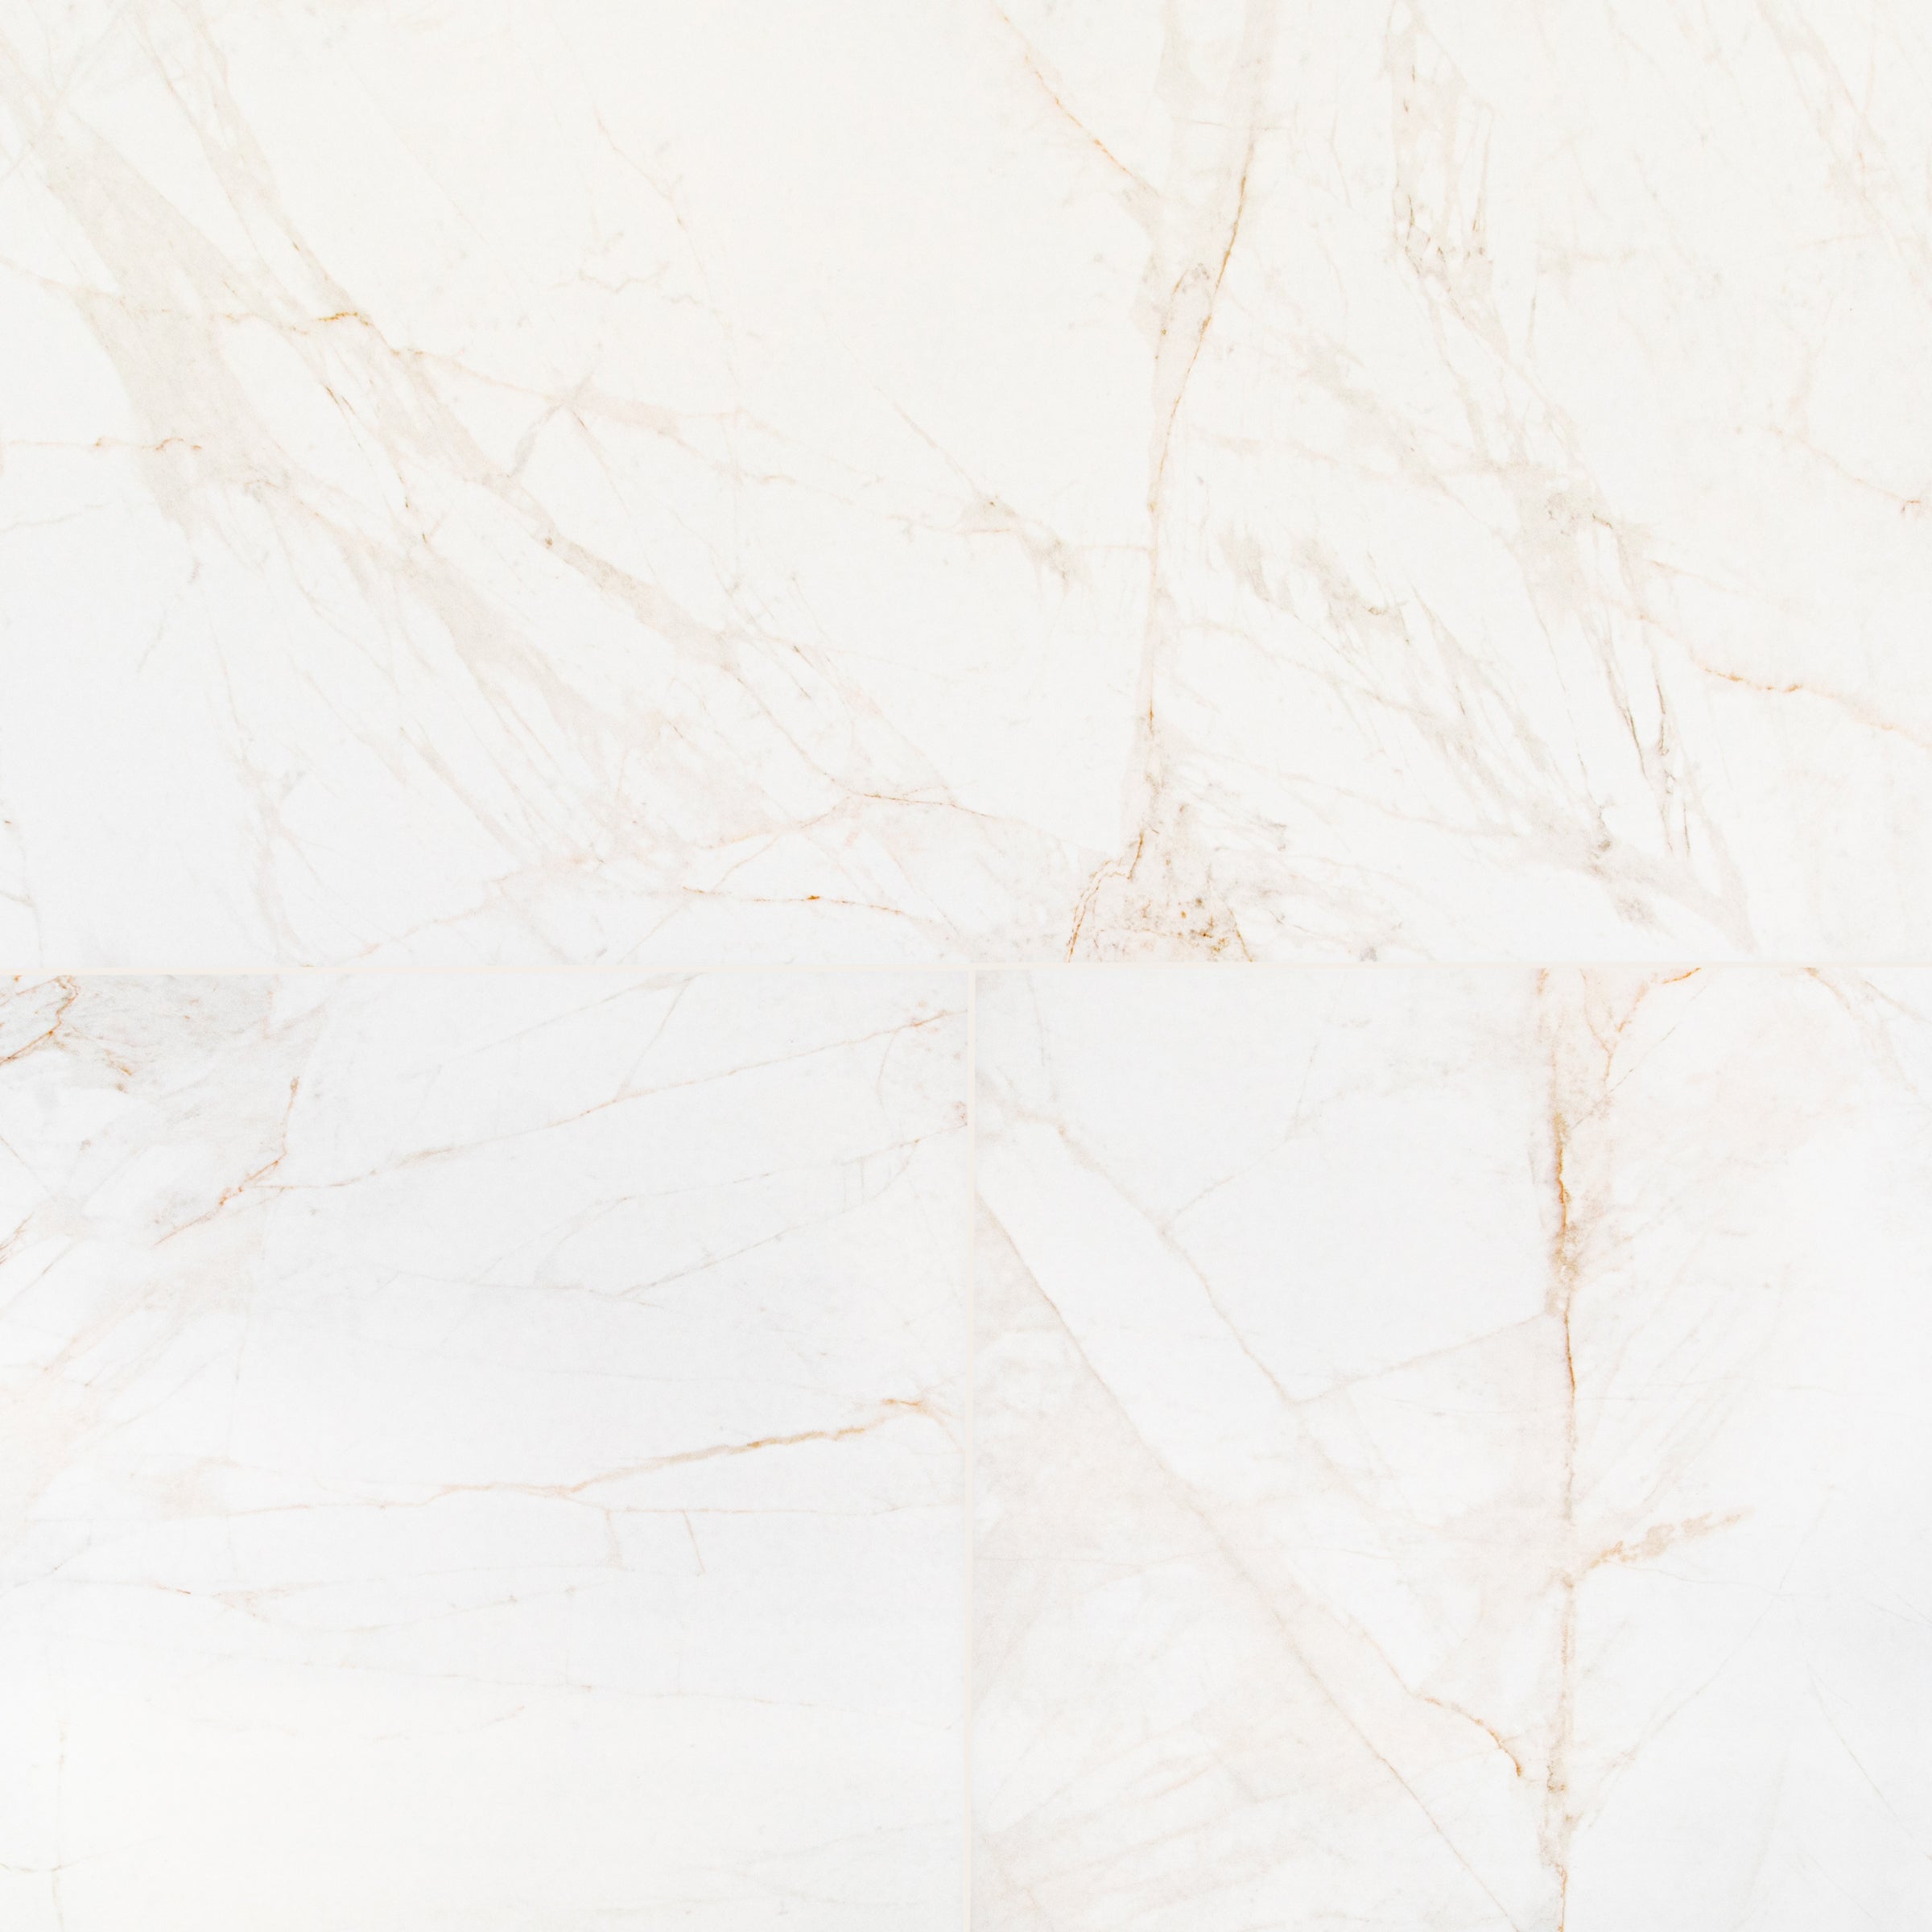
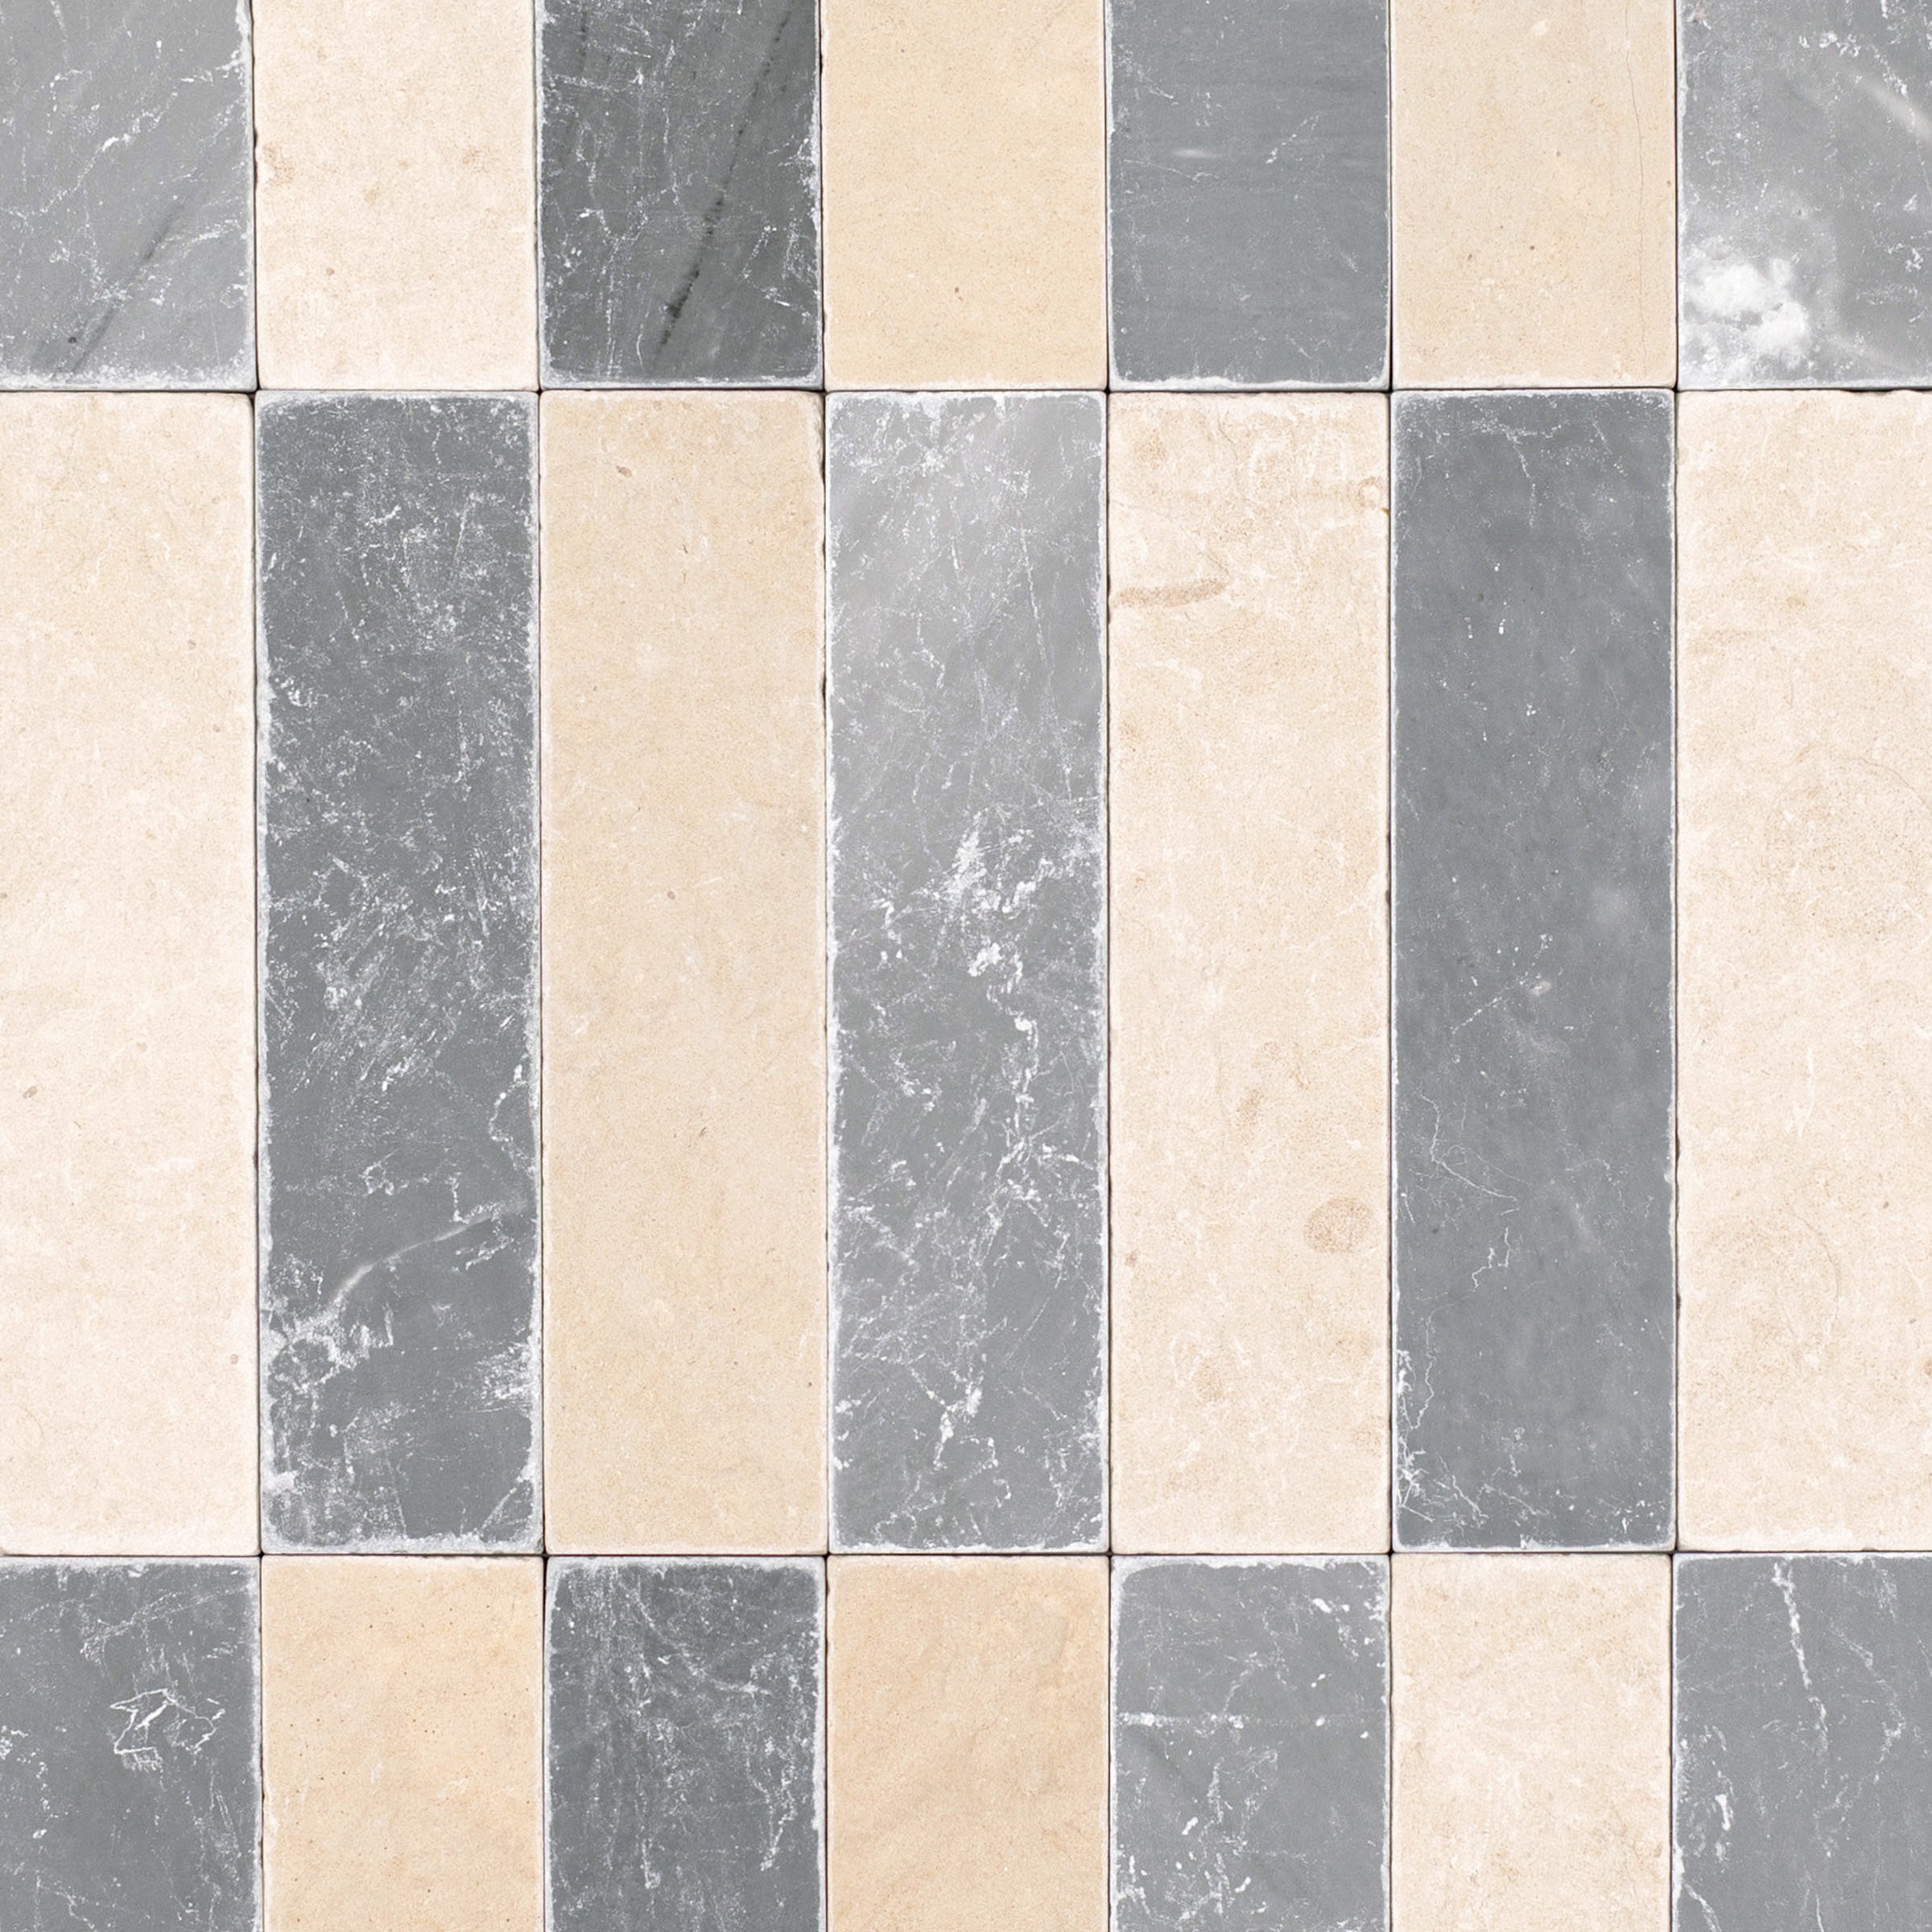
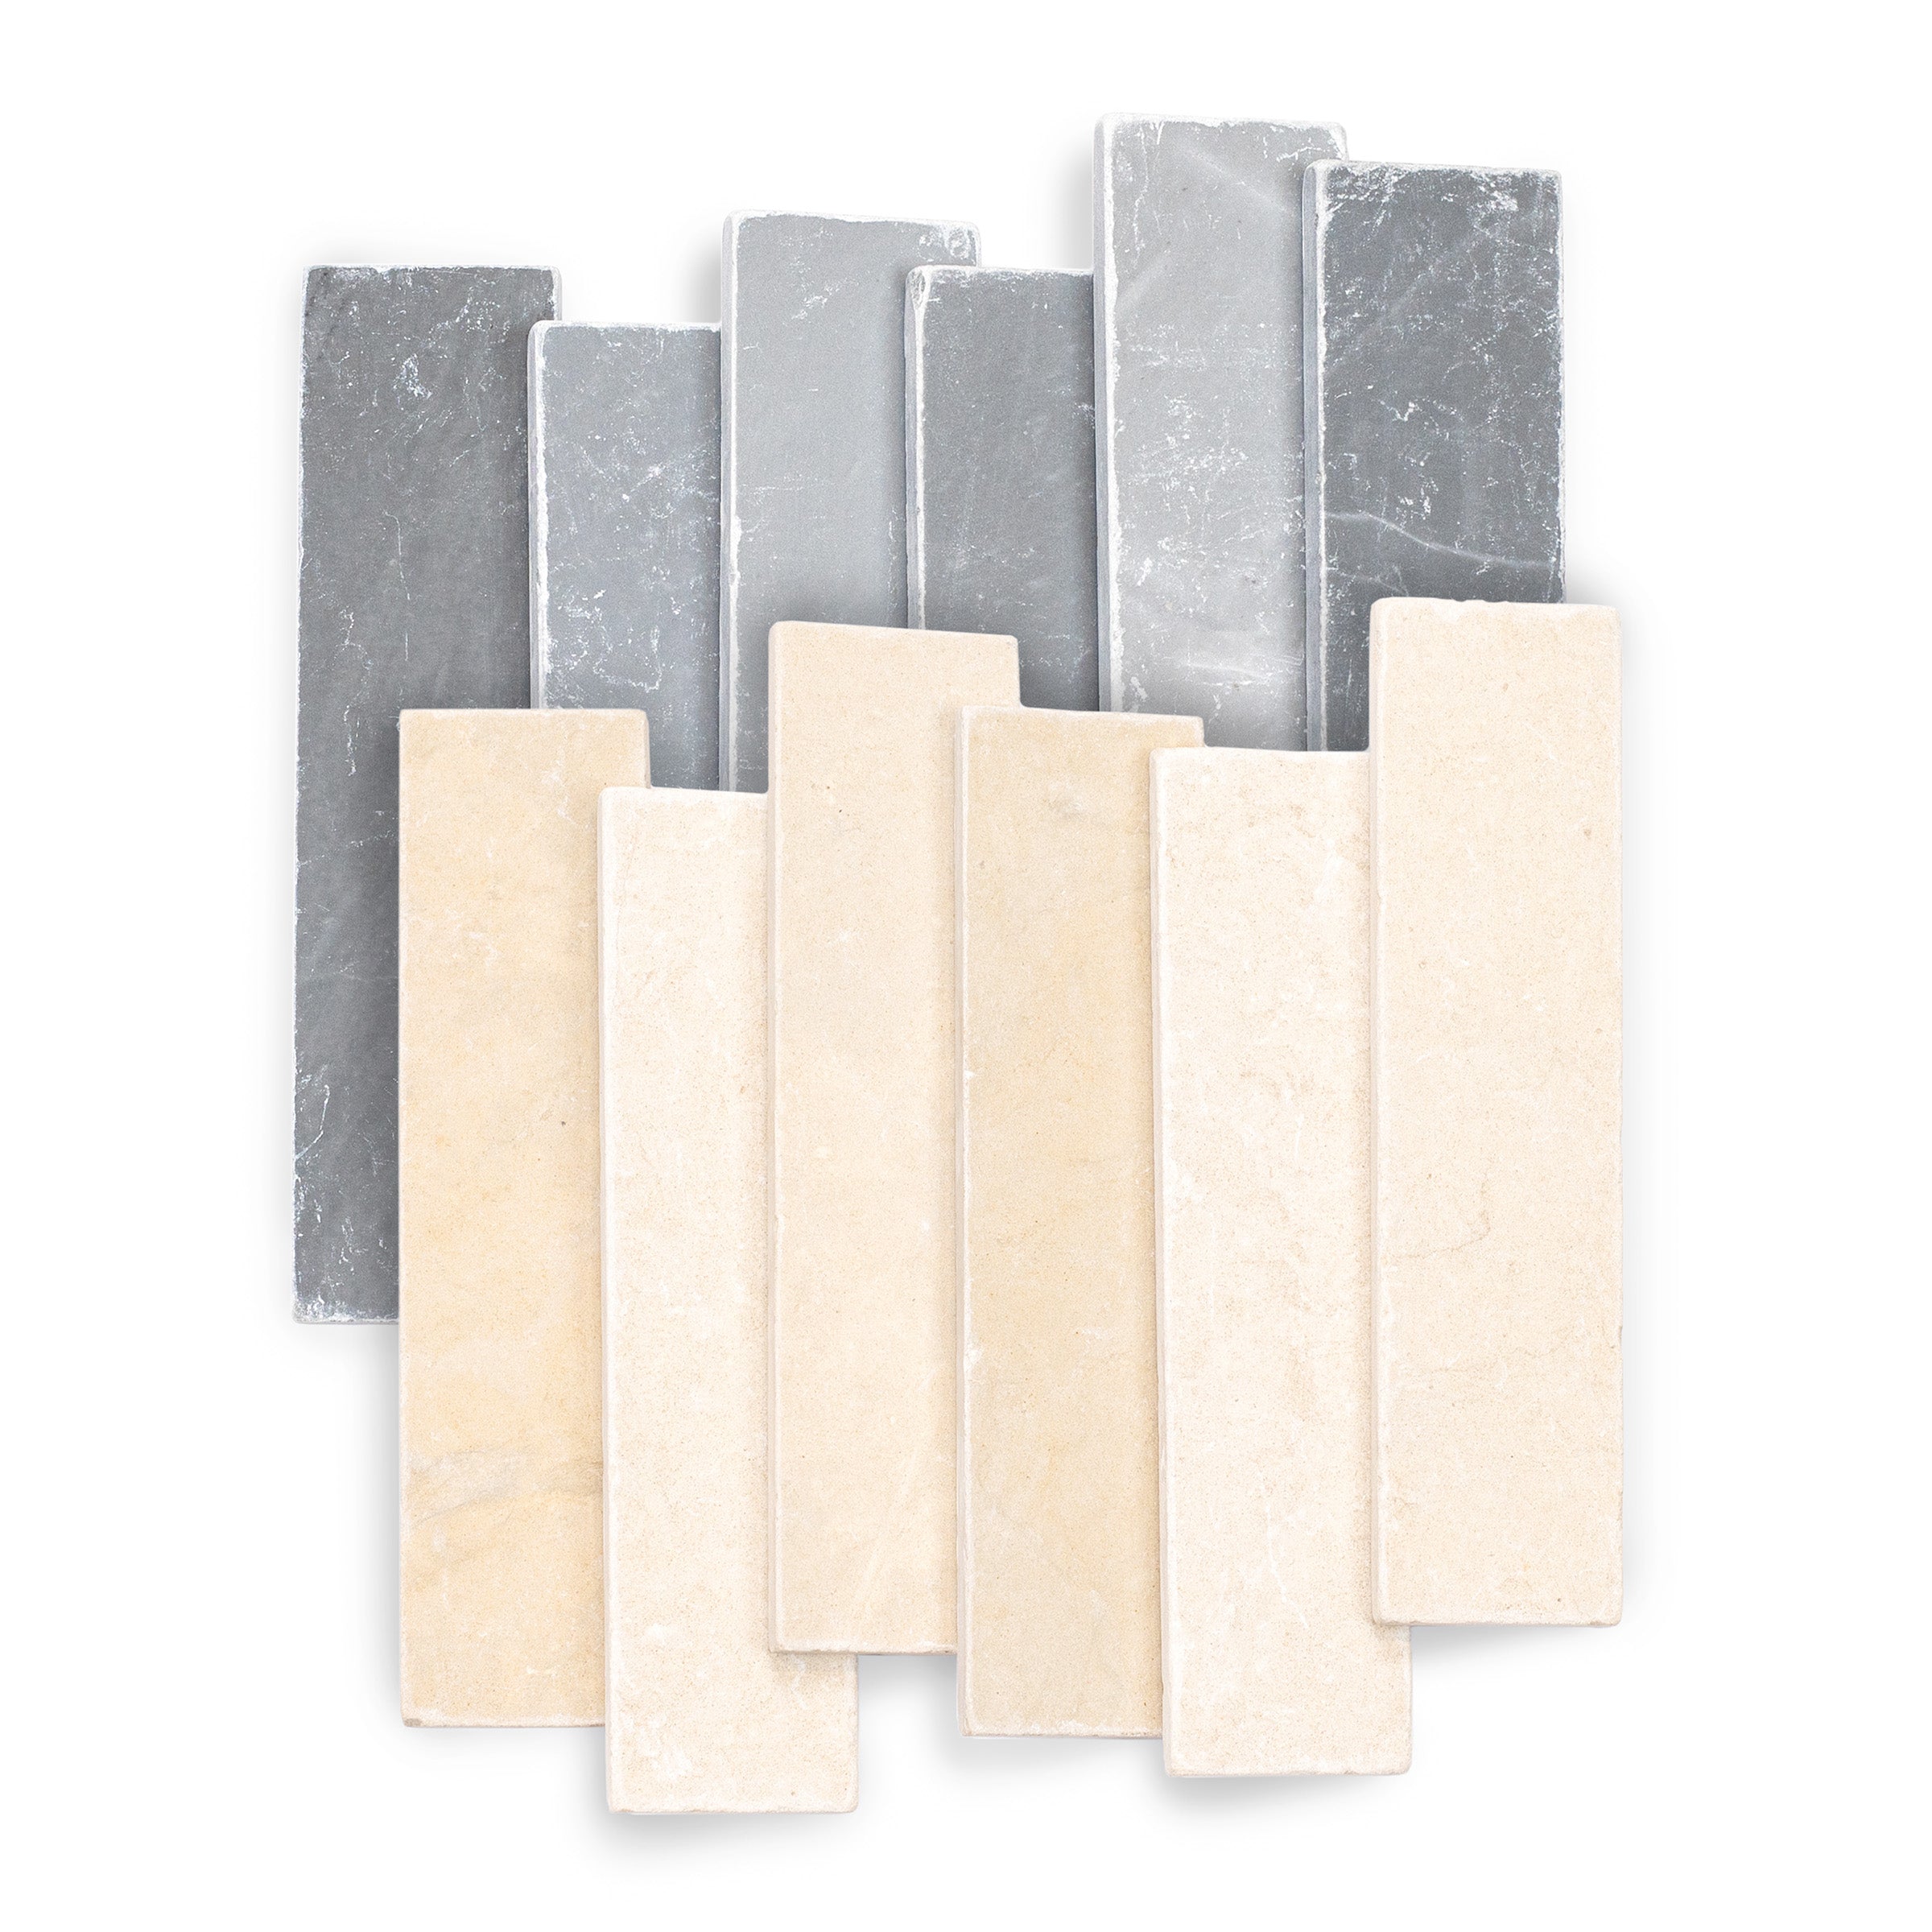
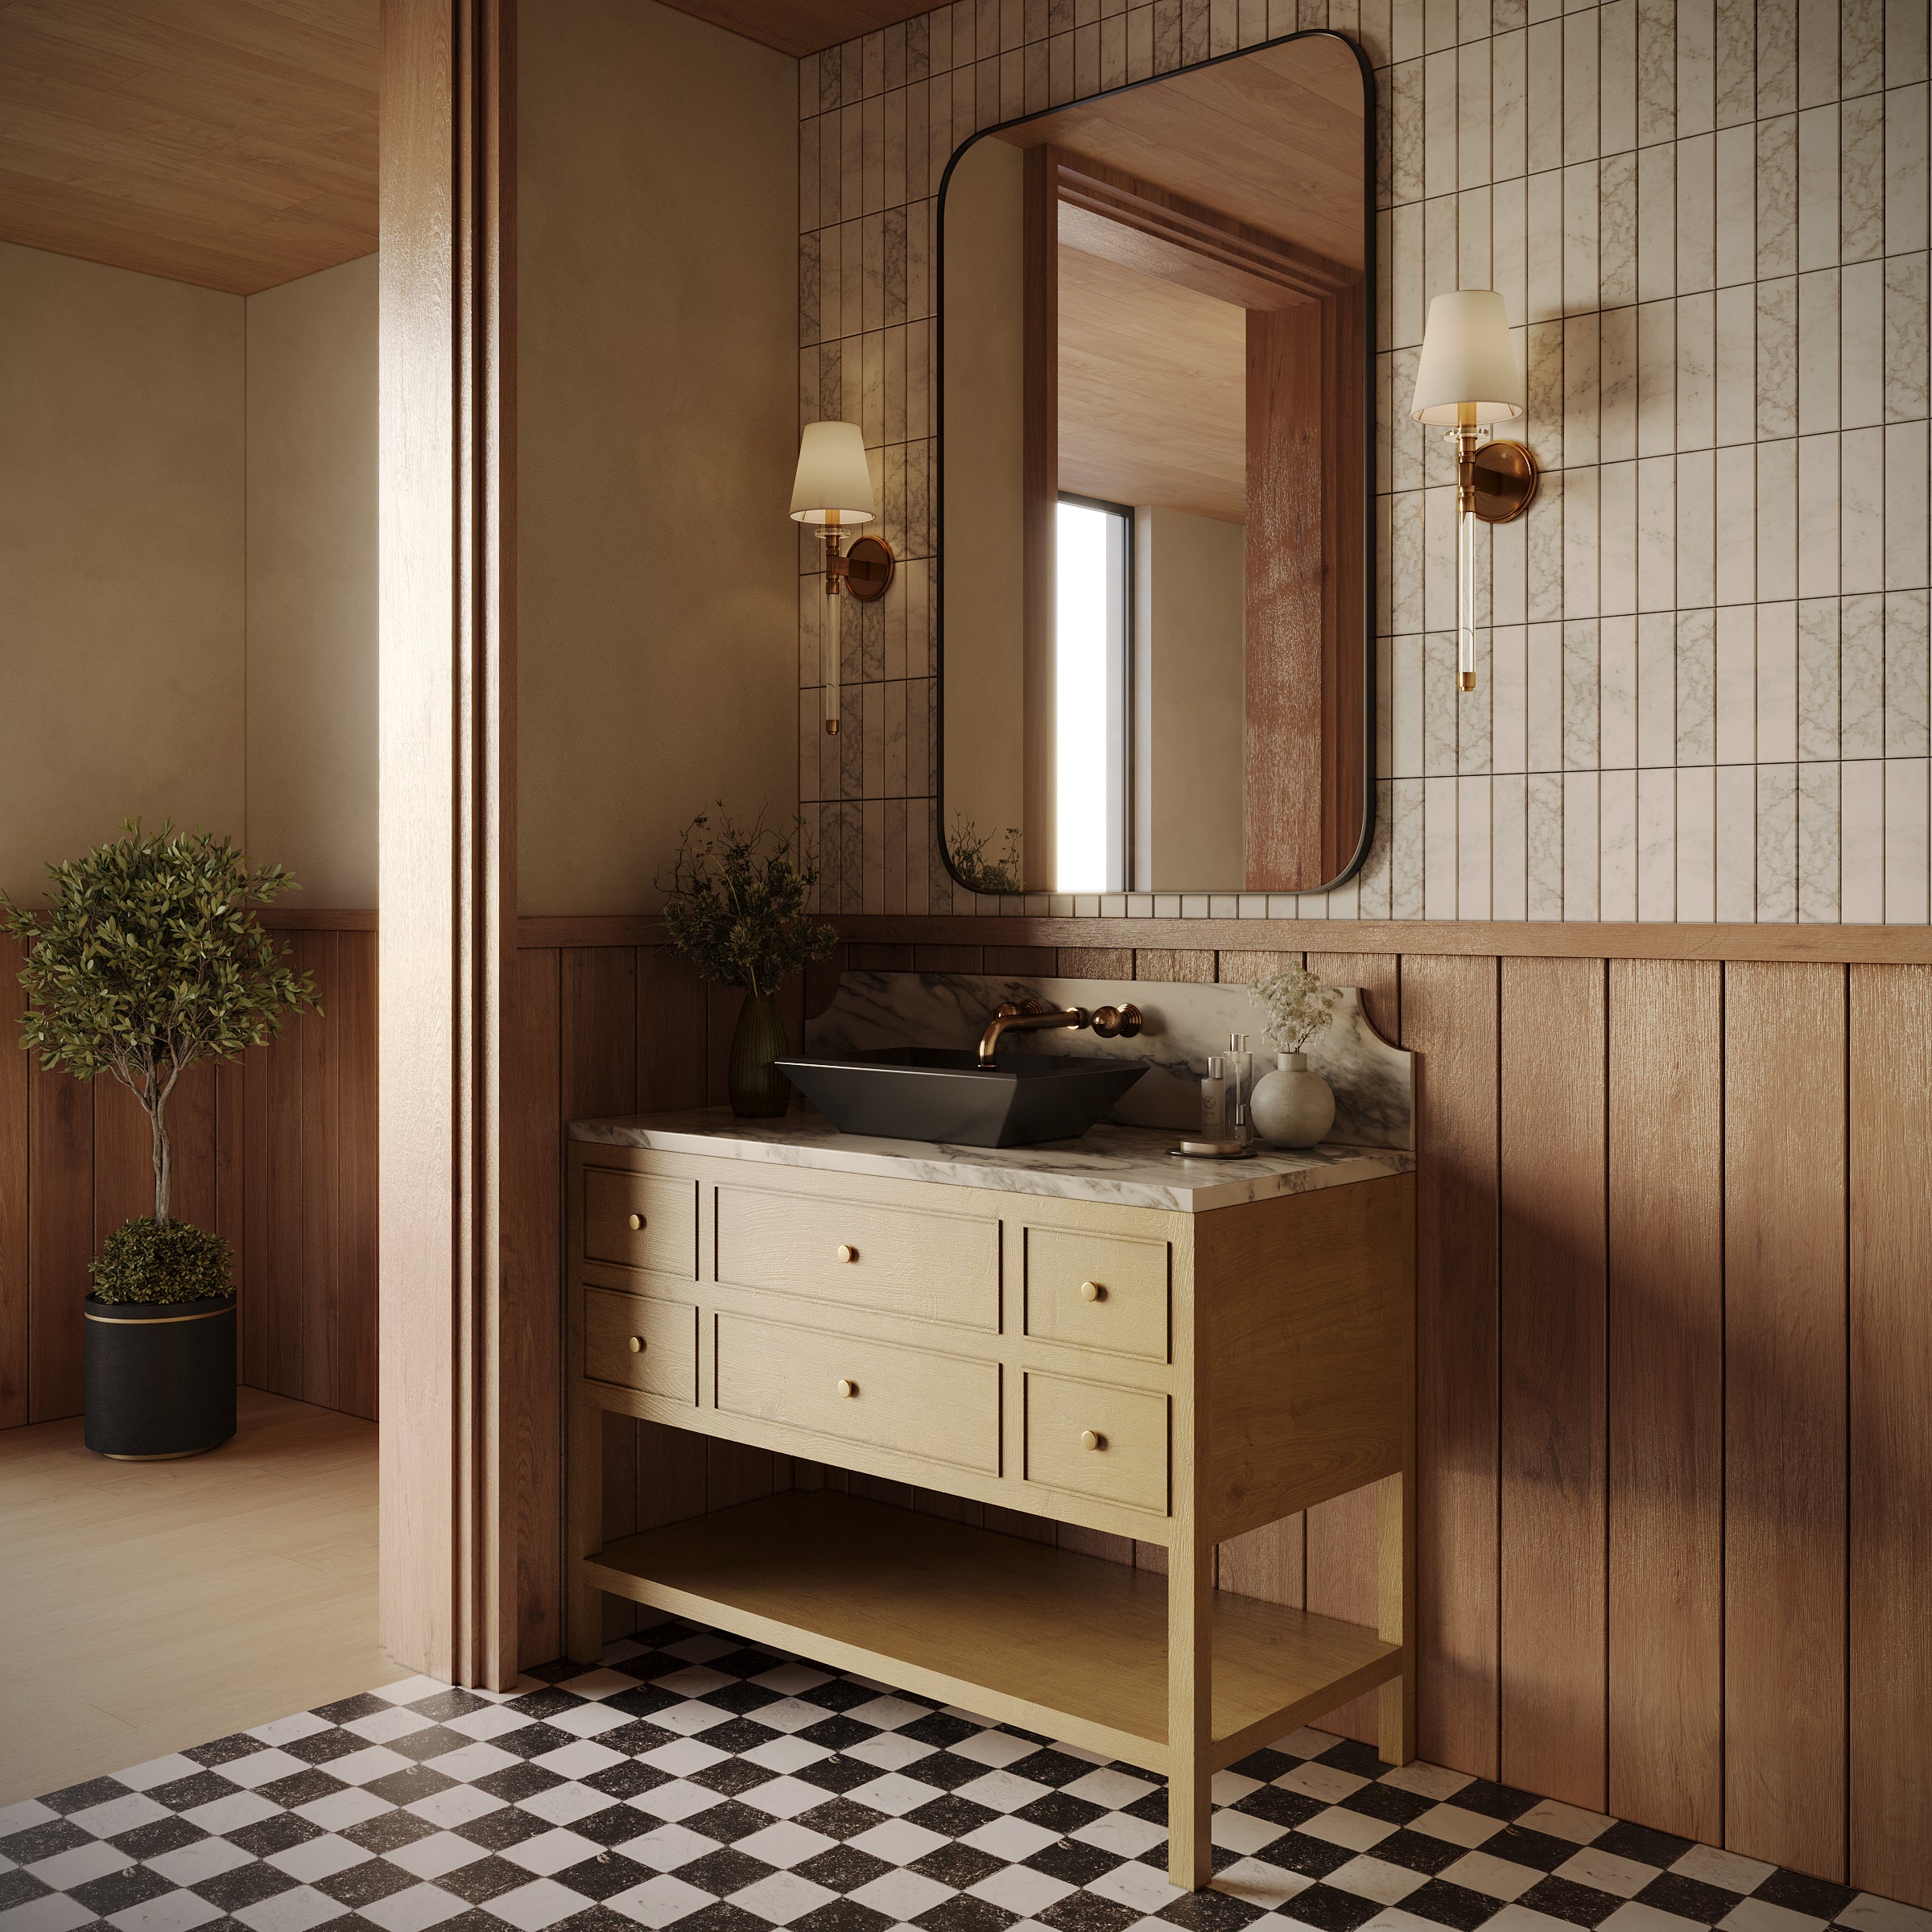
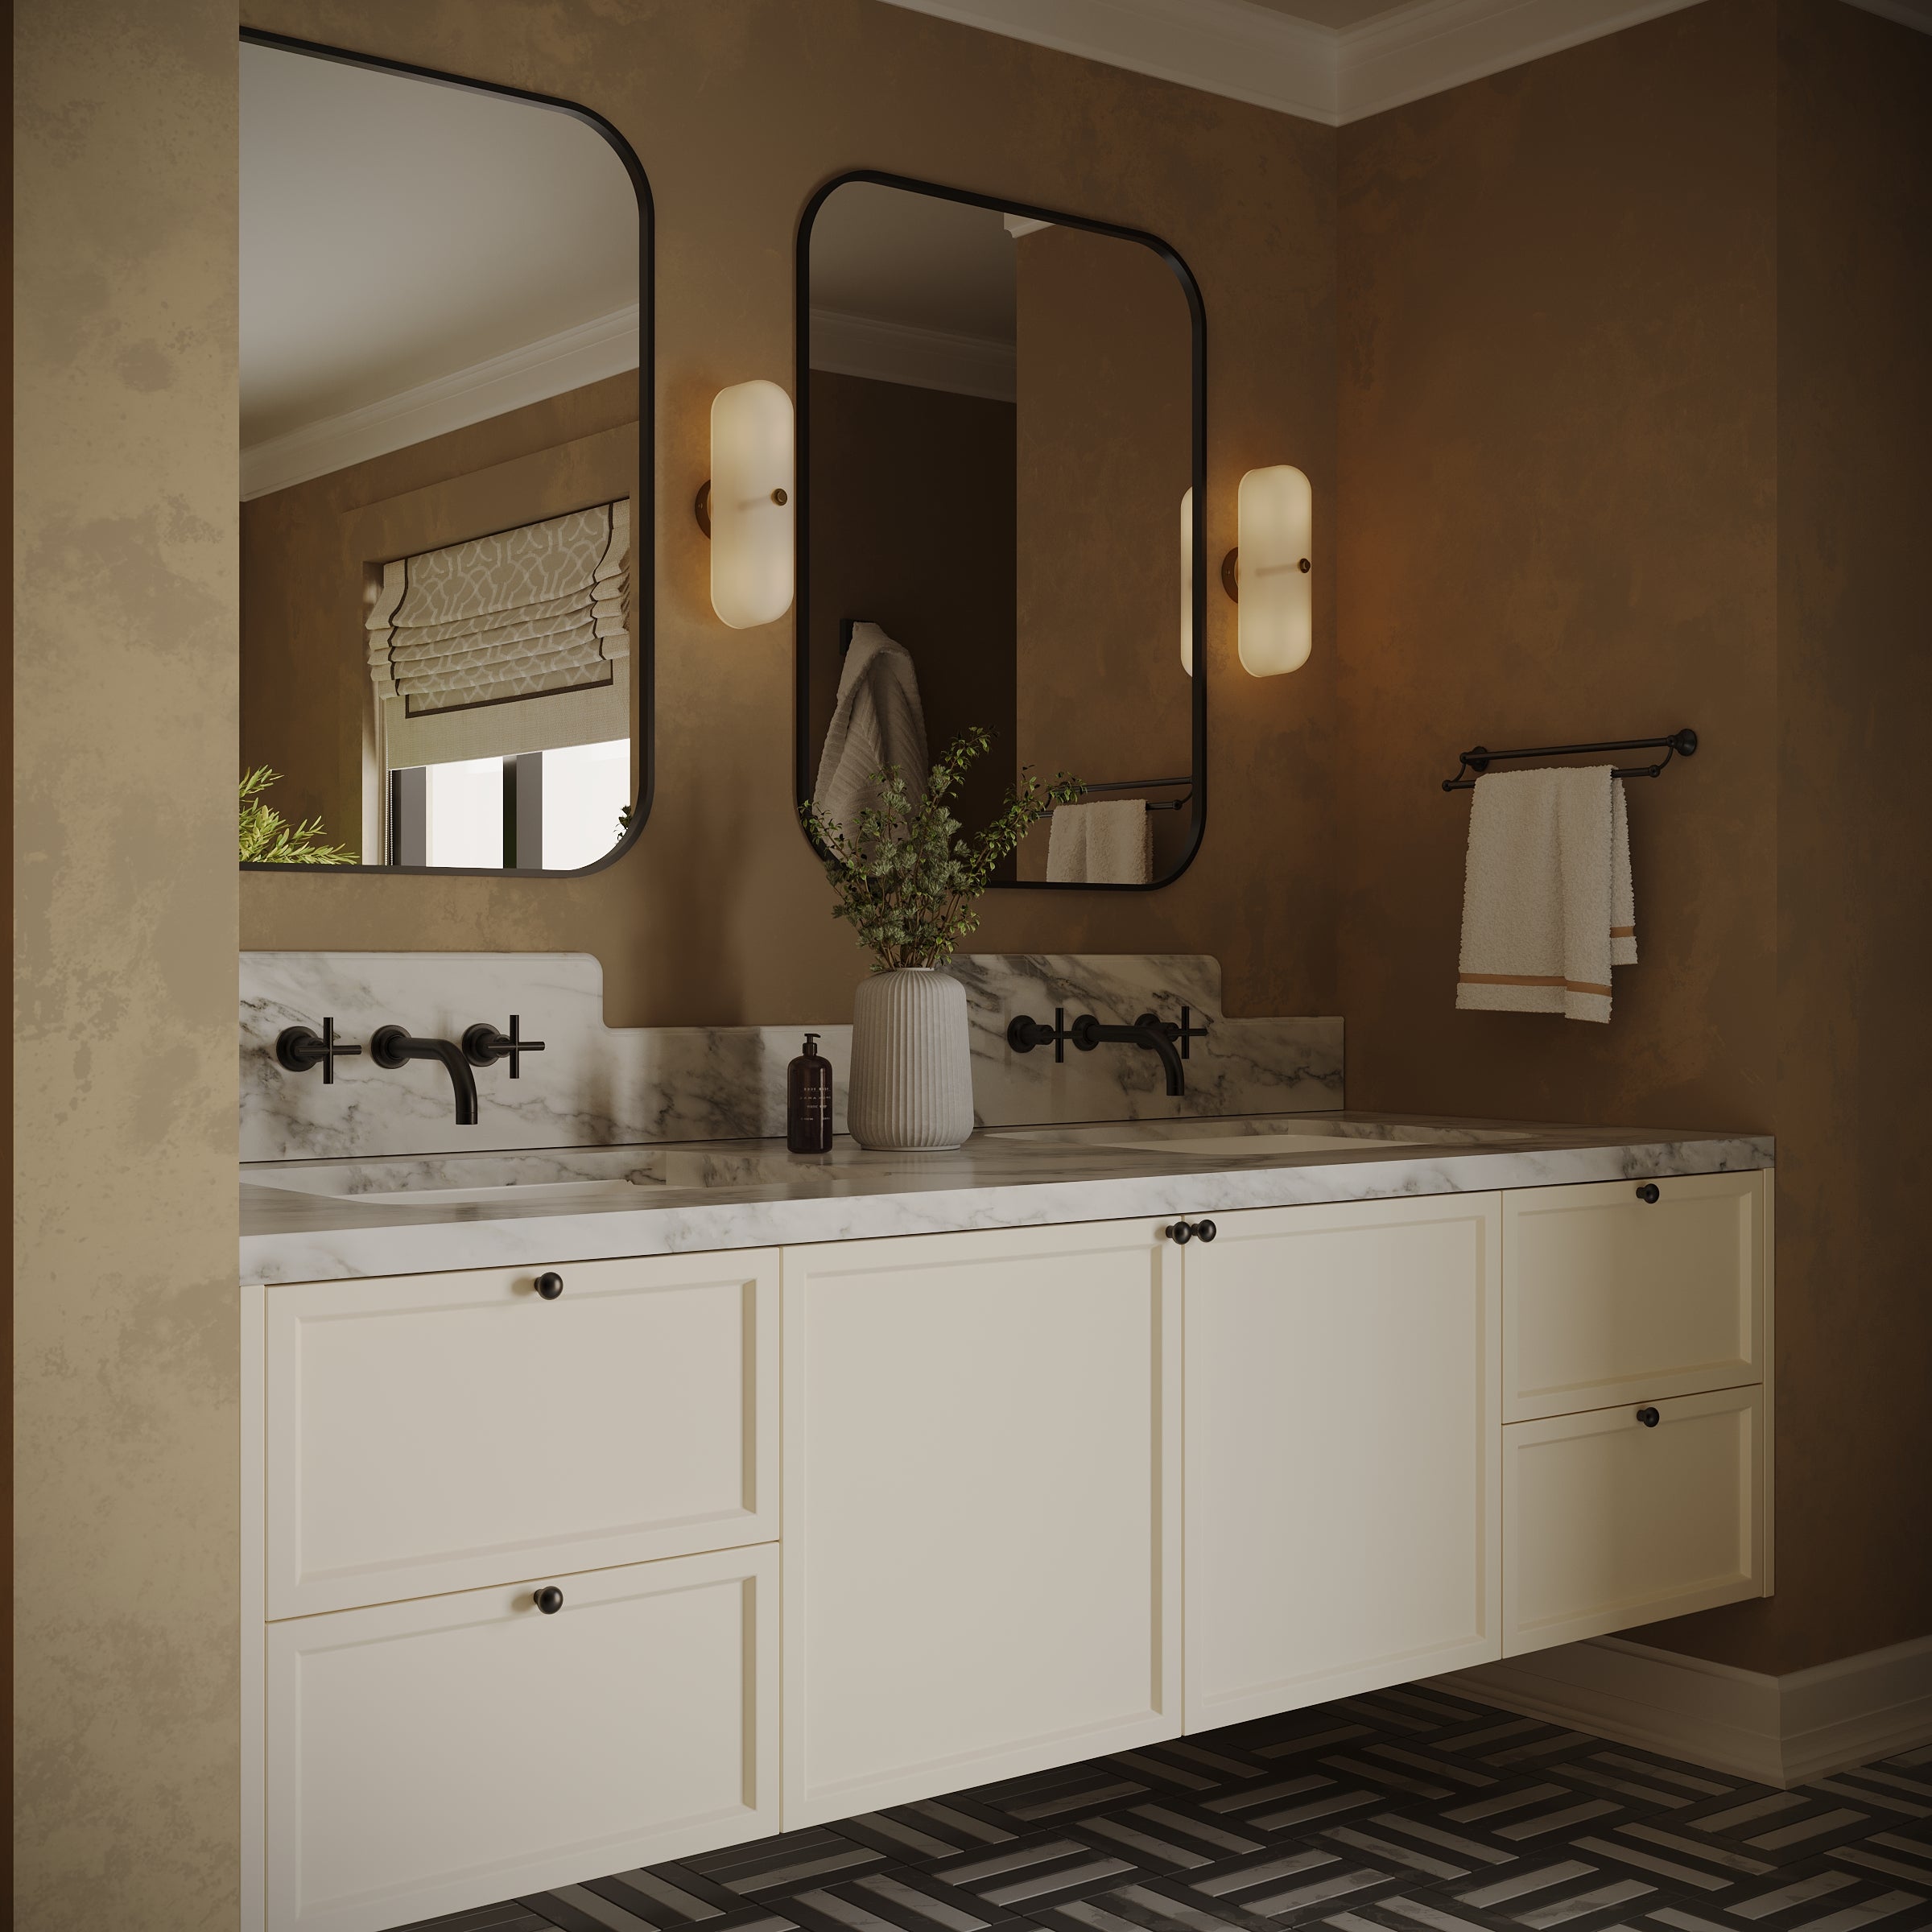
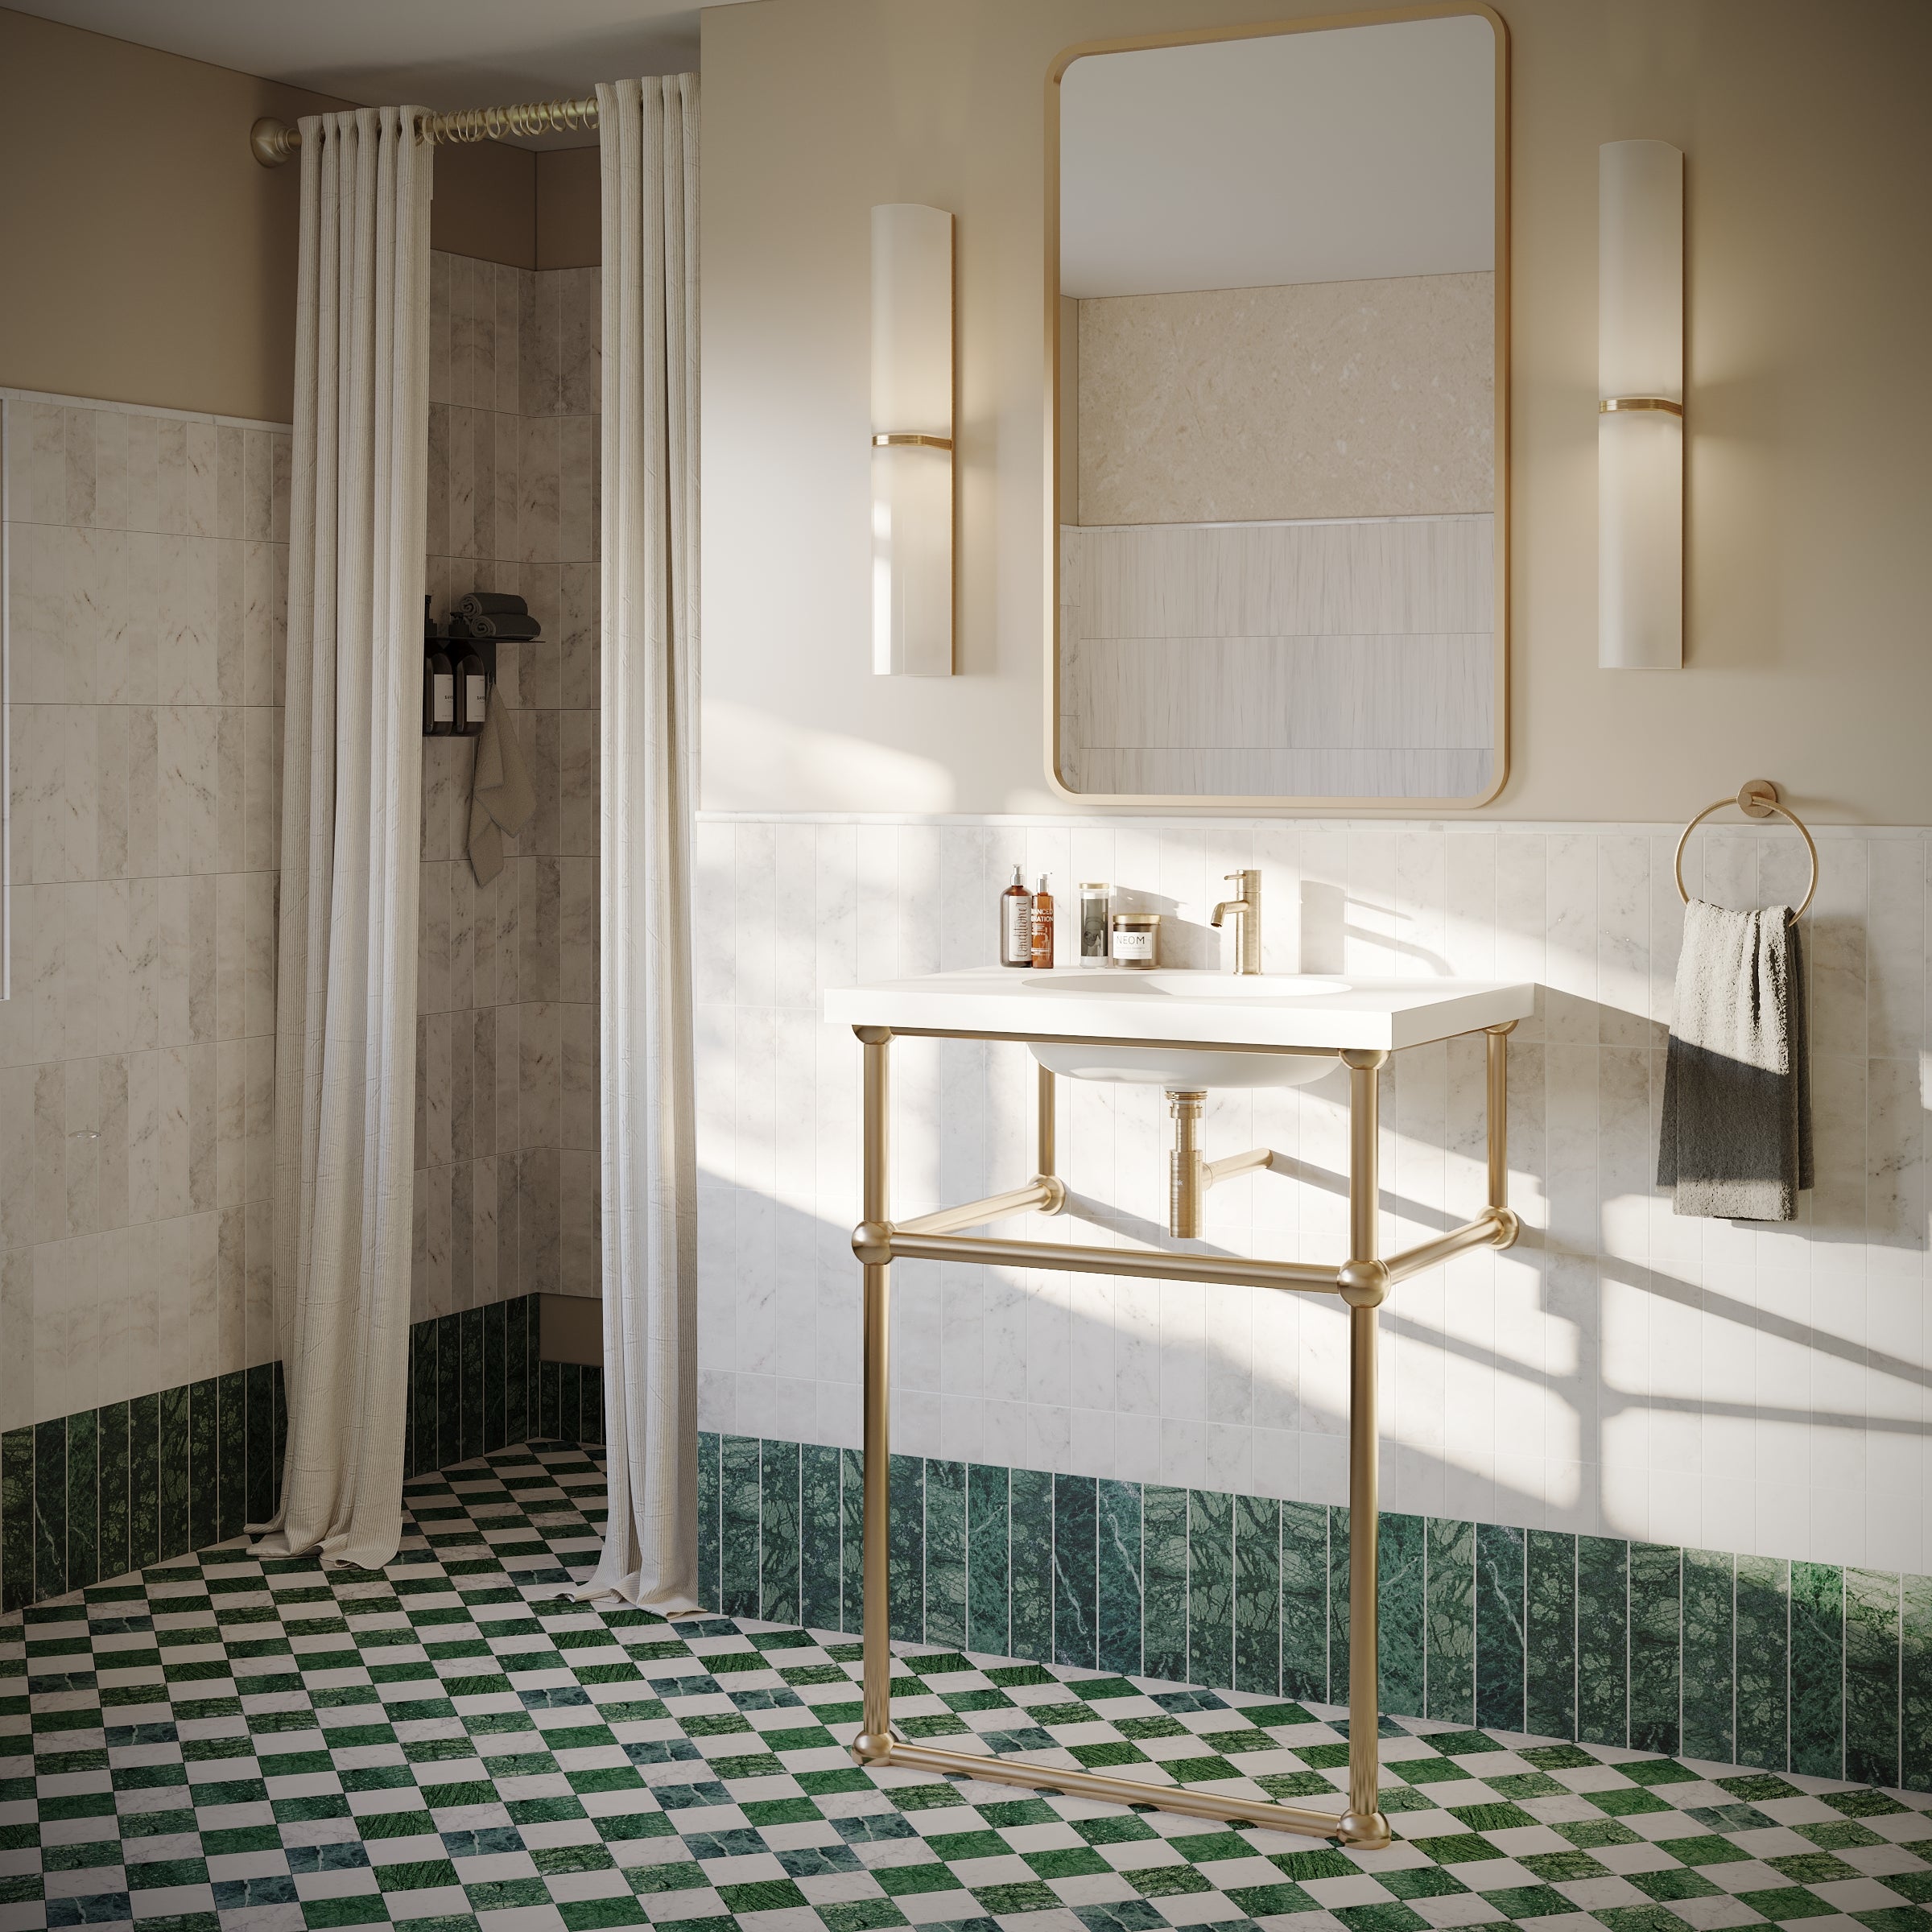
This marble floor mosaic works seamlessly alongside larger-format Carrara or Nero Marquina tiles, honed limestone, or even neutral porcelain field tiles. Its bold yet versatile palette also complements warm wood cabinetry and polished nickel or brass fixtures, allowing for endless styling options that bring luxury and lasting sophistication to any space.
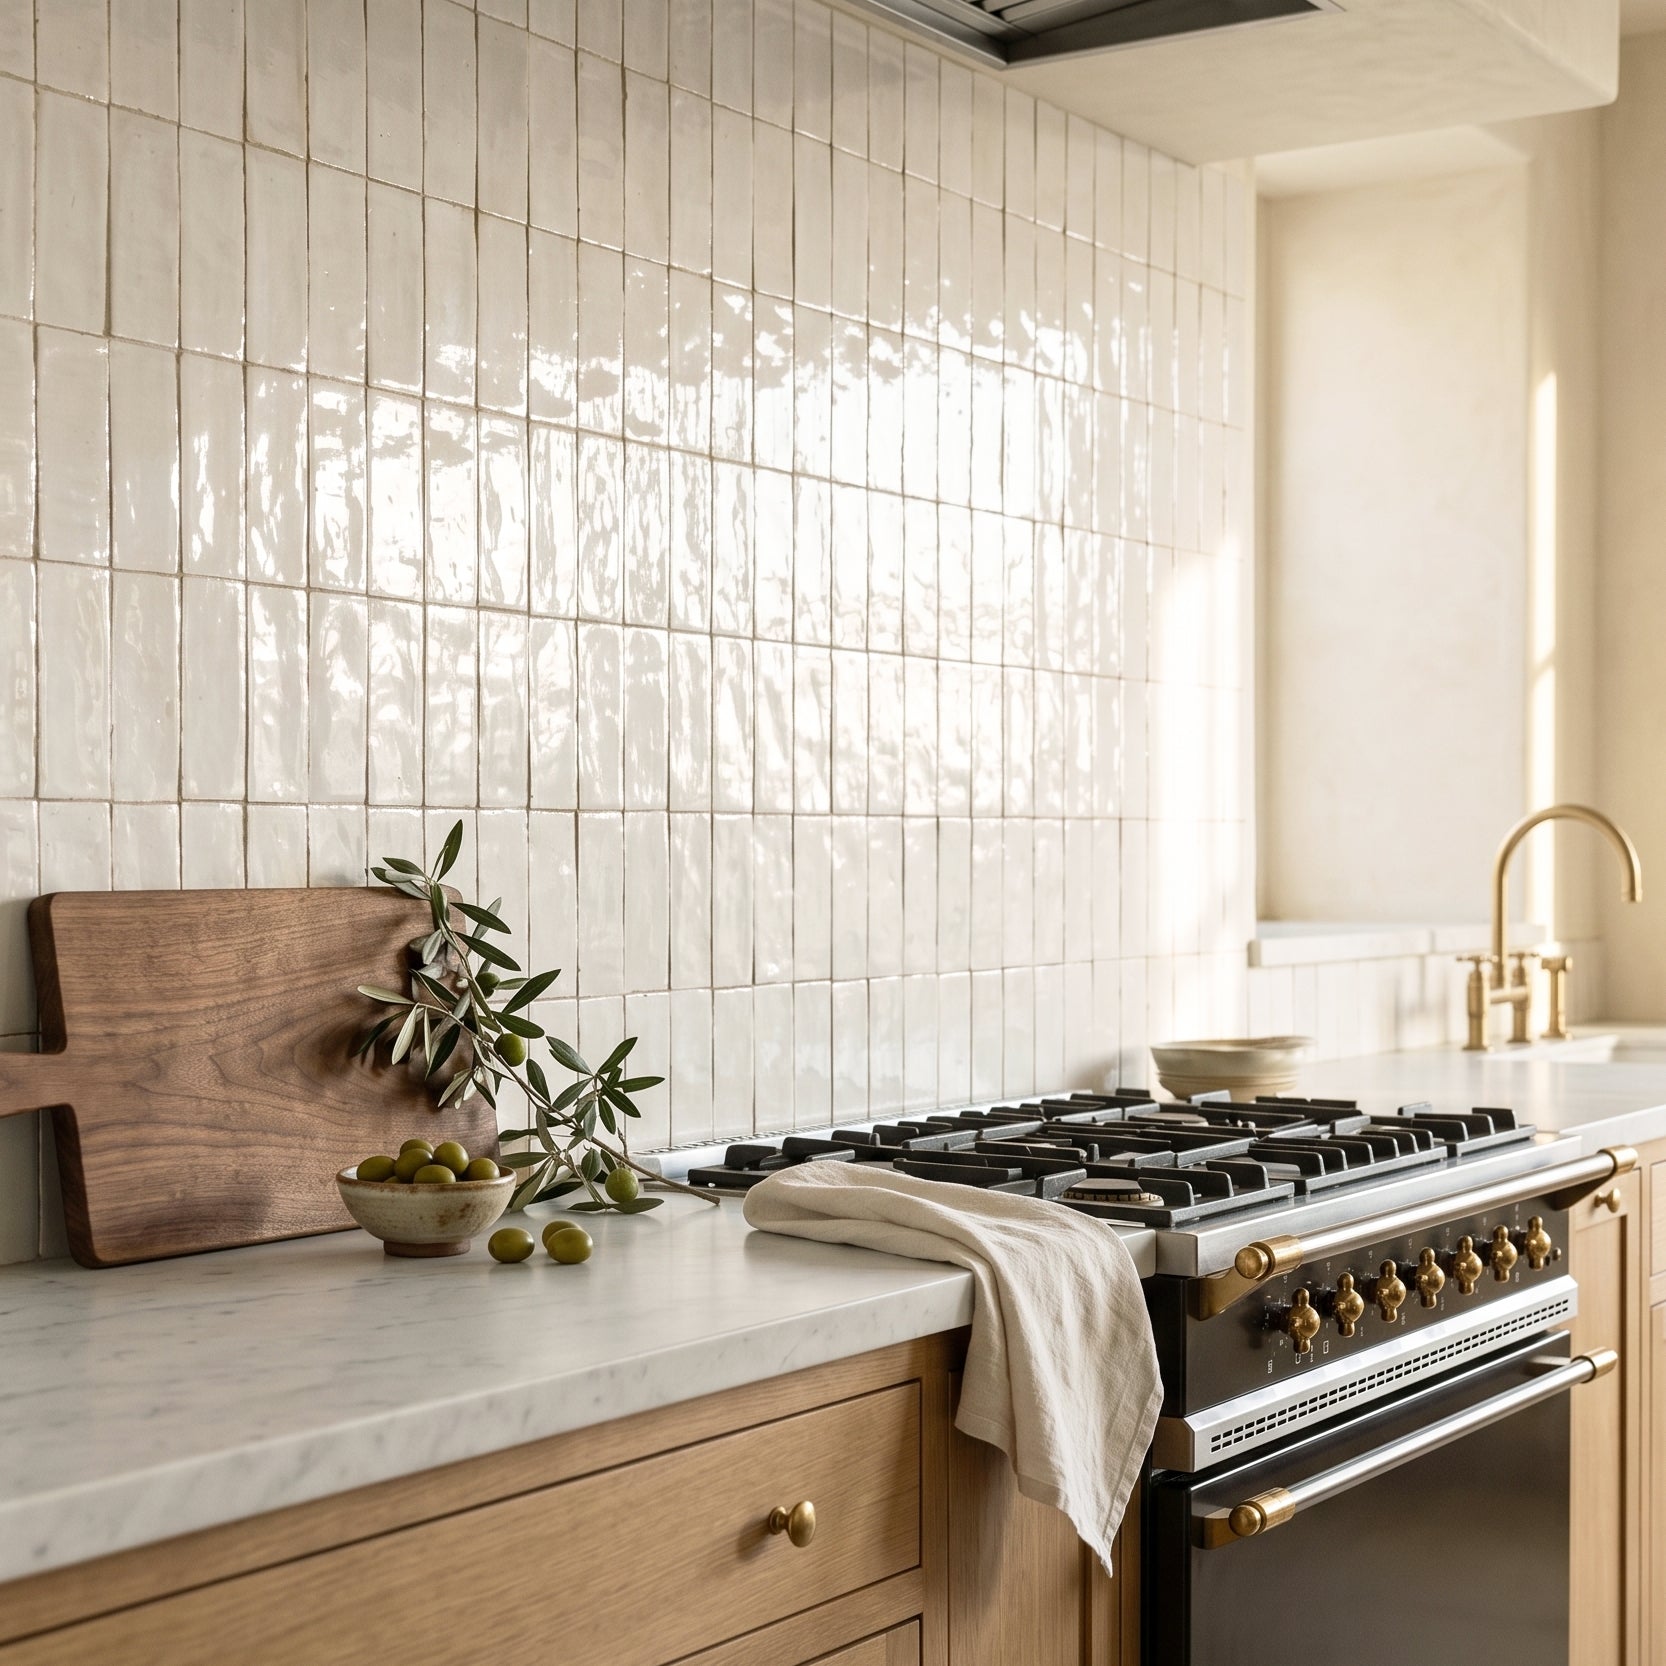
Where to Install
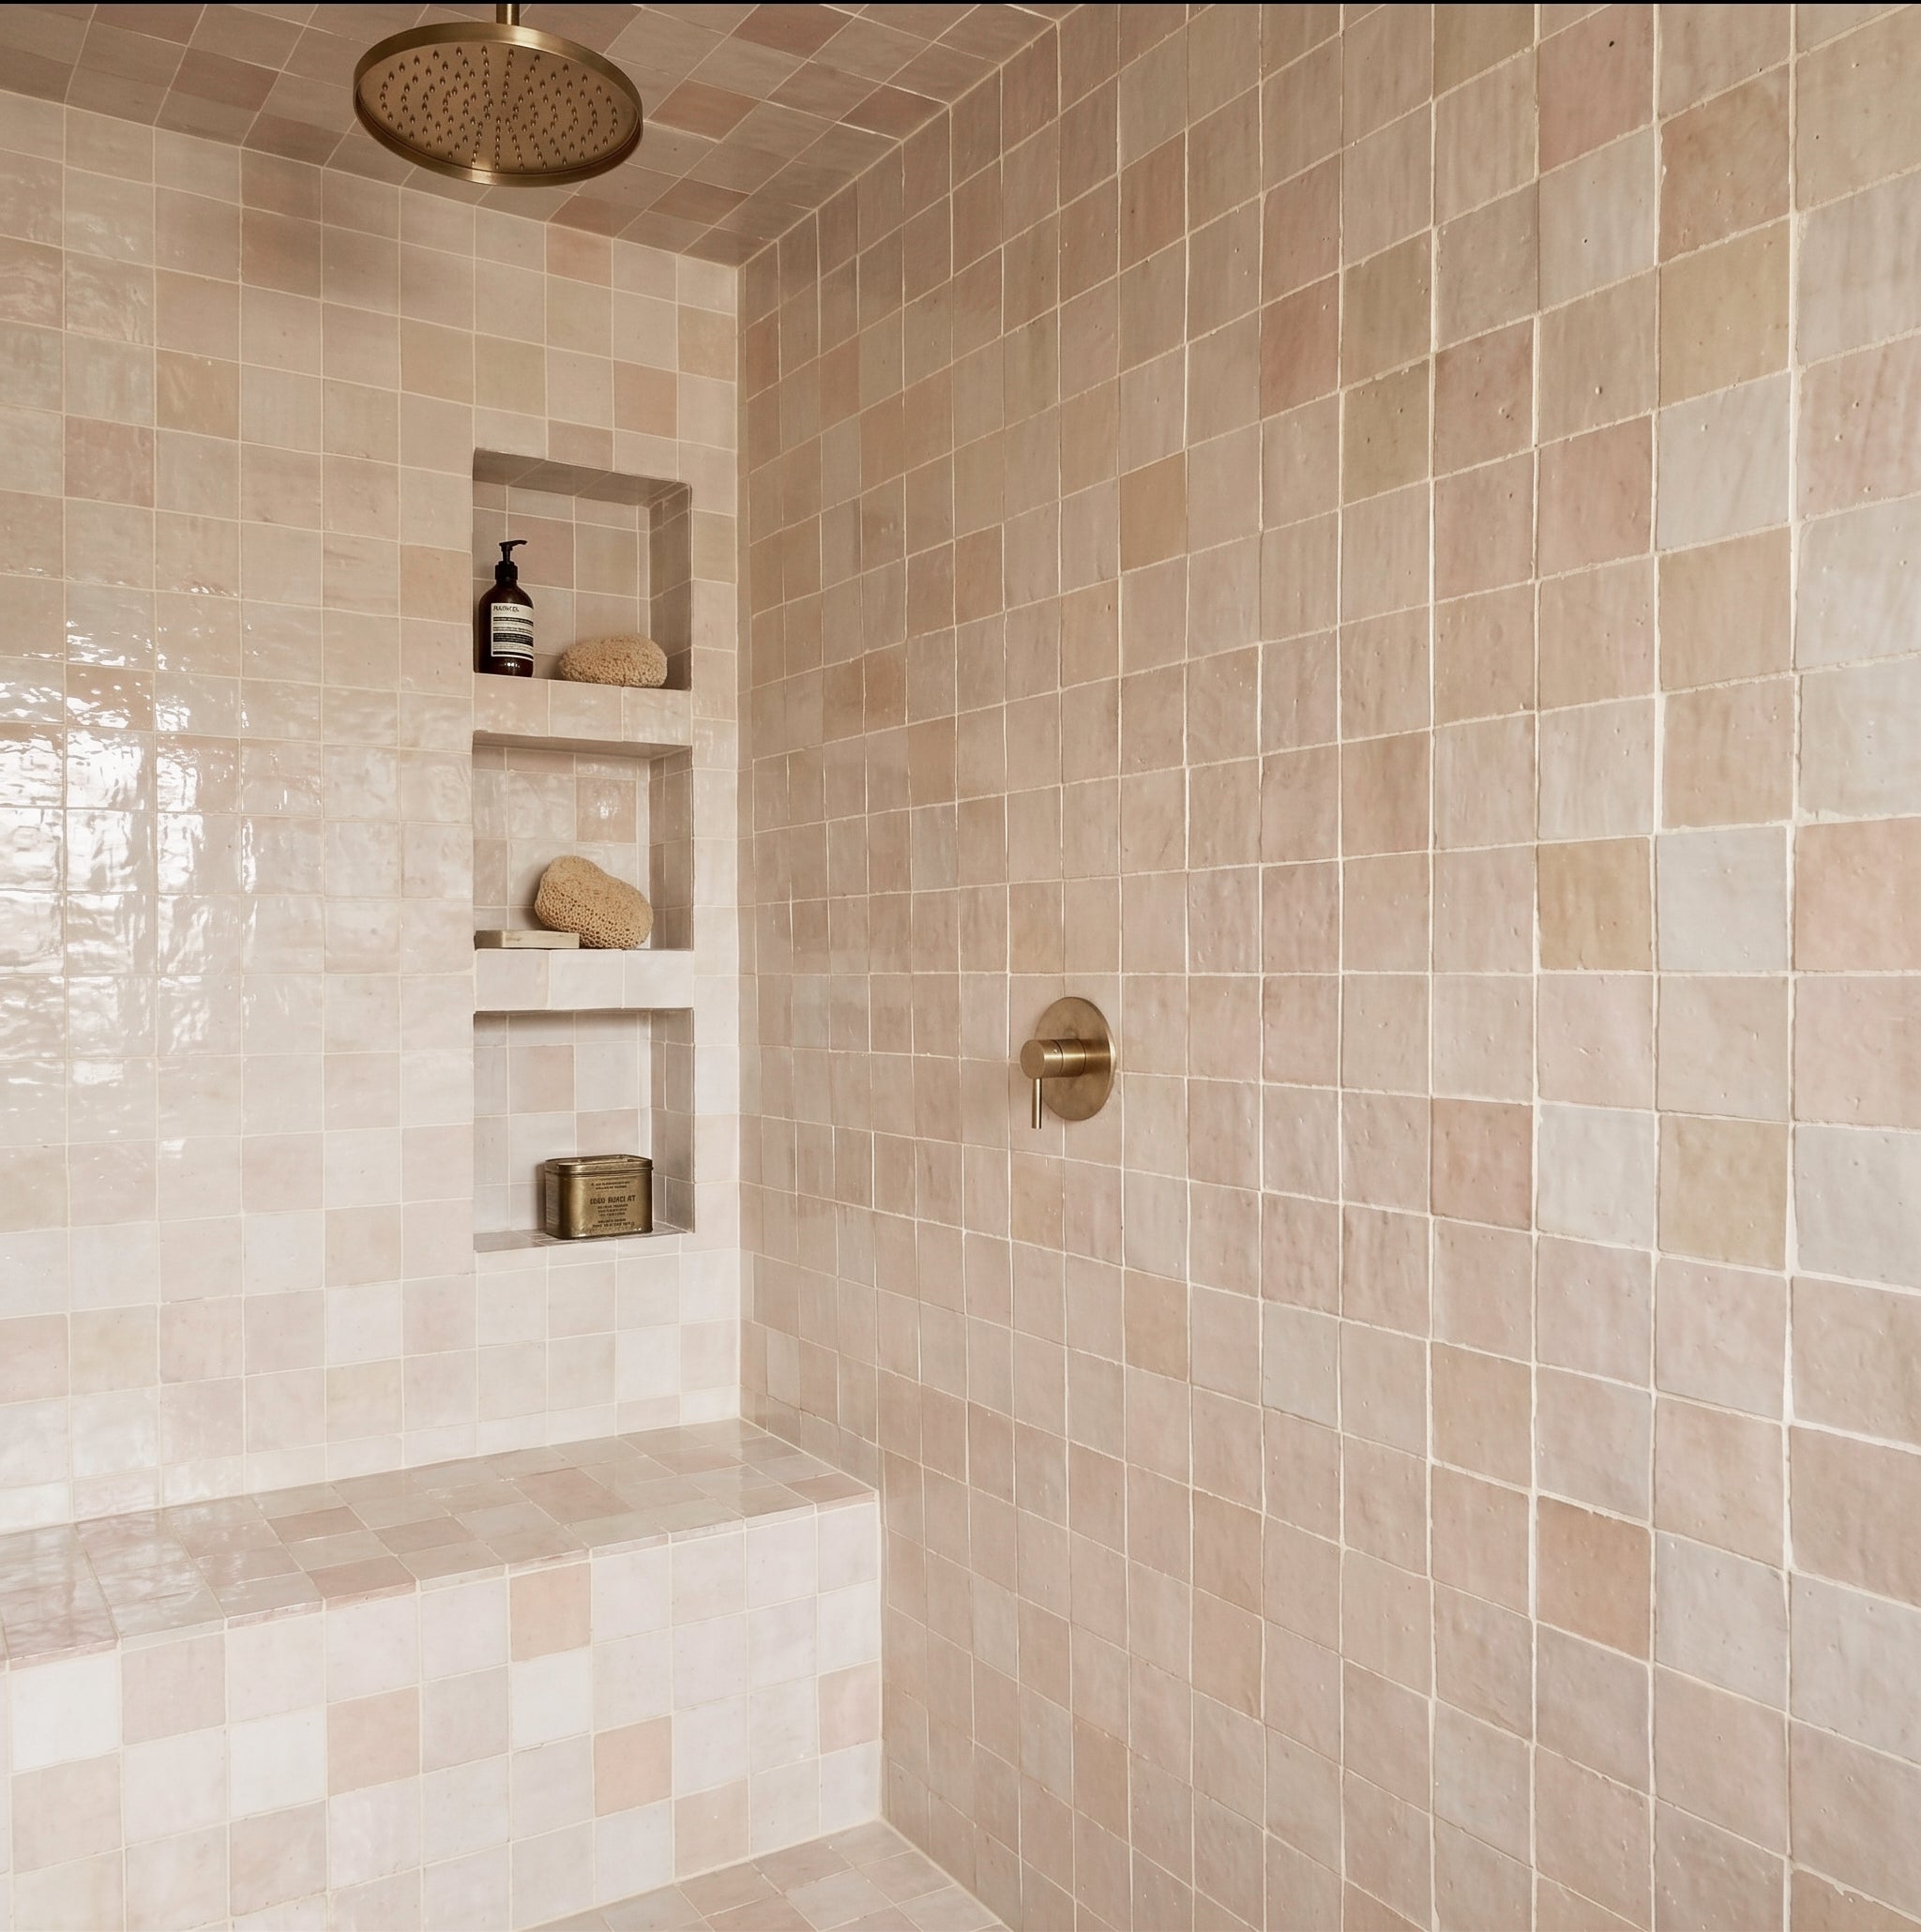
WALLS
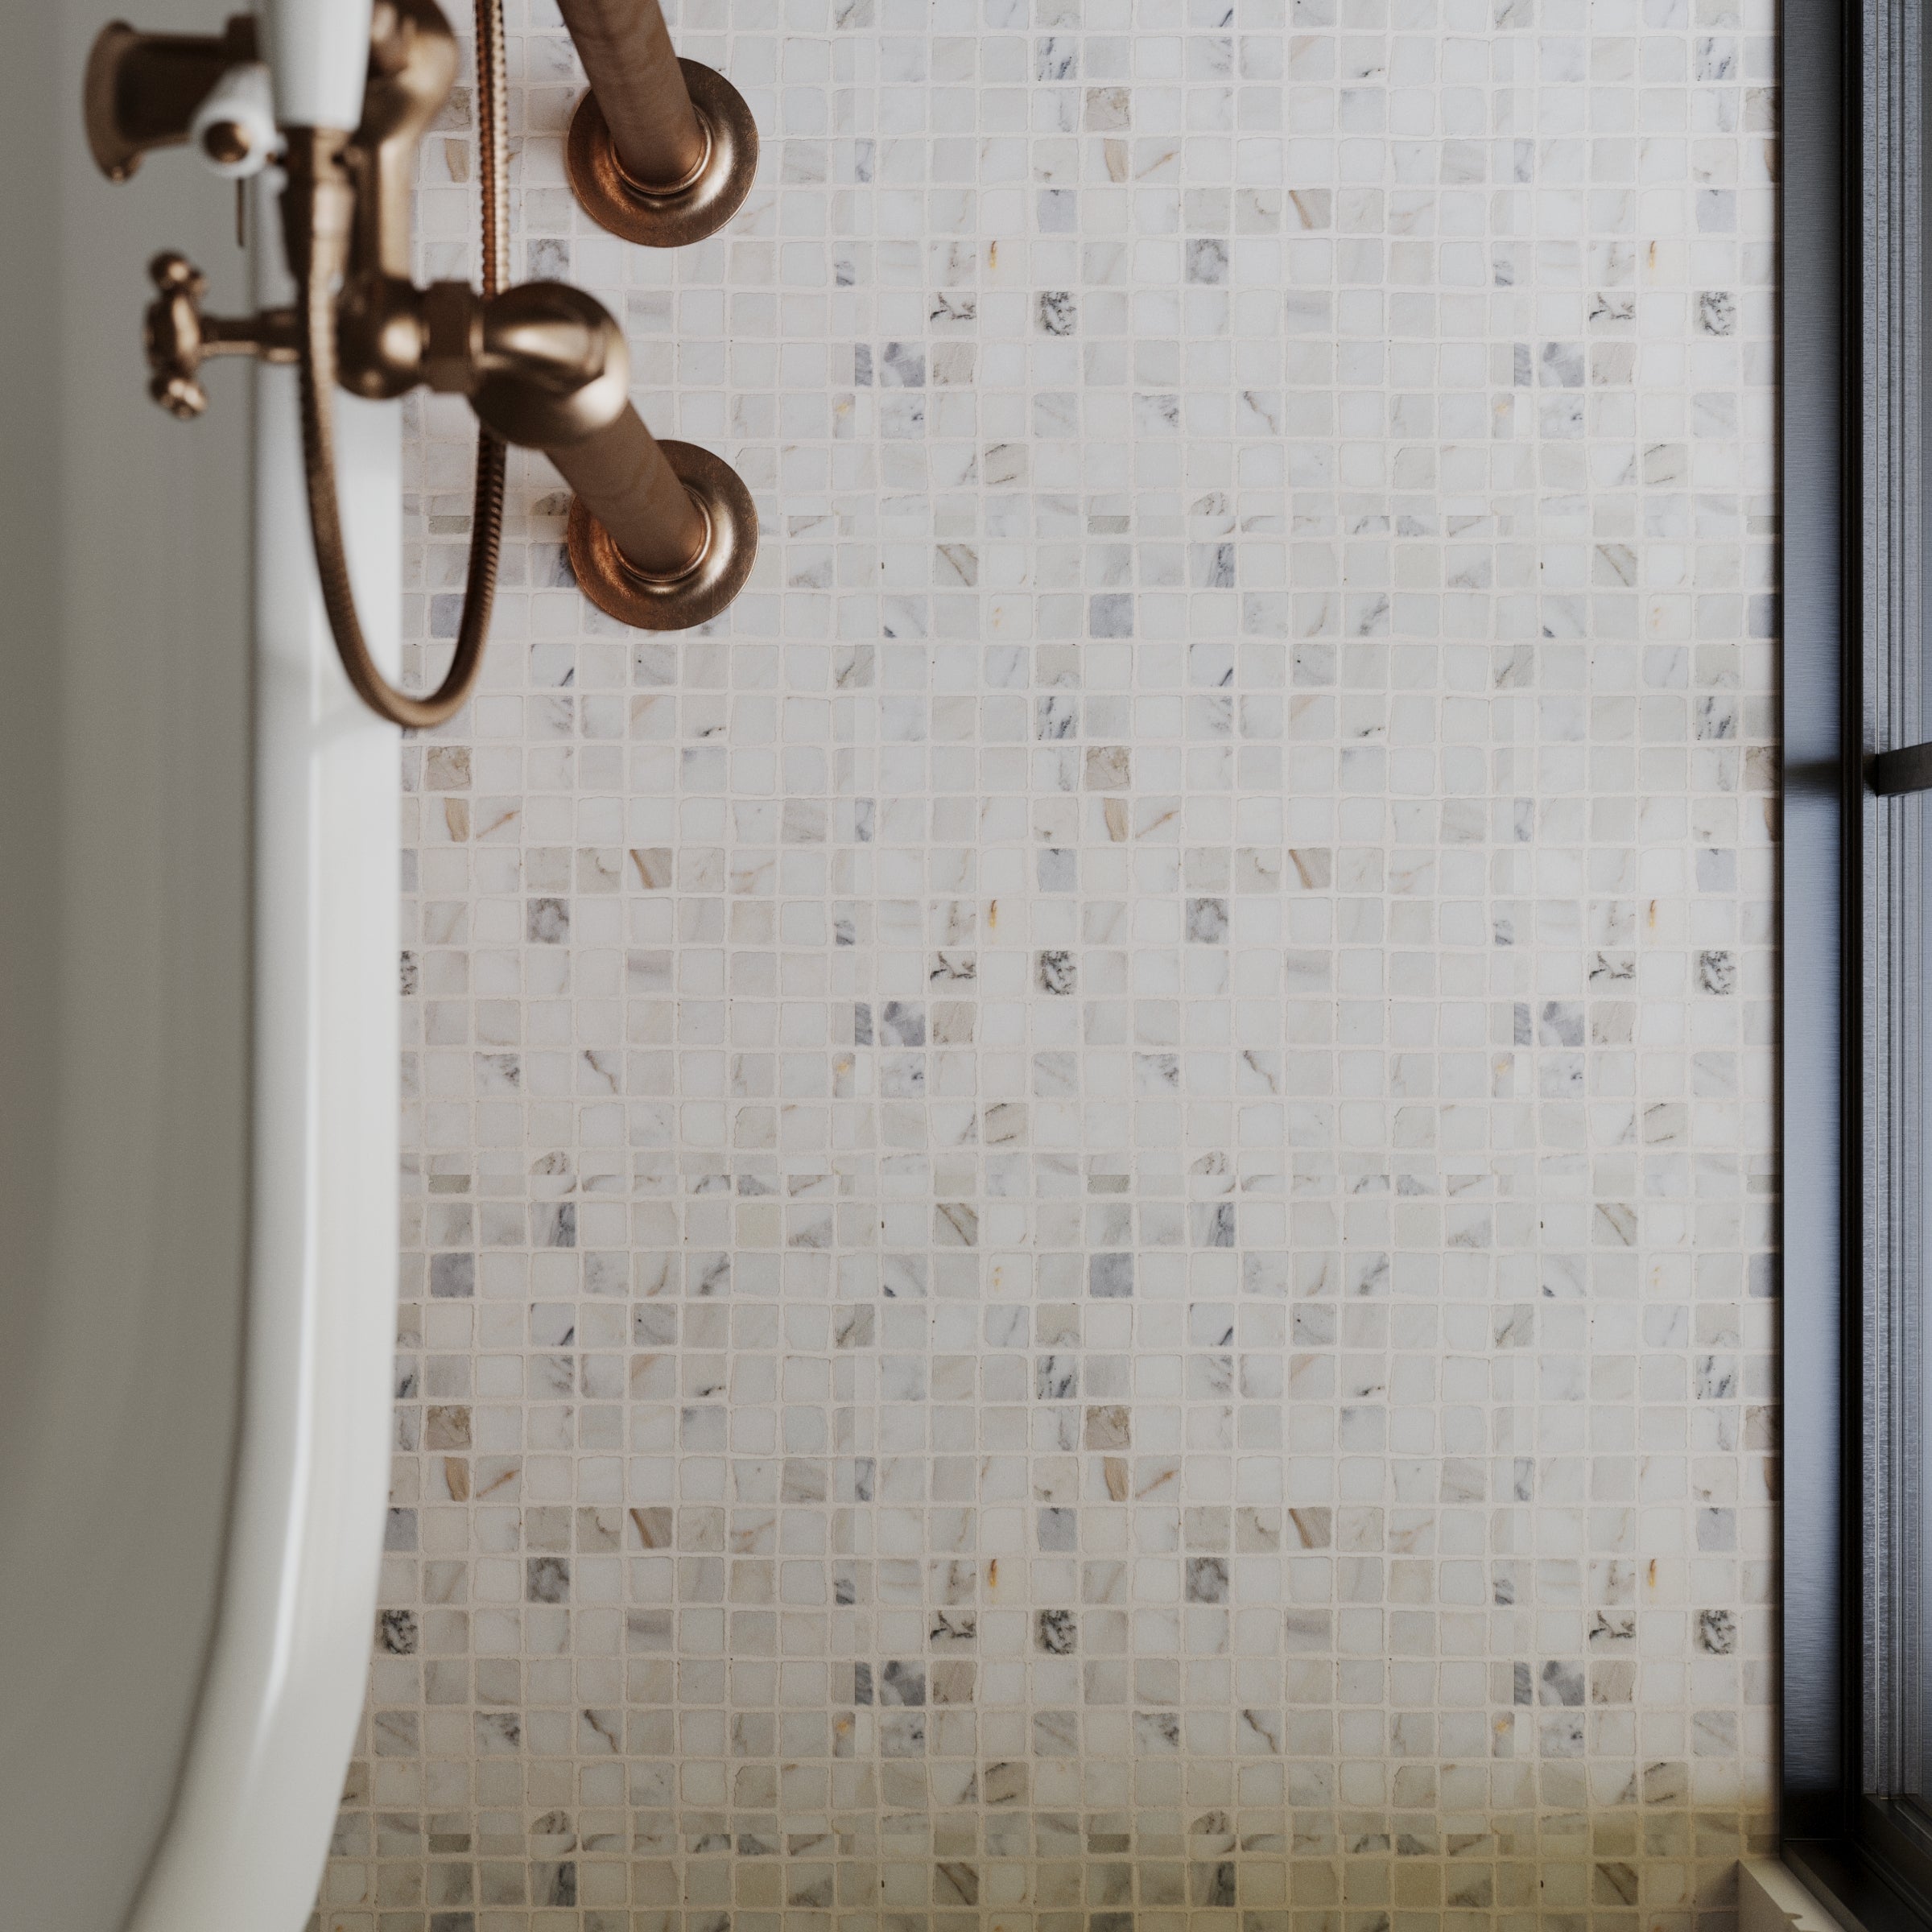
SHOWER WALL
BACKSPLASH
SHOWER FLOOR
FLOORS
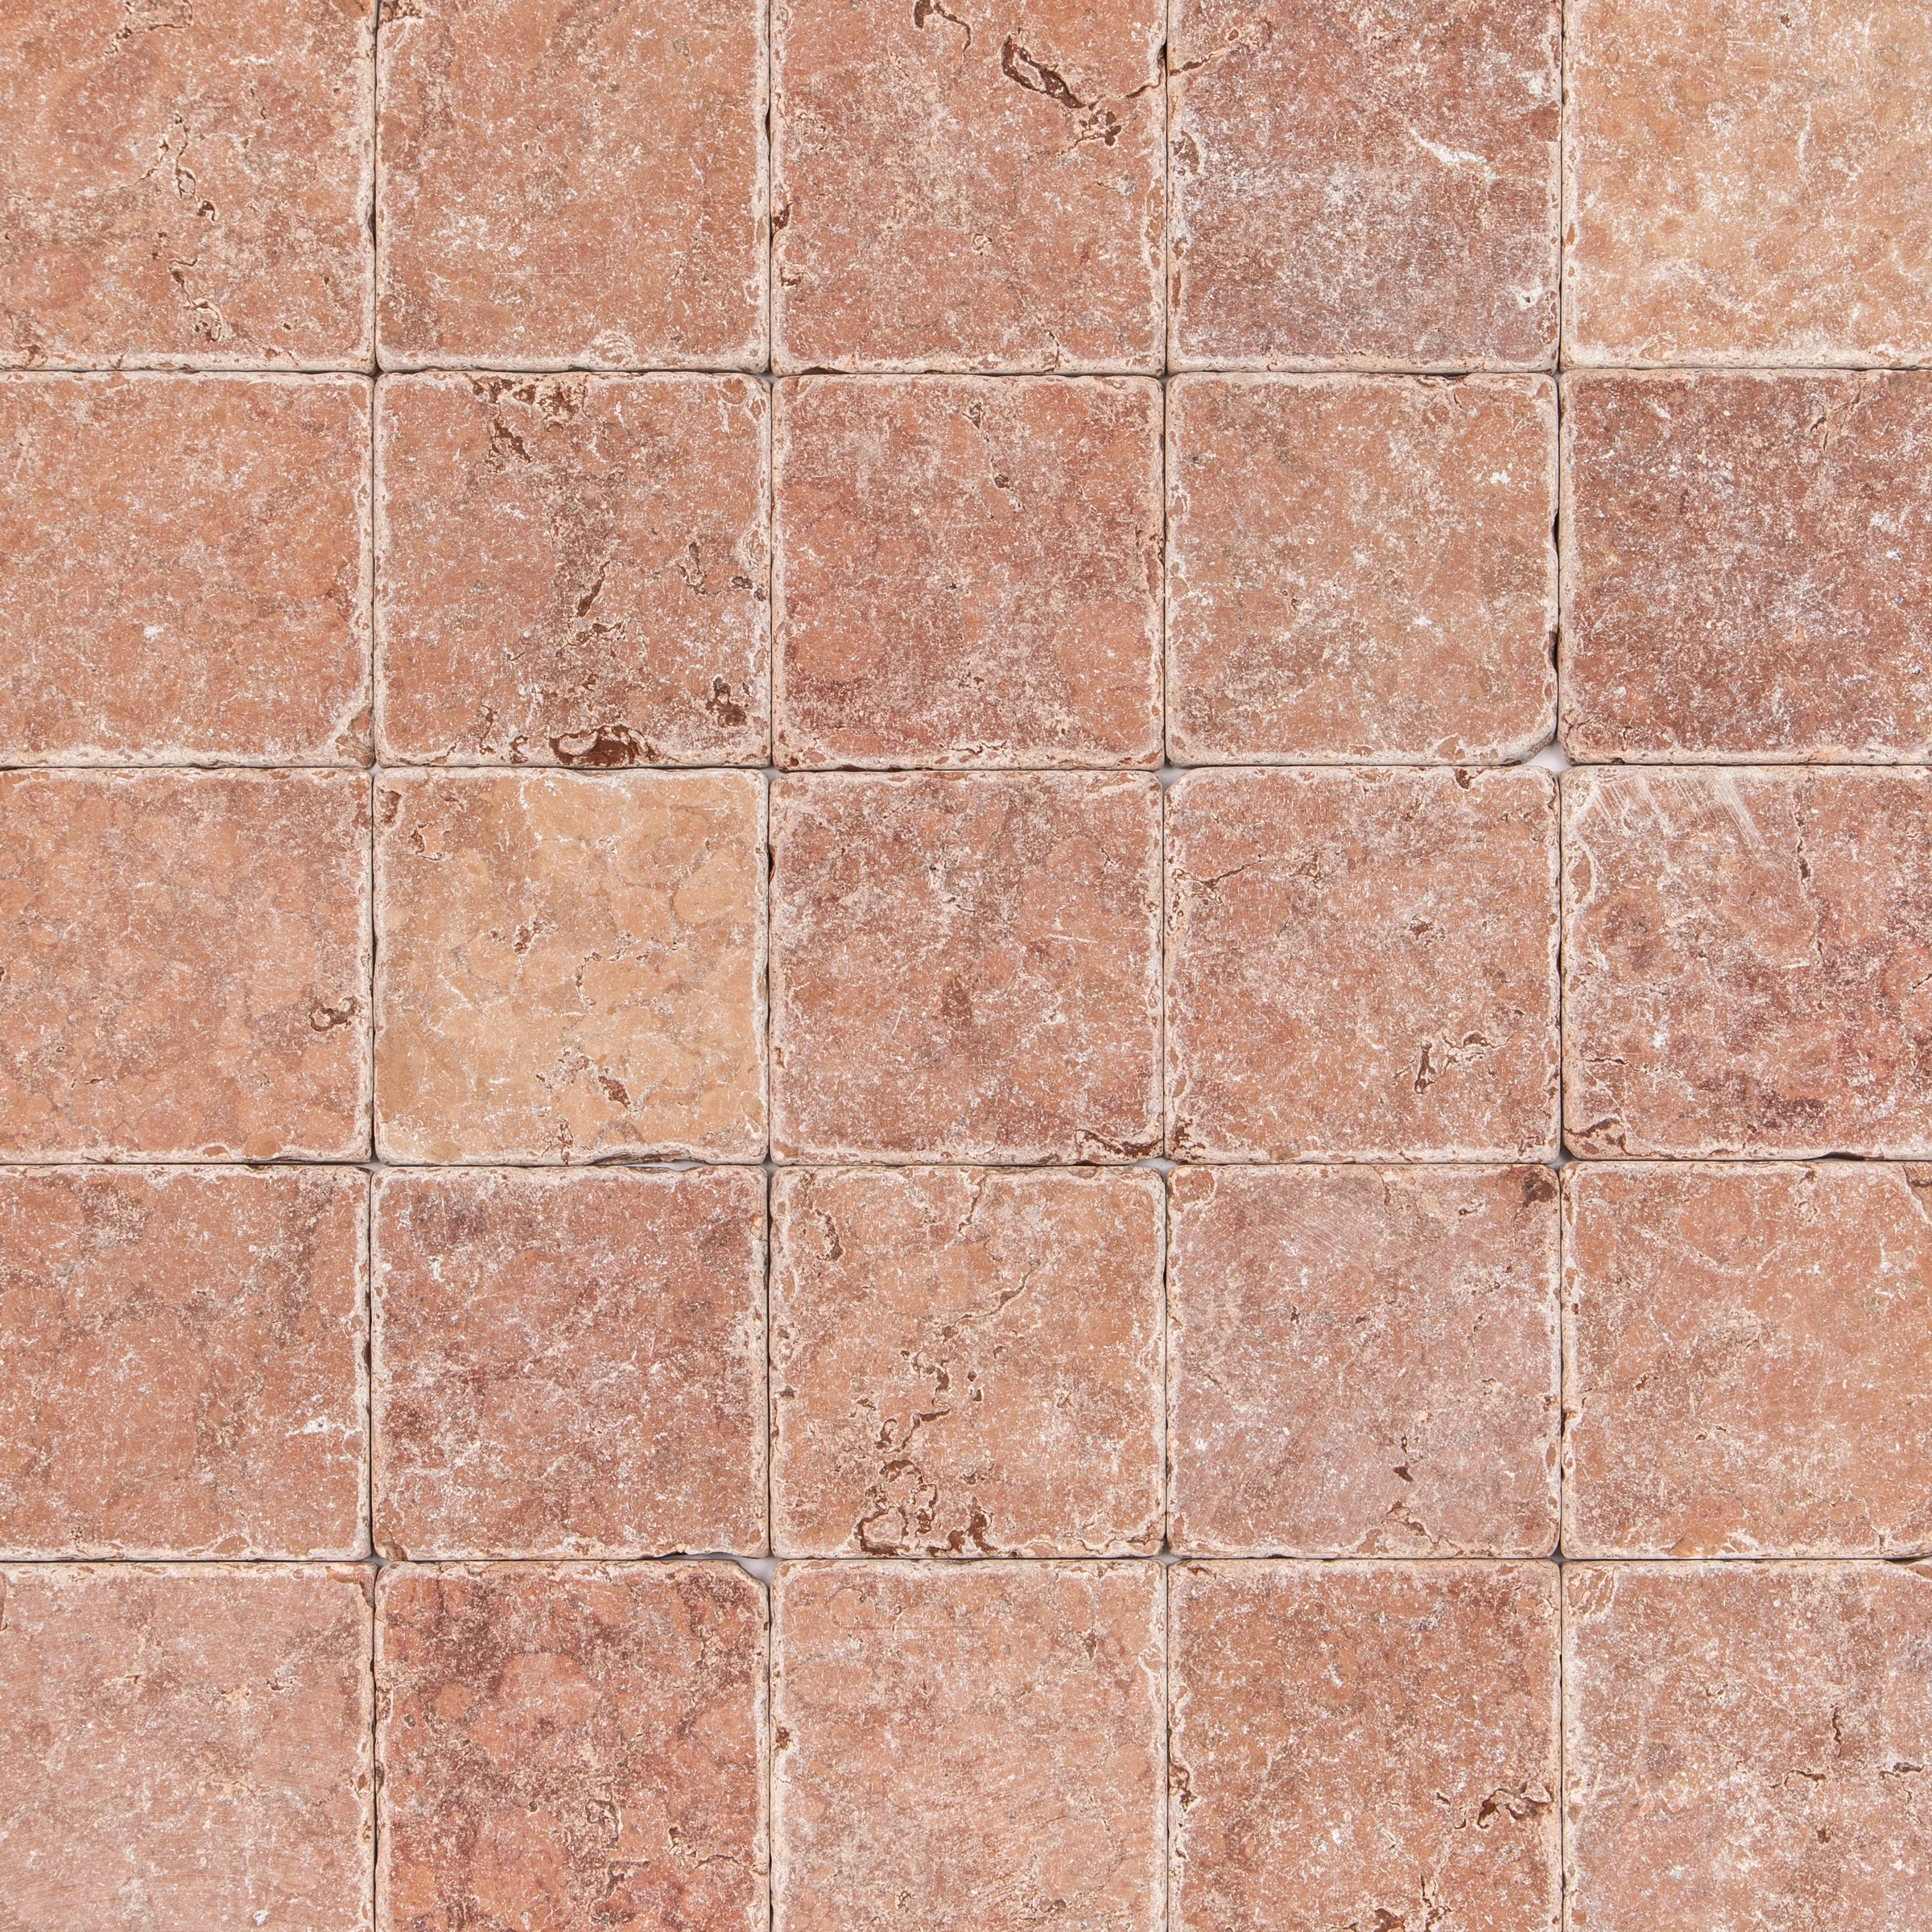
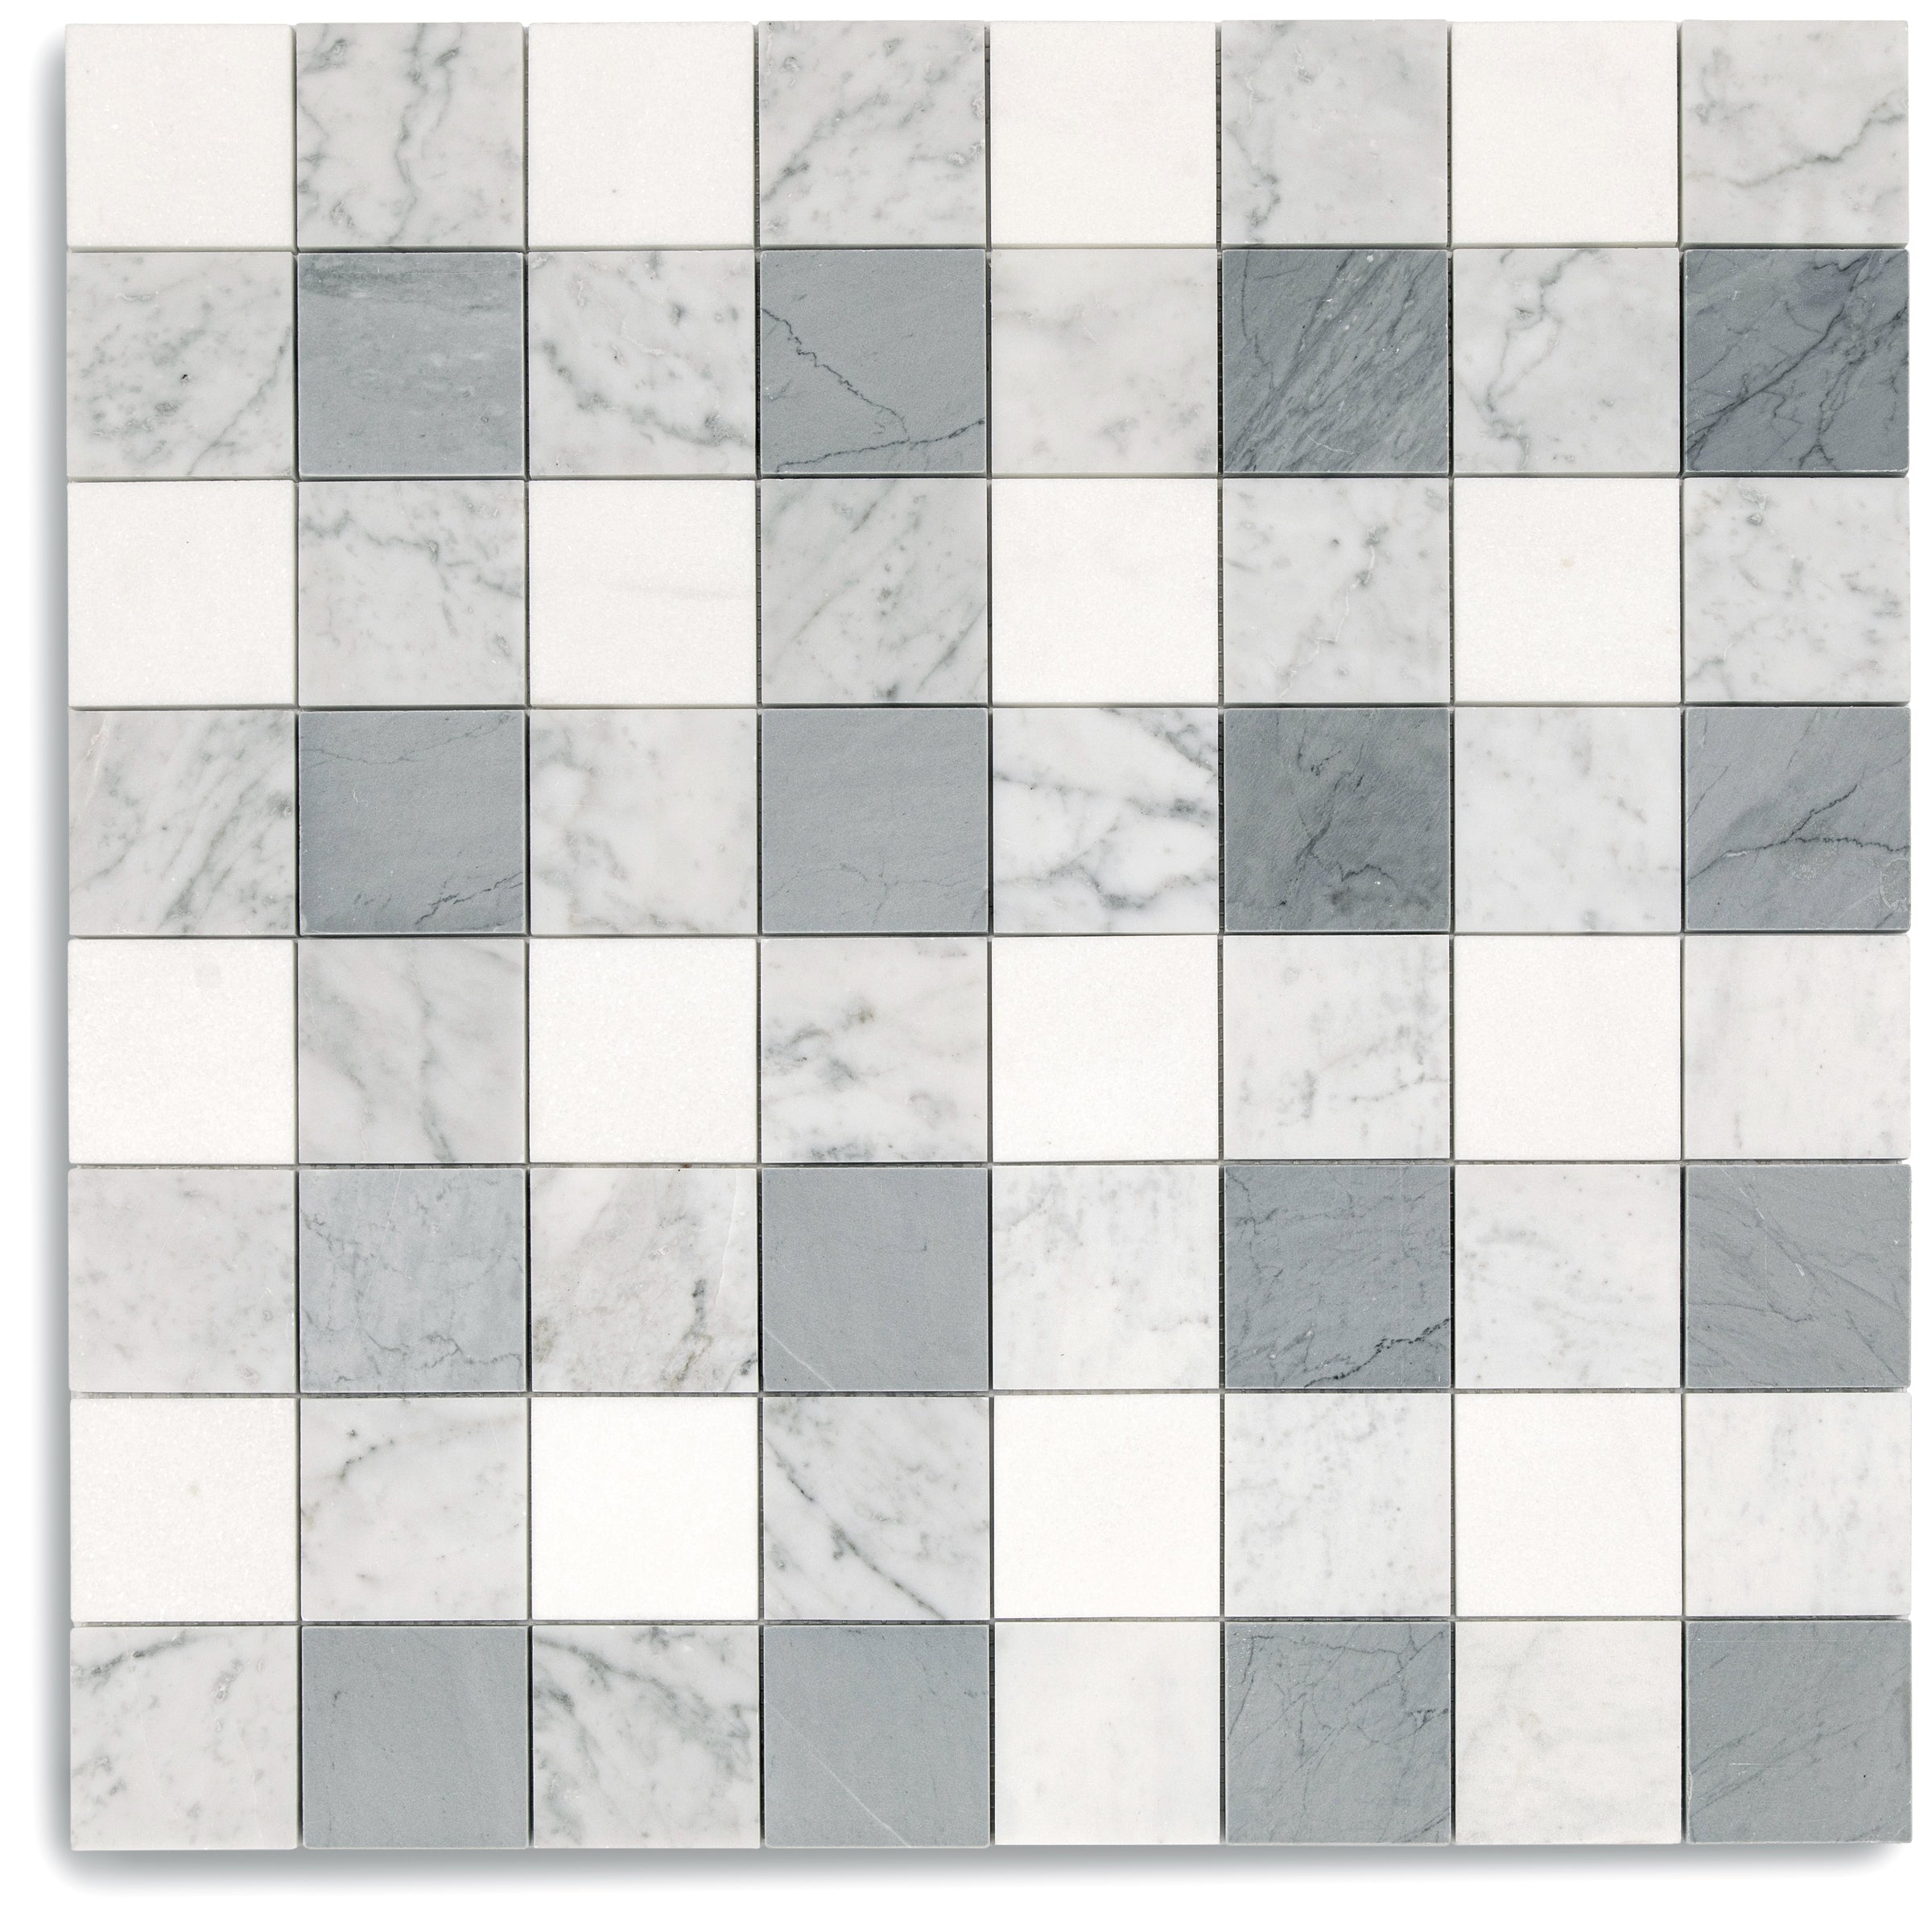
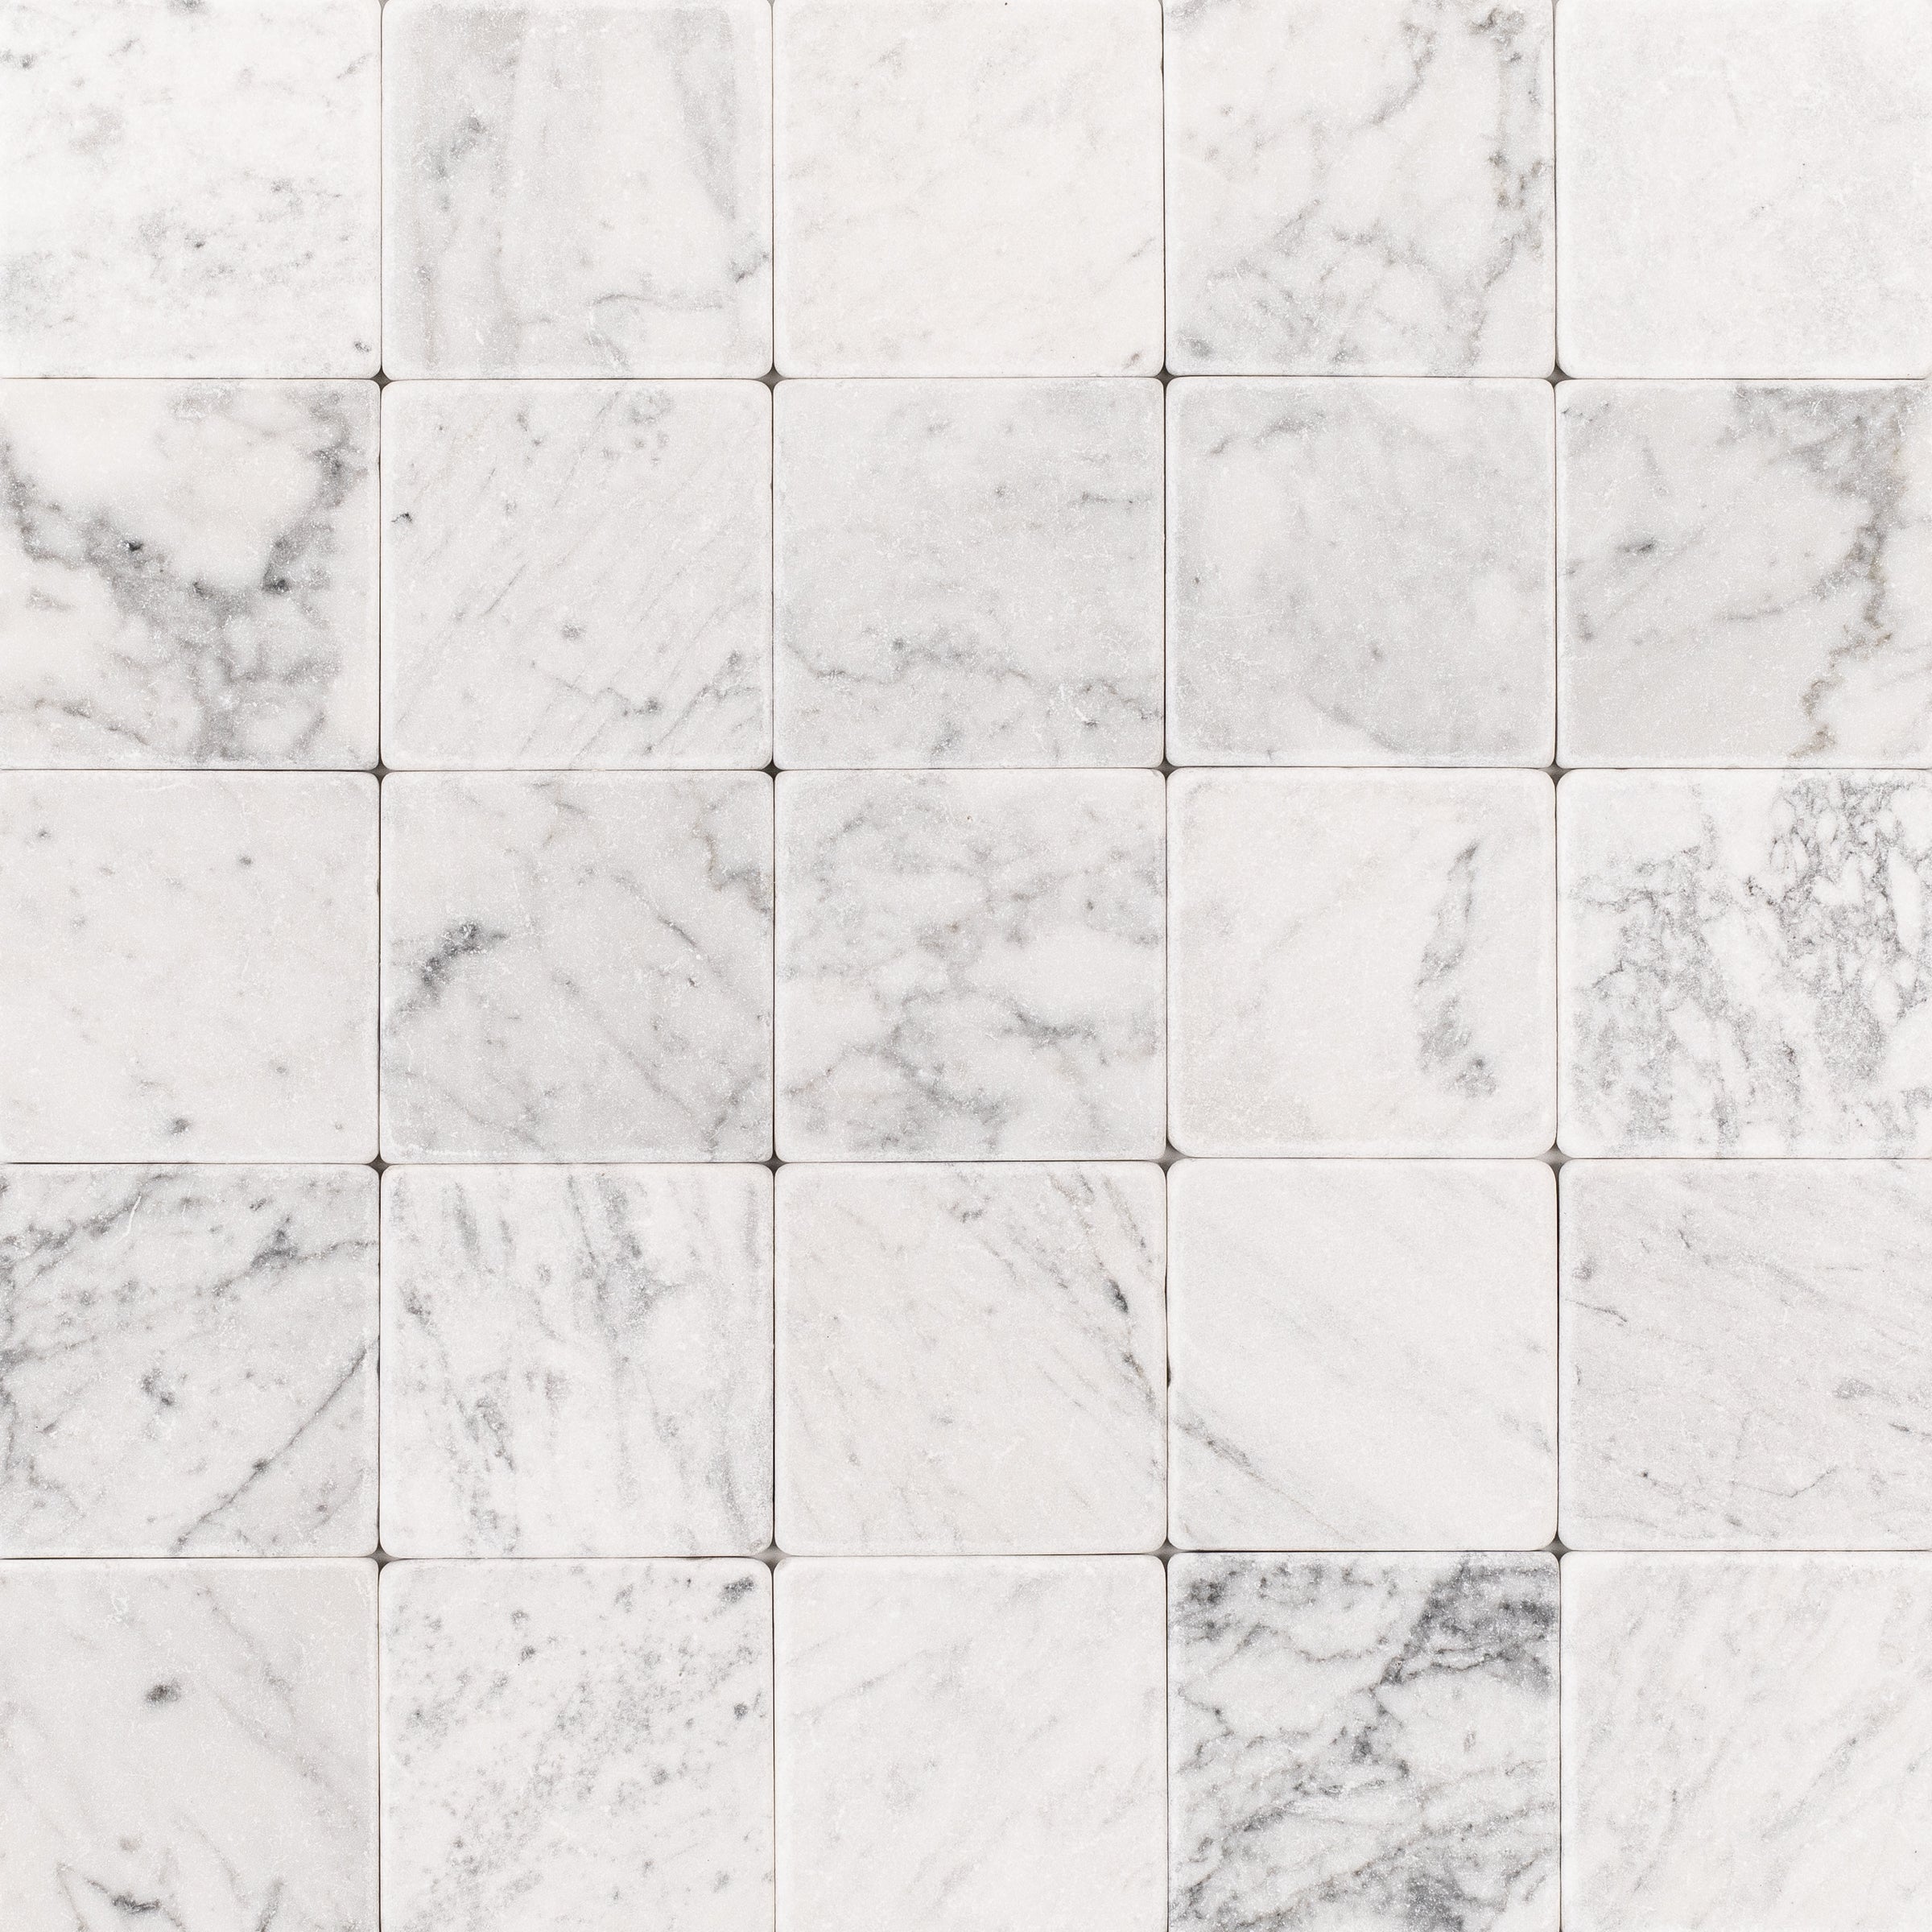
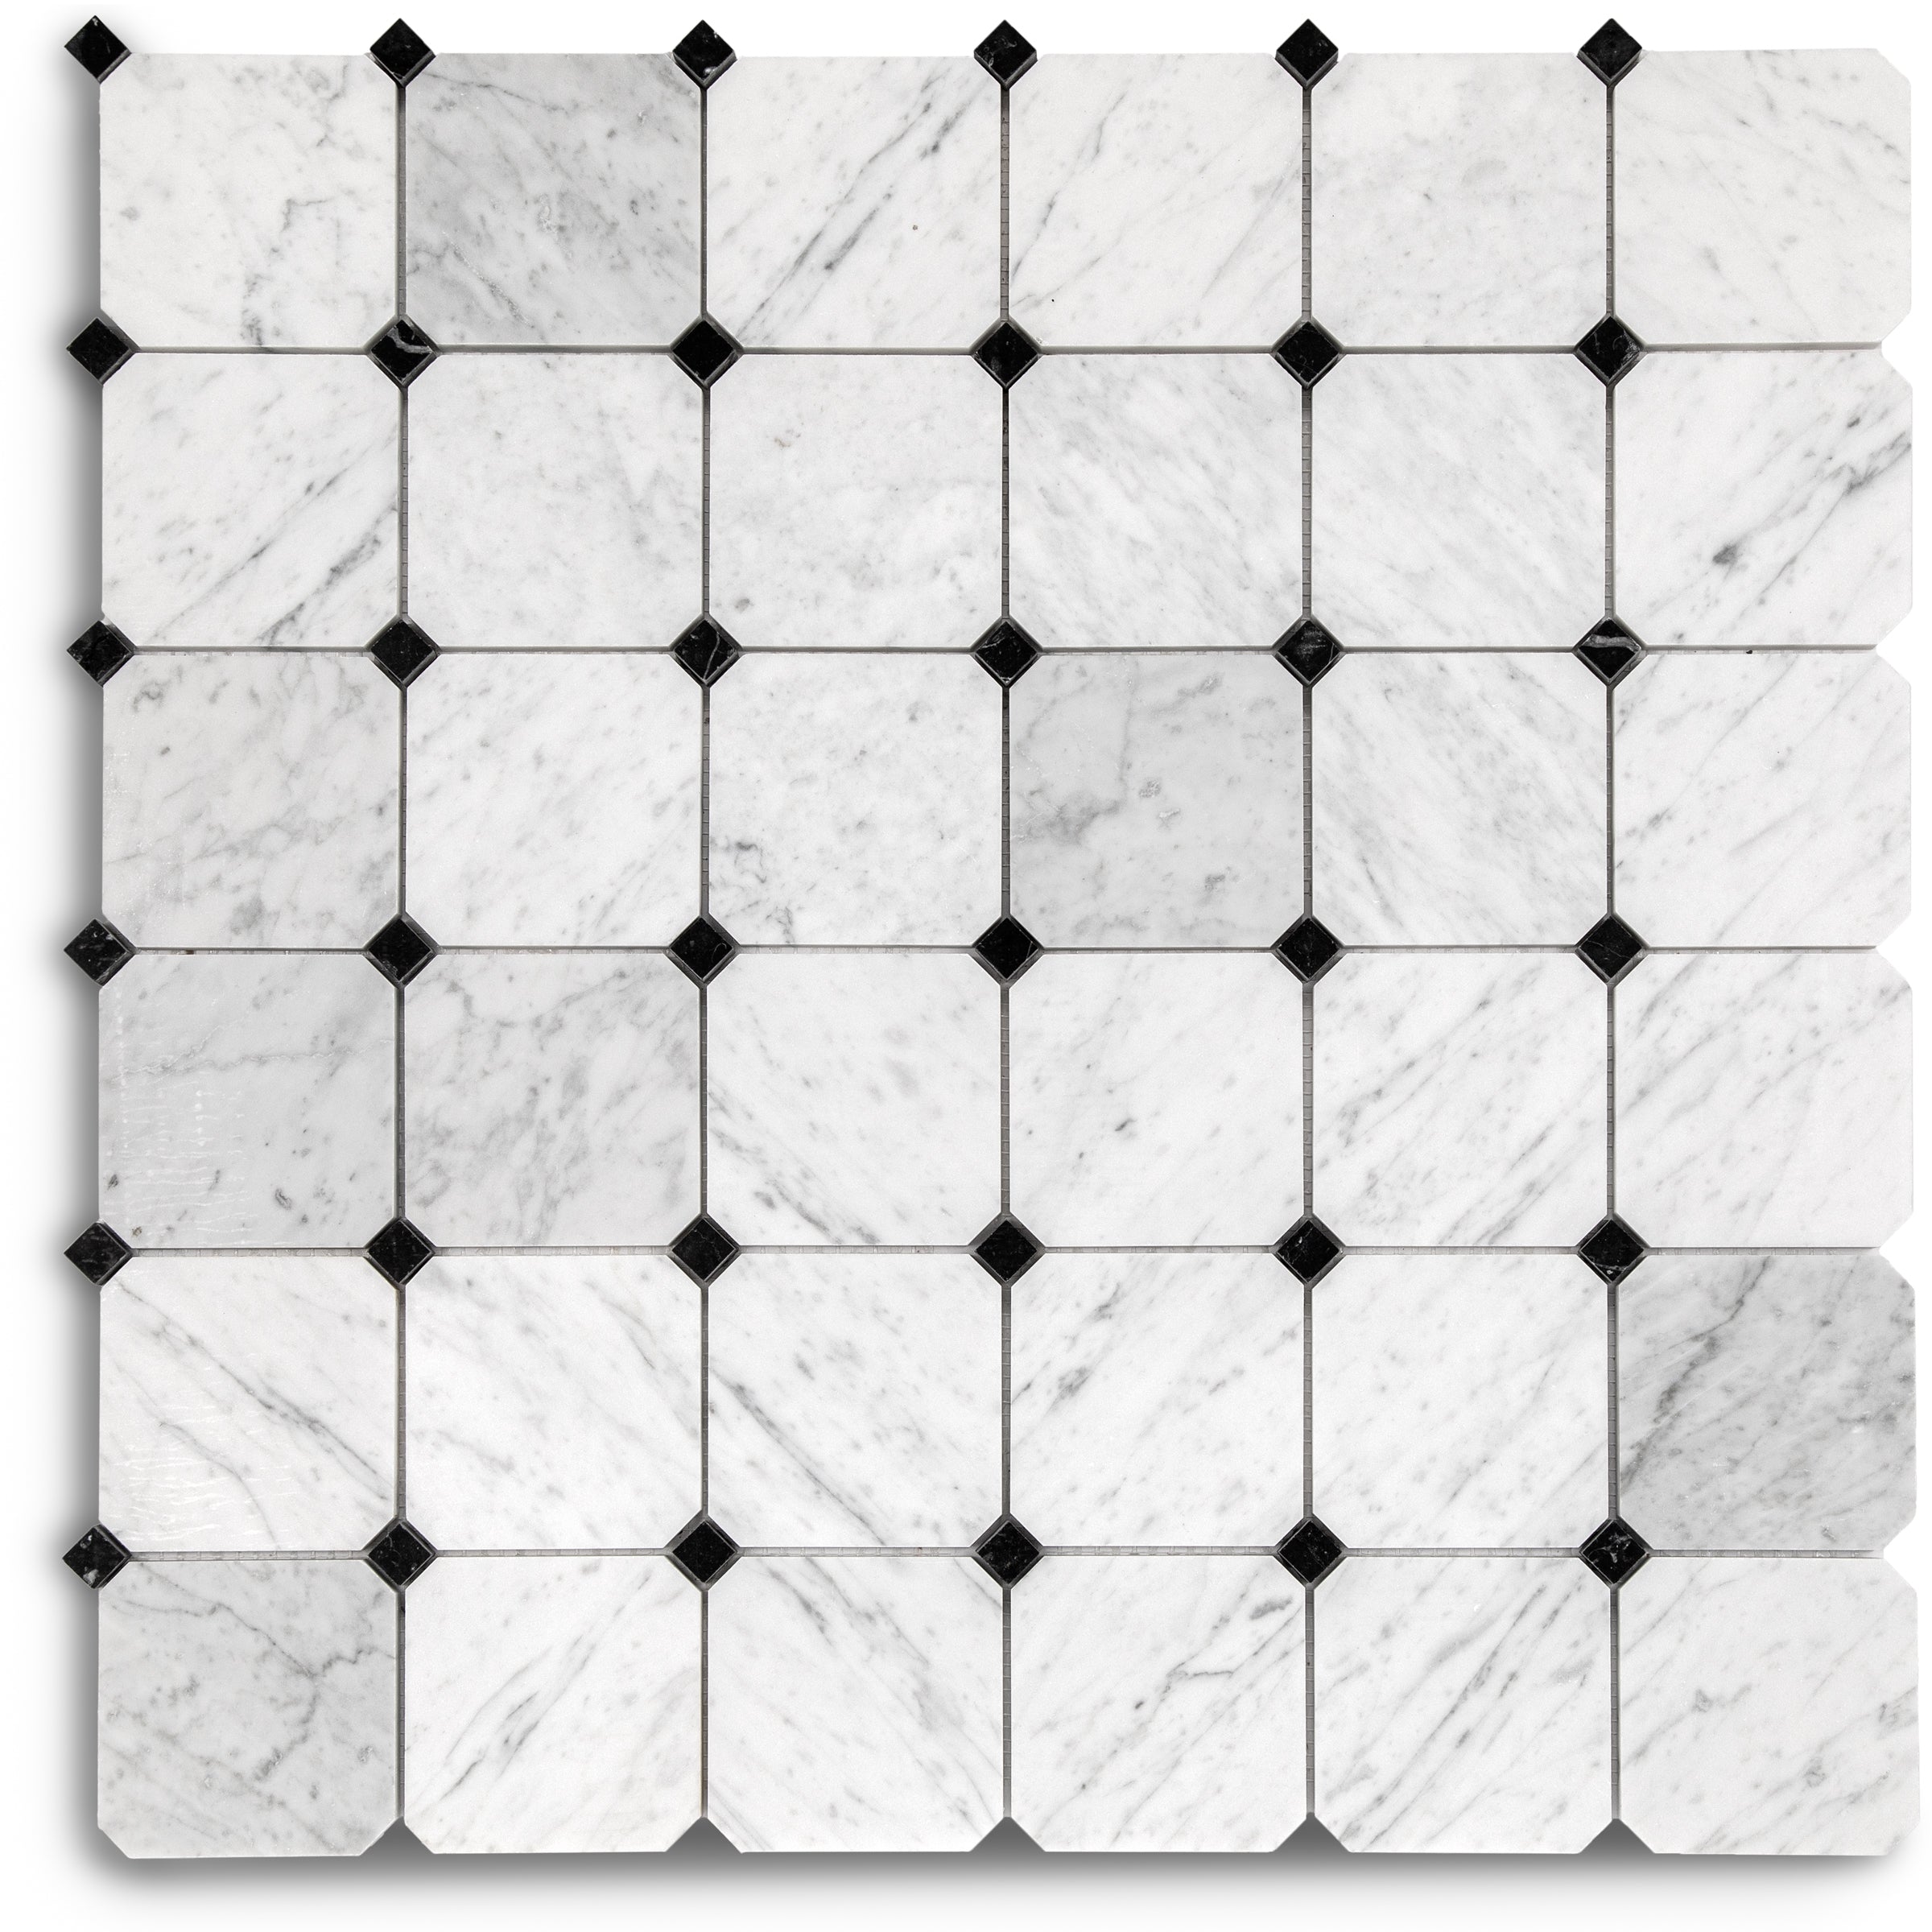
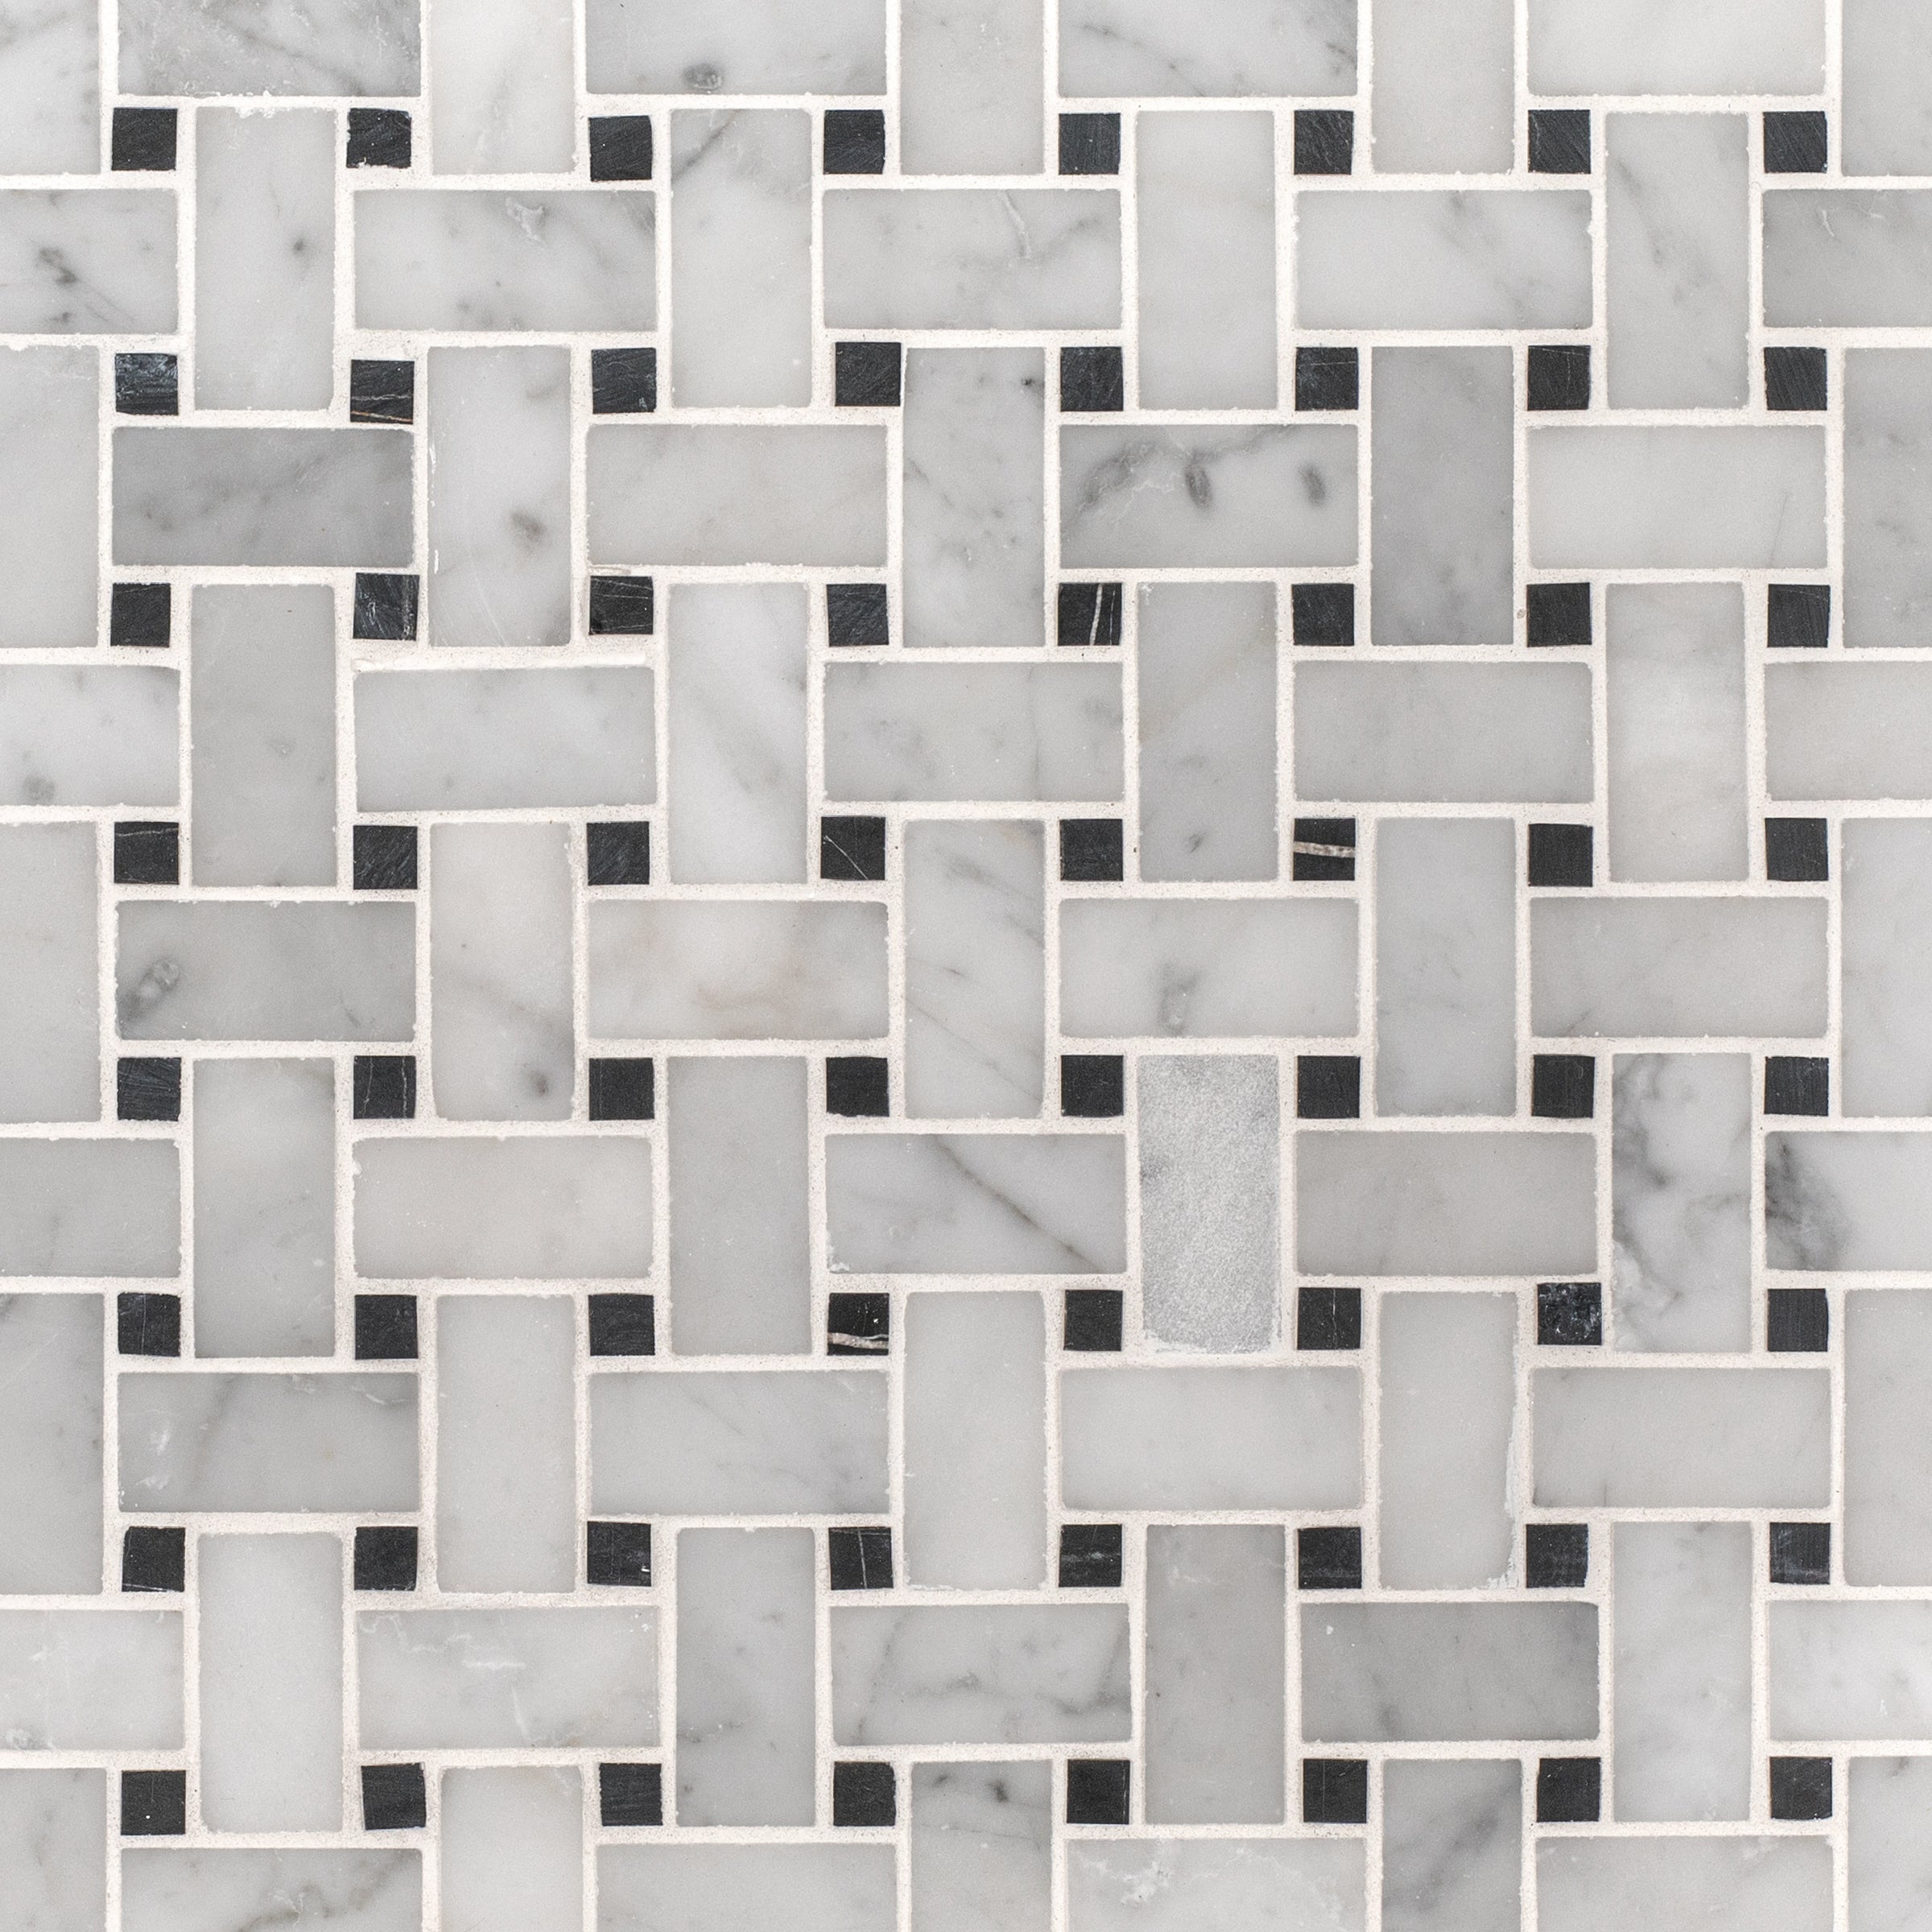
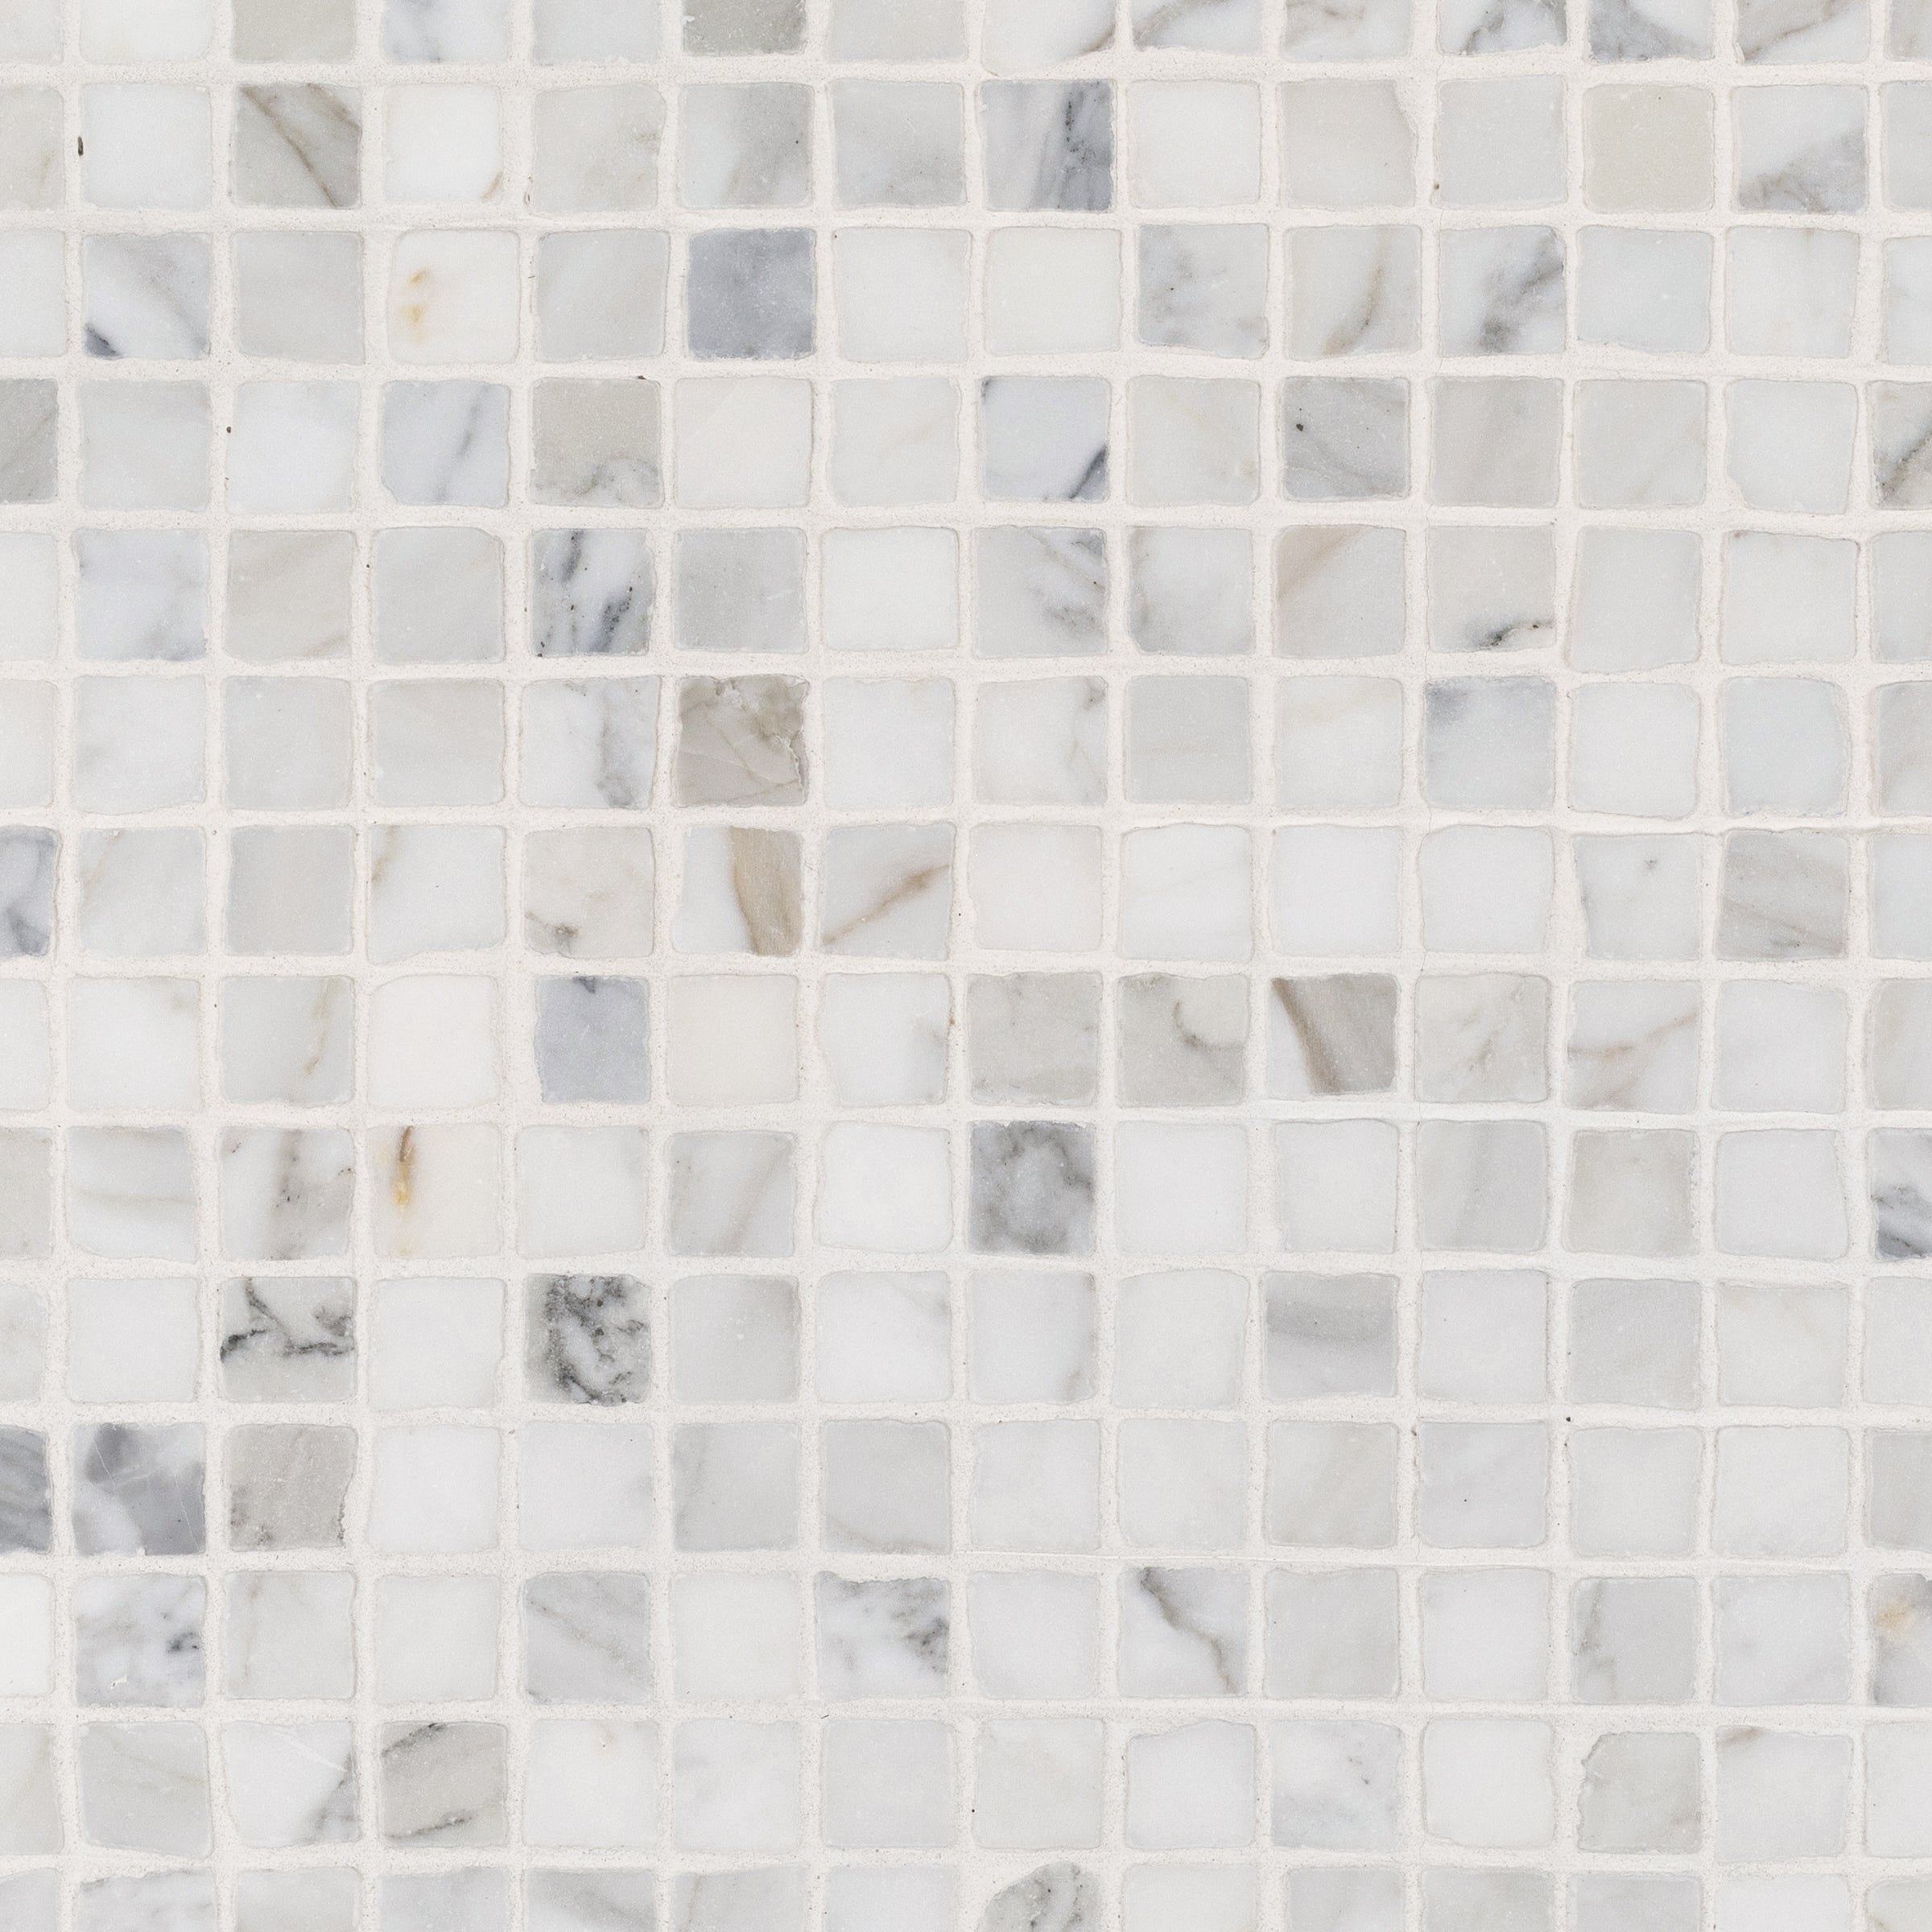
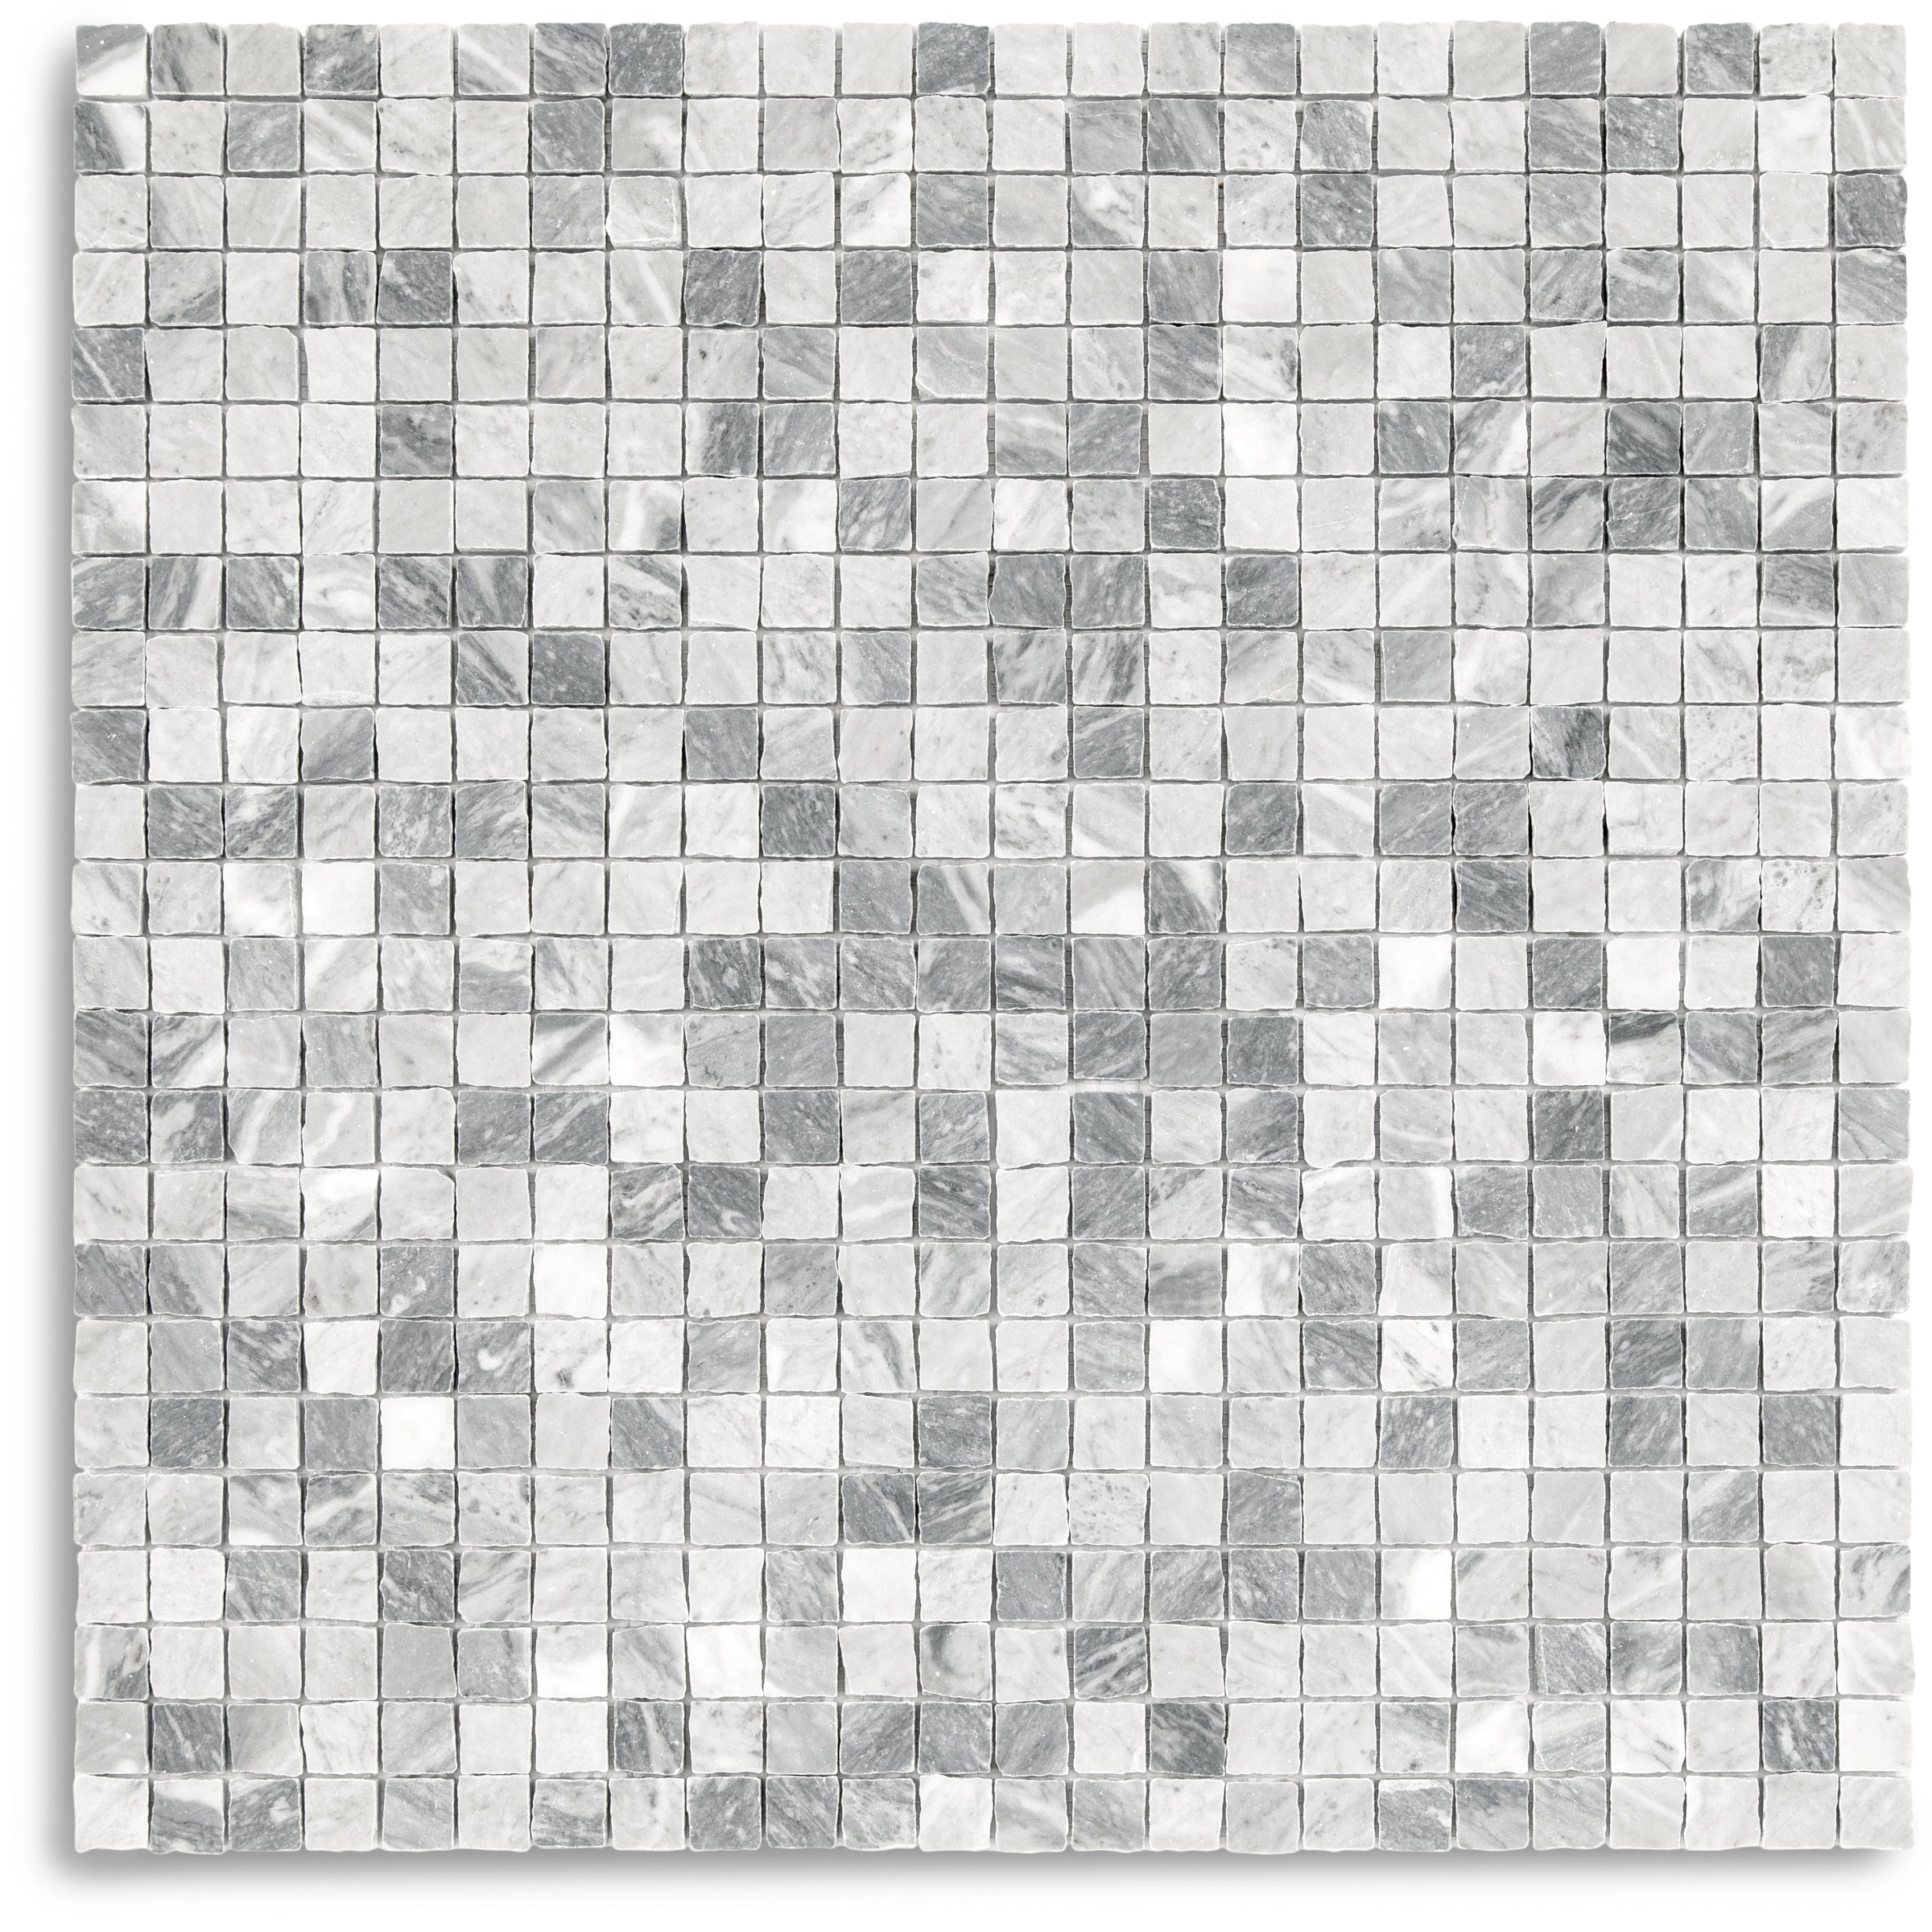
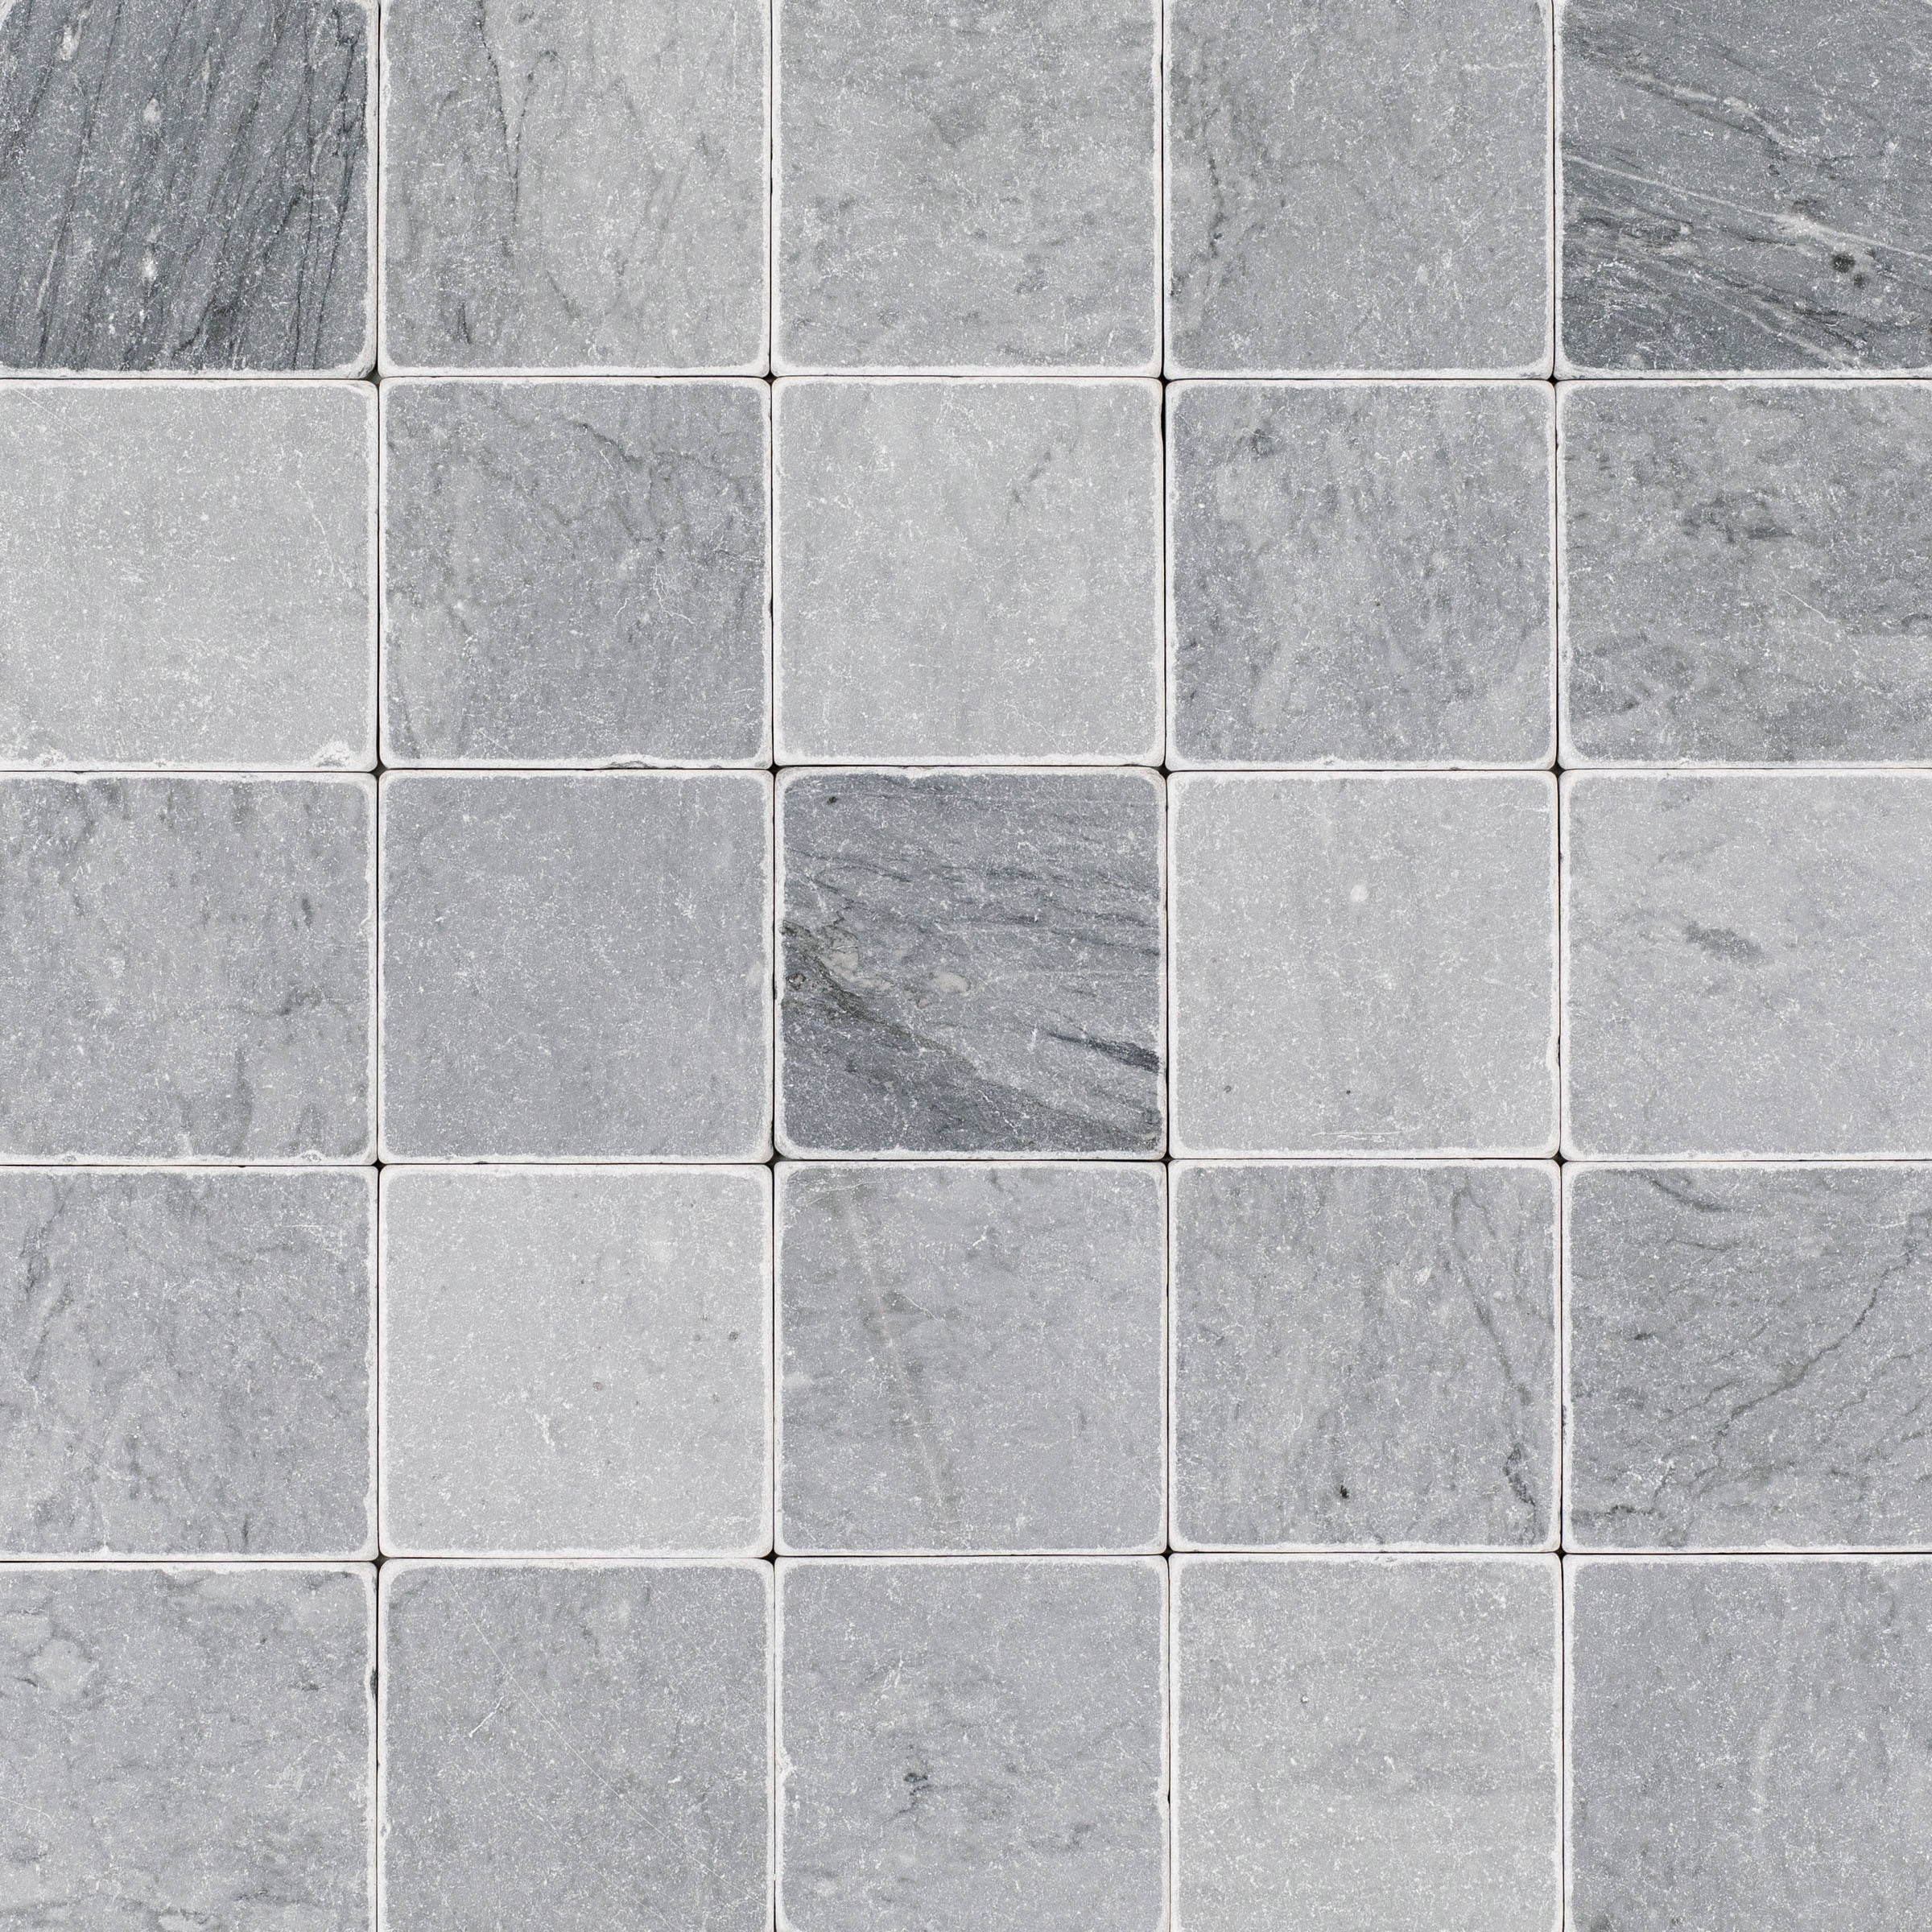
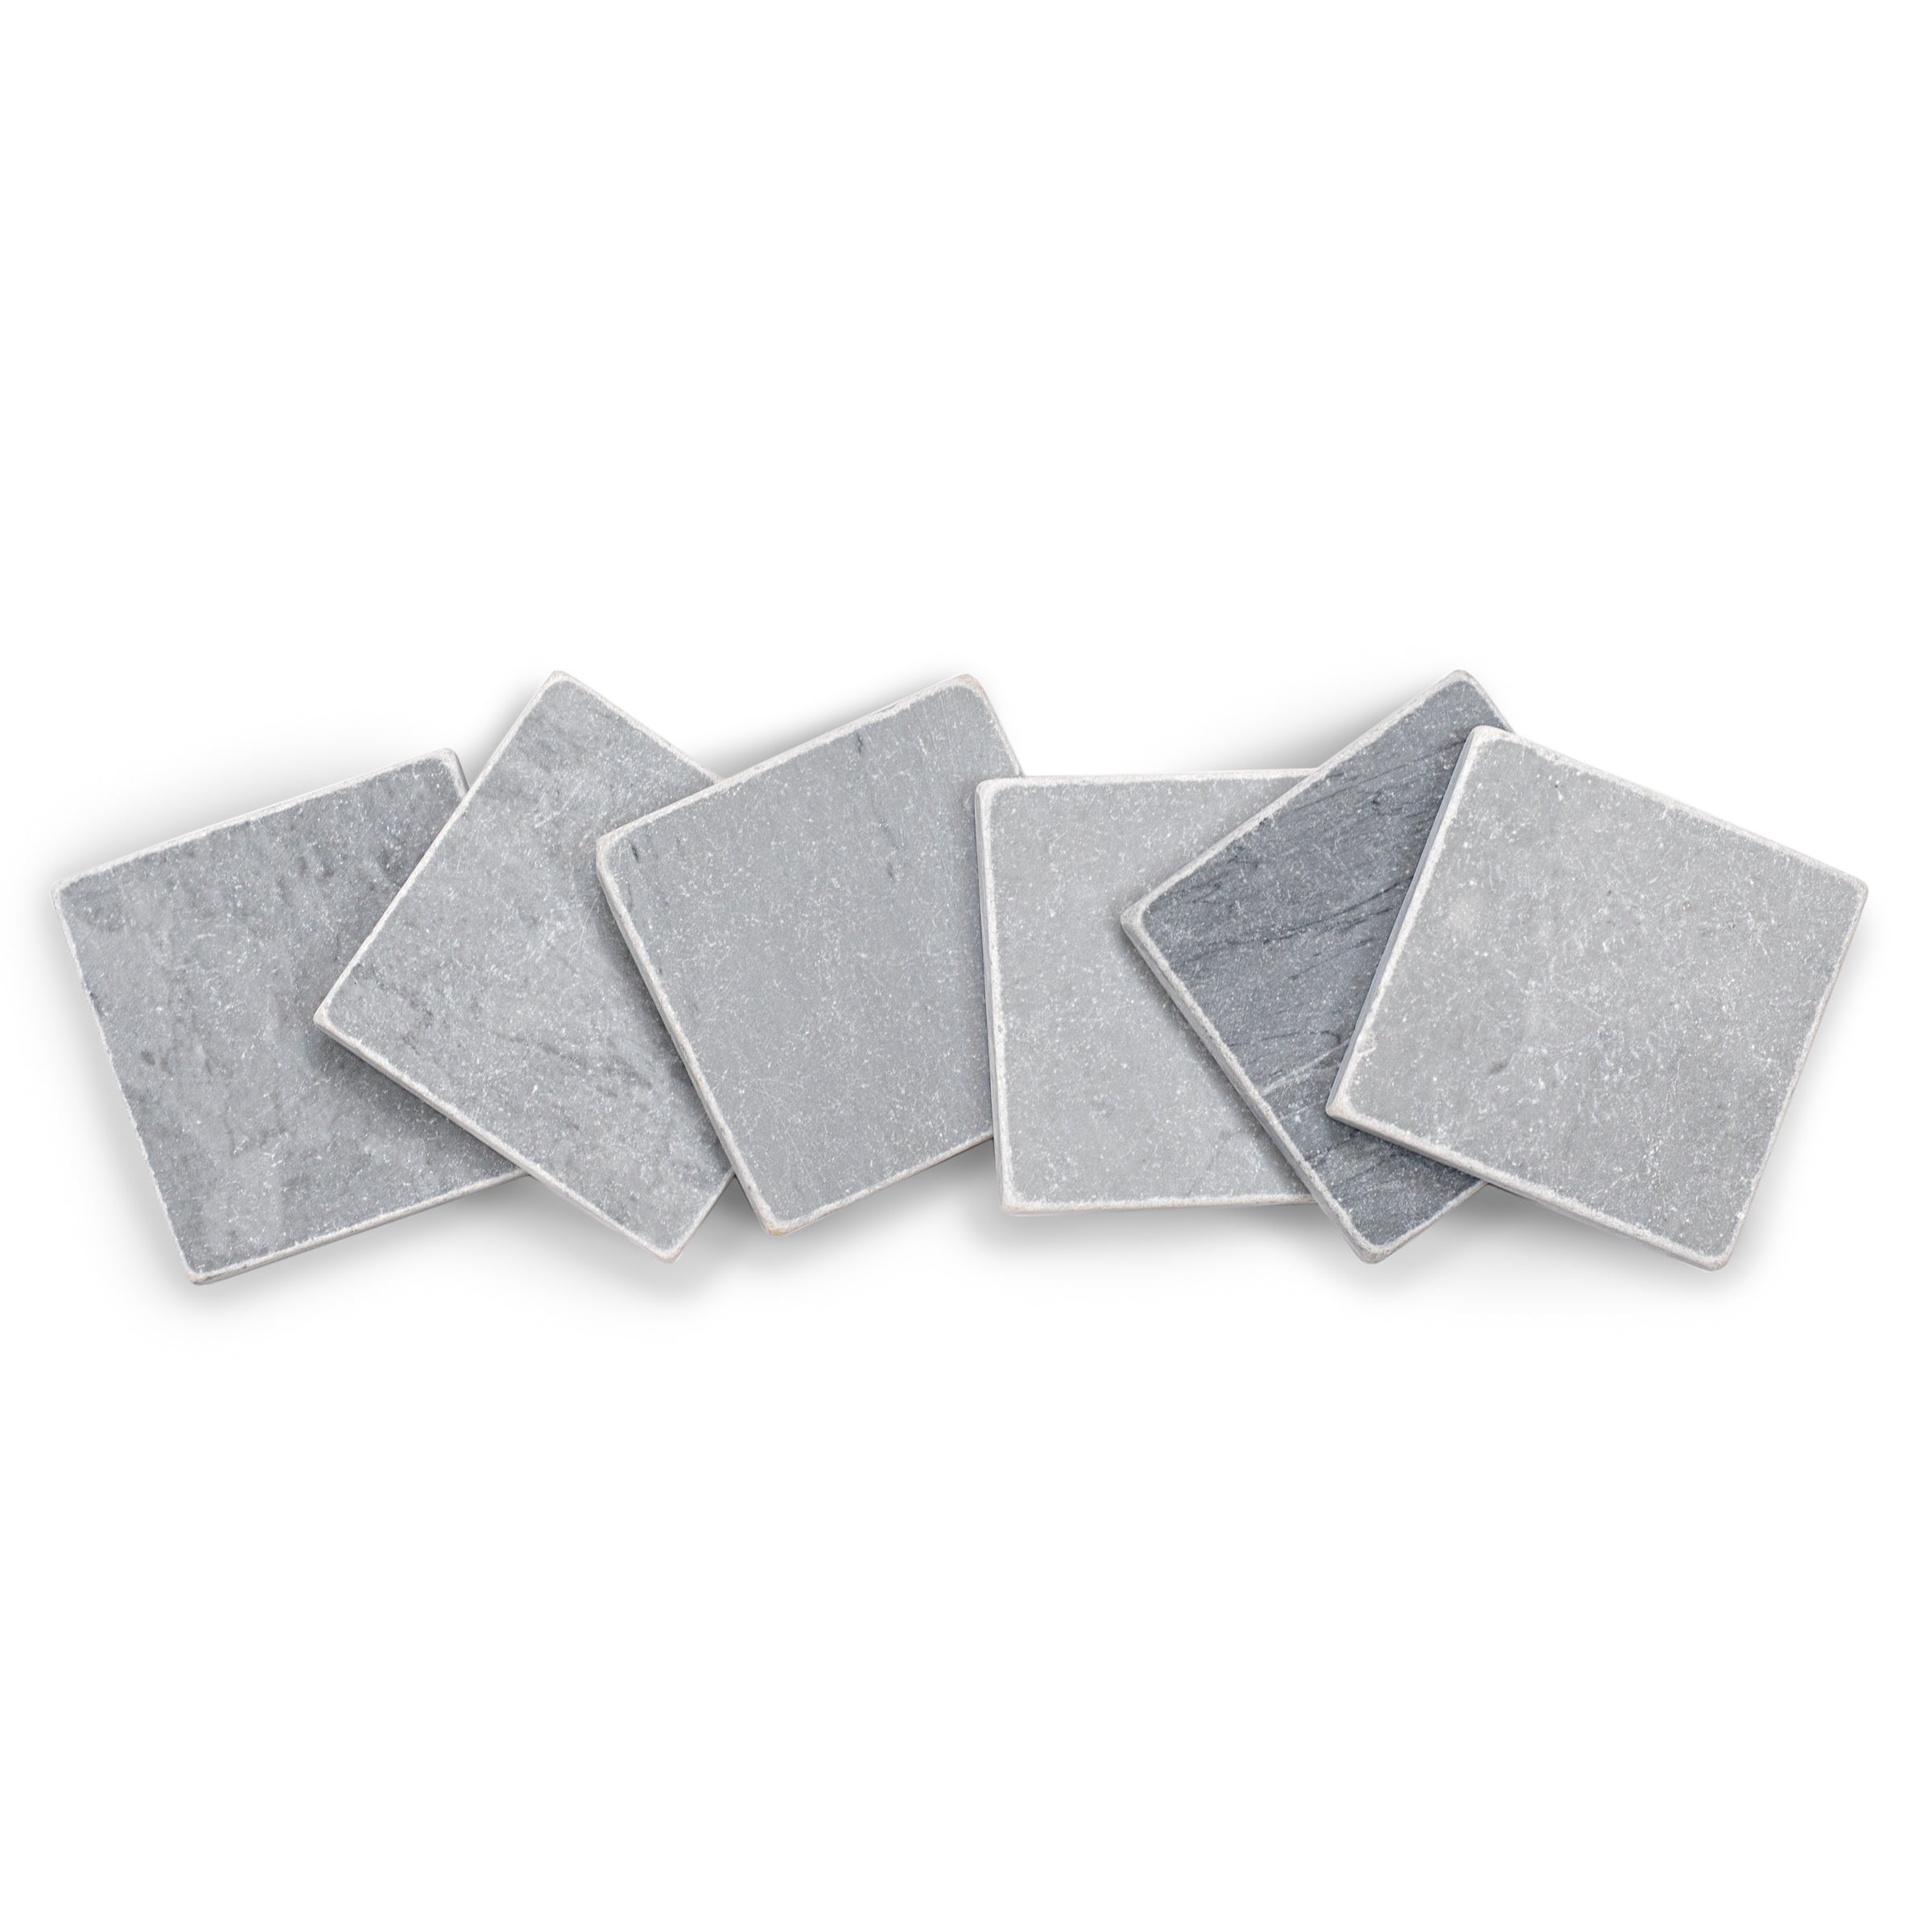
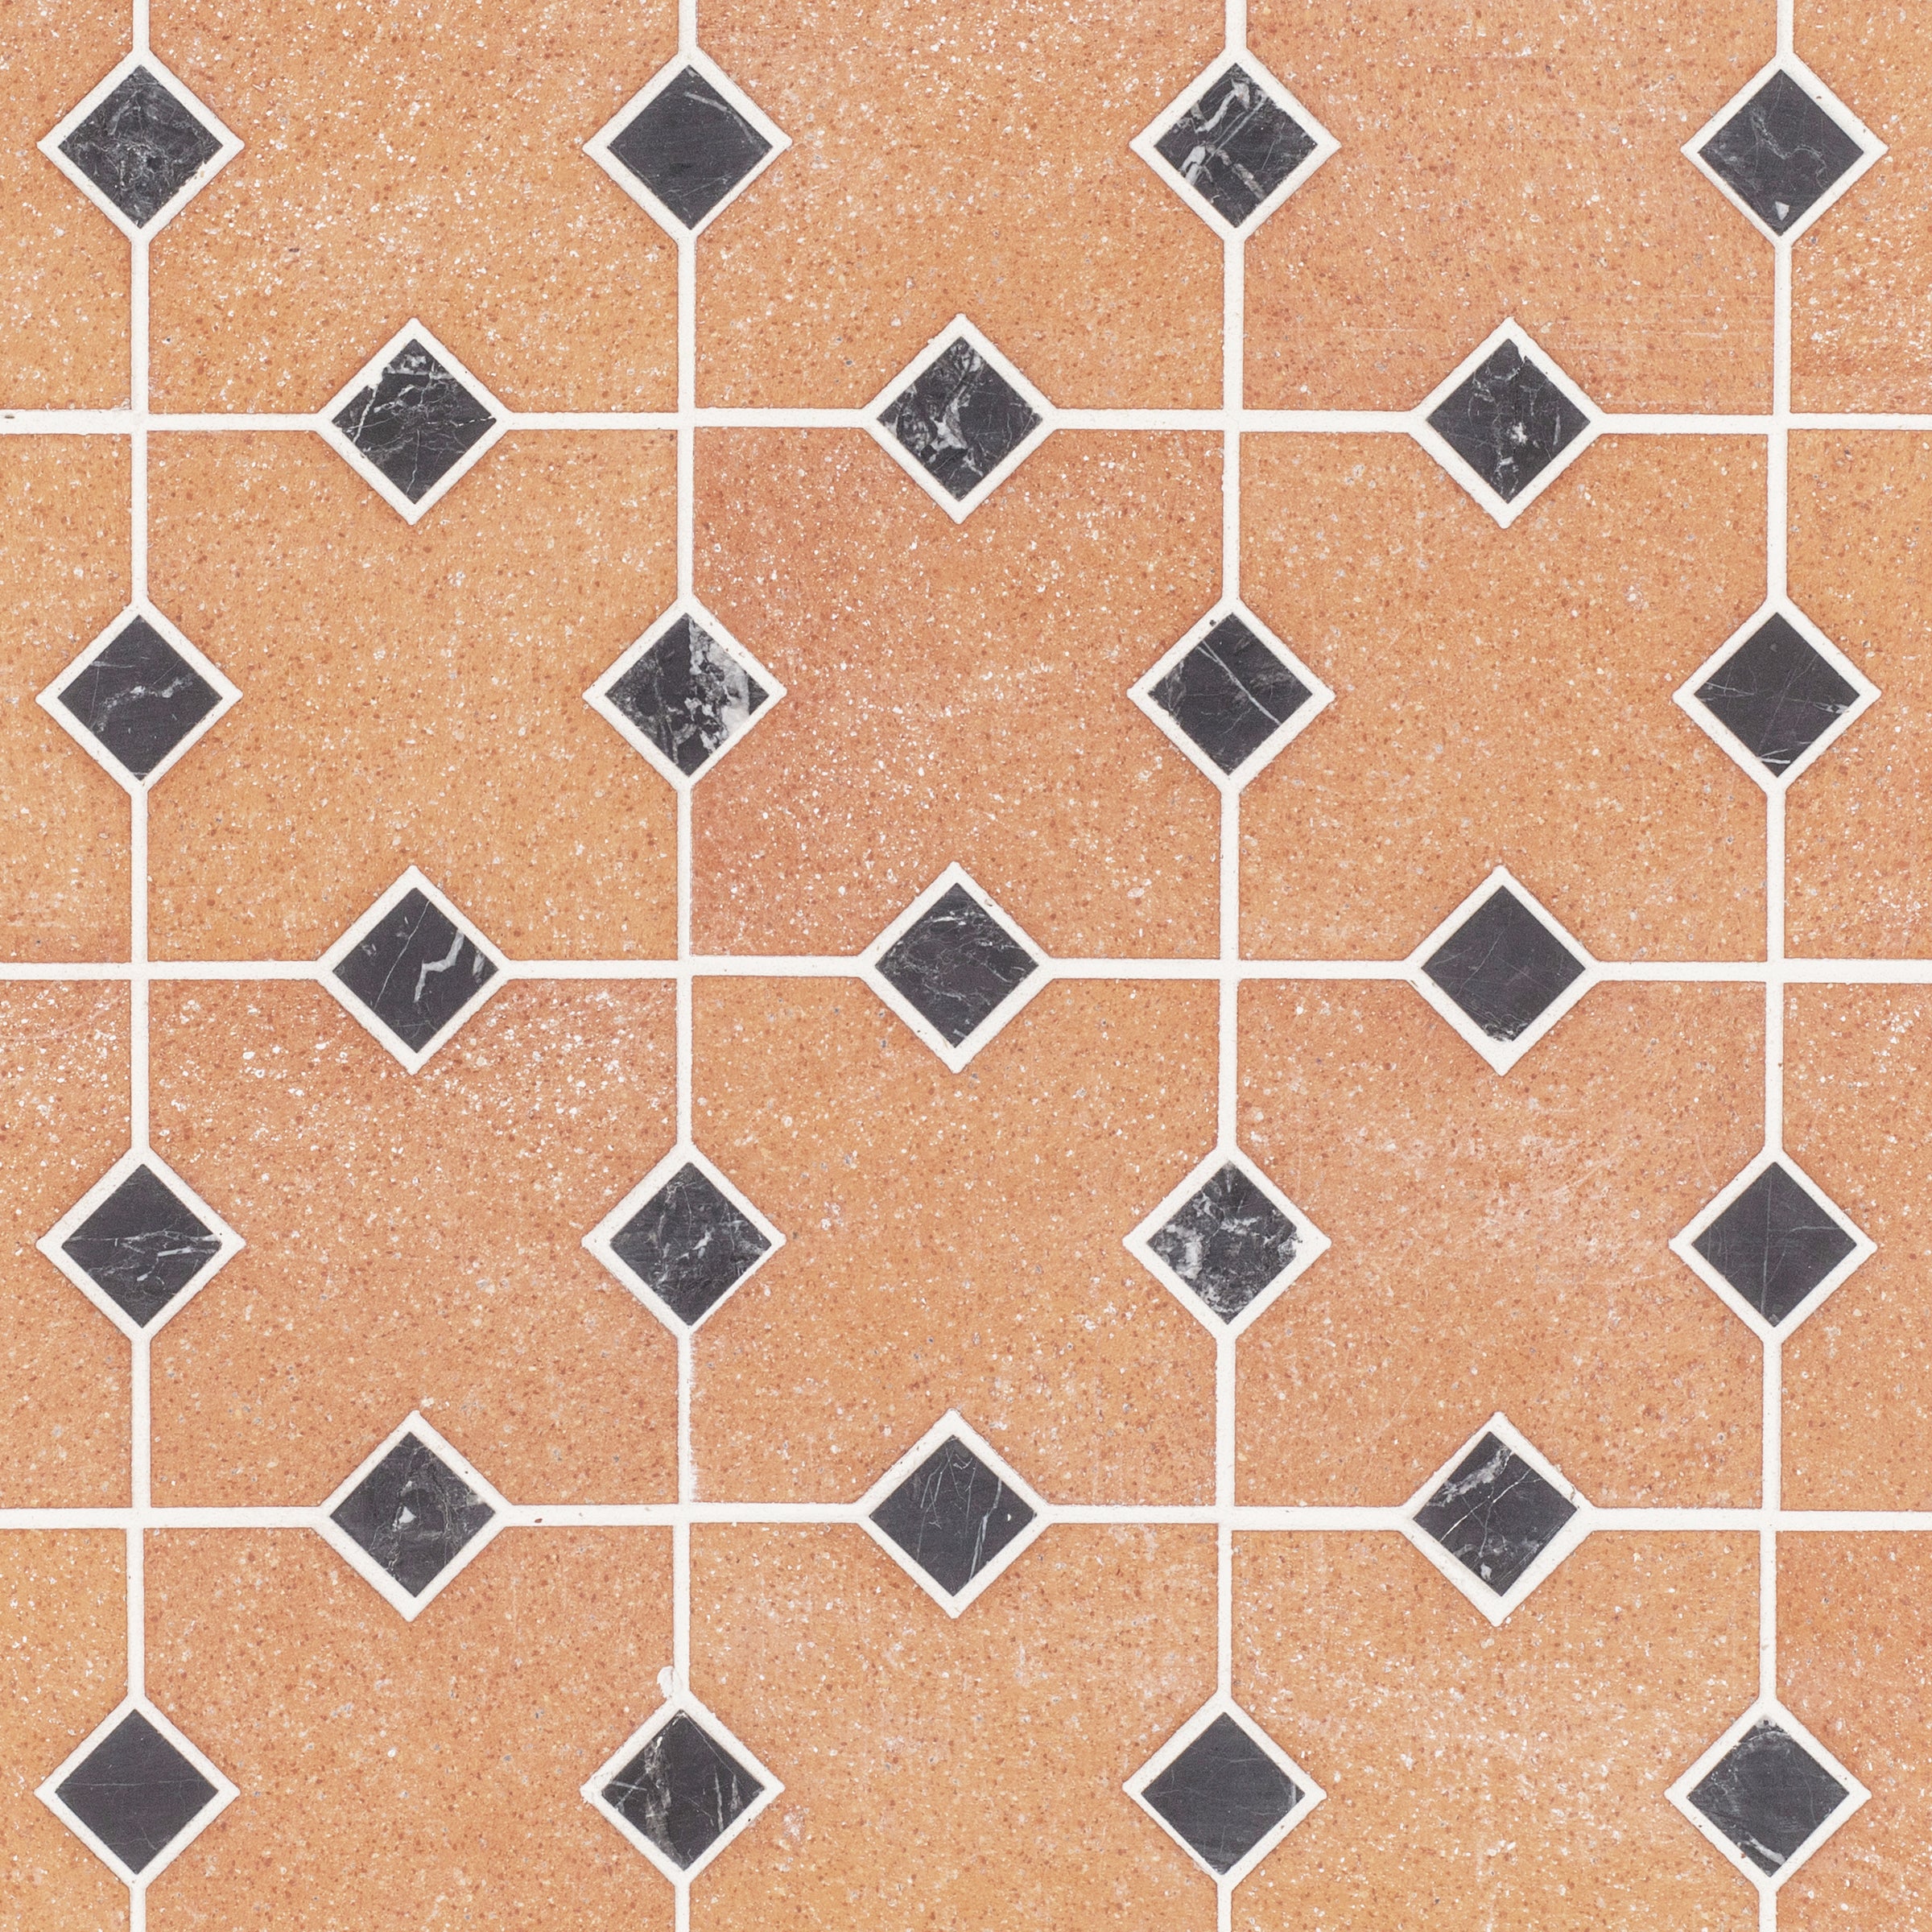
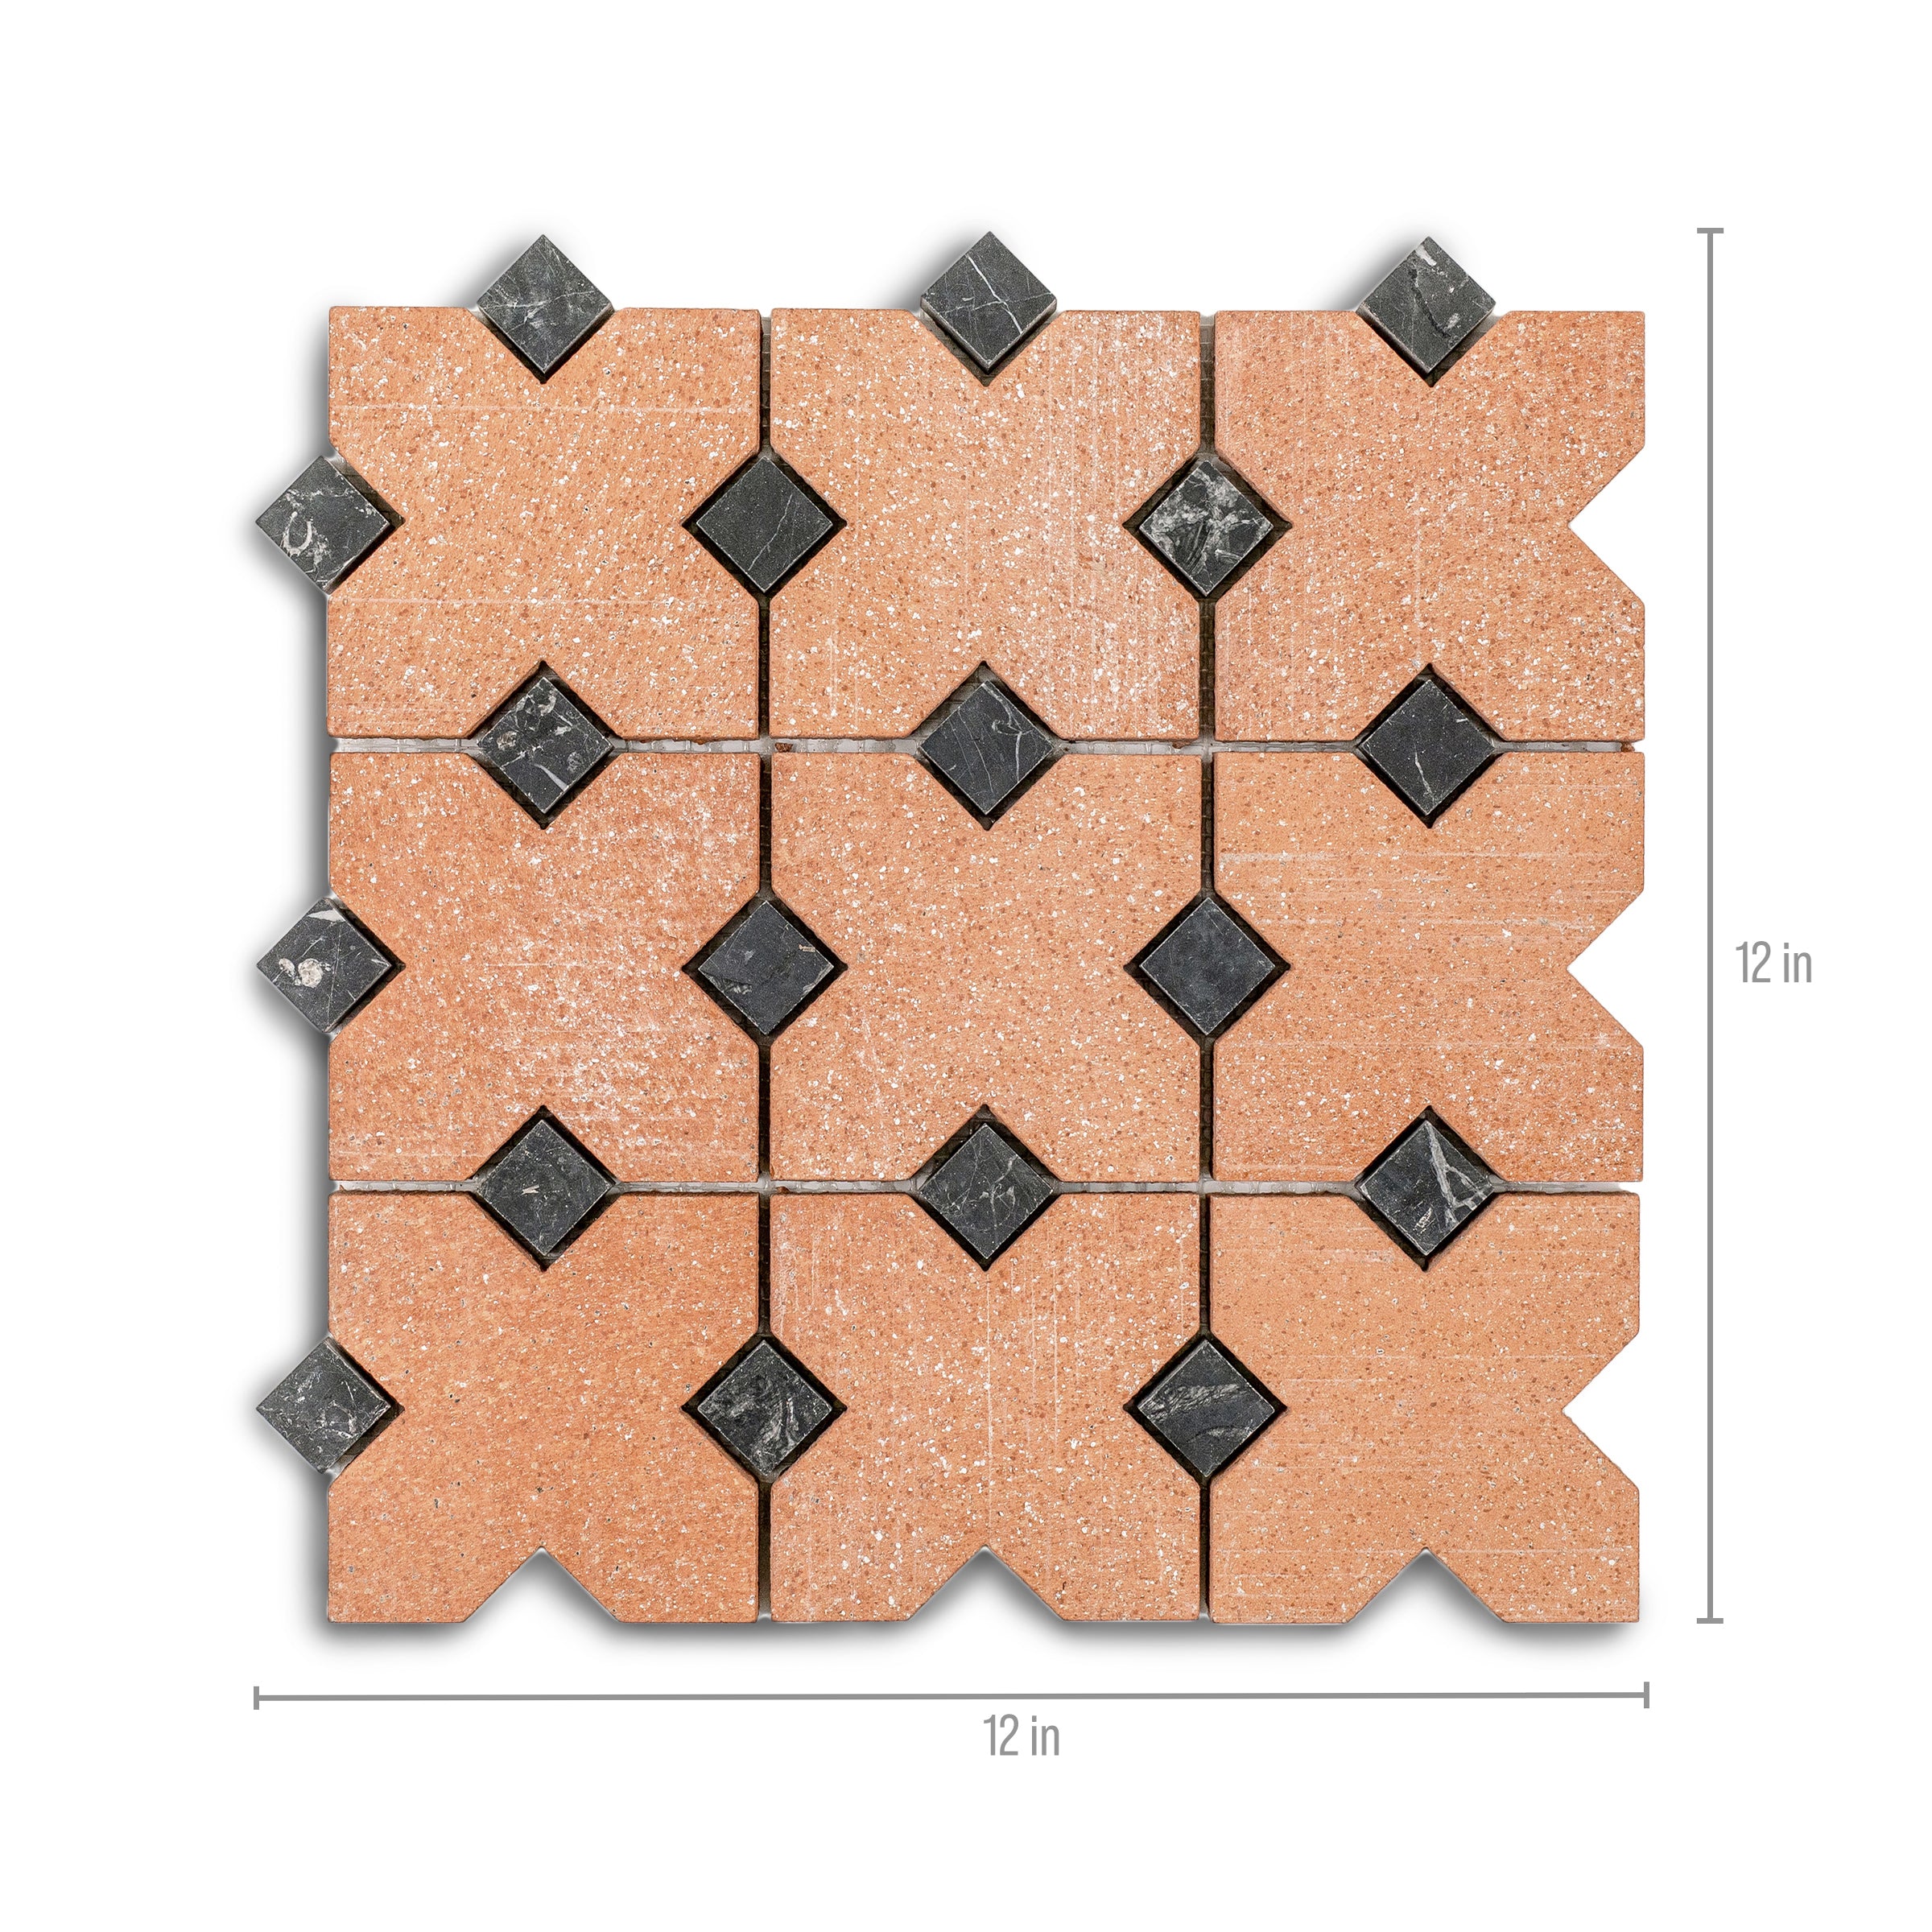
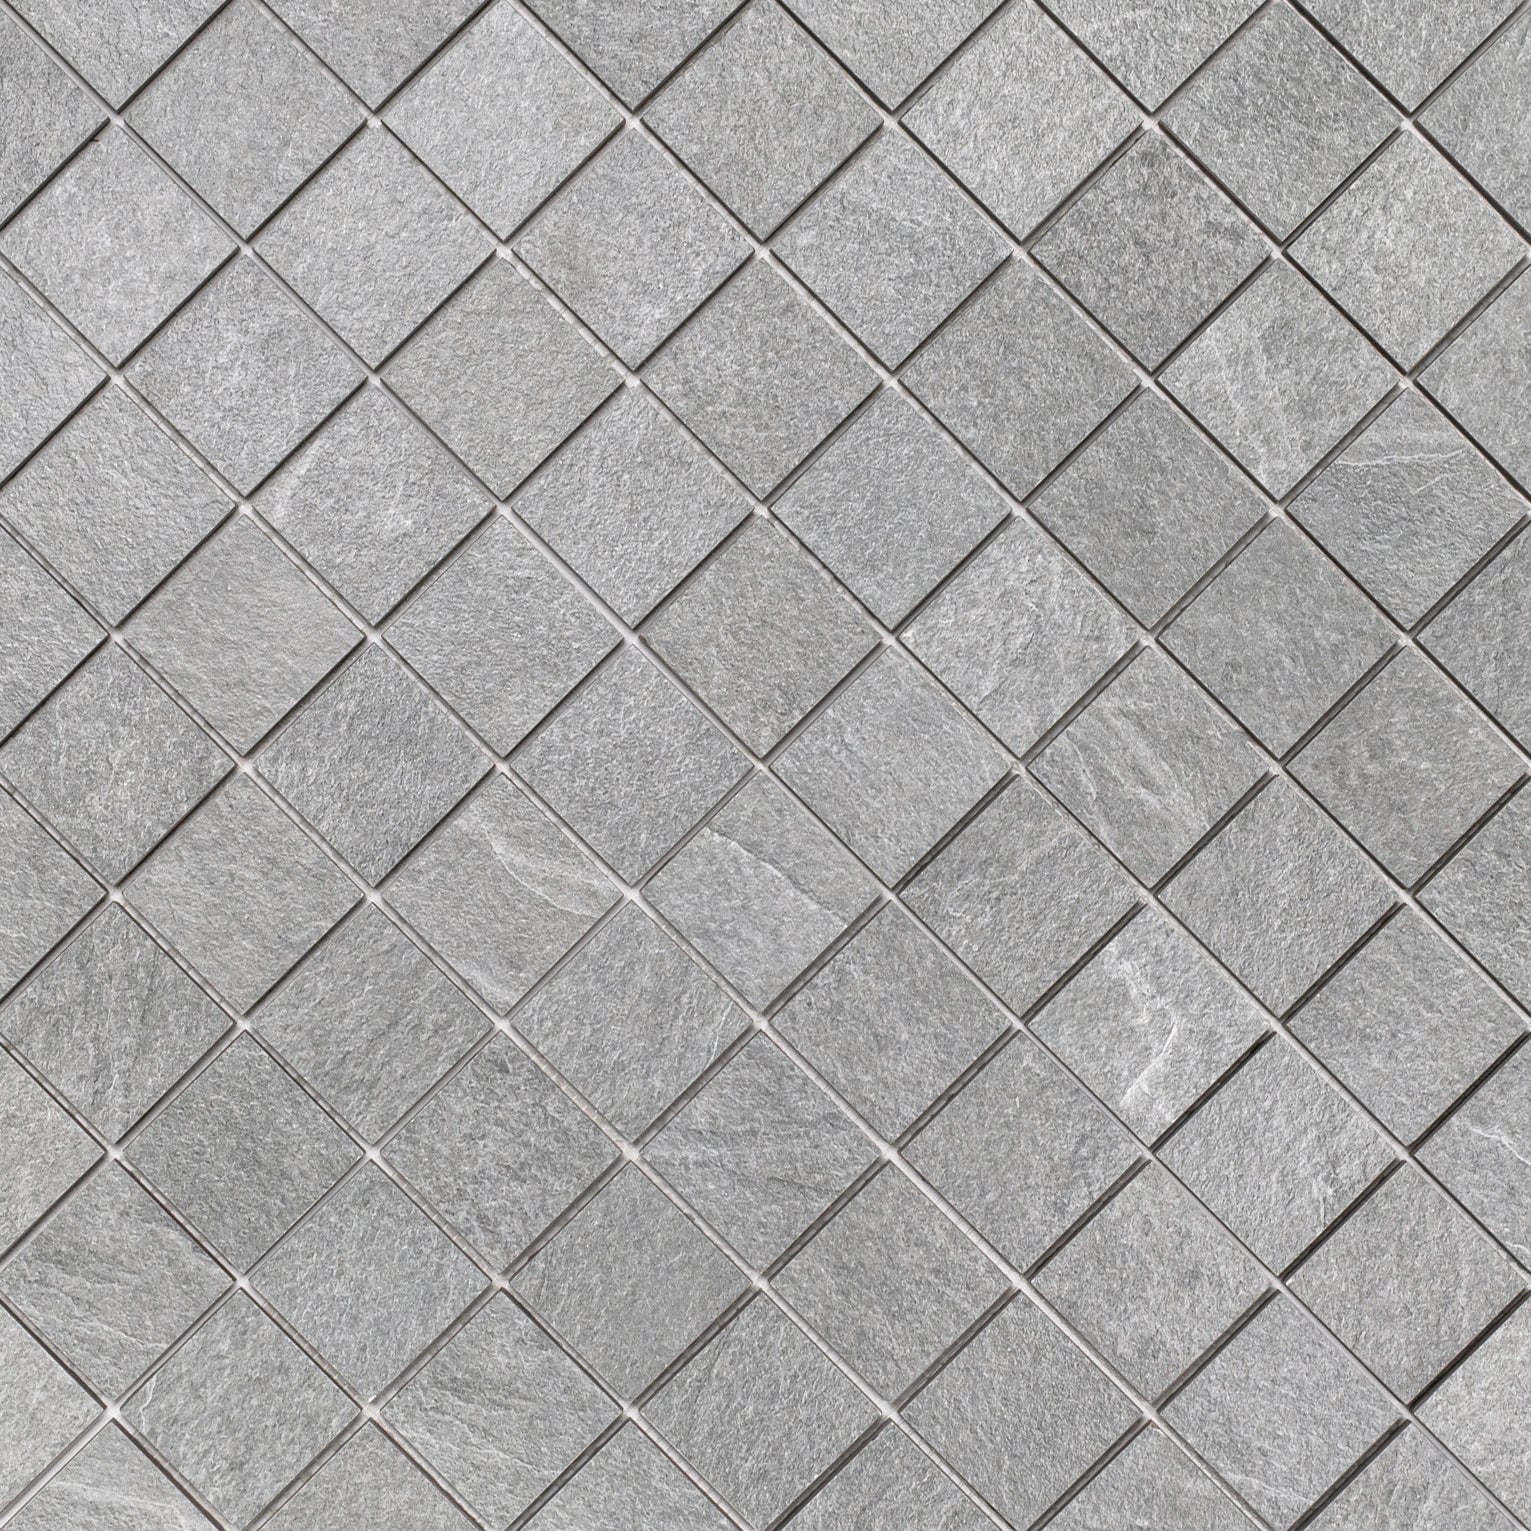
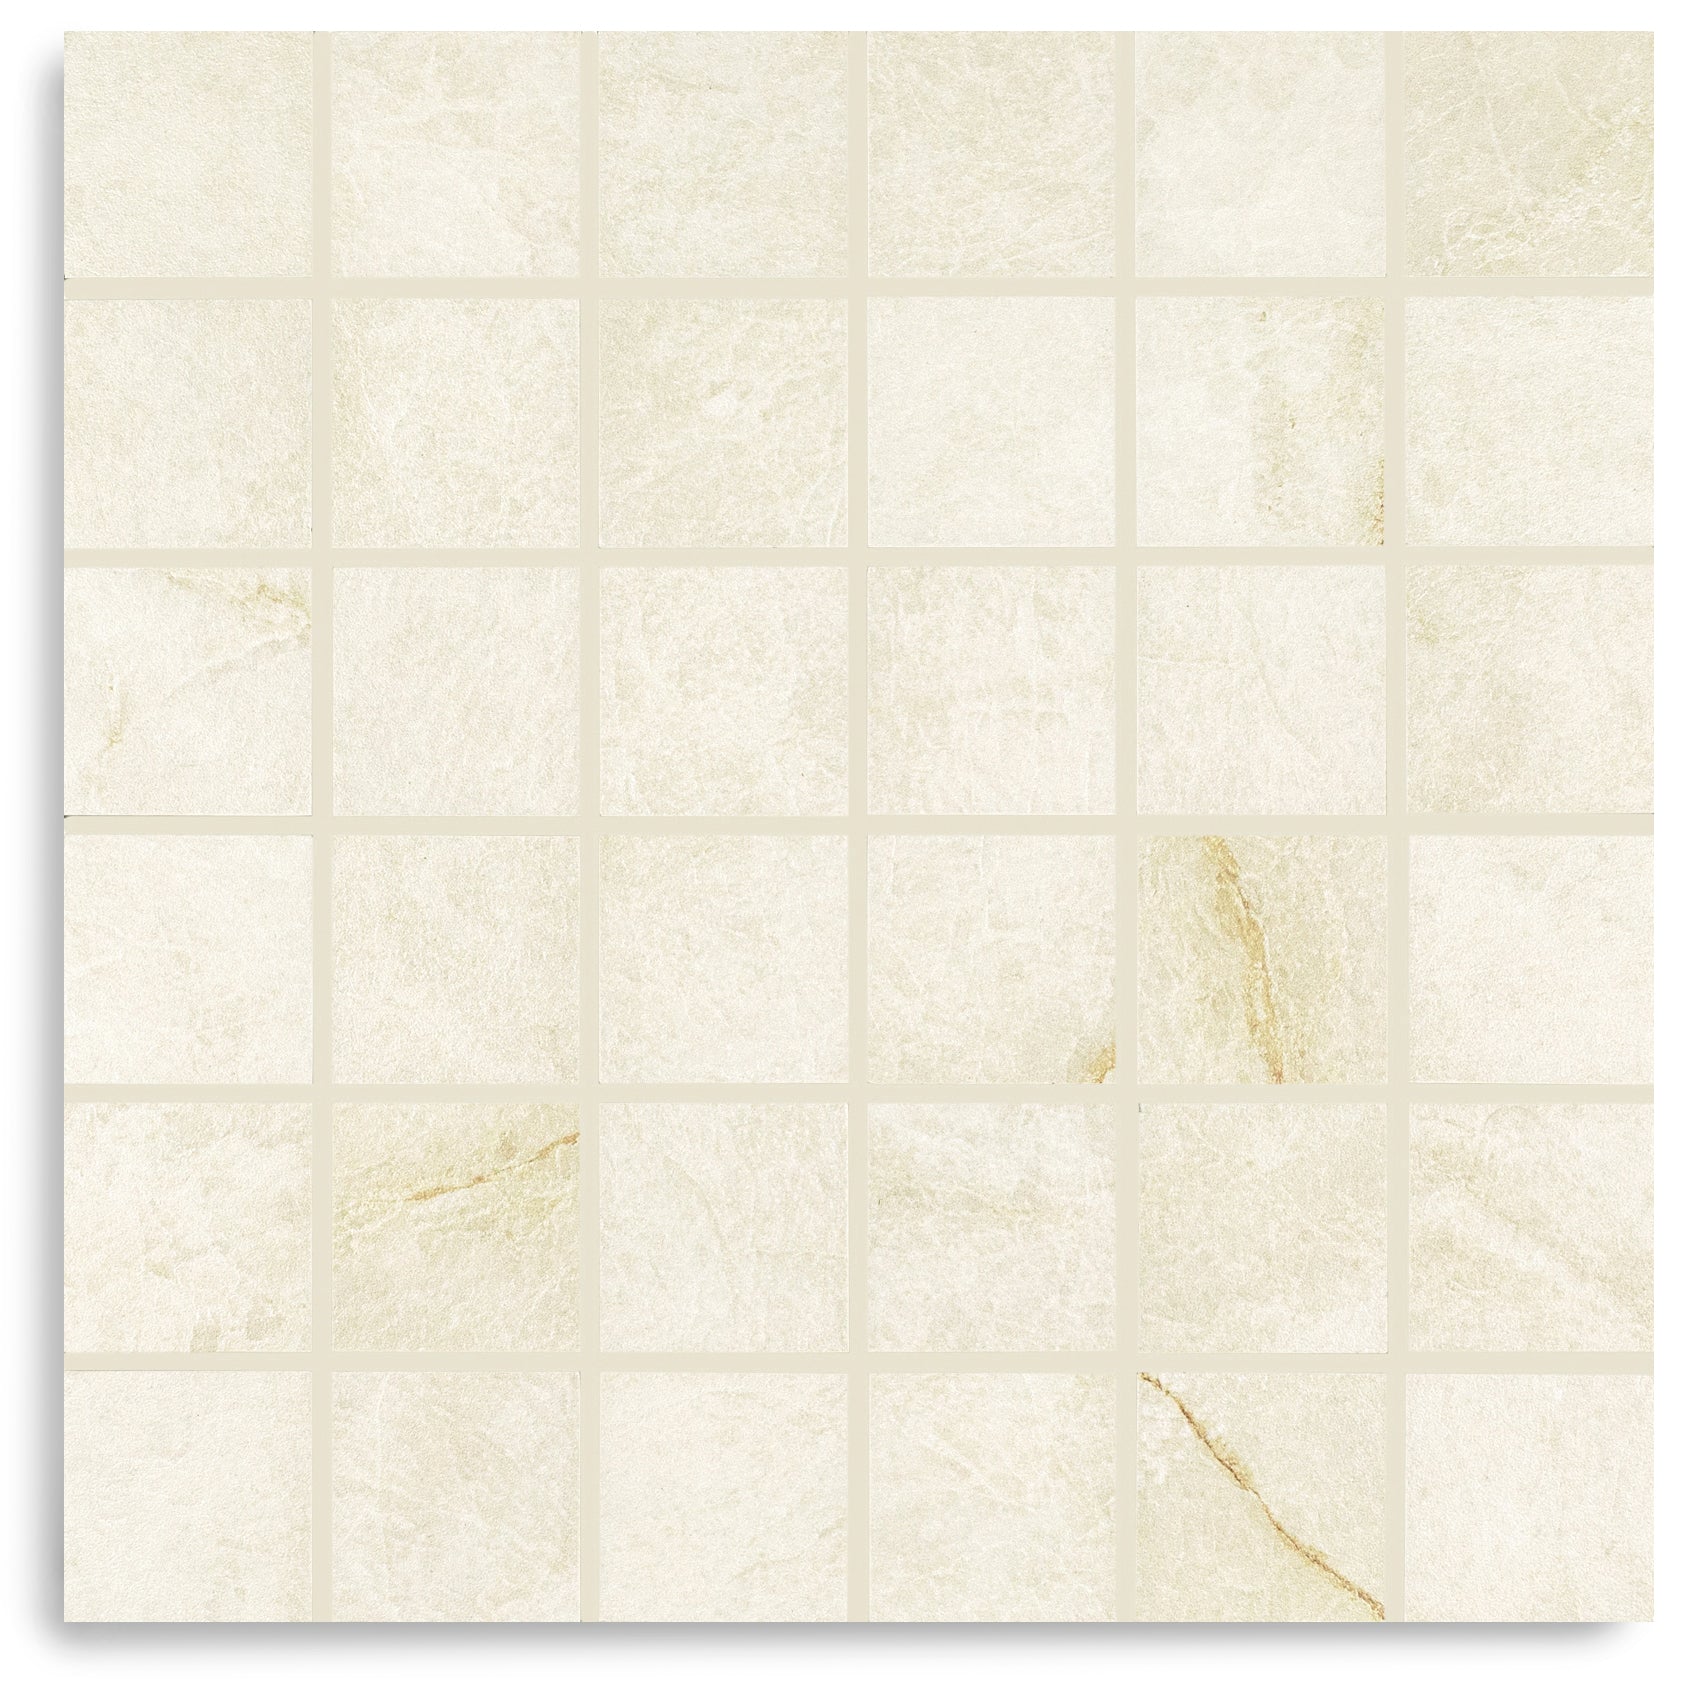
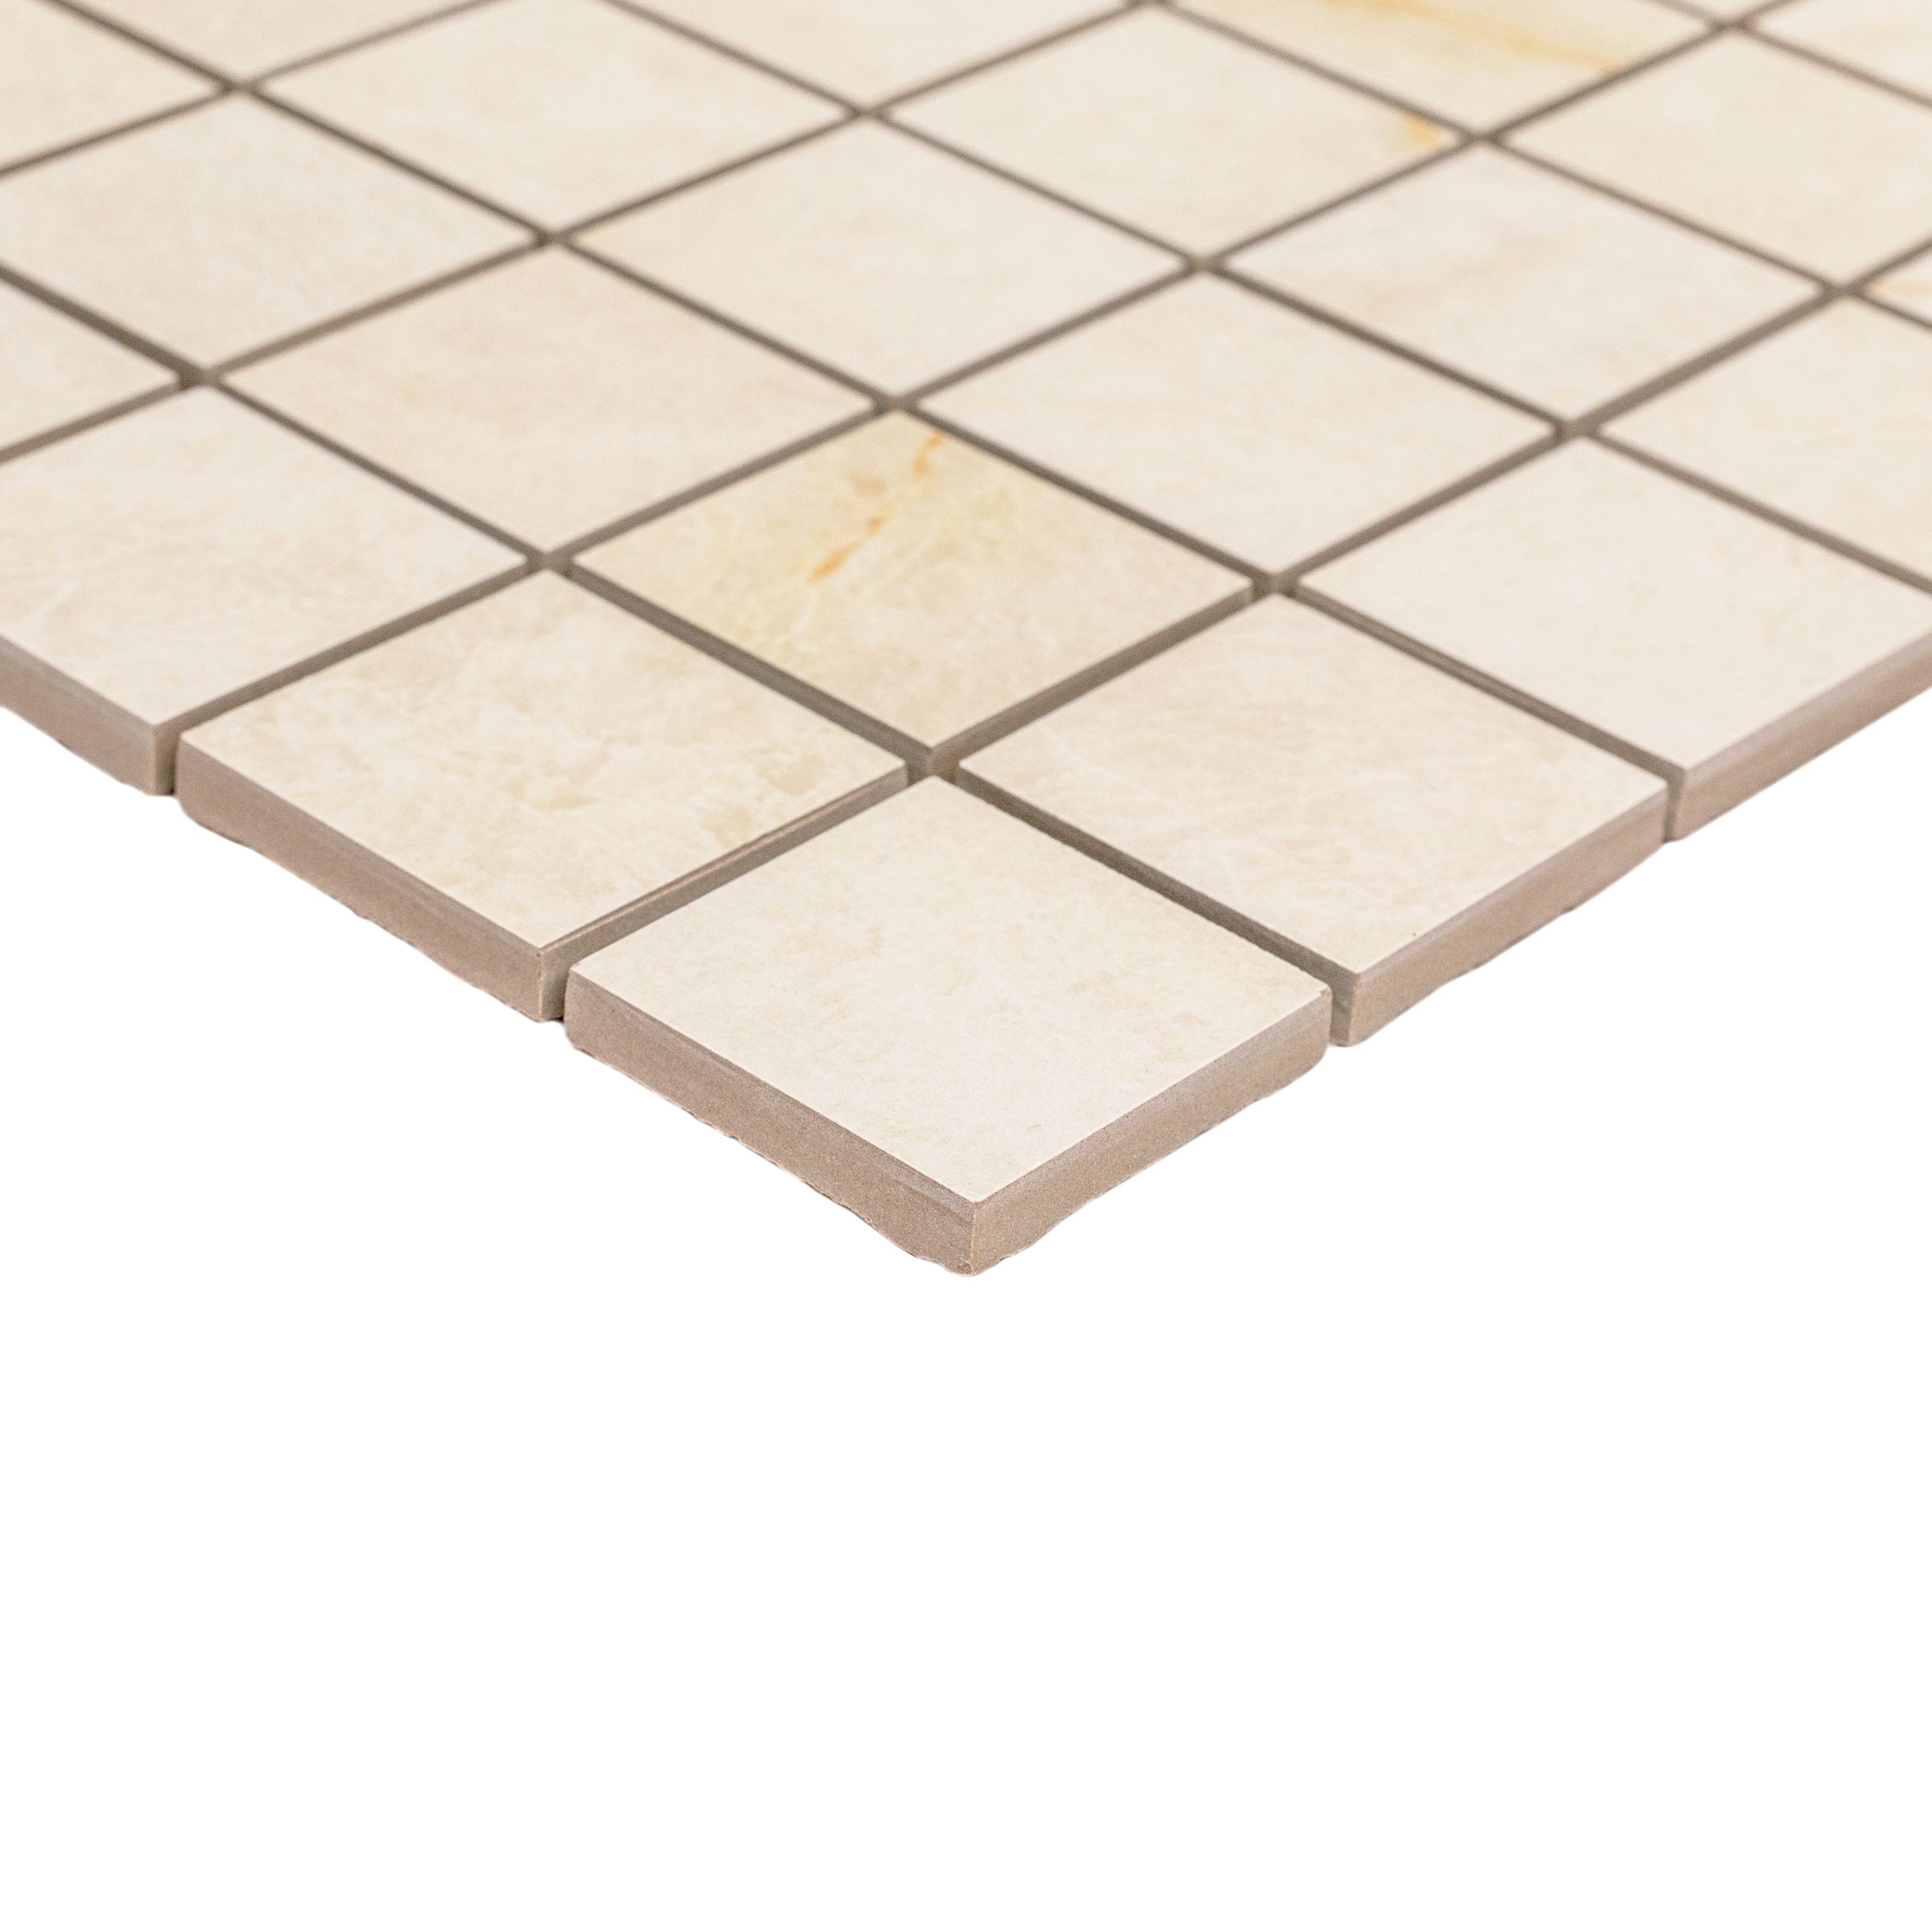
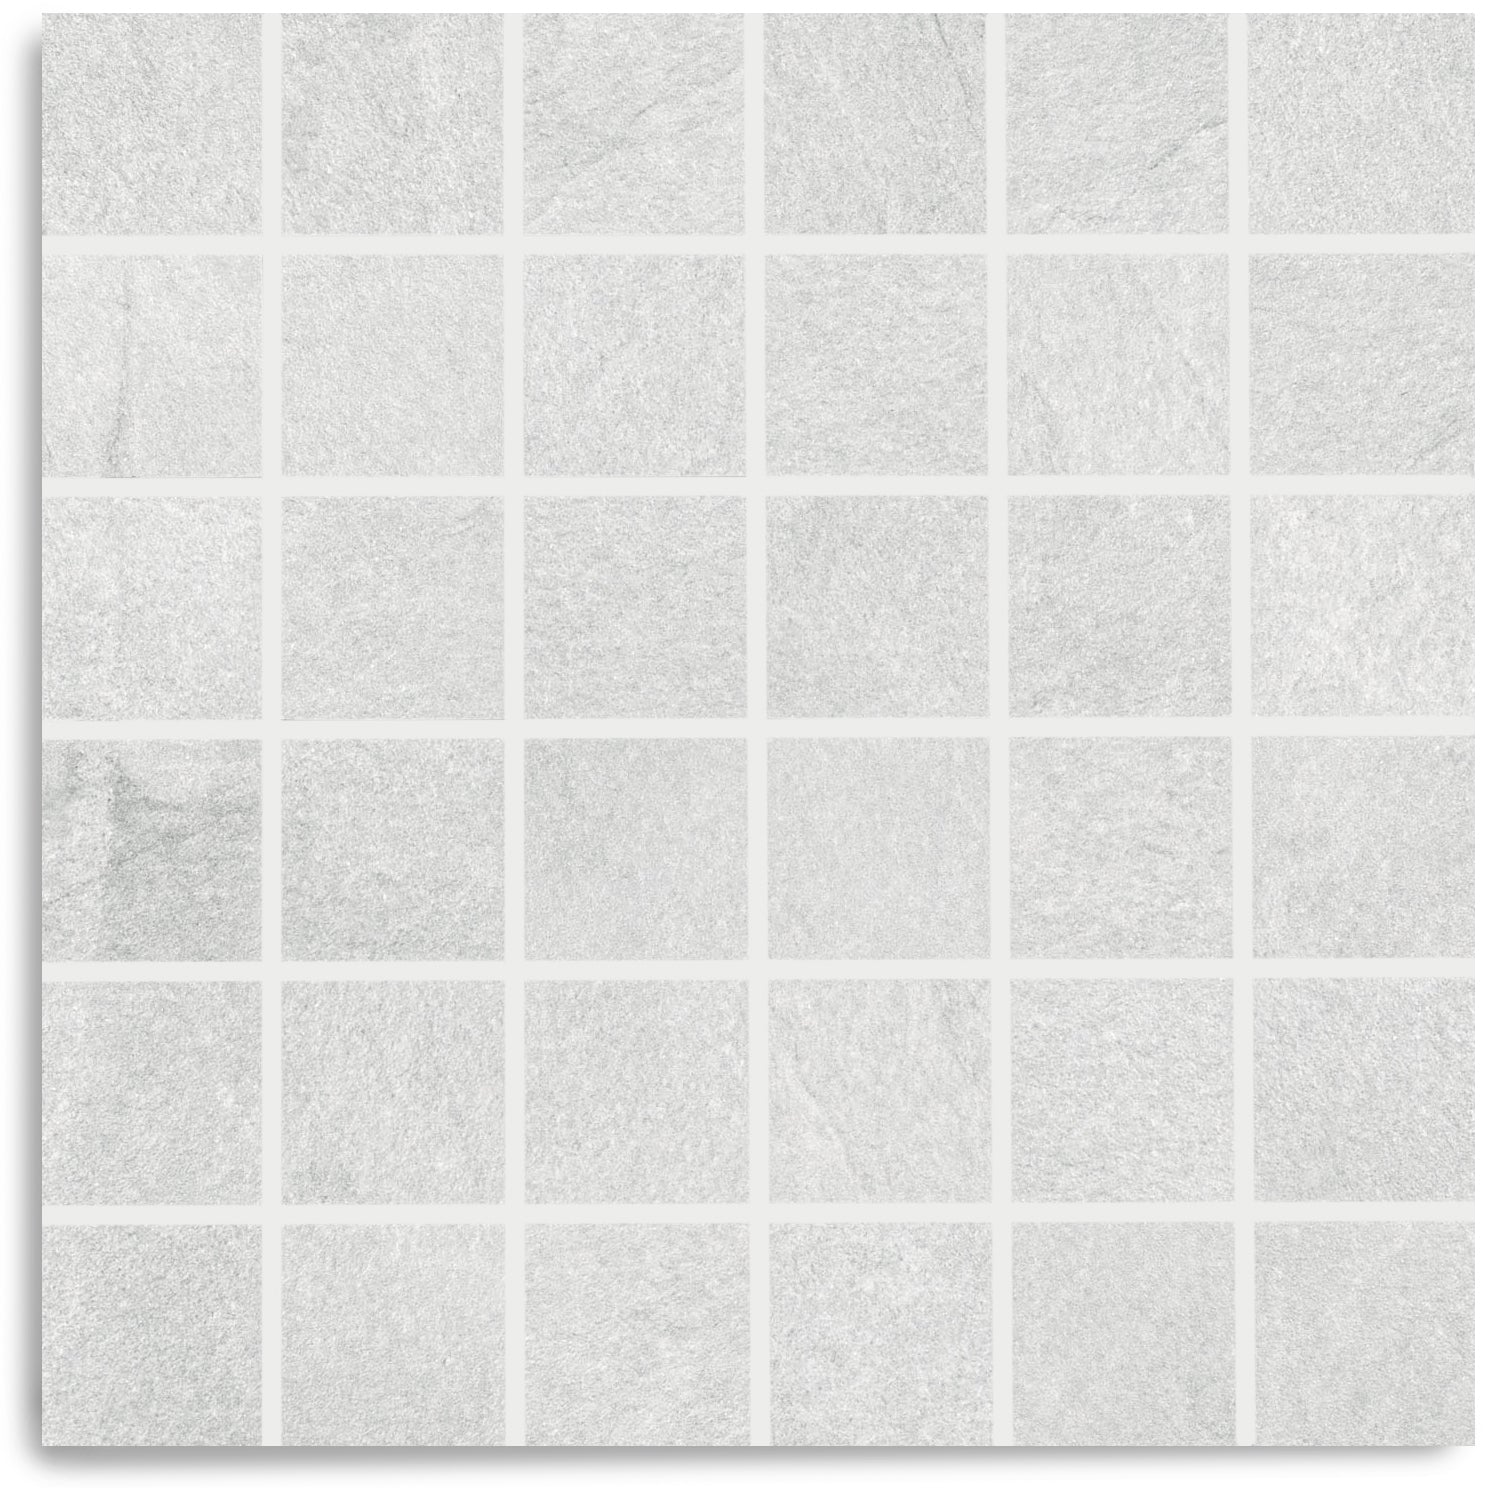
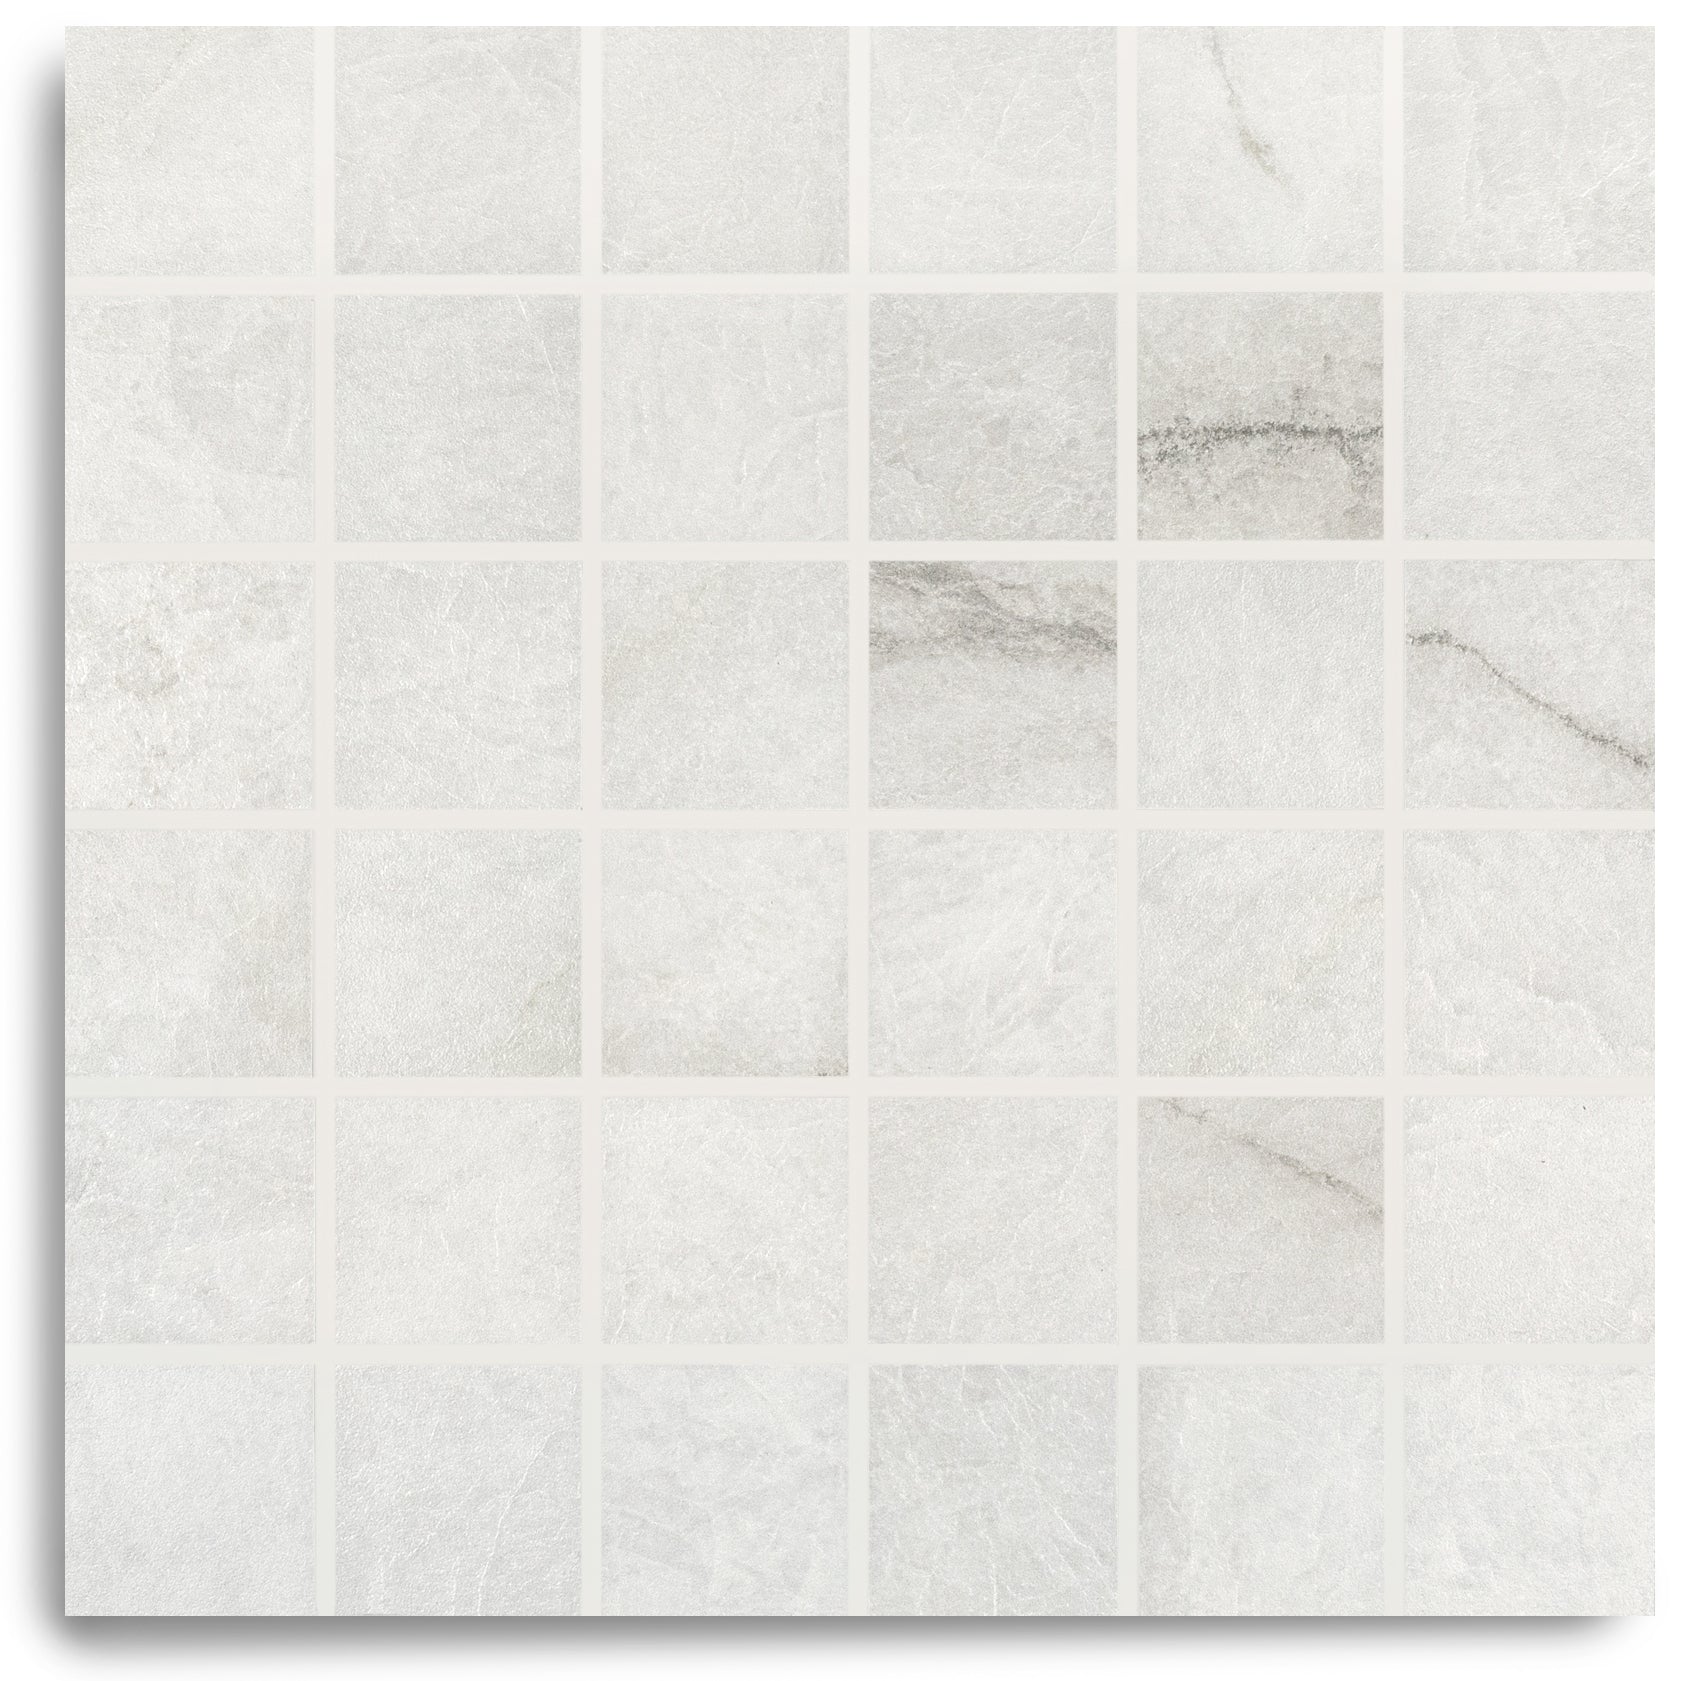
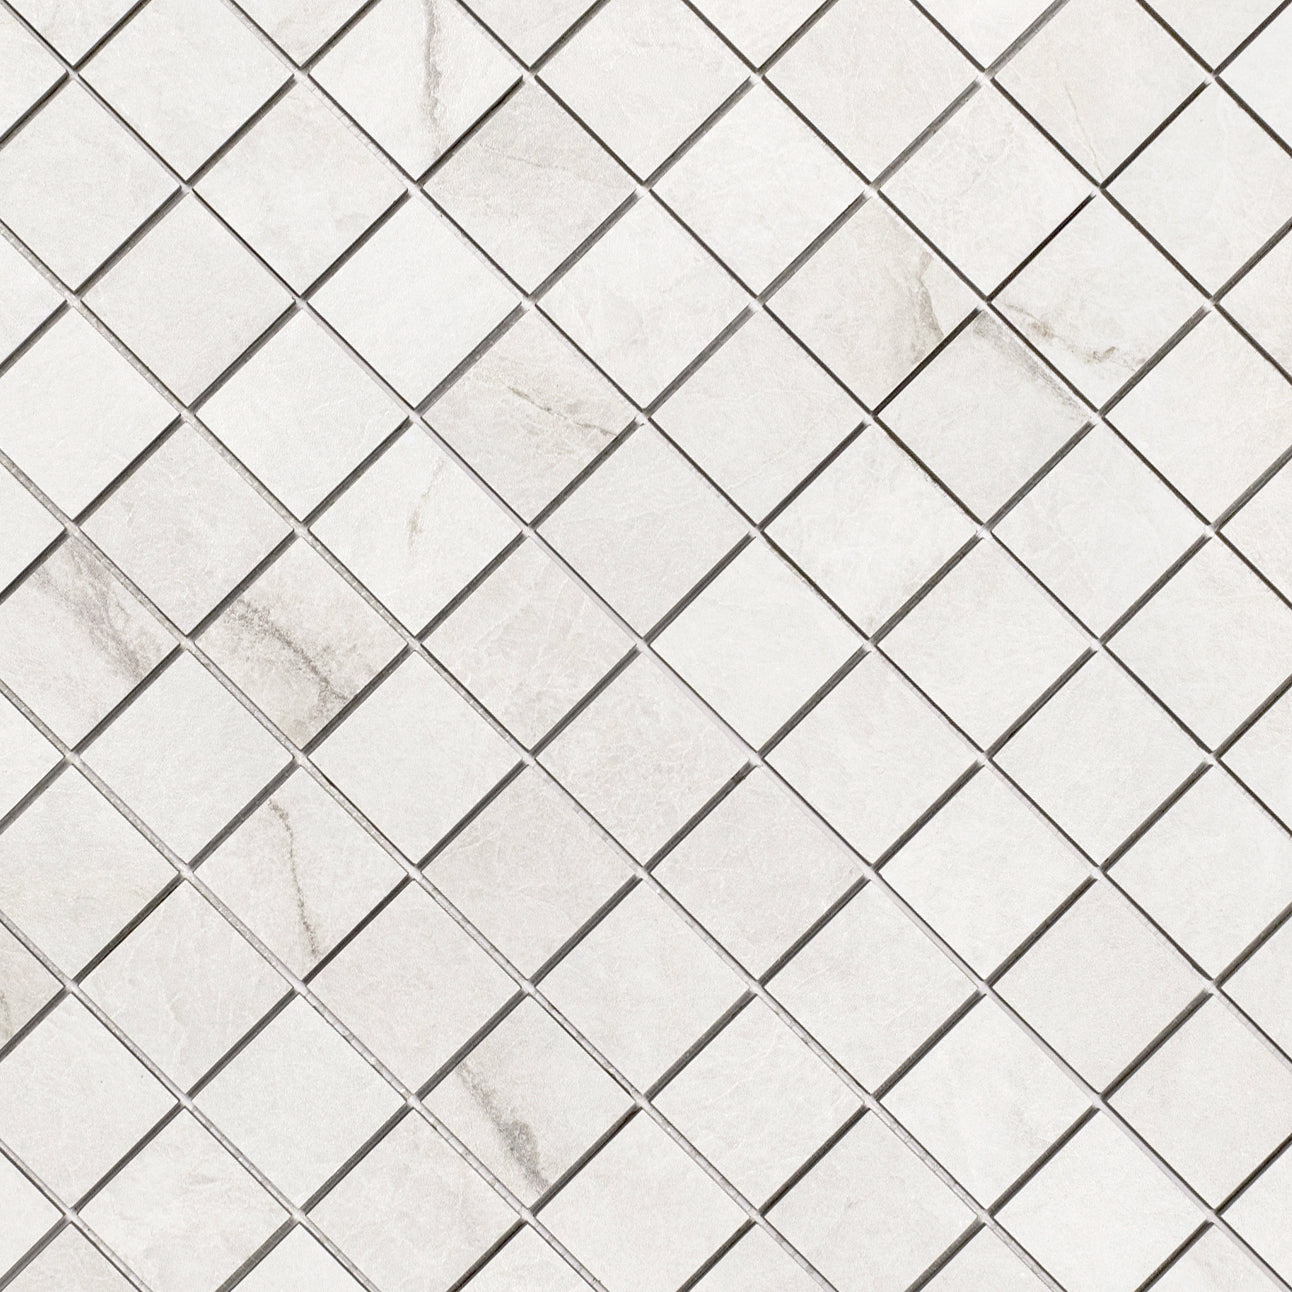
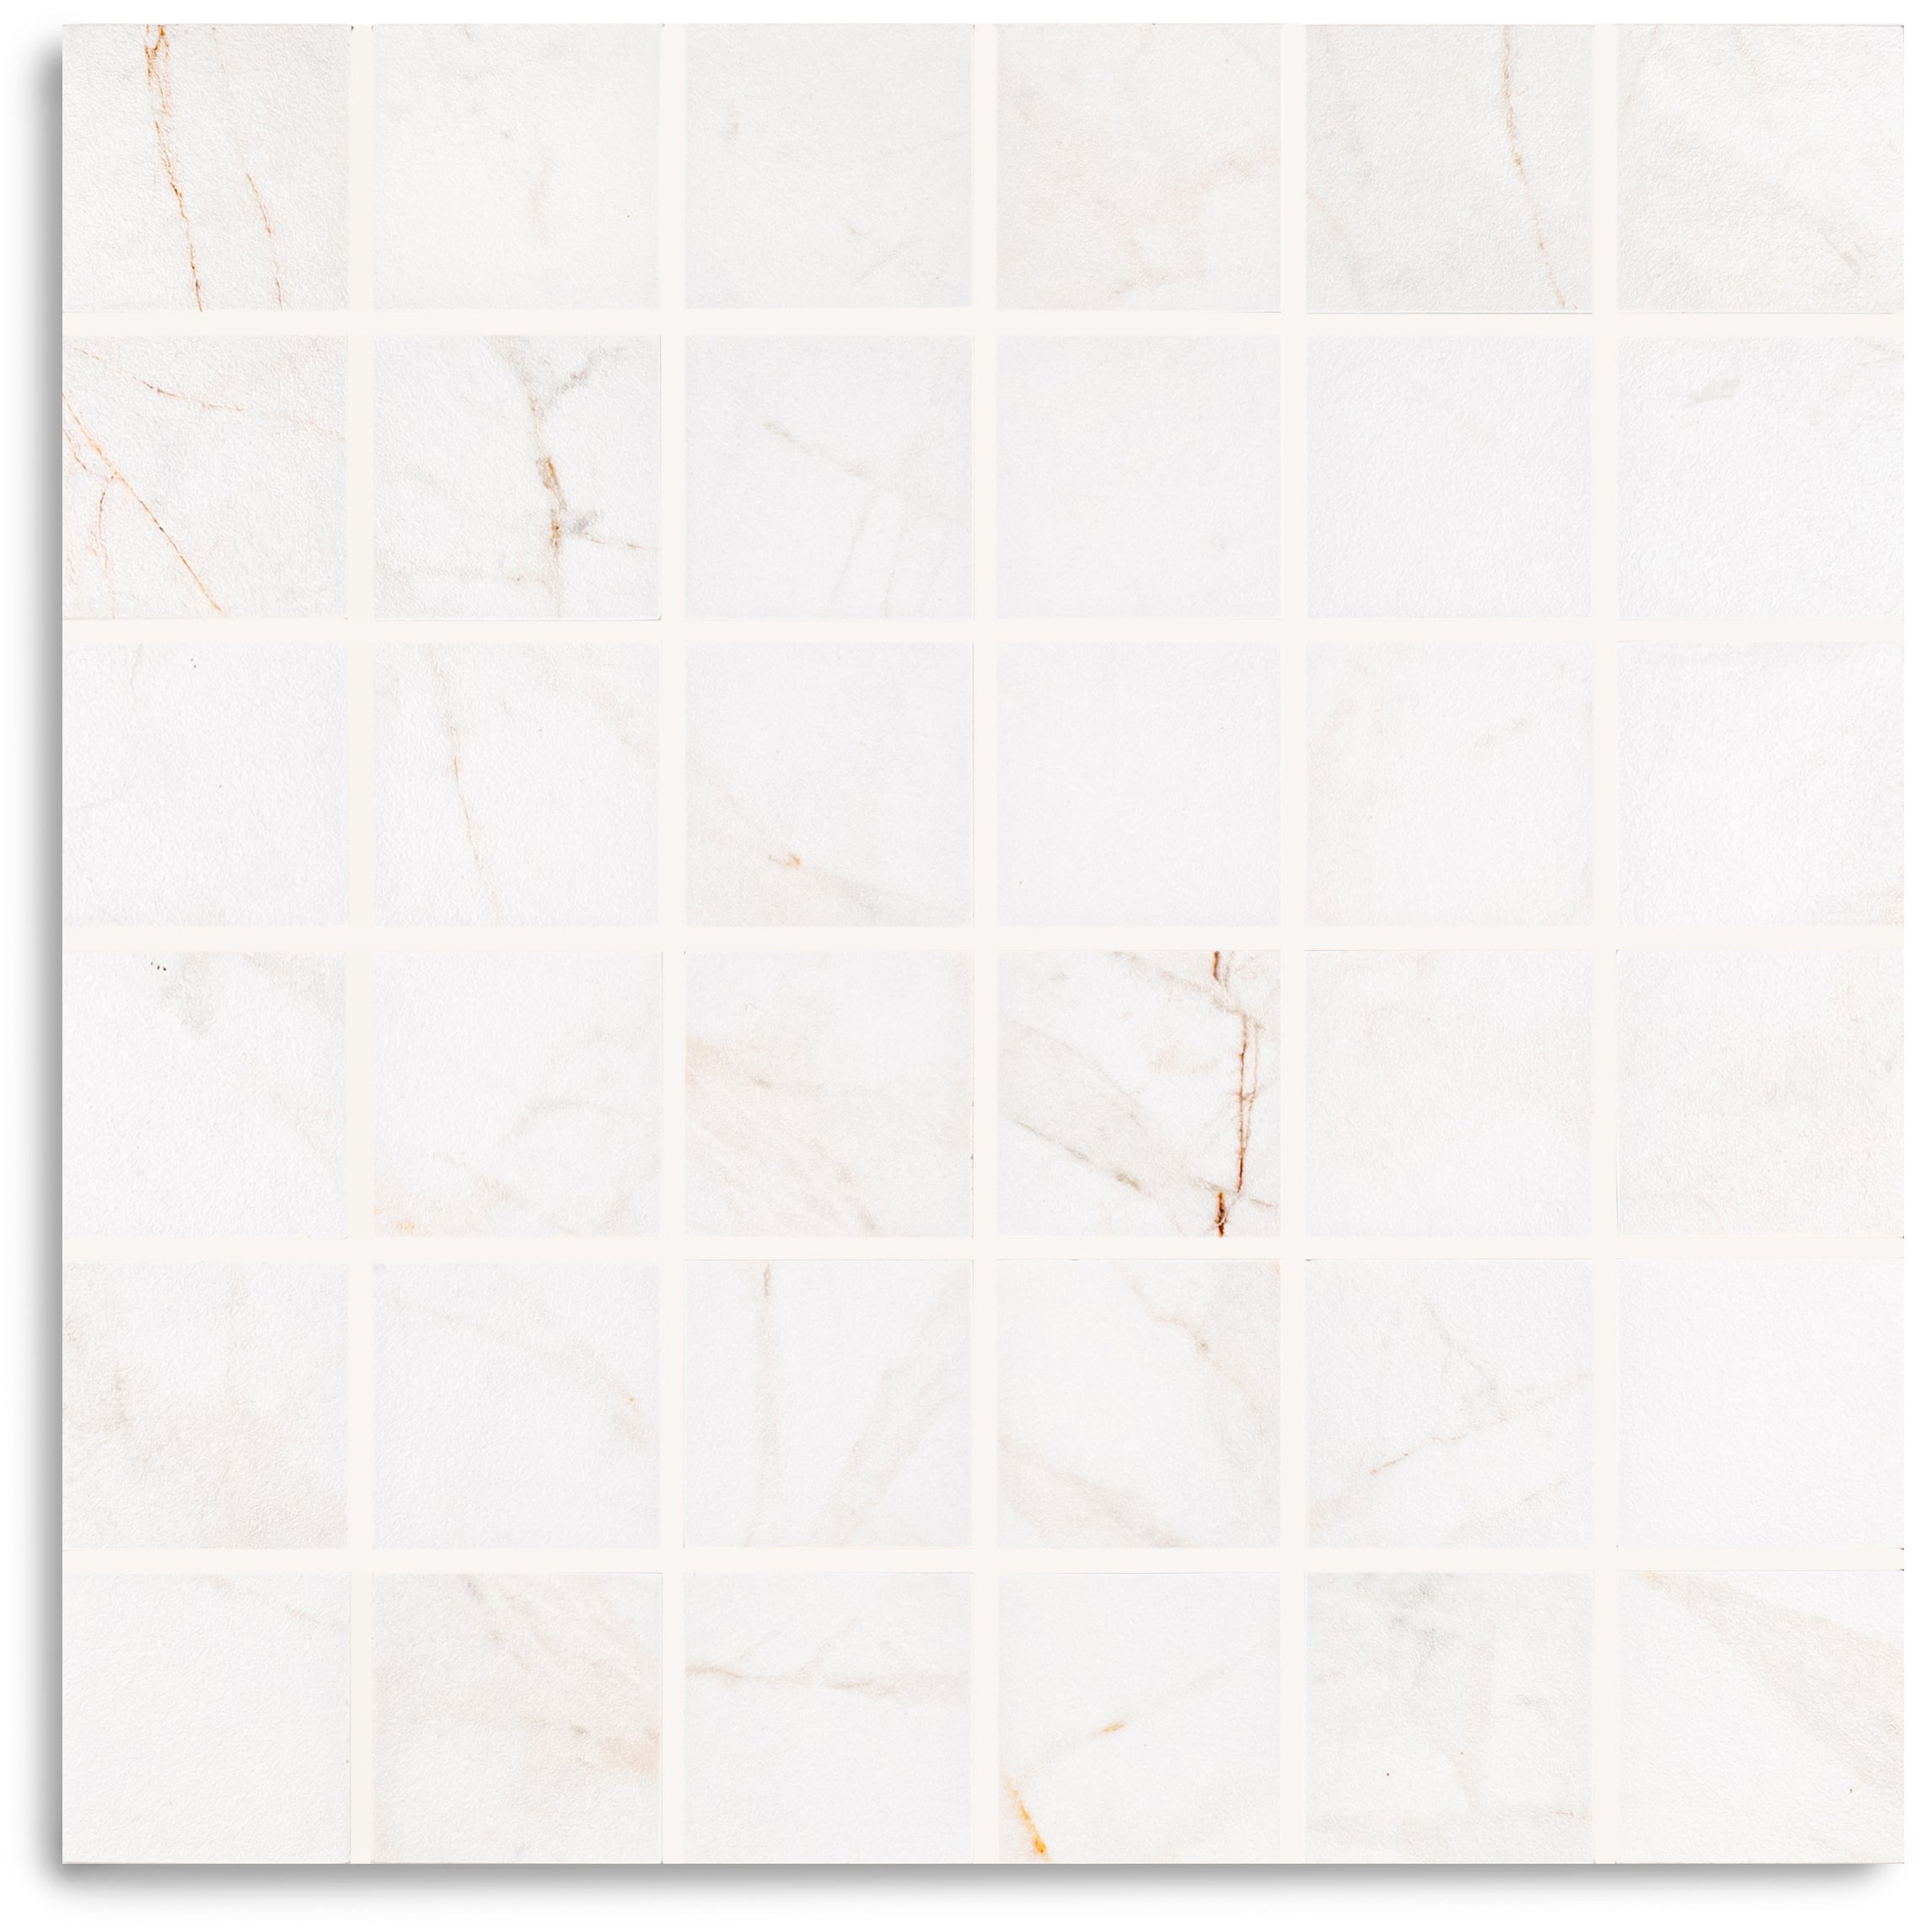
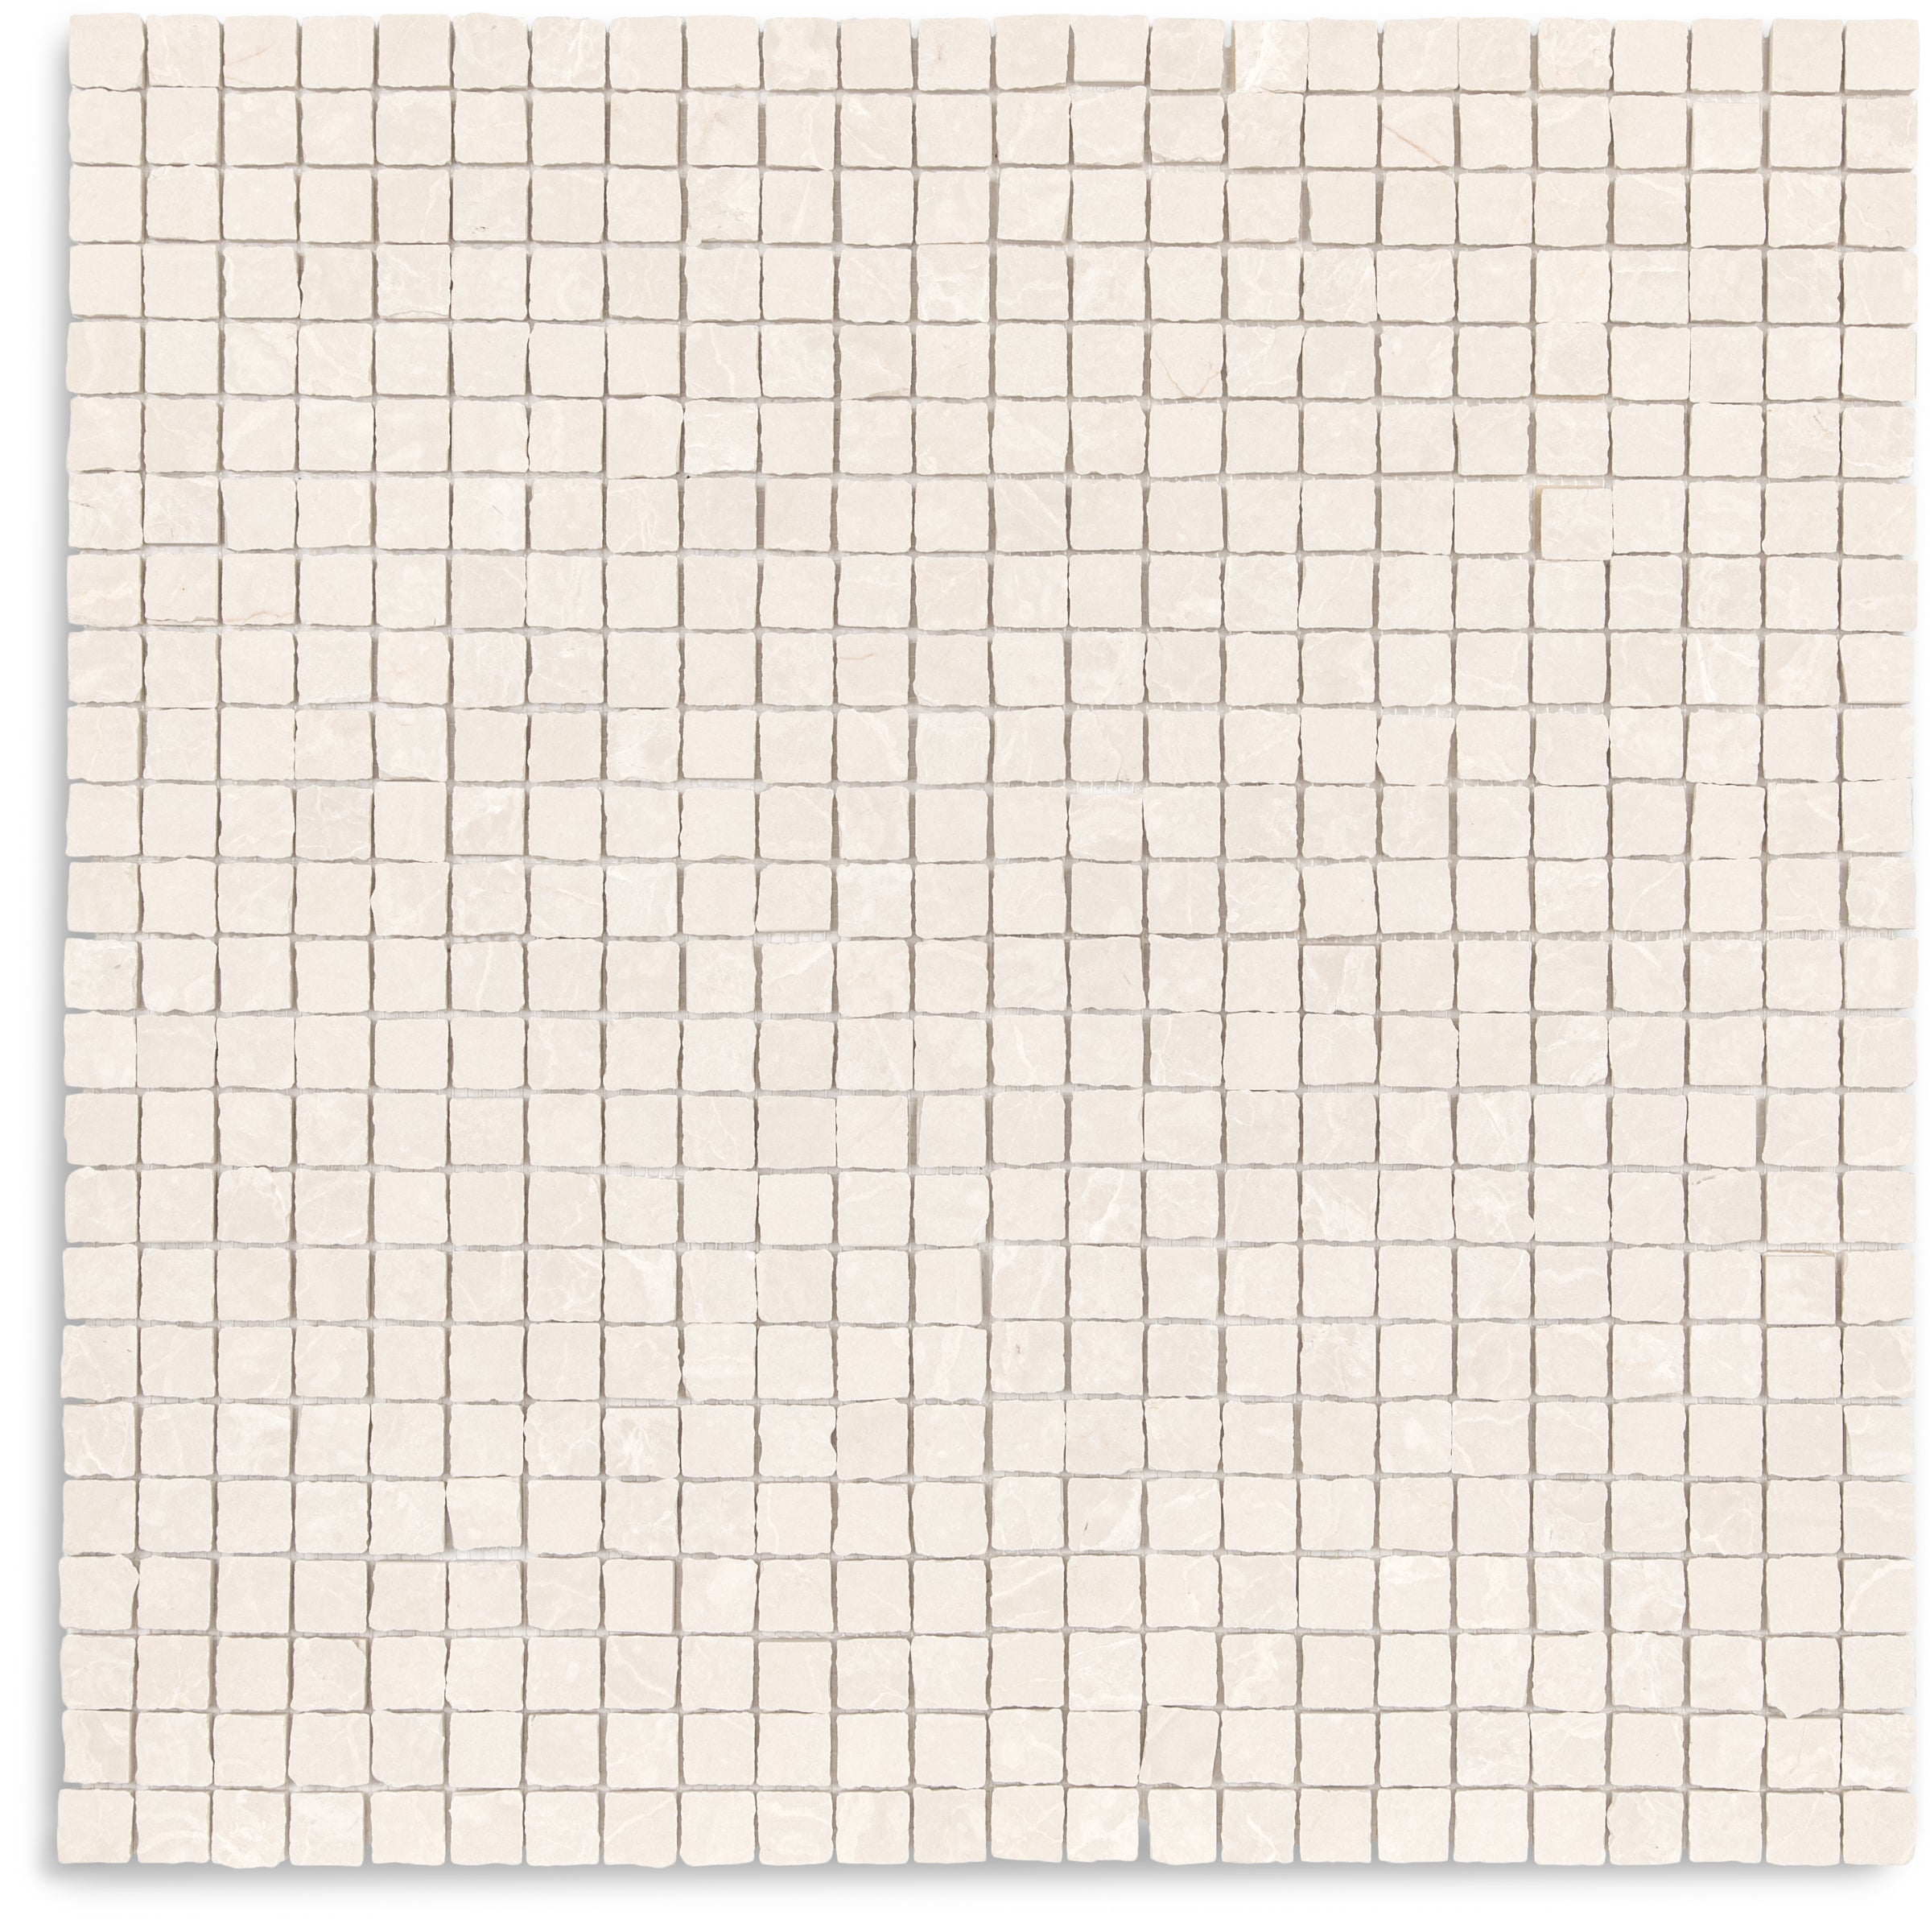
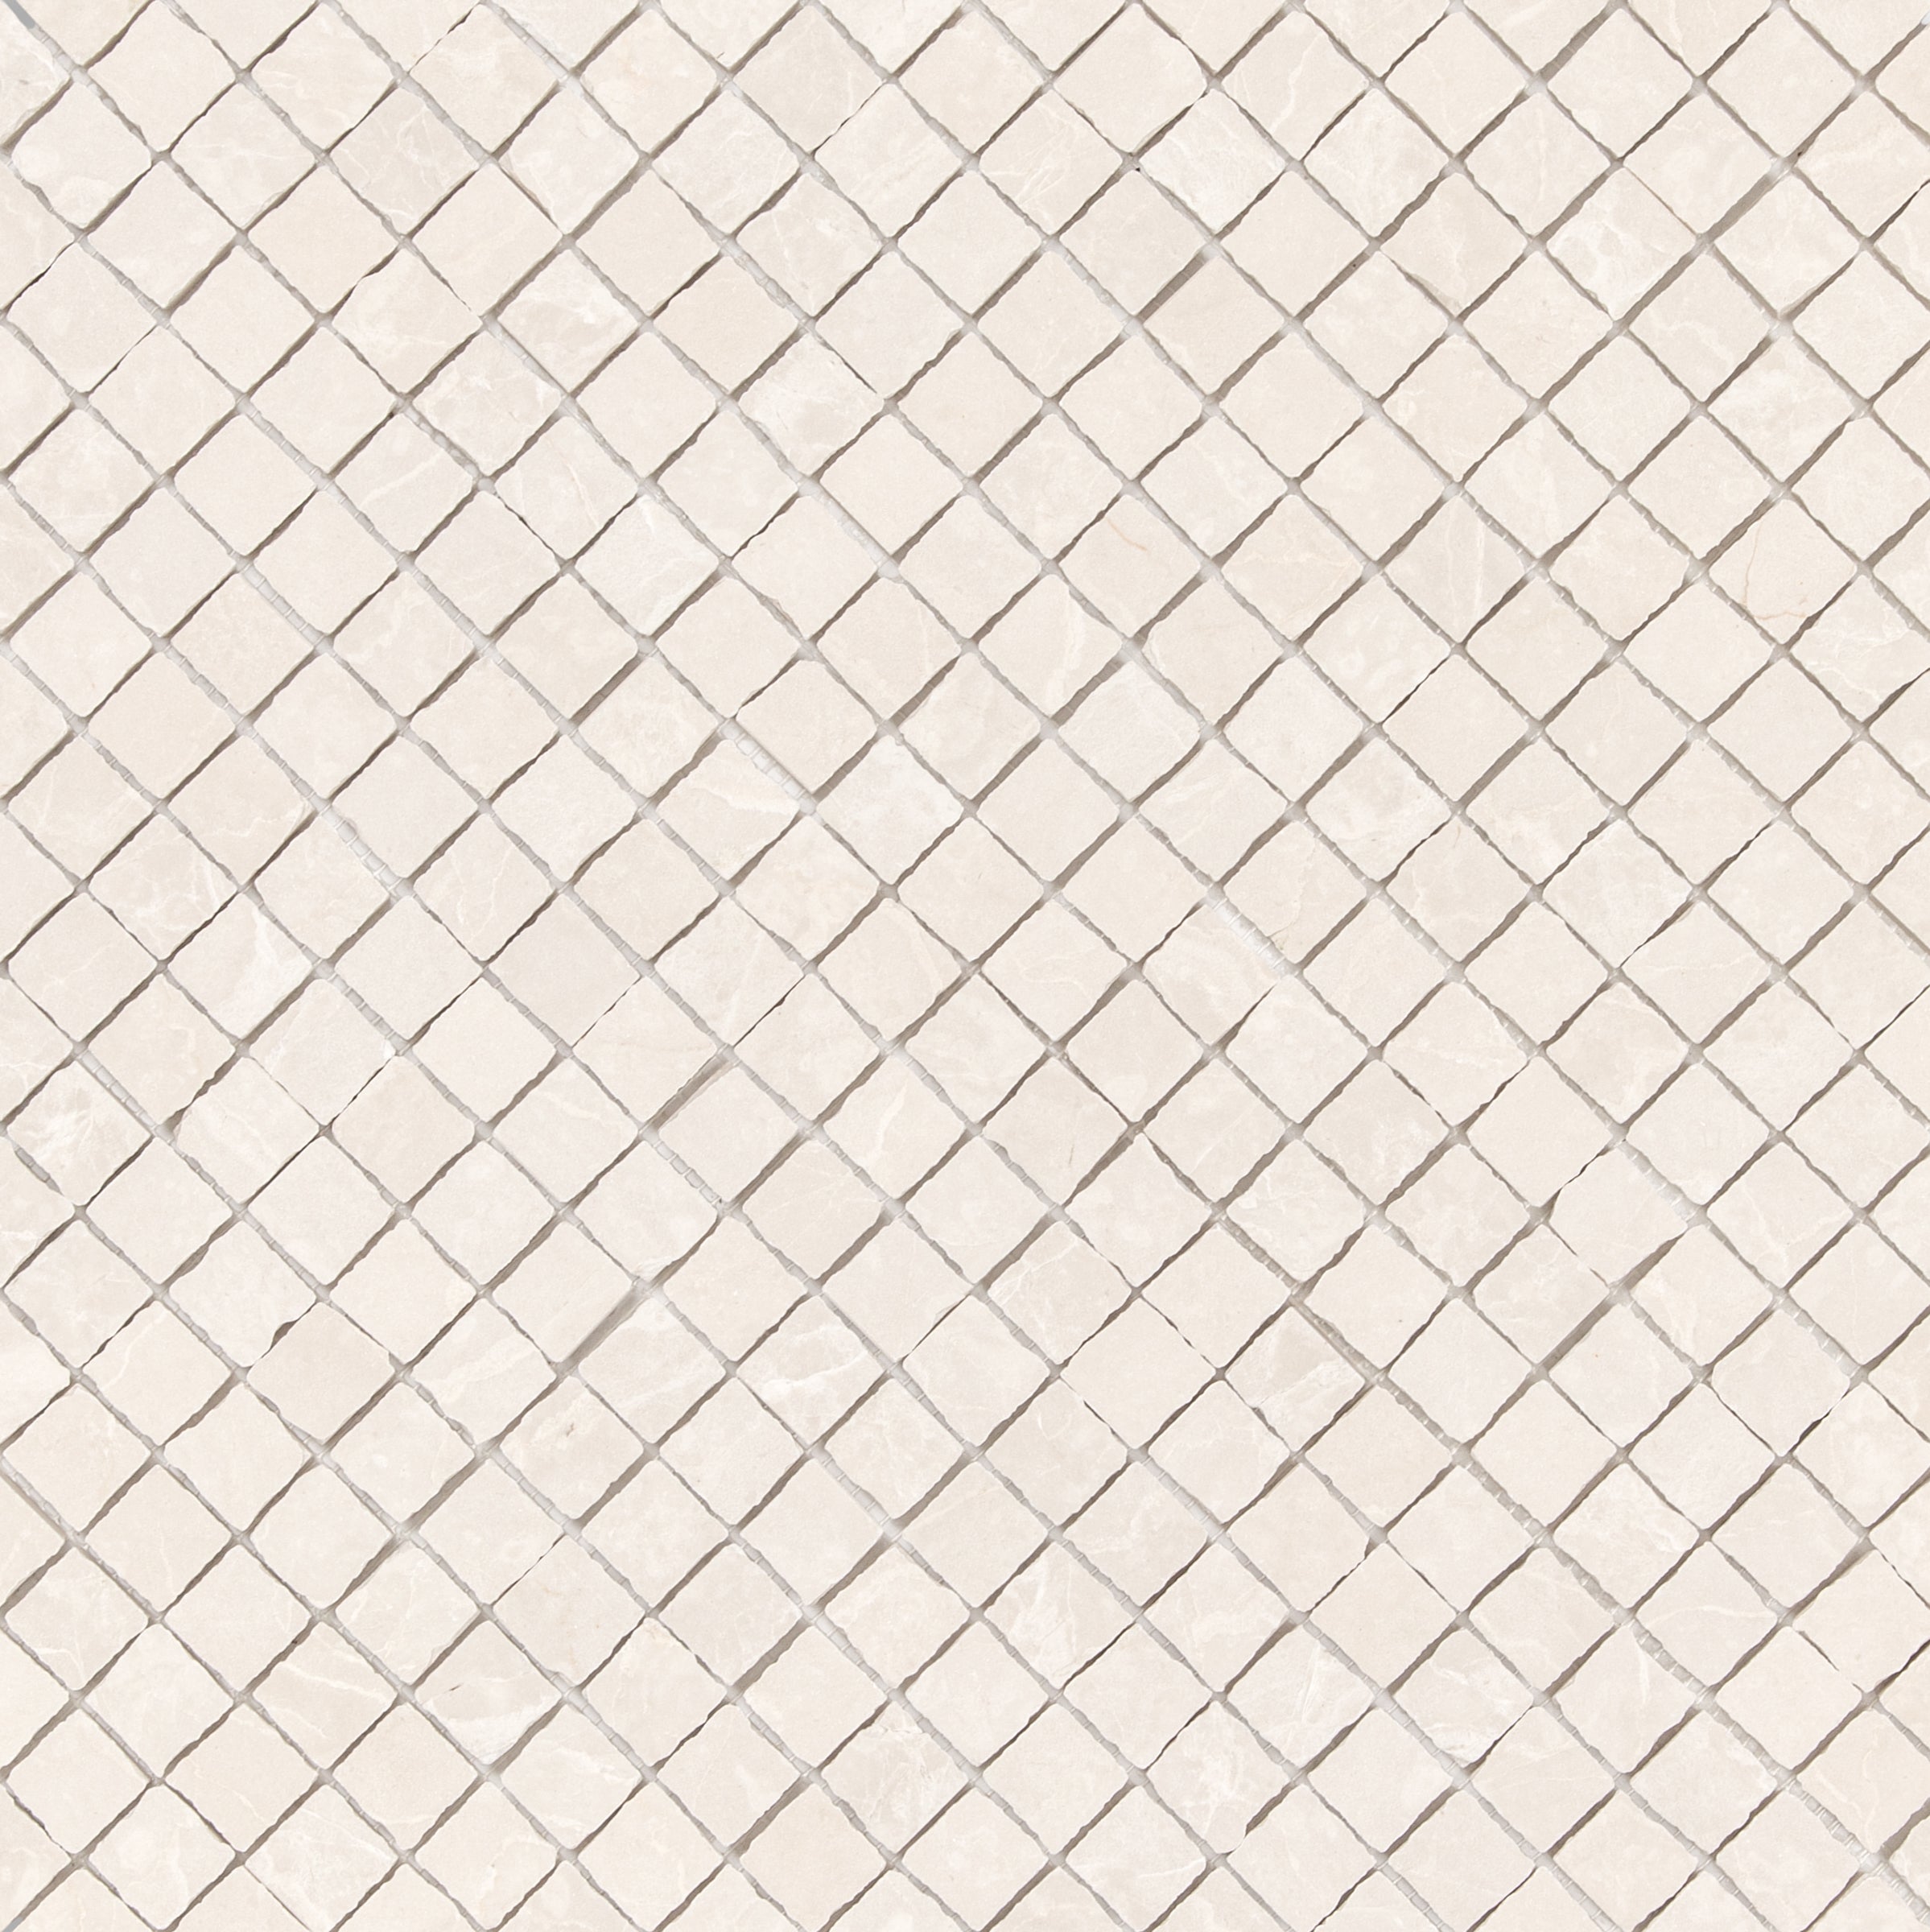
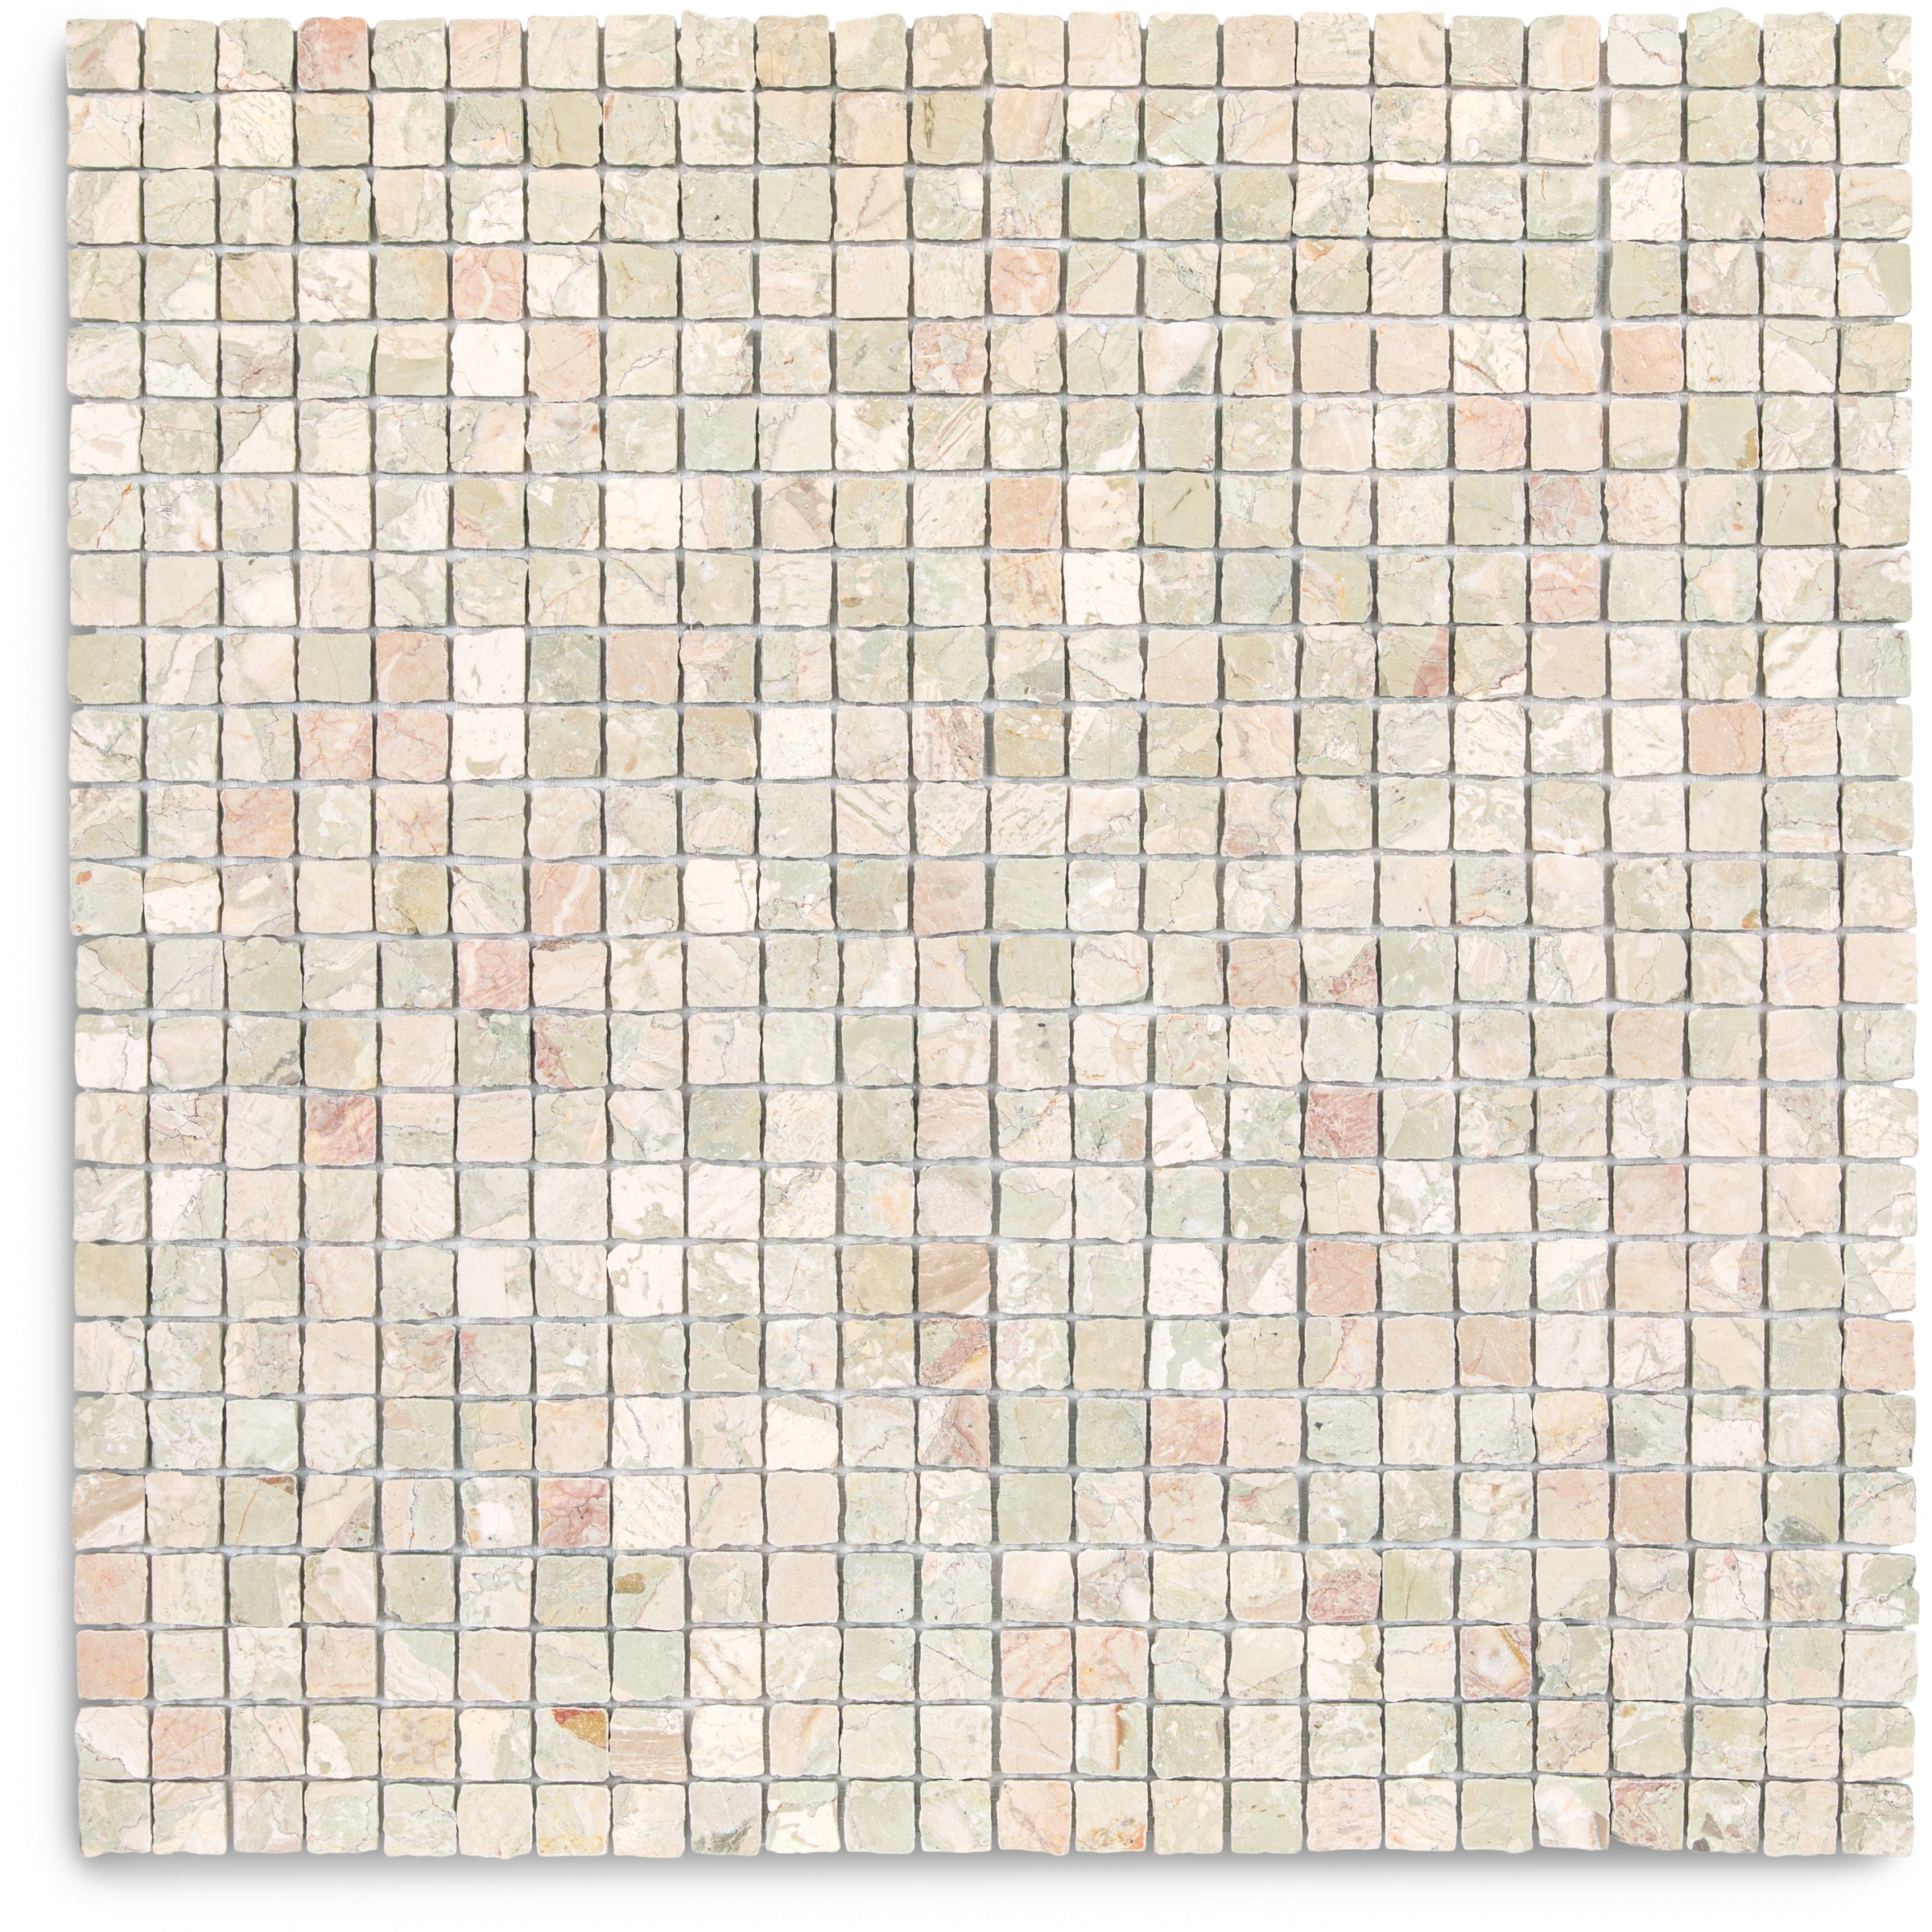
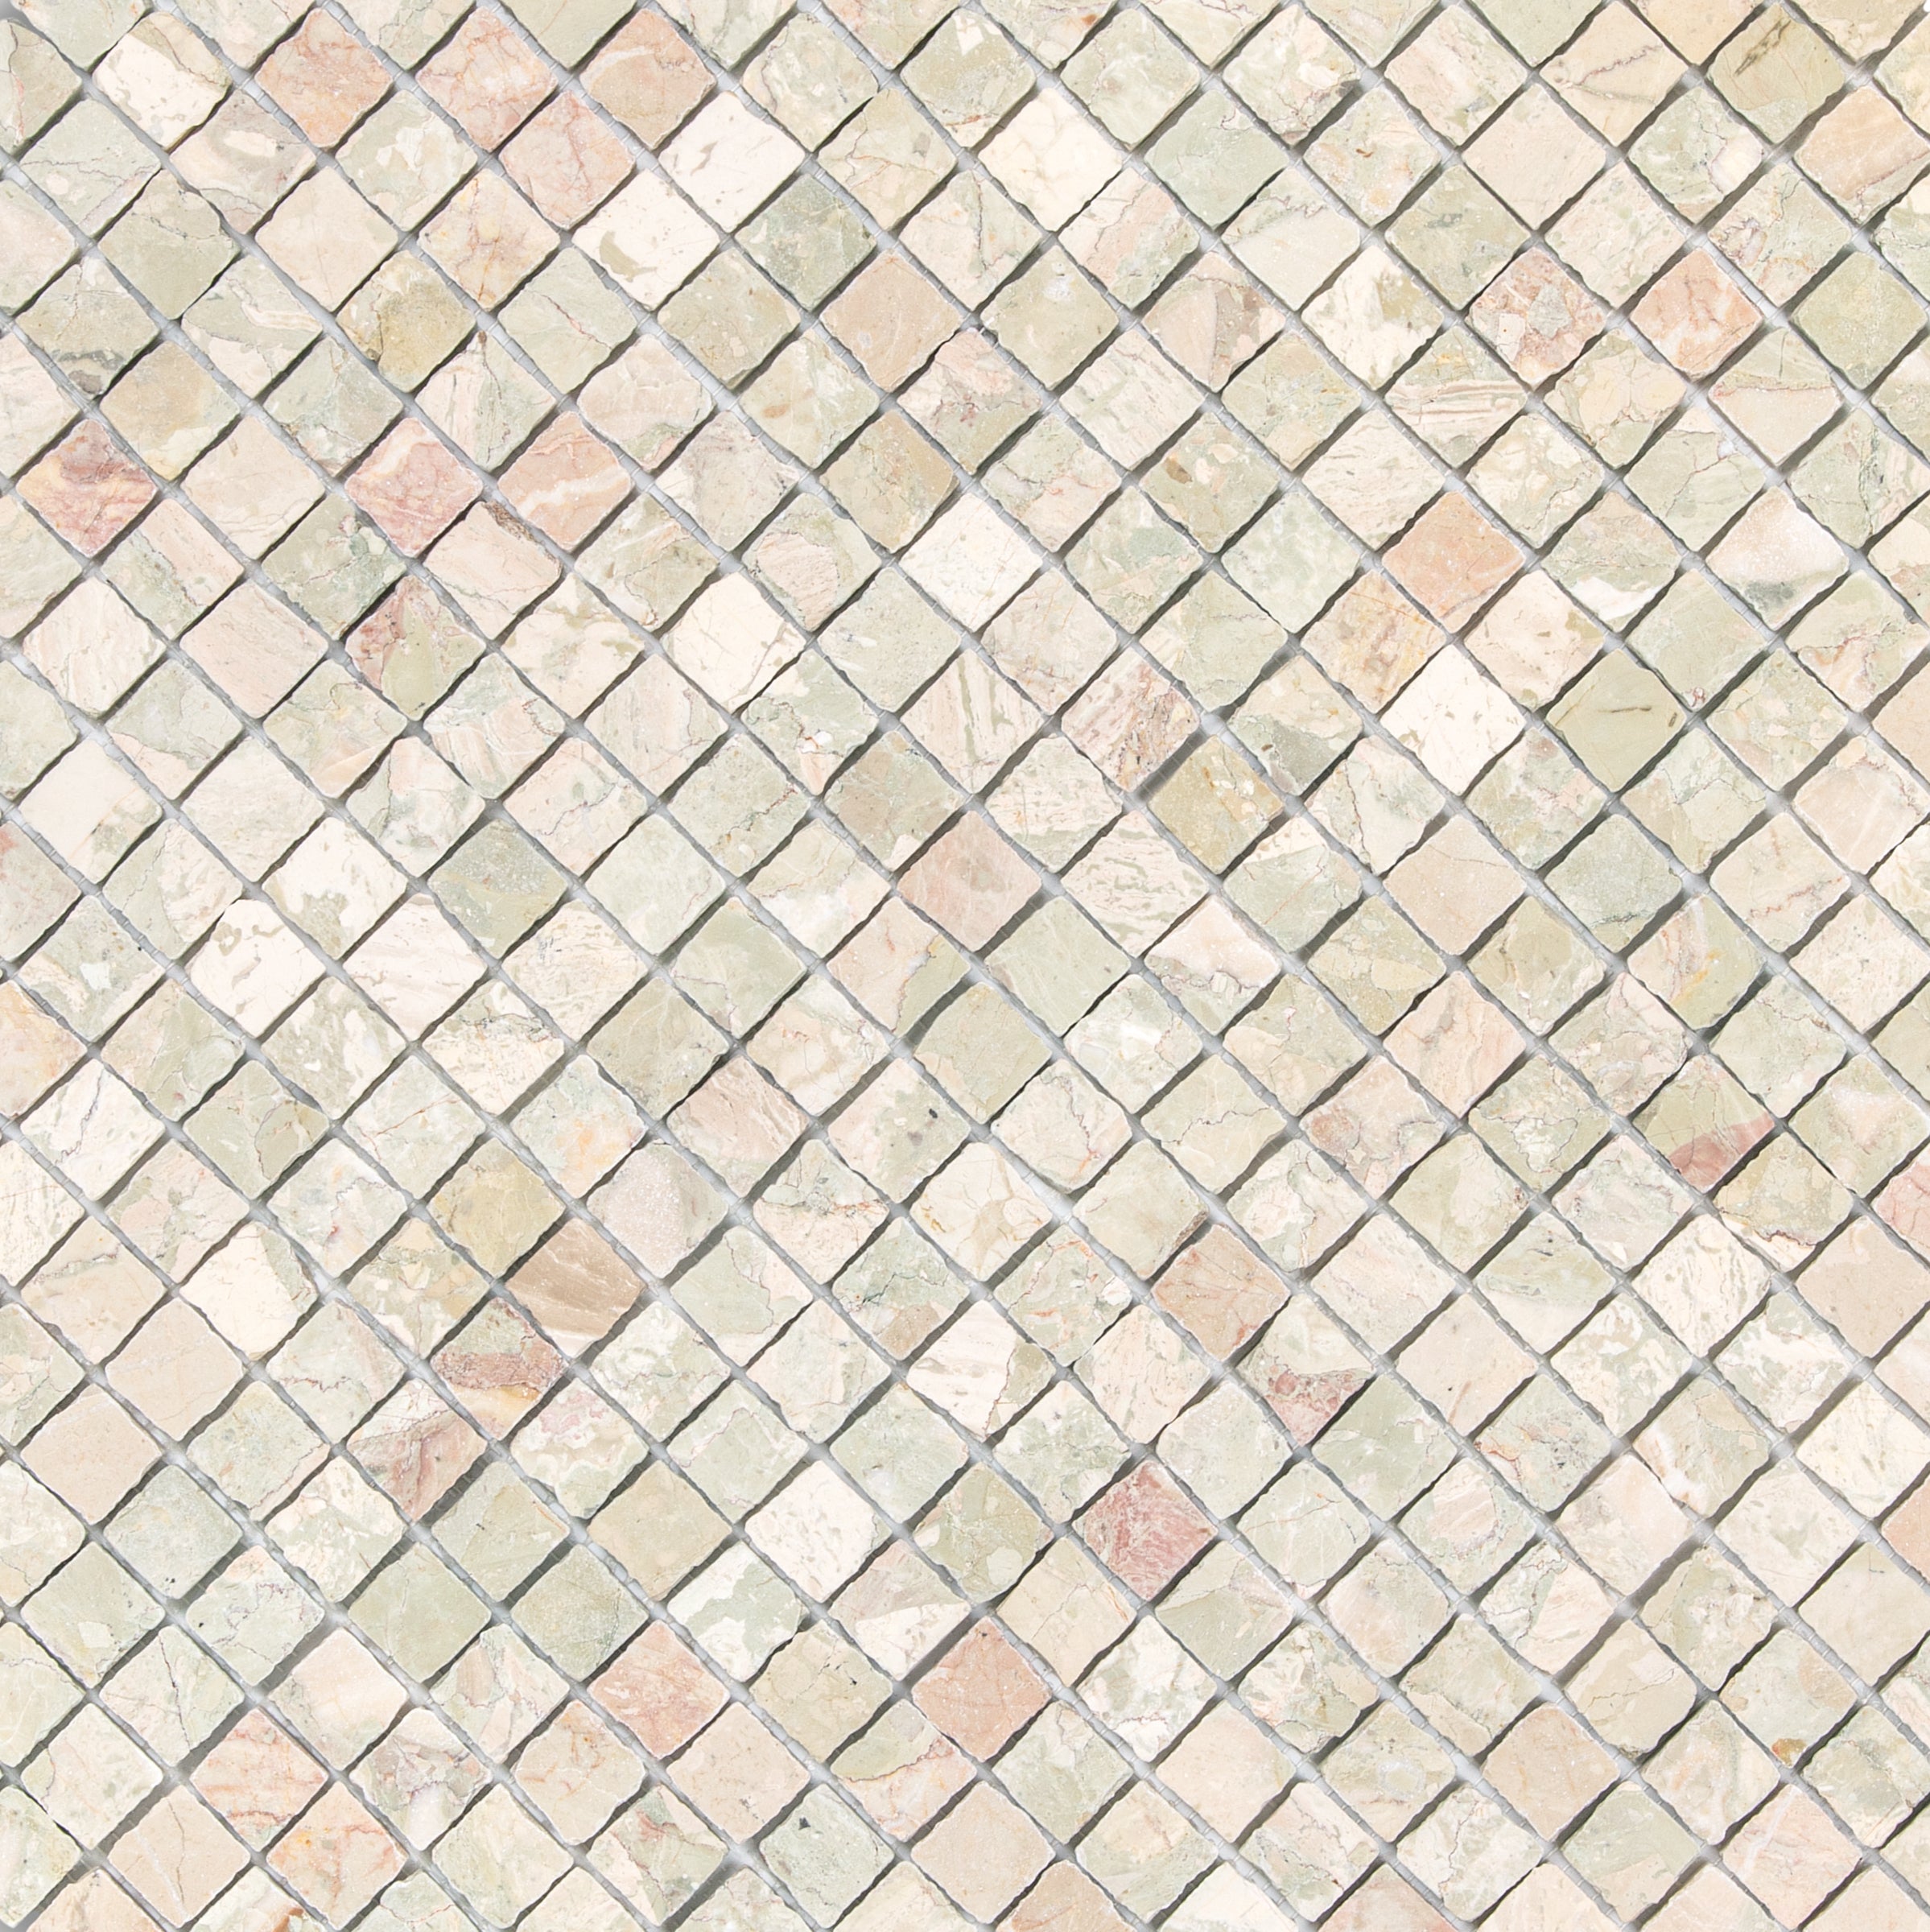
The Carrara Tumbled Basketweave Marble Mosaic takes a pattern that has been used in fine homes for centuries and gives it a softer, more lived in feel. The tumbled finish rounds the edges and gently textures the surface of each Carrara marble piece, creating a look that feels aged and collected rather than freshly cut. Paired with small black marble accent dots at each intersection, the classic interlocking weave pattern gets just enough contrast to pop without feeling busy. Mounted on 12x12 mesh backed sheets, this mosaic is a natural fit for bathroom floors, mudroom entries, and laundry rooms where you want something that looks like it has always been there. If the honed basketweave is the formal version, this is its relaxed, Old World cousin.
Details
Material
Marble
Finish
Tumbled
Chemical Resistant
No
Water Absorption
<.5%
Stain Resistant
No
Seal Required
Yes
Collection
Marble Mosaics
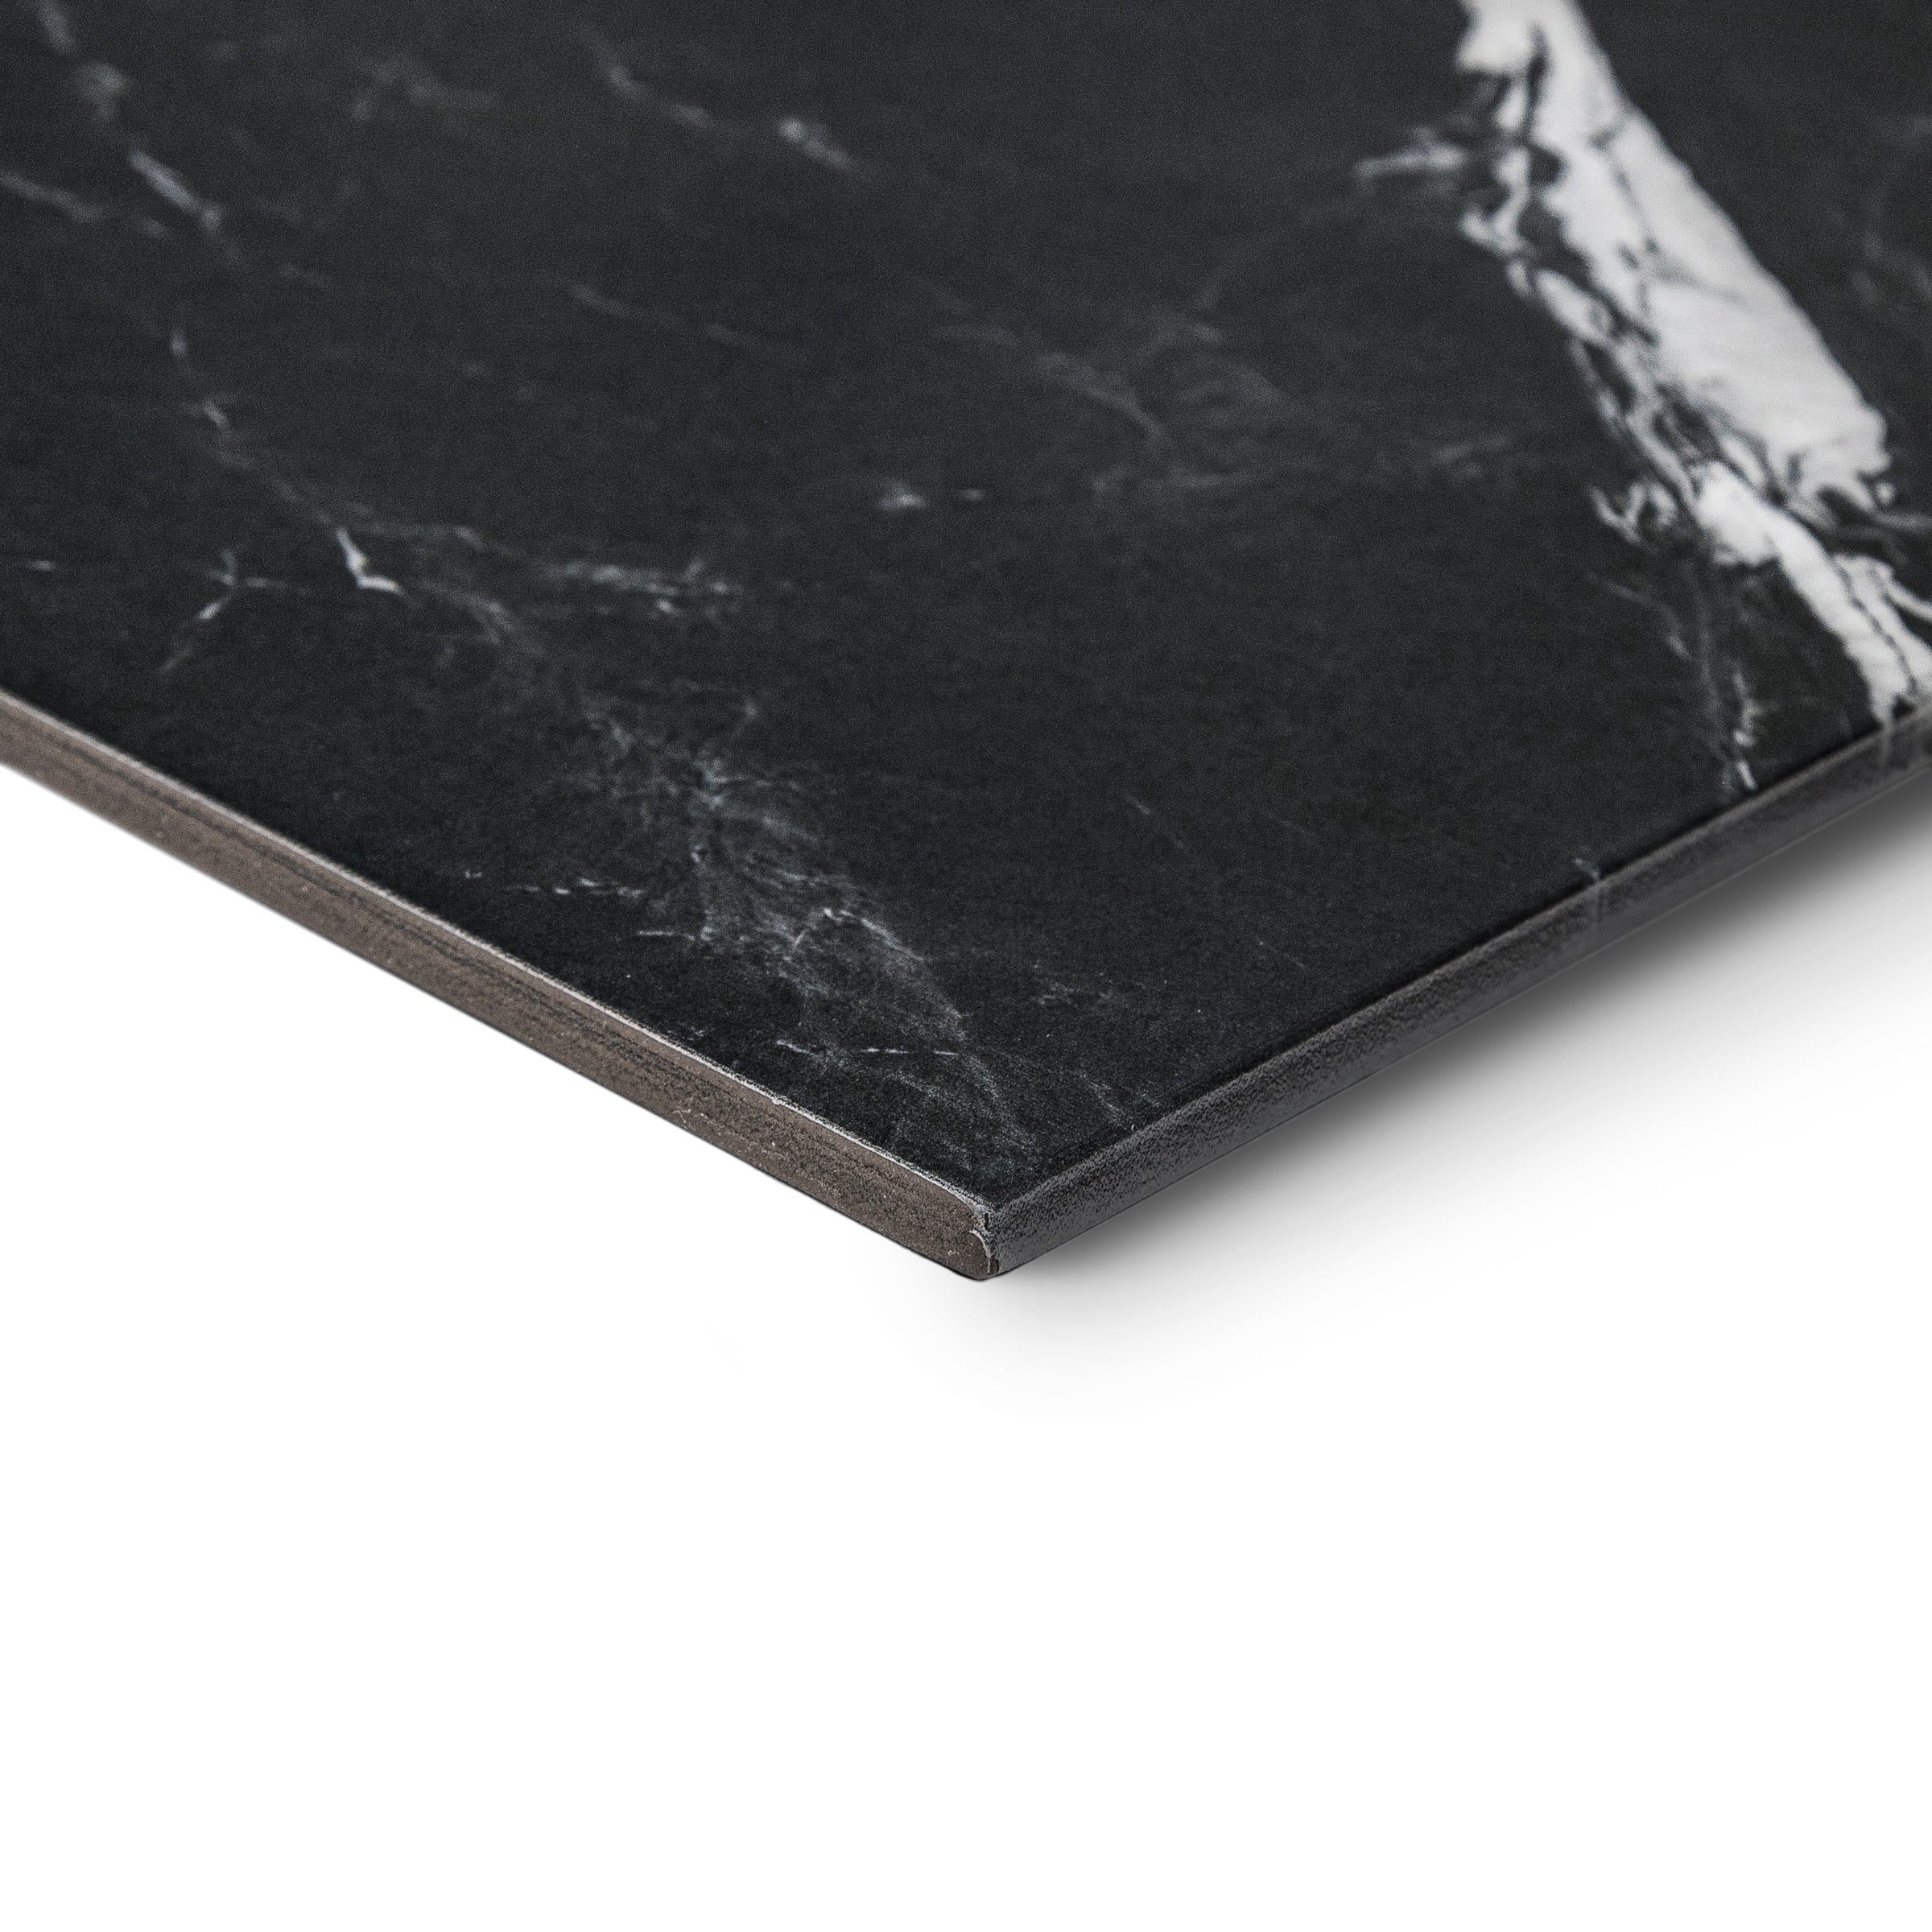
Thickness
3/8"
Actual Size
11 3/4" x 11 3/4"
Nominal Size
12x12
Country of Origin
Italy
Shape
Basketweave
Application
Floors
Edge
Honed
Location
Bathroom Floors, Hallway Floors, Kitchen Floors, Entryway
Look
Marble
Gradient bar
Marble Mosaic Installation Guide
MARBLE MOSAIC TILE INSTALLATION GUIDE
A Comprehensive Guide for DIY Homeowners and Professional Installers
BEFORE YOU BEGIN
Marble mosaics require specialized knowledge and techniques that differ from standard ceramic or porcelain tile installation. We strongly recommend working with a professional installer who has direct experience setting and sealing natural marble. Attempting installation without proper expertise can lead to staining, cracking, and other costly outcomes.
PLEASE NOTE
Reno Source provides these tiles and installation guidance, but cannot assume responsibility for the installation process itself or any issues that arise during or after installation. Following these guidelines carefully will help ensure the best possible outcome for your project.
-
OVERVIEW
Marble mosaics are composed of small pieces of natural marble mounted on a mesh or paper backing for easier handling and installation. These tiles bring the timeless elegance of natural stone into kitchens, bathrooms, entryways, and other spaces. Because each piece is cut from real marble, no two sheets are exactly alike. Subtle differences in veining, color, and texture are inherent to the material and part of its natural character.
Proper installation is essential to getting the most out of marble mosaics. Unlike porcelain or ceramic tile, marble is porous, softer, and more sensitive to chemicals and moisture. The steps in this guide, from surface preparation through sealing, are designed to protect the stone and ensure a lasting, professional result.
Natural variations to expect include color variation in tone and veining, natural pits and fissures, slight dimensional differences between pieces, and unique veining patterns throughout the installation. These characteristics are not defects but natural qualities of marble. If a perfectly uniform appearance is desired, marble mosaics may not be the right choice.
-
TOOLS AND MATERIALS
Required tools include a notched trowel sized 1/4 inch by 1/4 inch or 3/16 inch by 3/16 inch V notch, a flat margin trowel for back buttering, a rubber grout float, a grout bag if using contrasting grout, a water cooled tile saw with diamond blade, 2 foot and 4 foot levels, measuring tape and pencil, mixing bucket and drill with paddle, sponges, clean water bucket, lint free cloths, eye protection, and an N95 dust mask.
Materials include high quality white medium bed thinset mortar, never gray thinset, Mapei Flexcolor CQ grout or equivalent, penetrating stone sealer such as Fila Stone Sealer, pH neutral stone cleaner such as Fila Stone Clean, an appropriate substrate such as cement board or concrete, and a waterproof membrane for all wet area installations.
-
STEP BY STEP INSTALLATION
Step 1 Inspect Your Order
Open all boxes and inspect every sheet for shipping damage. Verify quantities and spread sheets from multiple boxes to view the full range of natural variation. Once installed, concerns related to inherent stone characteristics cannot be addressed.
Order at least 15 to 20 percent extra material for cuts, waste, and future repairs. For more selective installations, 20 to 25 percent extra is recommended.
Step 2 Surface Preparation
The substrate must be rigid, flat, clean, and dry. Wood framed floors should use an uncoupling membrane. Flatness must be within 1/8 inch over 10 feet. Remove all dust, debris, paint, or oils. New concrete must cure a minimum of 30 days to prevent efflorescence.
For wet areas, apply a waterproof membrane over the entire surface, seal all seams and penetrations, and allow to cure fully. Never install marble directly on untreated drywall in wet areas.
Step 3 Layout Planning
Blend sheets from all boxes throughout the installation. Perform a full dry layout under the actual lighting conditions of the space. Choose grout color carefully as it significantly affects appearance. Plan all cuts and transitions in advance.
Photograph the dry layout before setting tile to maintain reference during installation.
Step 4 Setting the Tile
Mix white thinset per manufacturer instructions and allow proper slake time. Spread thinset in sections no larger than 2 by 2 feet and comb in straight lines. Lightly dampen the back of each sheet before installation. Back butter each sheet with a thin, even layer of thinset. Press sheets into place by hand, do not use a mallet. Align sheets carefully using 1/8 inch spacers unless specified otherwise. Clean excess thinset immediately.
Step 5 Cutting
All cuts must be made using a water cooled tile saw with a sharp diamond blade. Cut slowly and steadily. Always wear eye protection and an N95 mask. Perform cutting outdoors or in a well ventilated area when possible.
Step 6 Curing
Allow thinset to cure a minimum of 48 hours before proceeding. Do not apply pressure during this time. Cold or humid conditions may require longer cure times.
-
SEALING AND GROUTING
Pre grout sealing is mandatory. Clean the surface with a pH neutral stone cleaner and allow to dry. Apply penetrating sealer in thin coats until the stone is saturated, wiping excess before it dries. Allow sealer to cure fully before grouting.
Grout in small sections using a rubber float at a diagonal angle. Fill joints and natural pits evenly. Clean continuously with a damp sponge. Do not allow grout to dry on the marble surface. Allow grout to cure at least 48 hours.
After grout cure, apply a final coat of sealer to protect both tile and grout. Follow manufacturer instructions for interior or exterior use.
-
FLOOR WALL AND WET AREA CONSIDERATIONS
For floors, ensure the substrate is fully cured and use an uncoupling membrane on wood framing. For walls, install only on stable surfaces. In dry areas, marble may be installed over drywall. Never install over paint.
For commercial or wet areas, verify slip resistance and DCOF requirements. Protect installed marble during construction. For edges, consider mitered corners or Schluter profiles.
-
TIPS AND TROUBLESHOOTING
Always use experienced installers, blend sheets thoroughly, work slowly, clean continuously, use white thinset only, keep spare material, and always seal before grouting.
Common issues include grout haze from delayed cleanup, efflorescence from moisture migration, tile release from poor coverage, uneven joints from misaligned sheets, staining from skipped sealing, and cracking from substrate movement.
-
CARE AND MAINTENANCE
Sweep or vacuum regularly. Clean with a soft damp cloth and pH neutral cleaner. Wipe spills immediately. Avoid acidic cleaners, bleach, abrasive tools, ammonia, or harsh chemicals. Reseal as needed based on water absorption testing. Address grout damage or leaks promptly. Natural patina and wear are expected over time.
-
PRODUCT AND LIABILITY INFORMATION
Reno Source provides this guide as a resource only. Responsibility for installation, material selection, and workmanship rests with the installer and homeowner. Natural variations in marble are inherent and not defects. Inspect material before installation. Installed tile is considered accepted.
Installers should wear protective equipment when handling and cutting stone. Cutting or grinding marble may release crystalline silica dust. Follow OSHA dust control guidelines. Wash hands after handling materials.
California Proposition 65 Warning: This product may expose you to chemicals including crystalline silica and lead, known to cause cancer and reproductive harm. More information is available at www.P65Warnings.ca.gov.
Reno Source
Finish Materials
Based in the USA
www.therenosource.com
support@therenosource.com
From the same collection


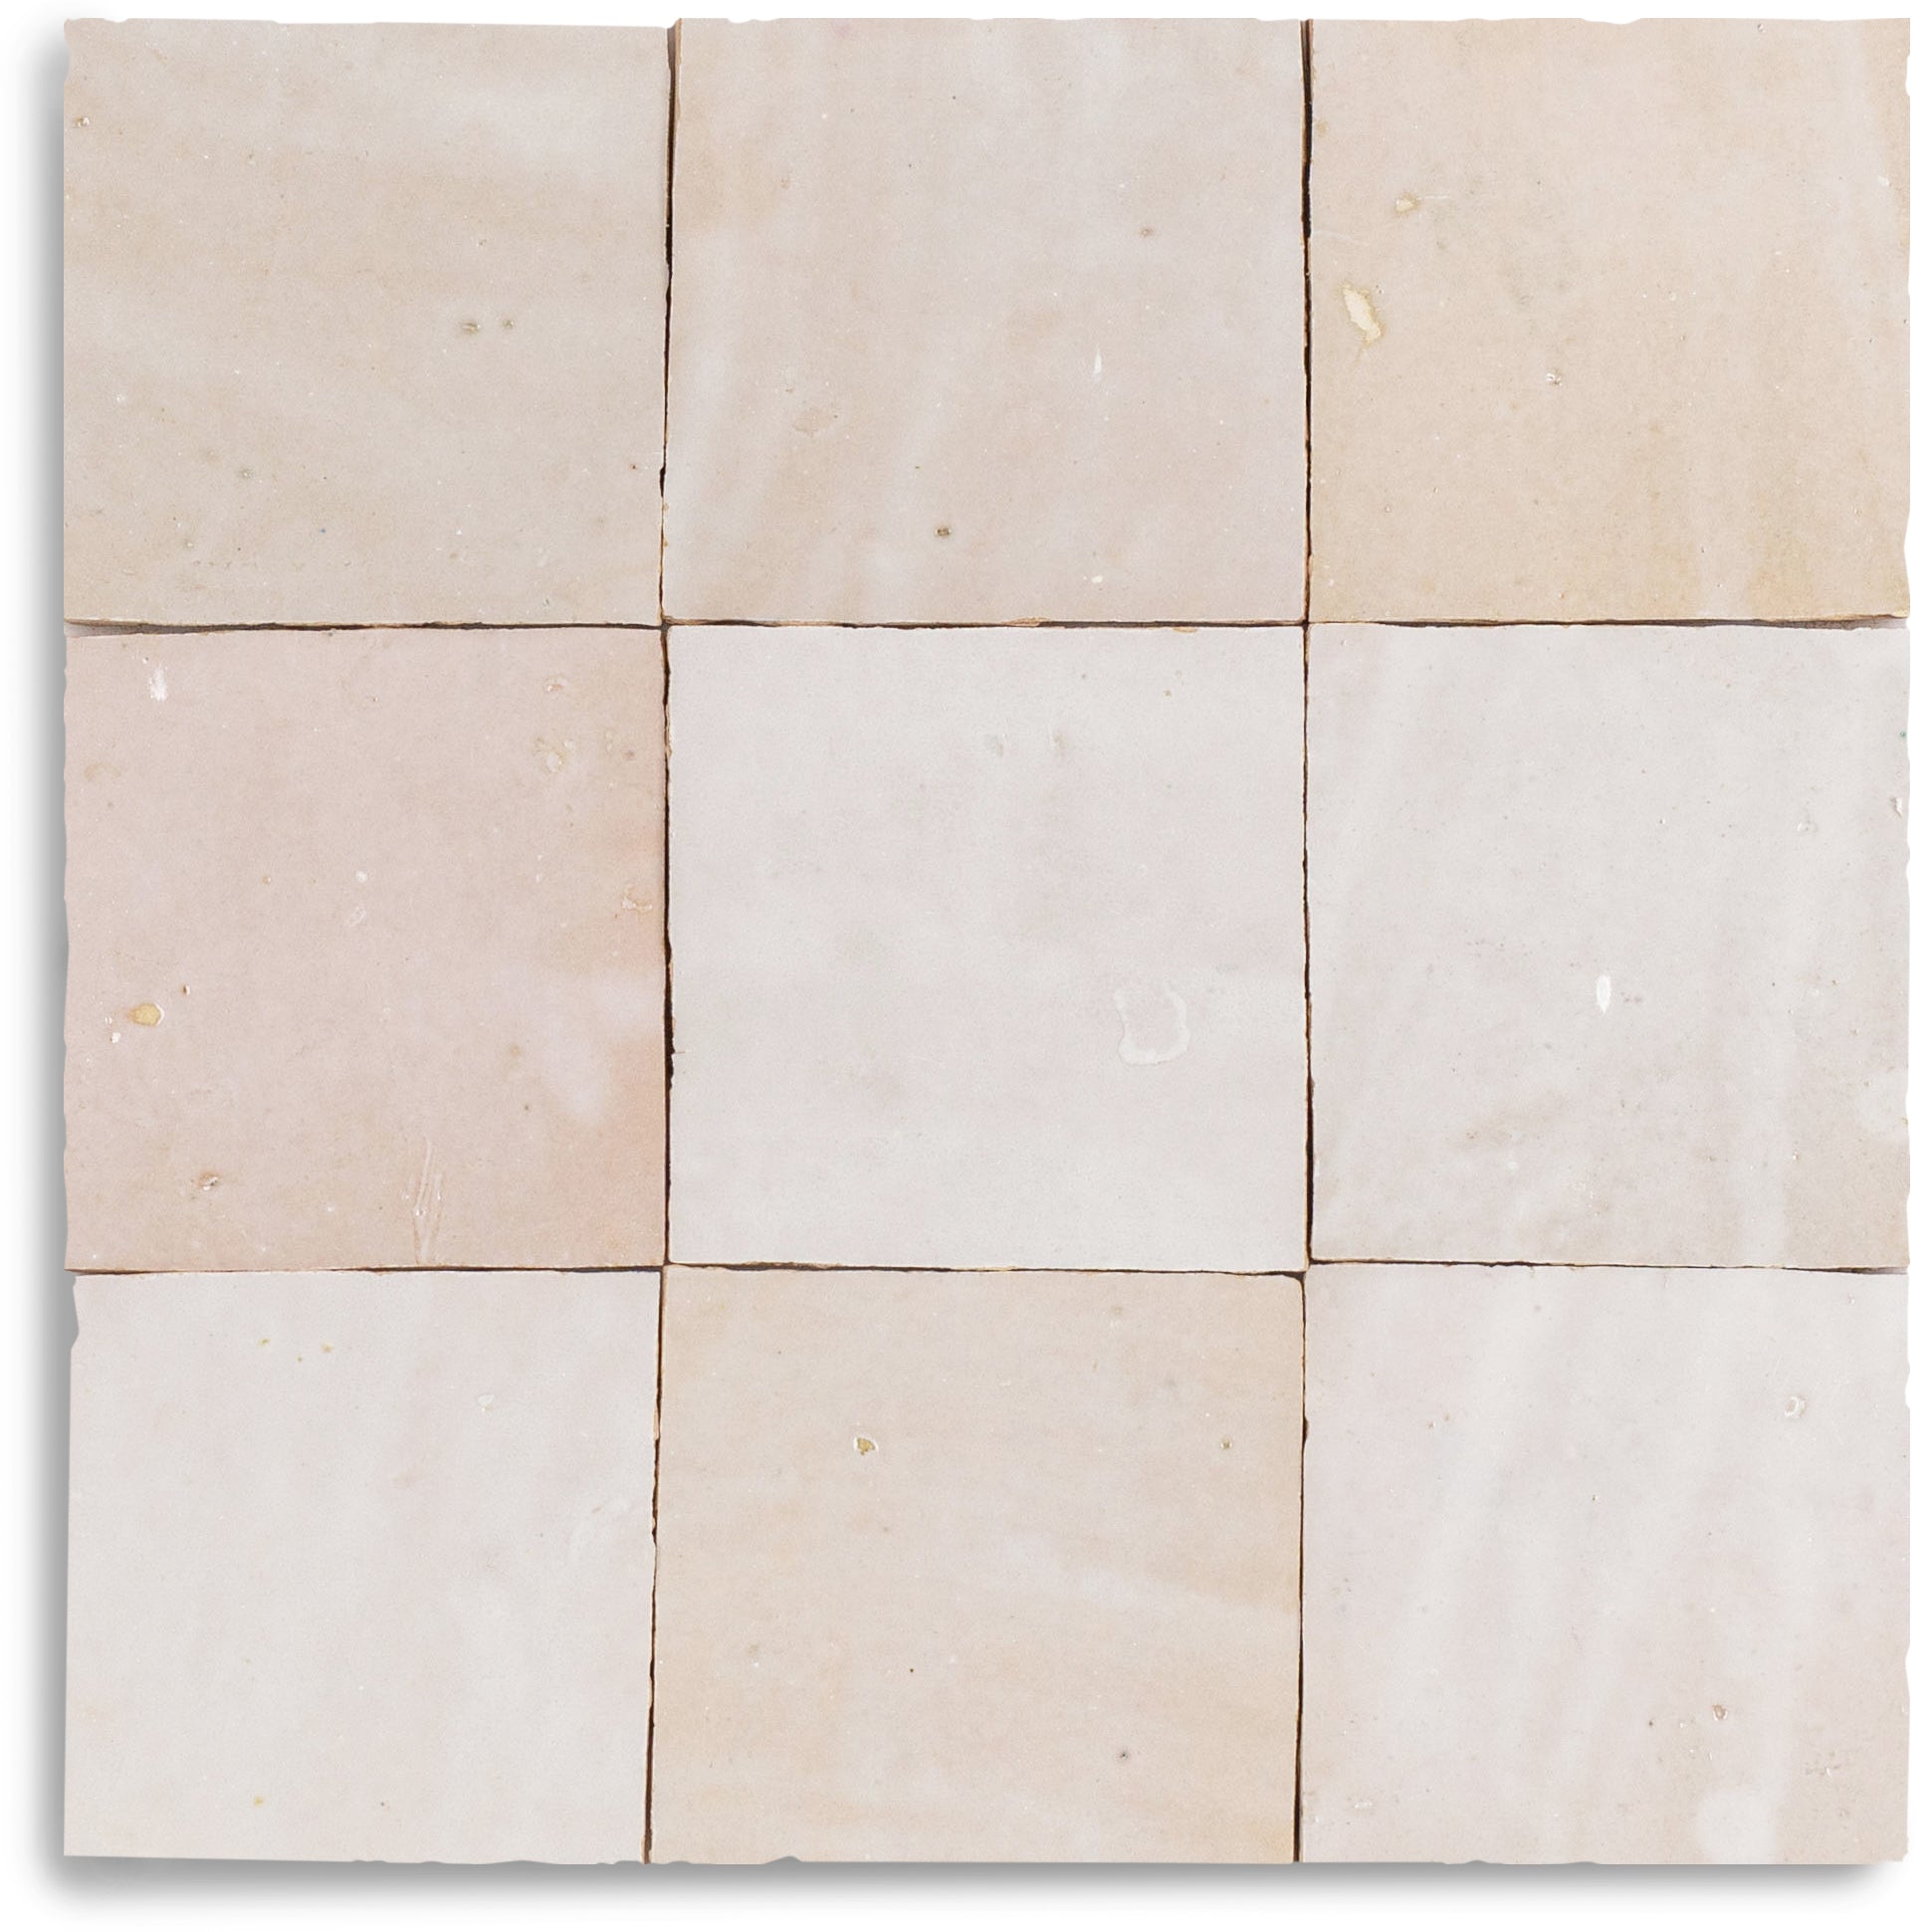
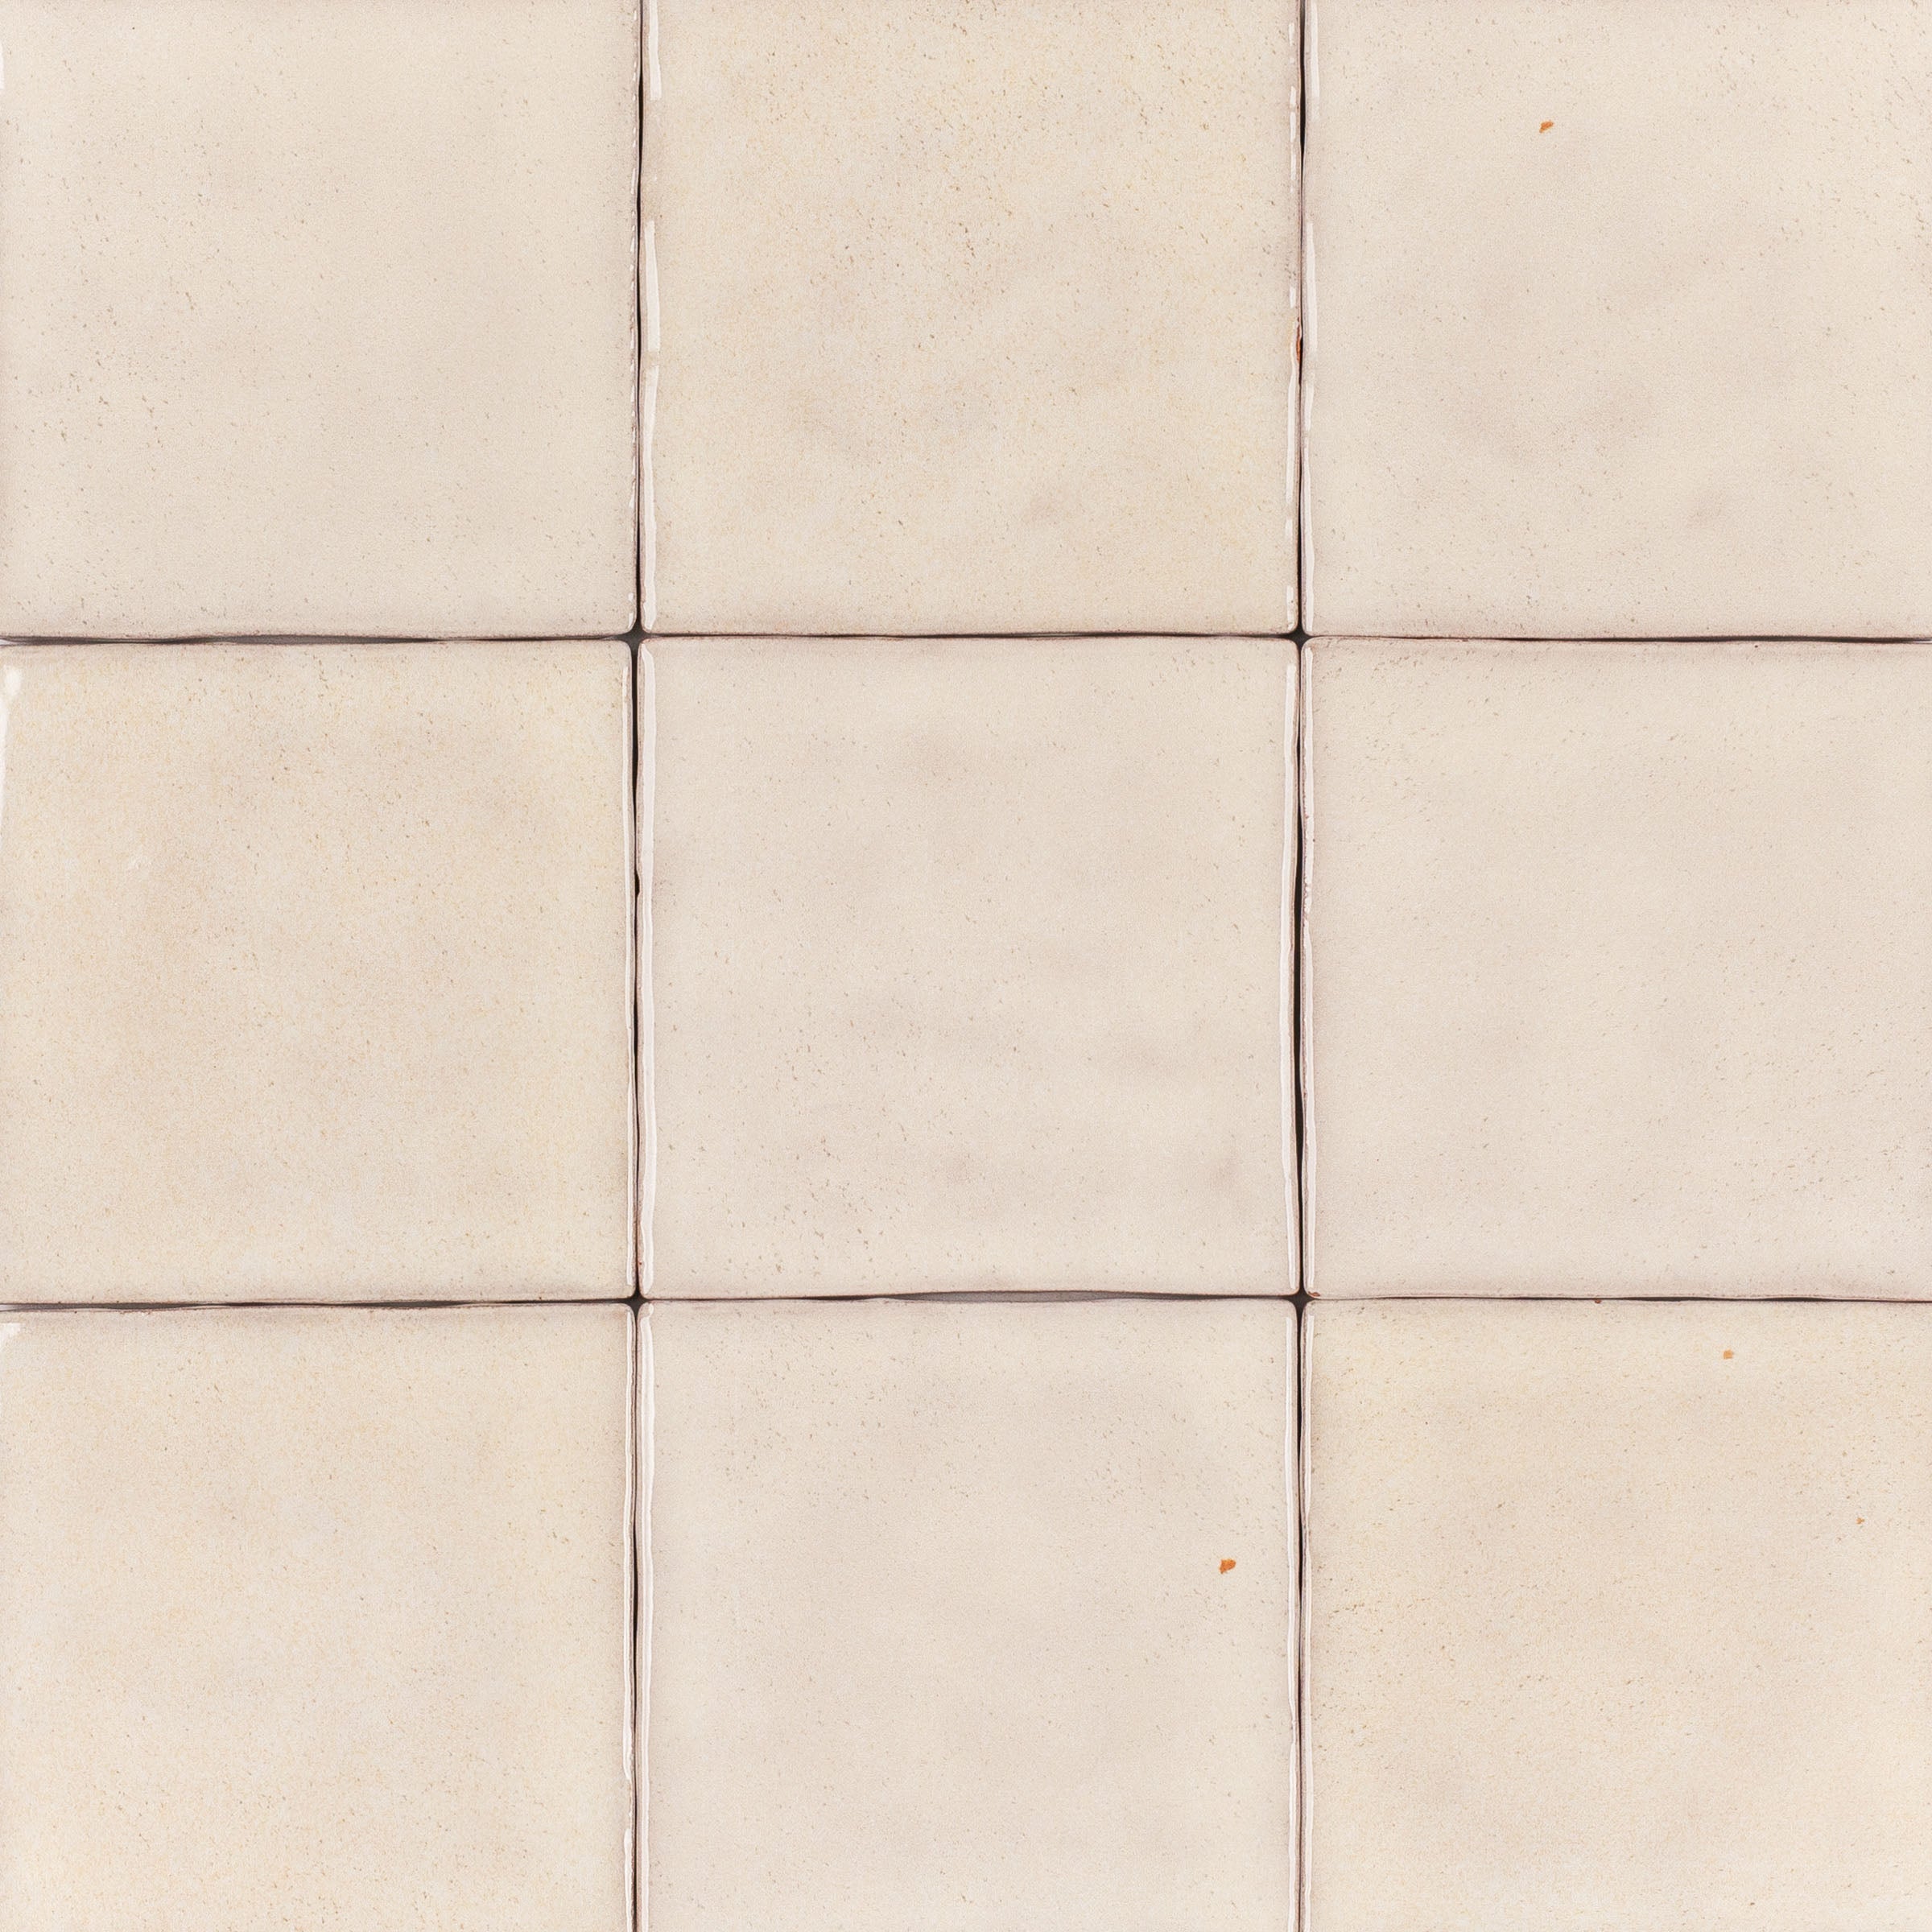
White & Ecru Octagon Zellige Mosaic

Cotto Deco Terracotta Look Matte Porcelain Tile


White & Ecru 2x2 Zellige Checkerboard Mosaic


Unglazed & White Octagon Zellige Mosaic


Chiaro Deco Terracotta Look Matte Porcelain Tile


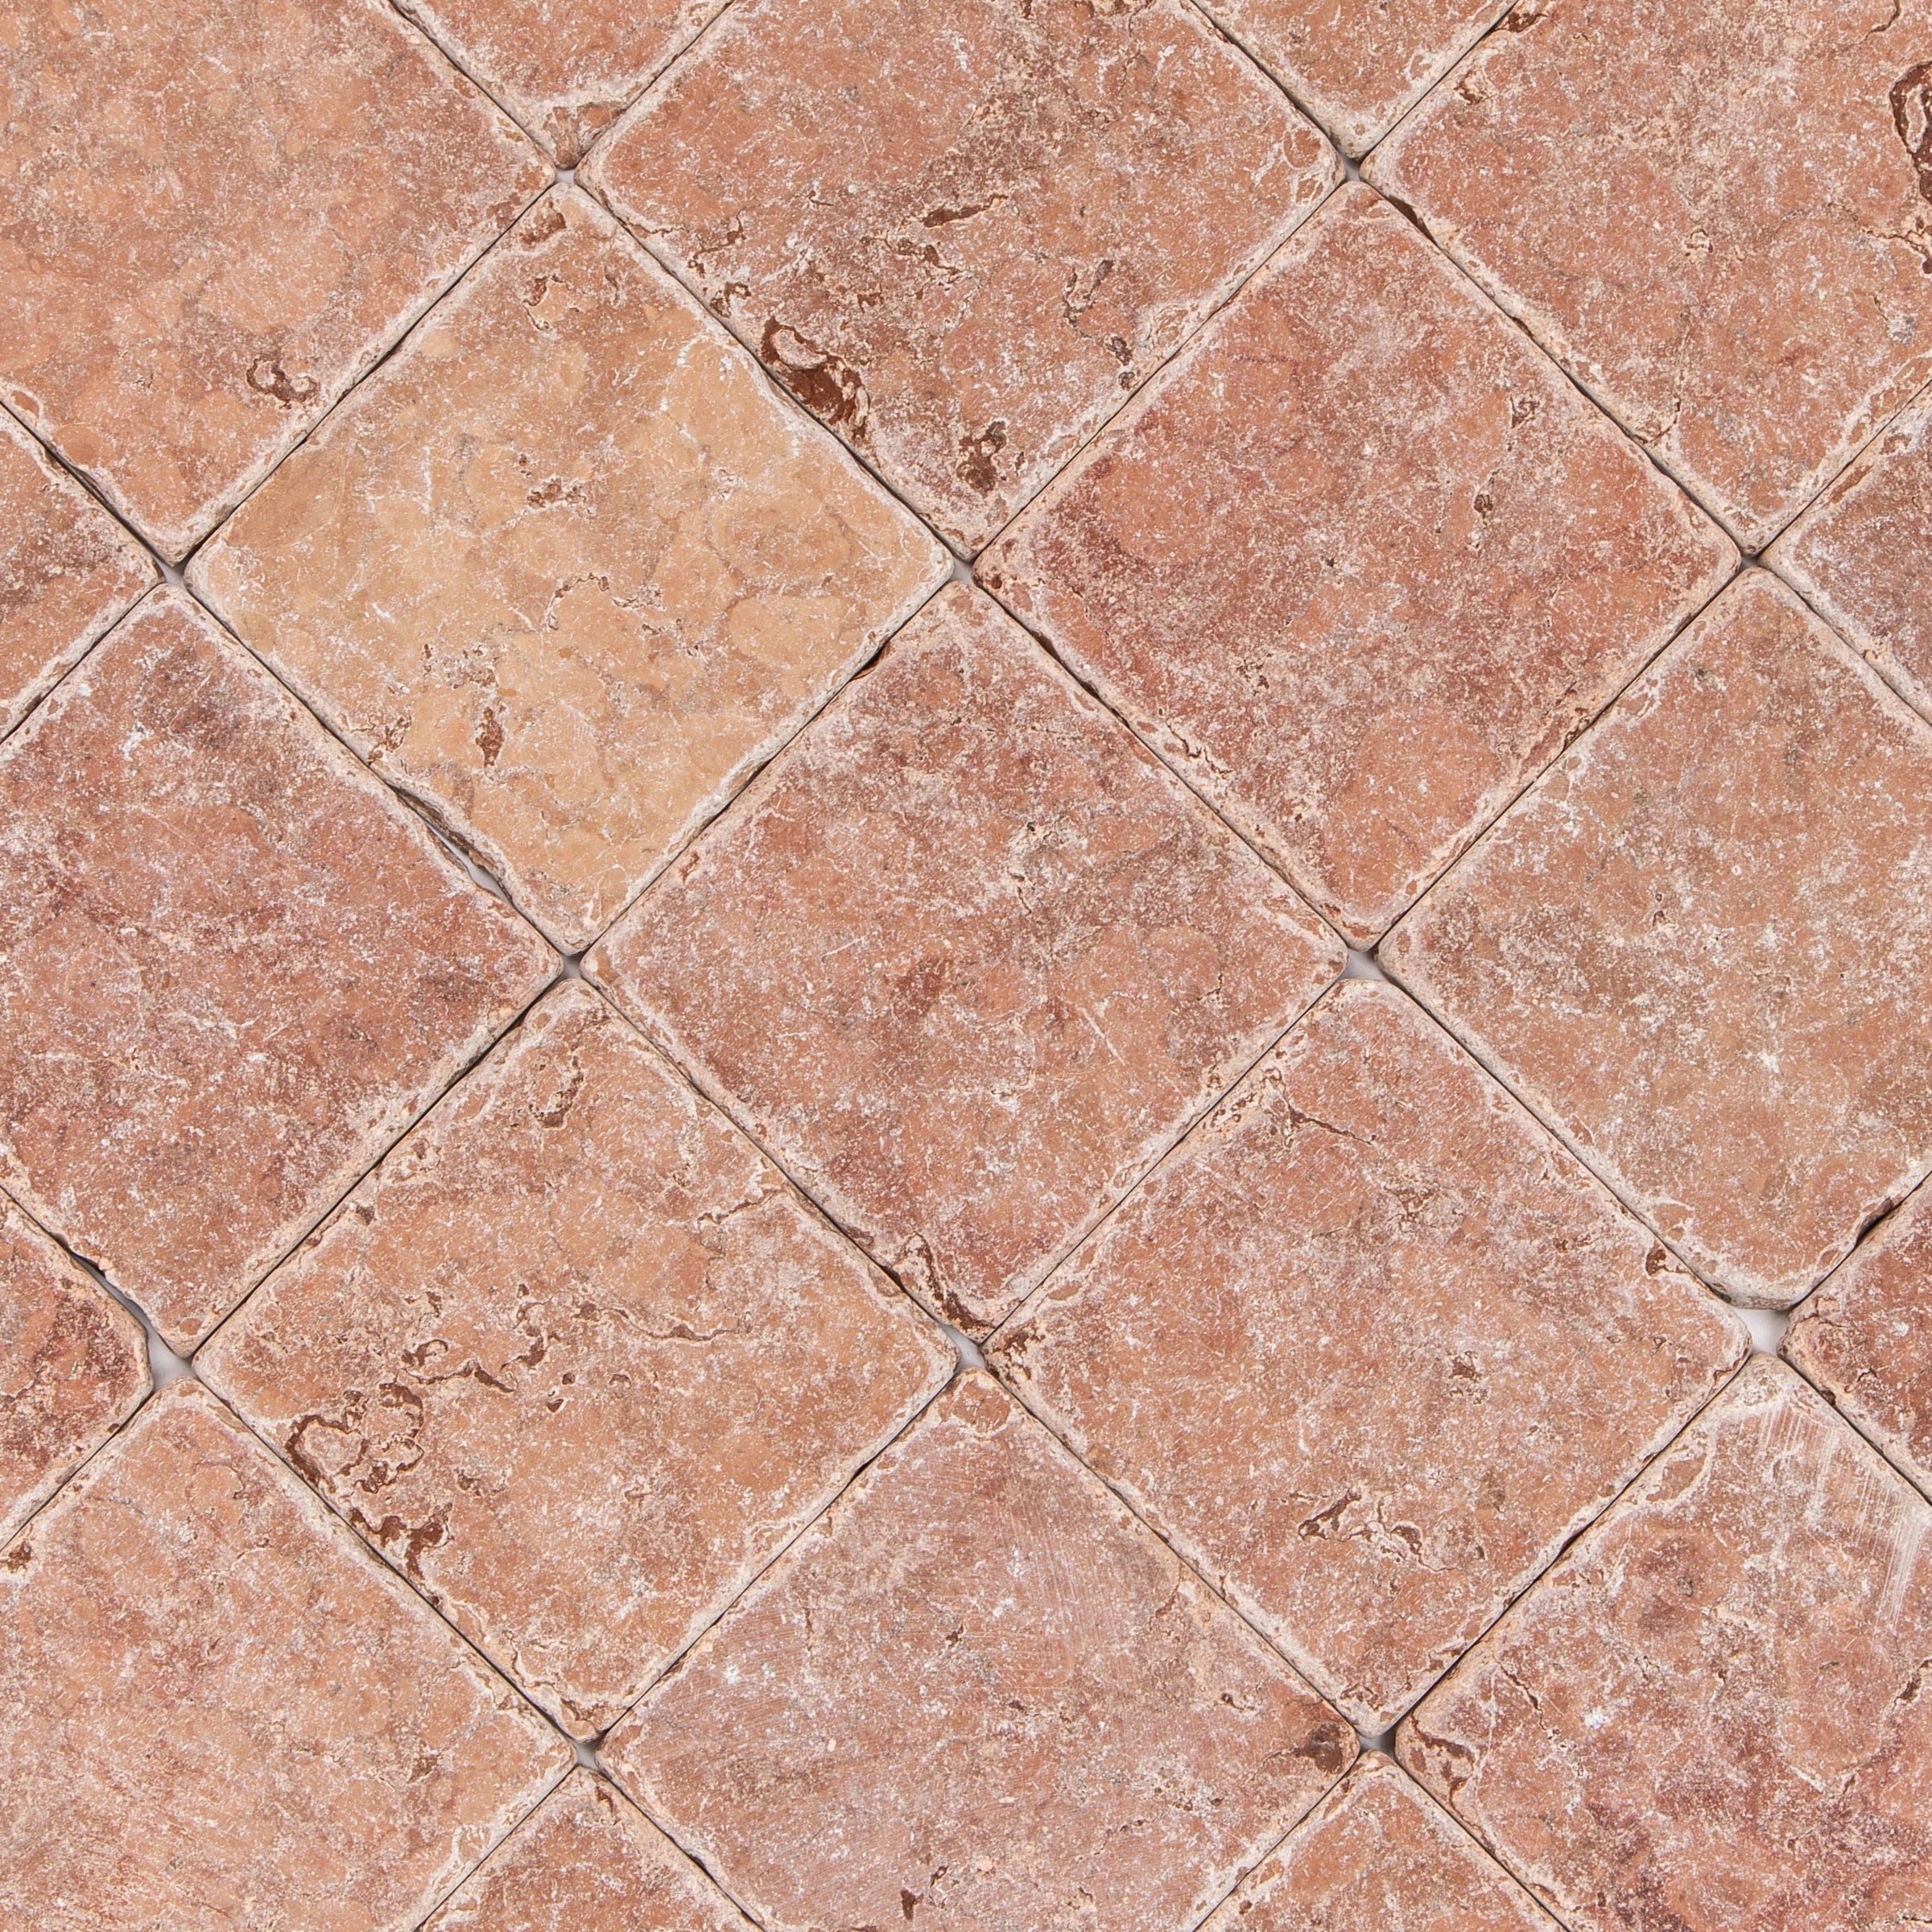
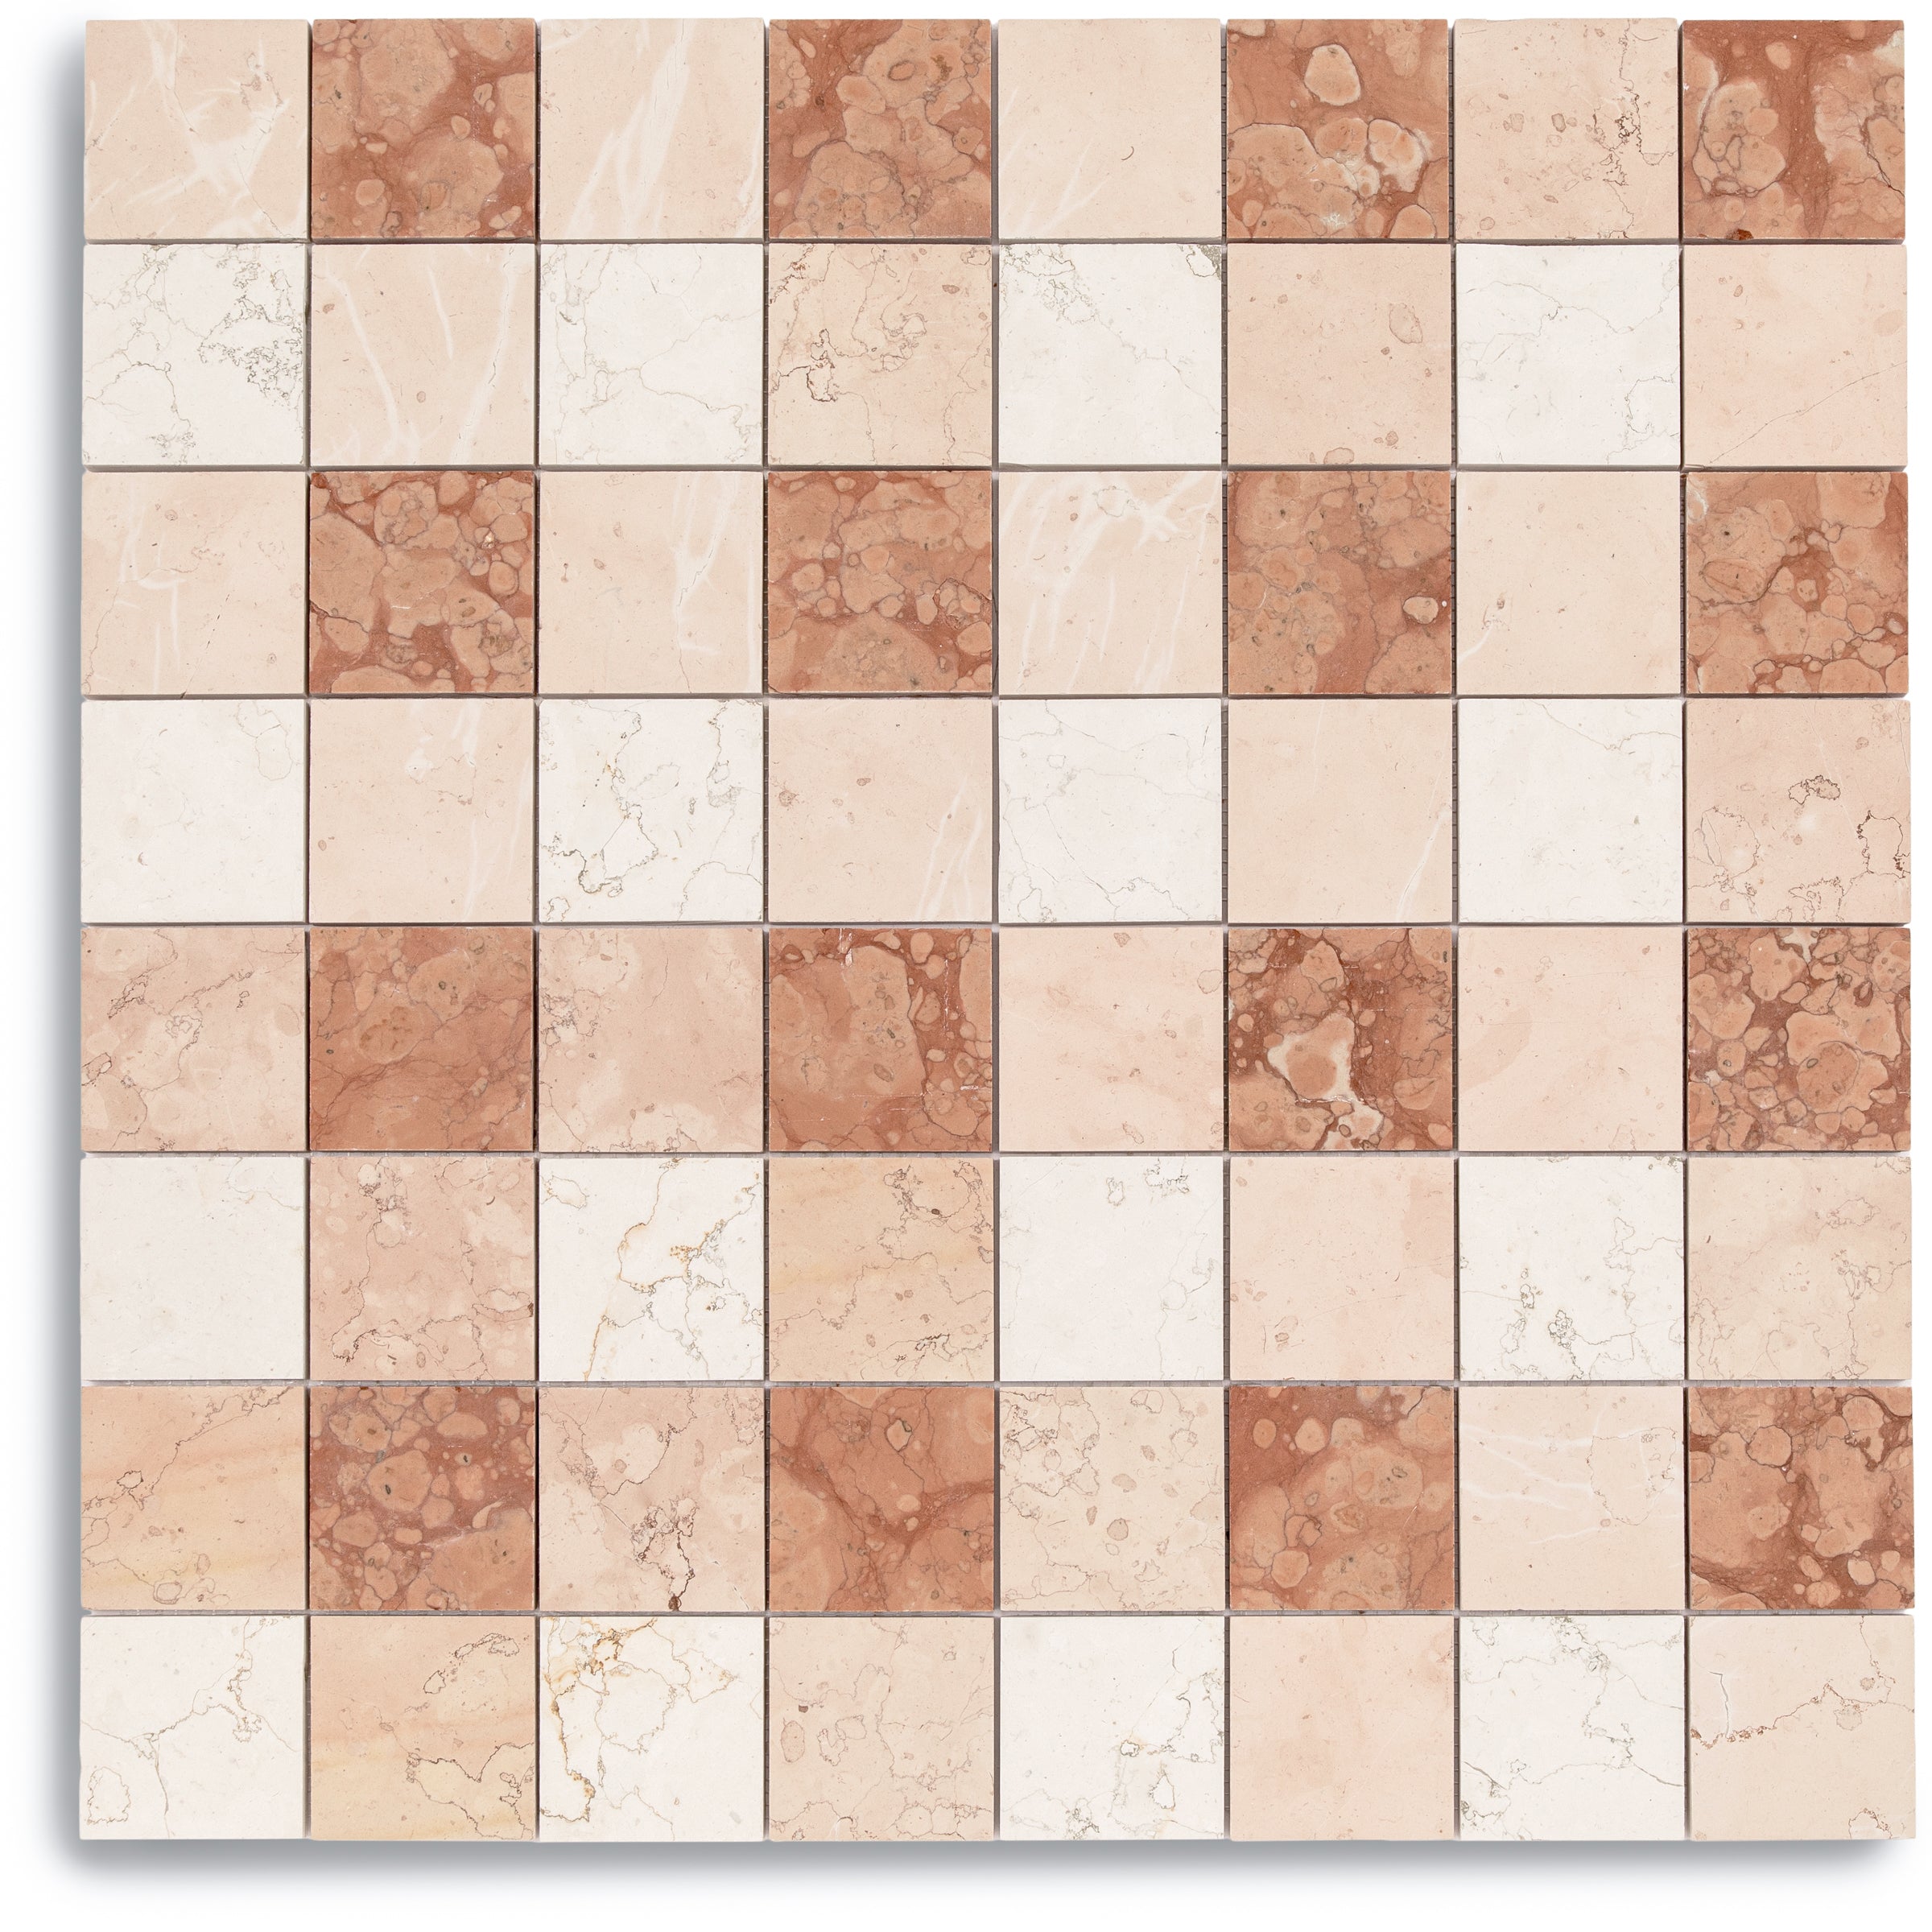
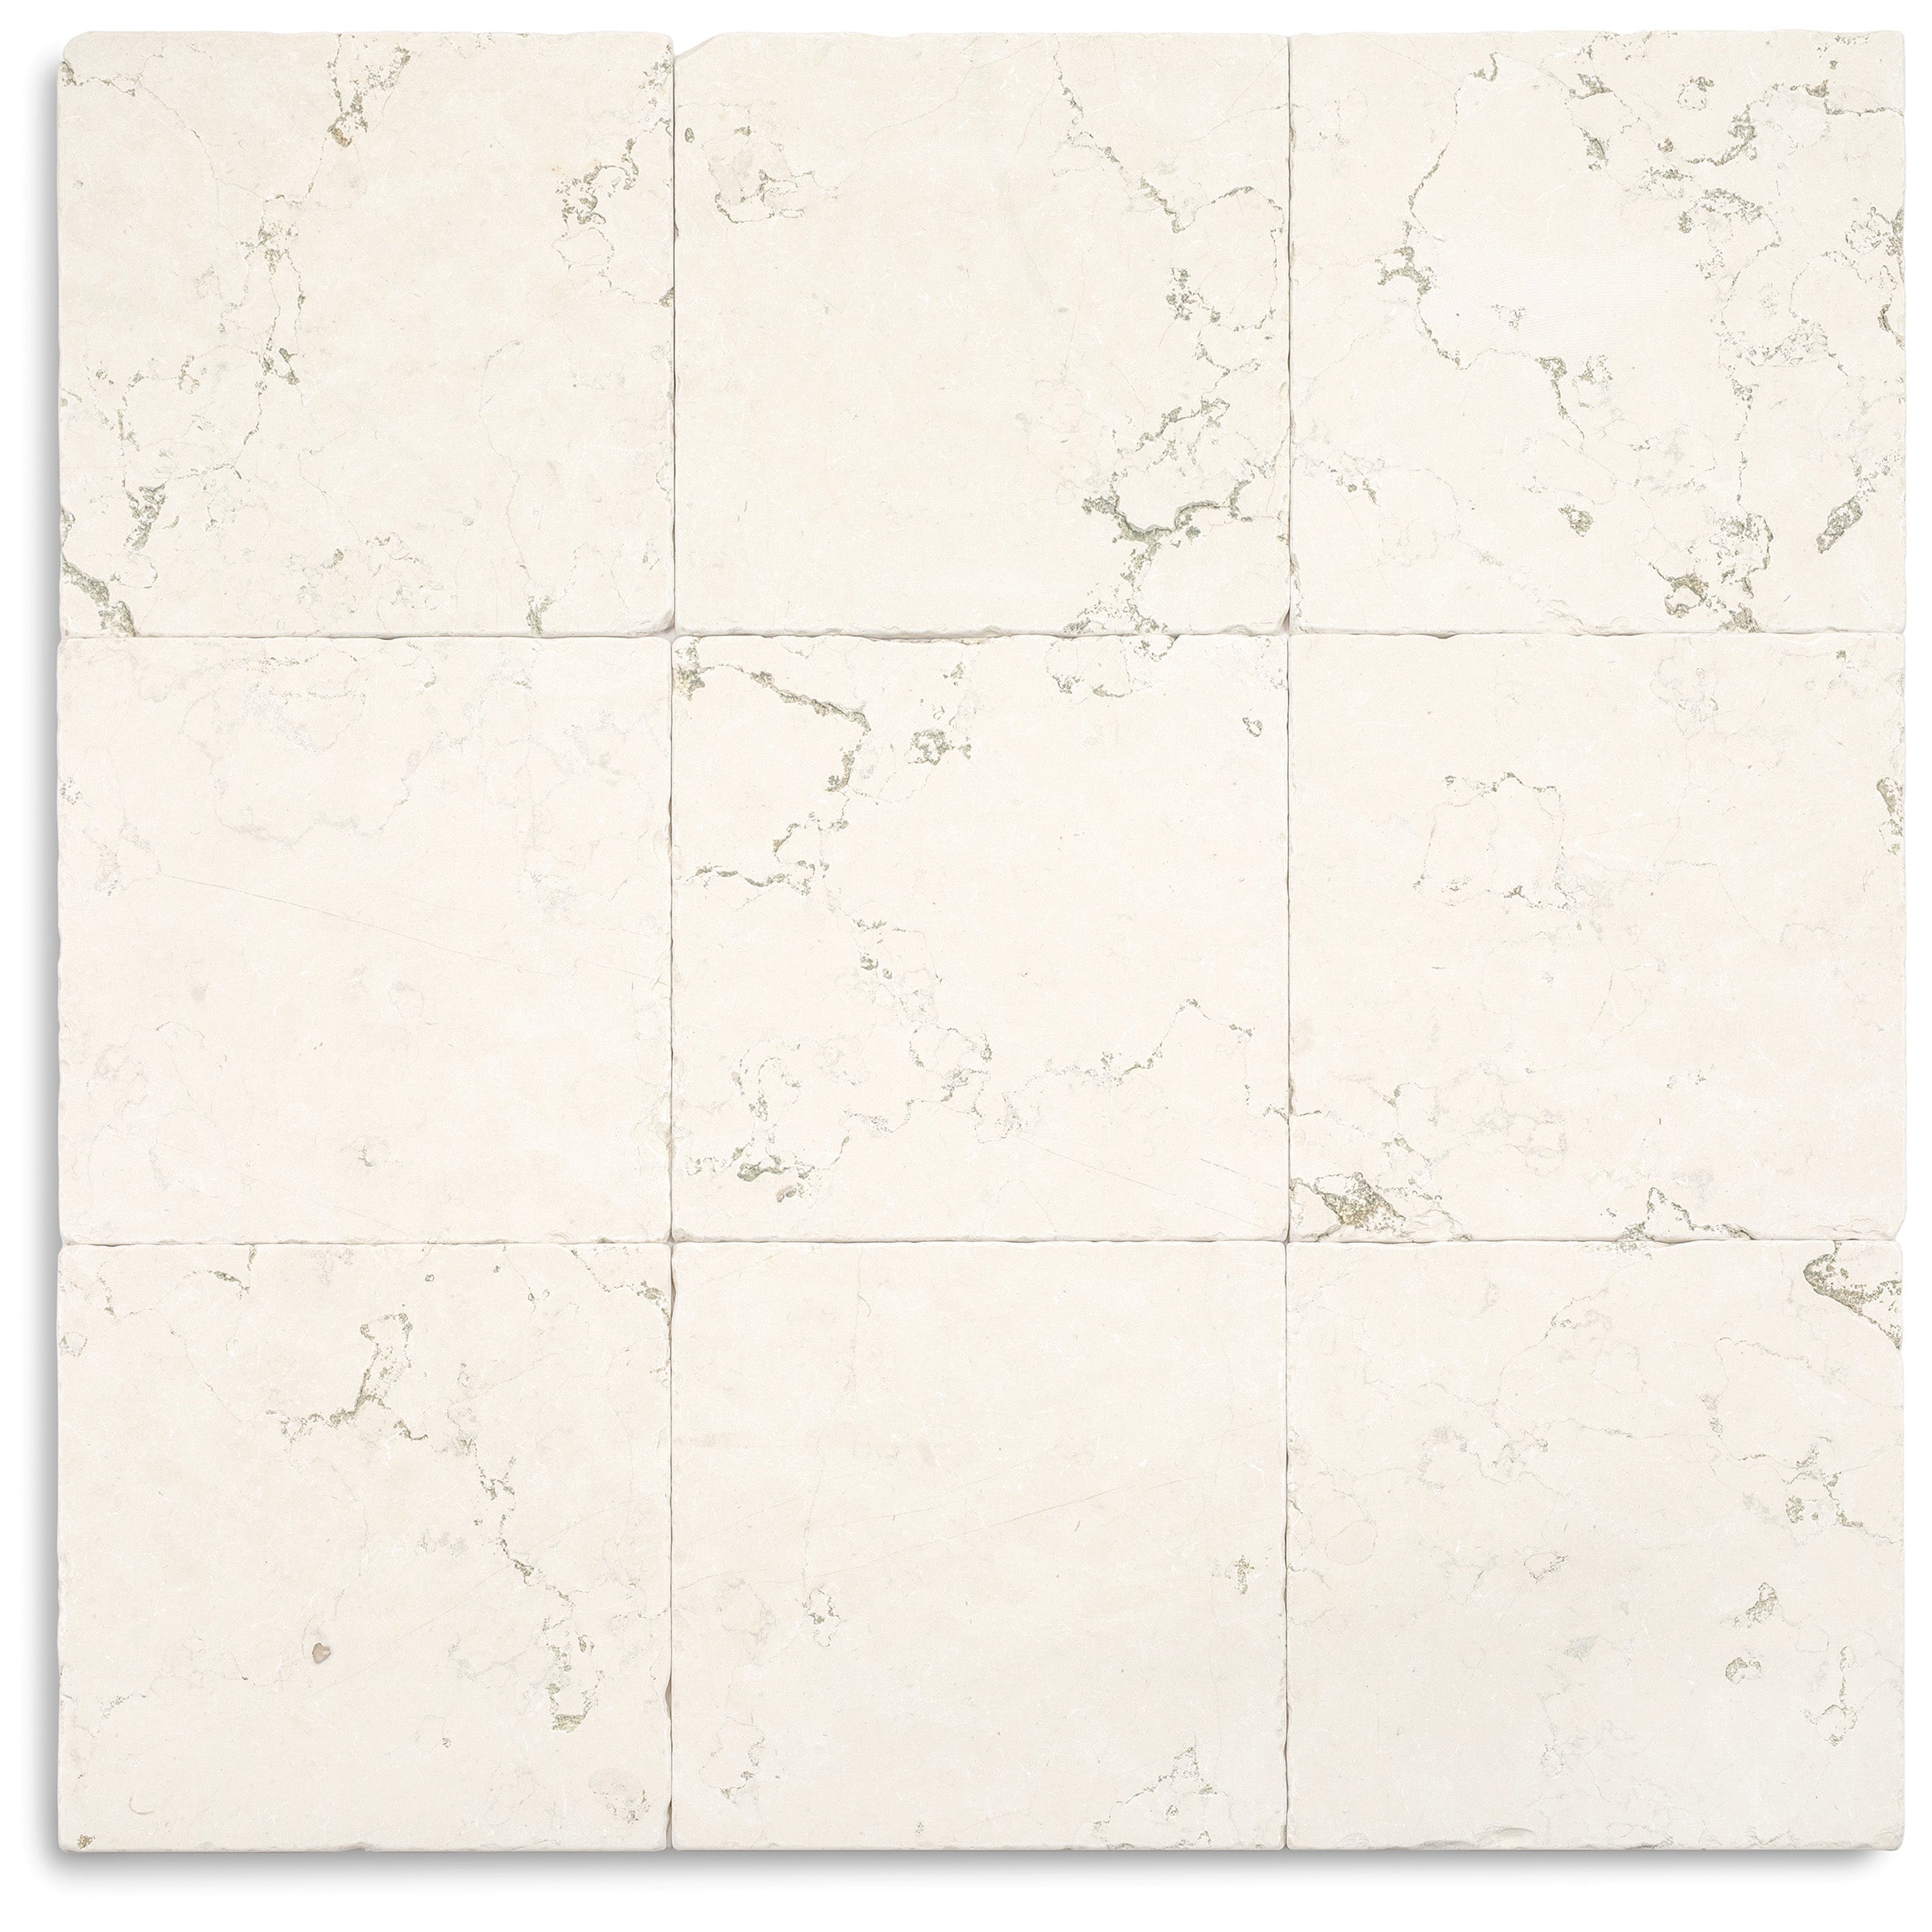
Rosso Verona Tumbled Marble Tile


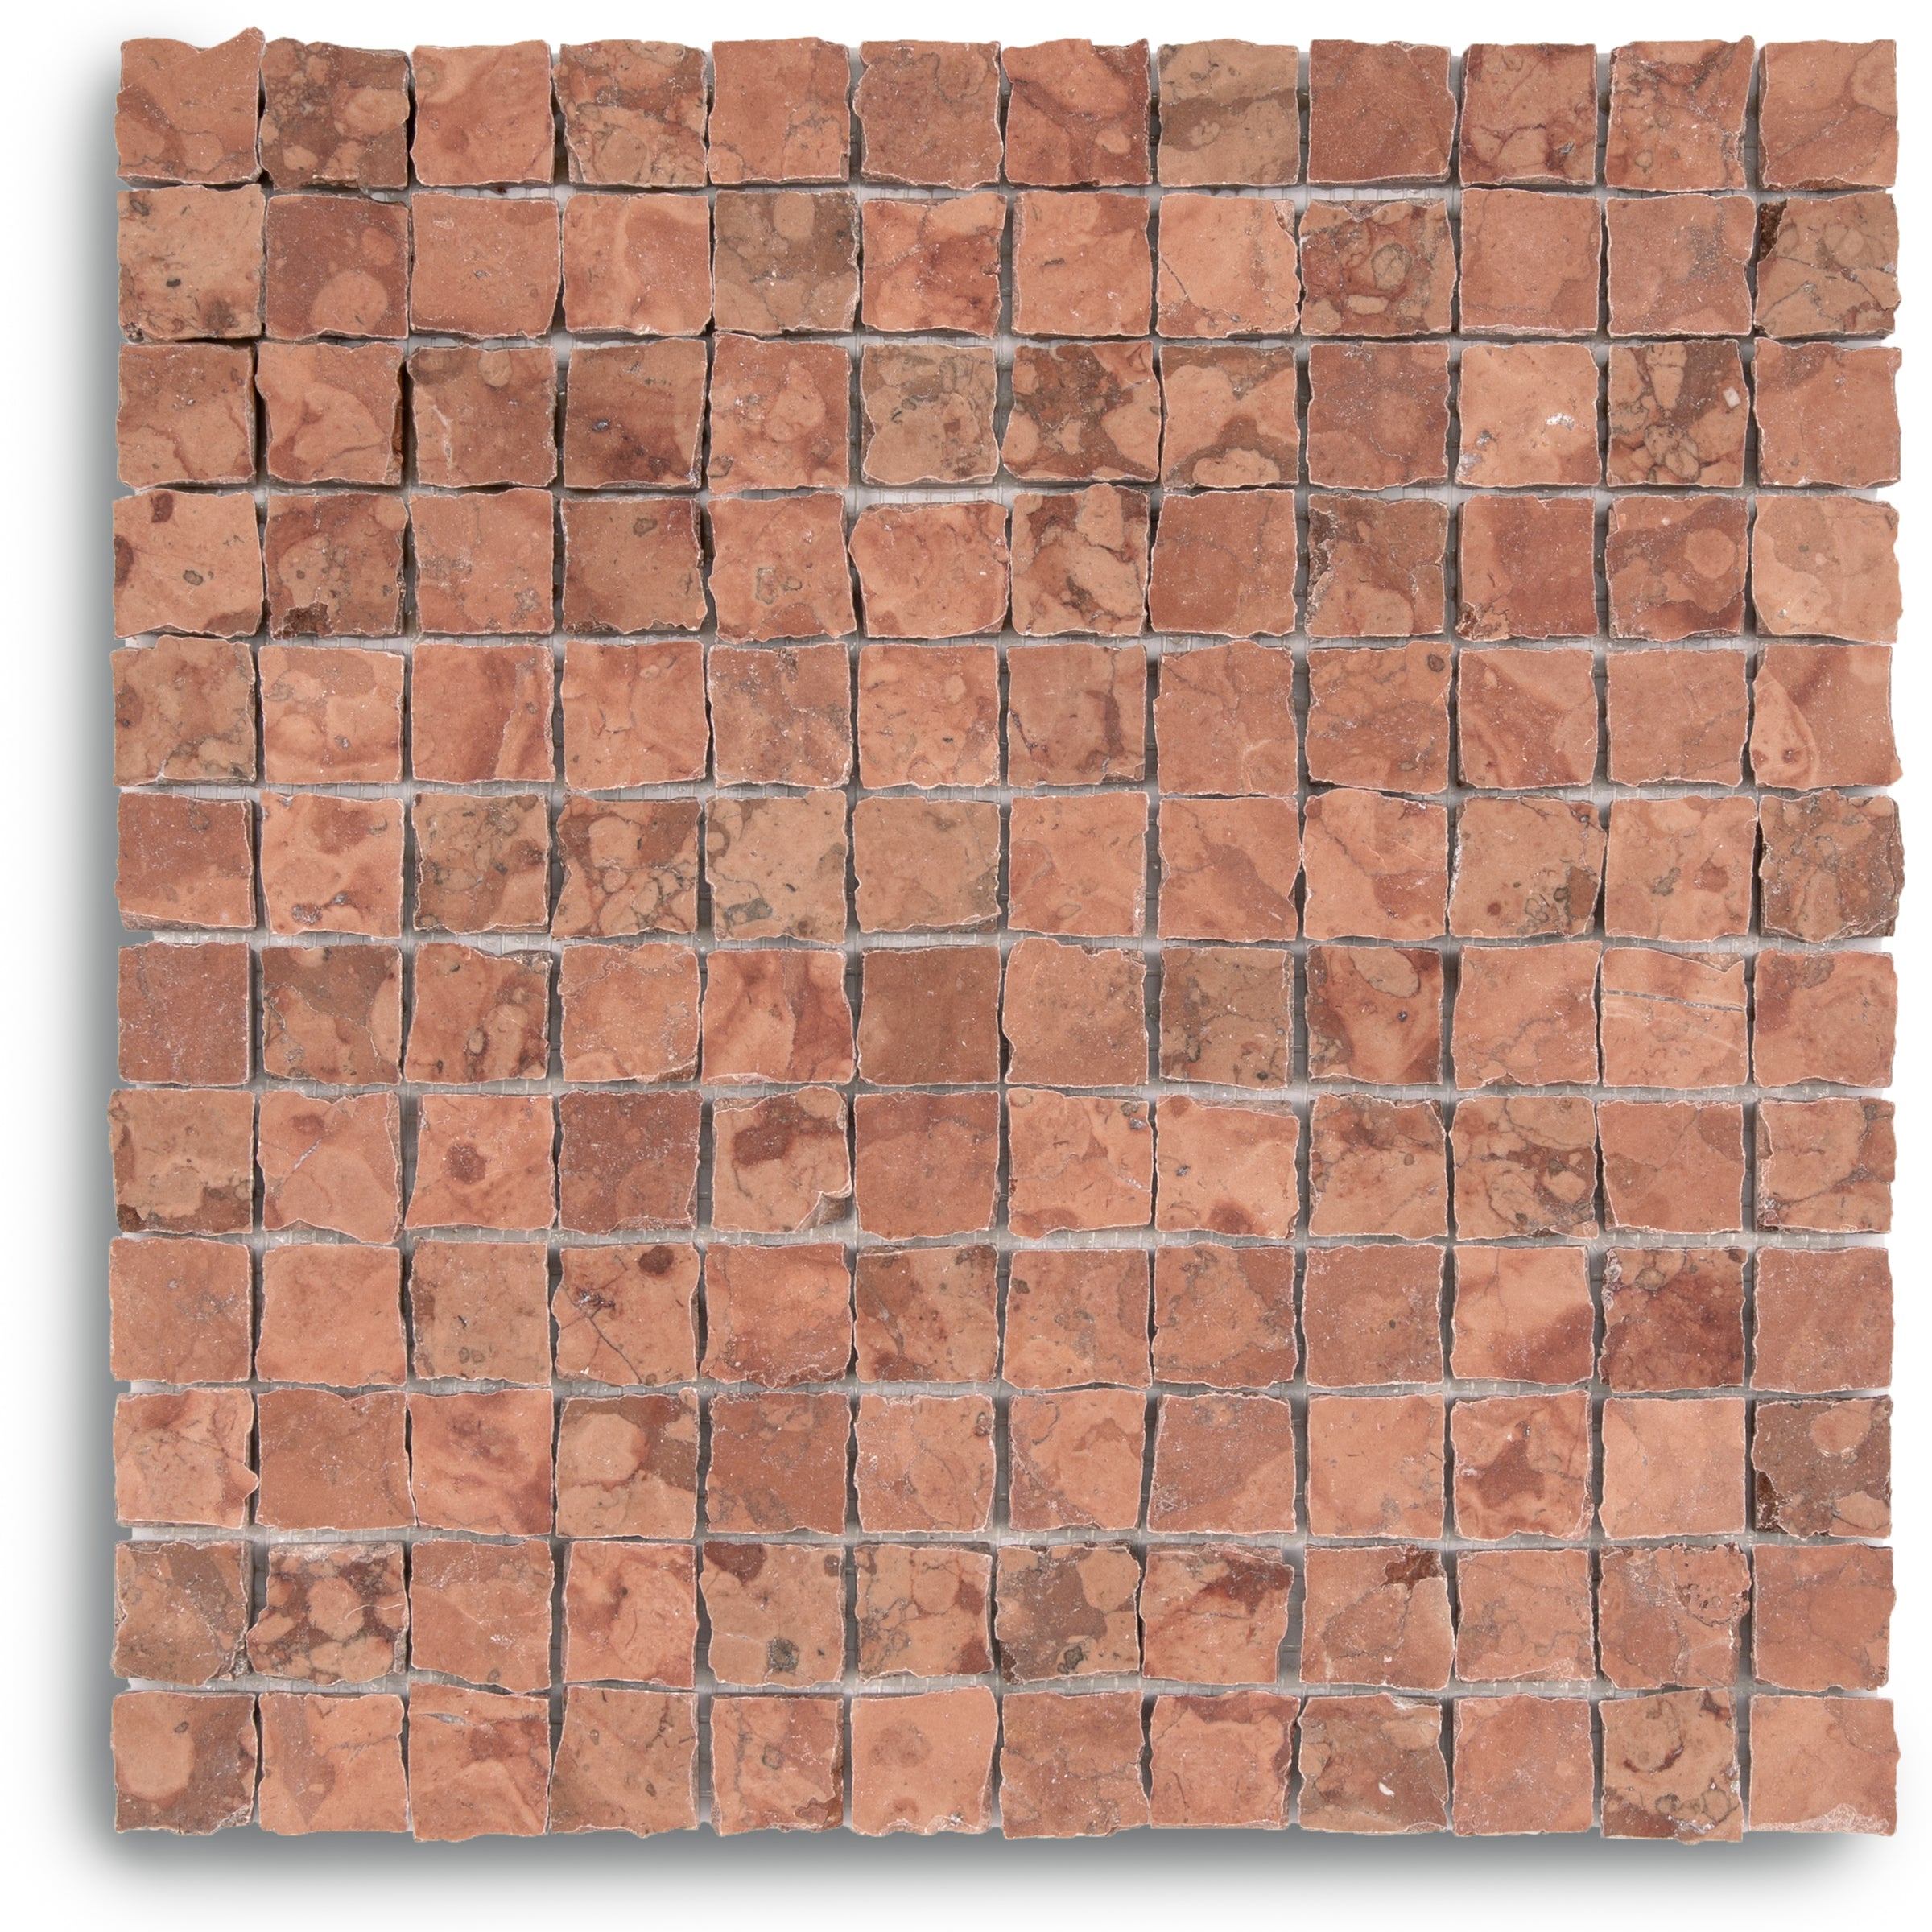
Rosso Verona 1x1 Hand Chipped Marble Mosaic

Natura Terracotta Look Matte Porcelain Tile

White Multi-Color Matte Porcelain Tile


Cream 2x2 Forma Porcelain Mosaic


Cotto 2x2 Forma Porcelain Mosaic


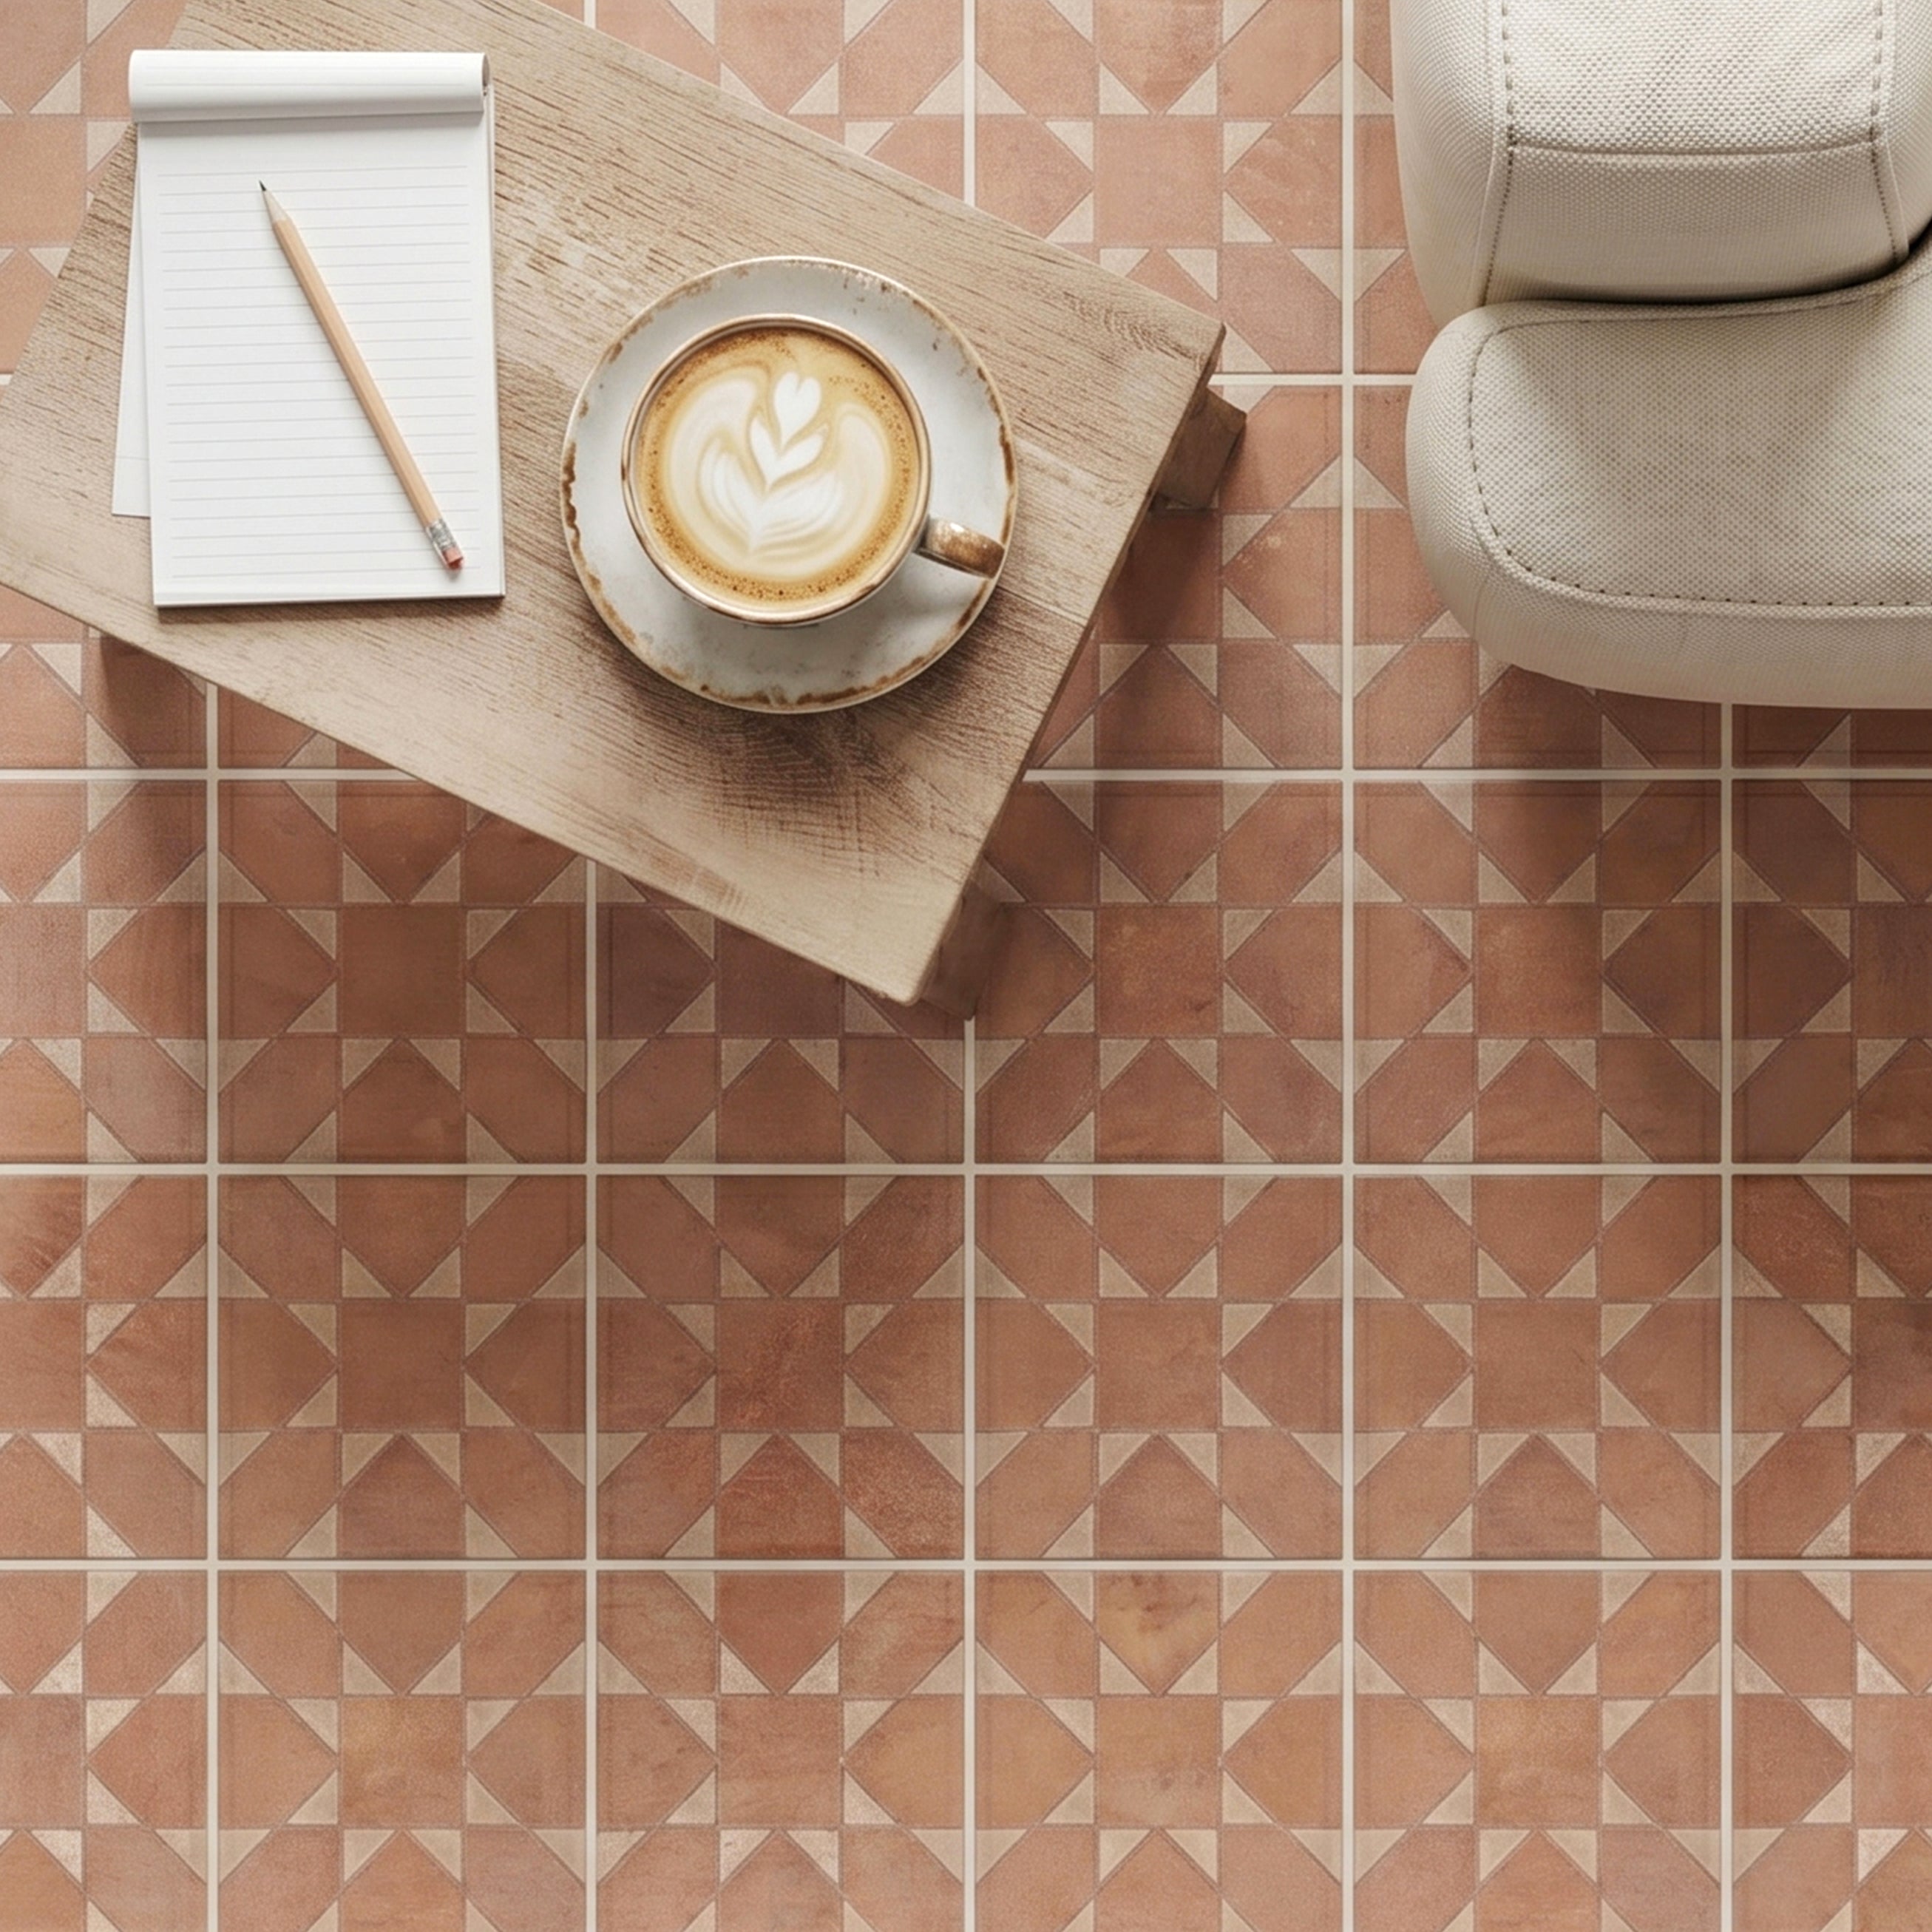
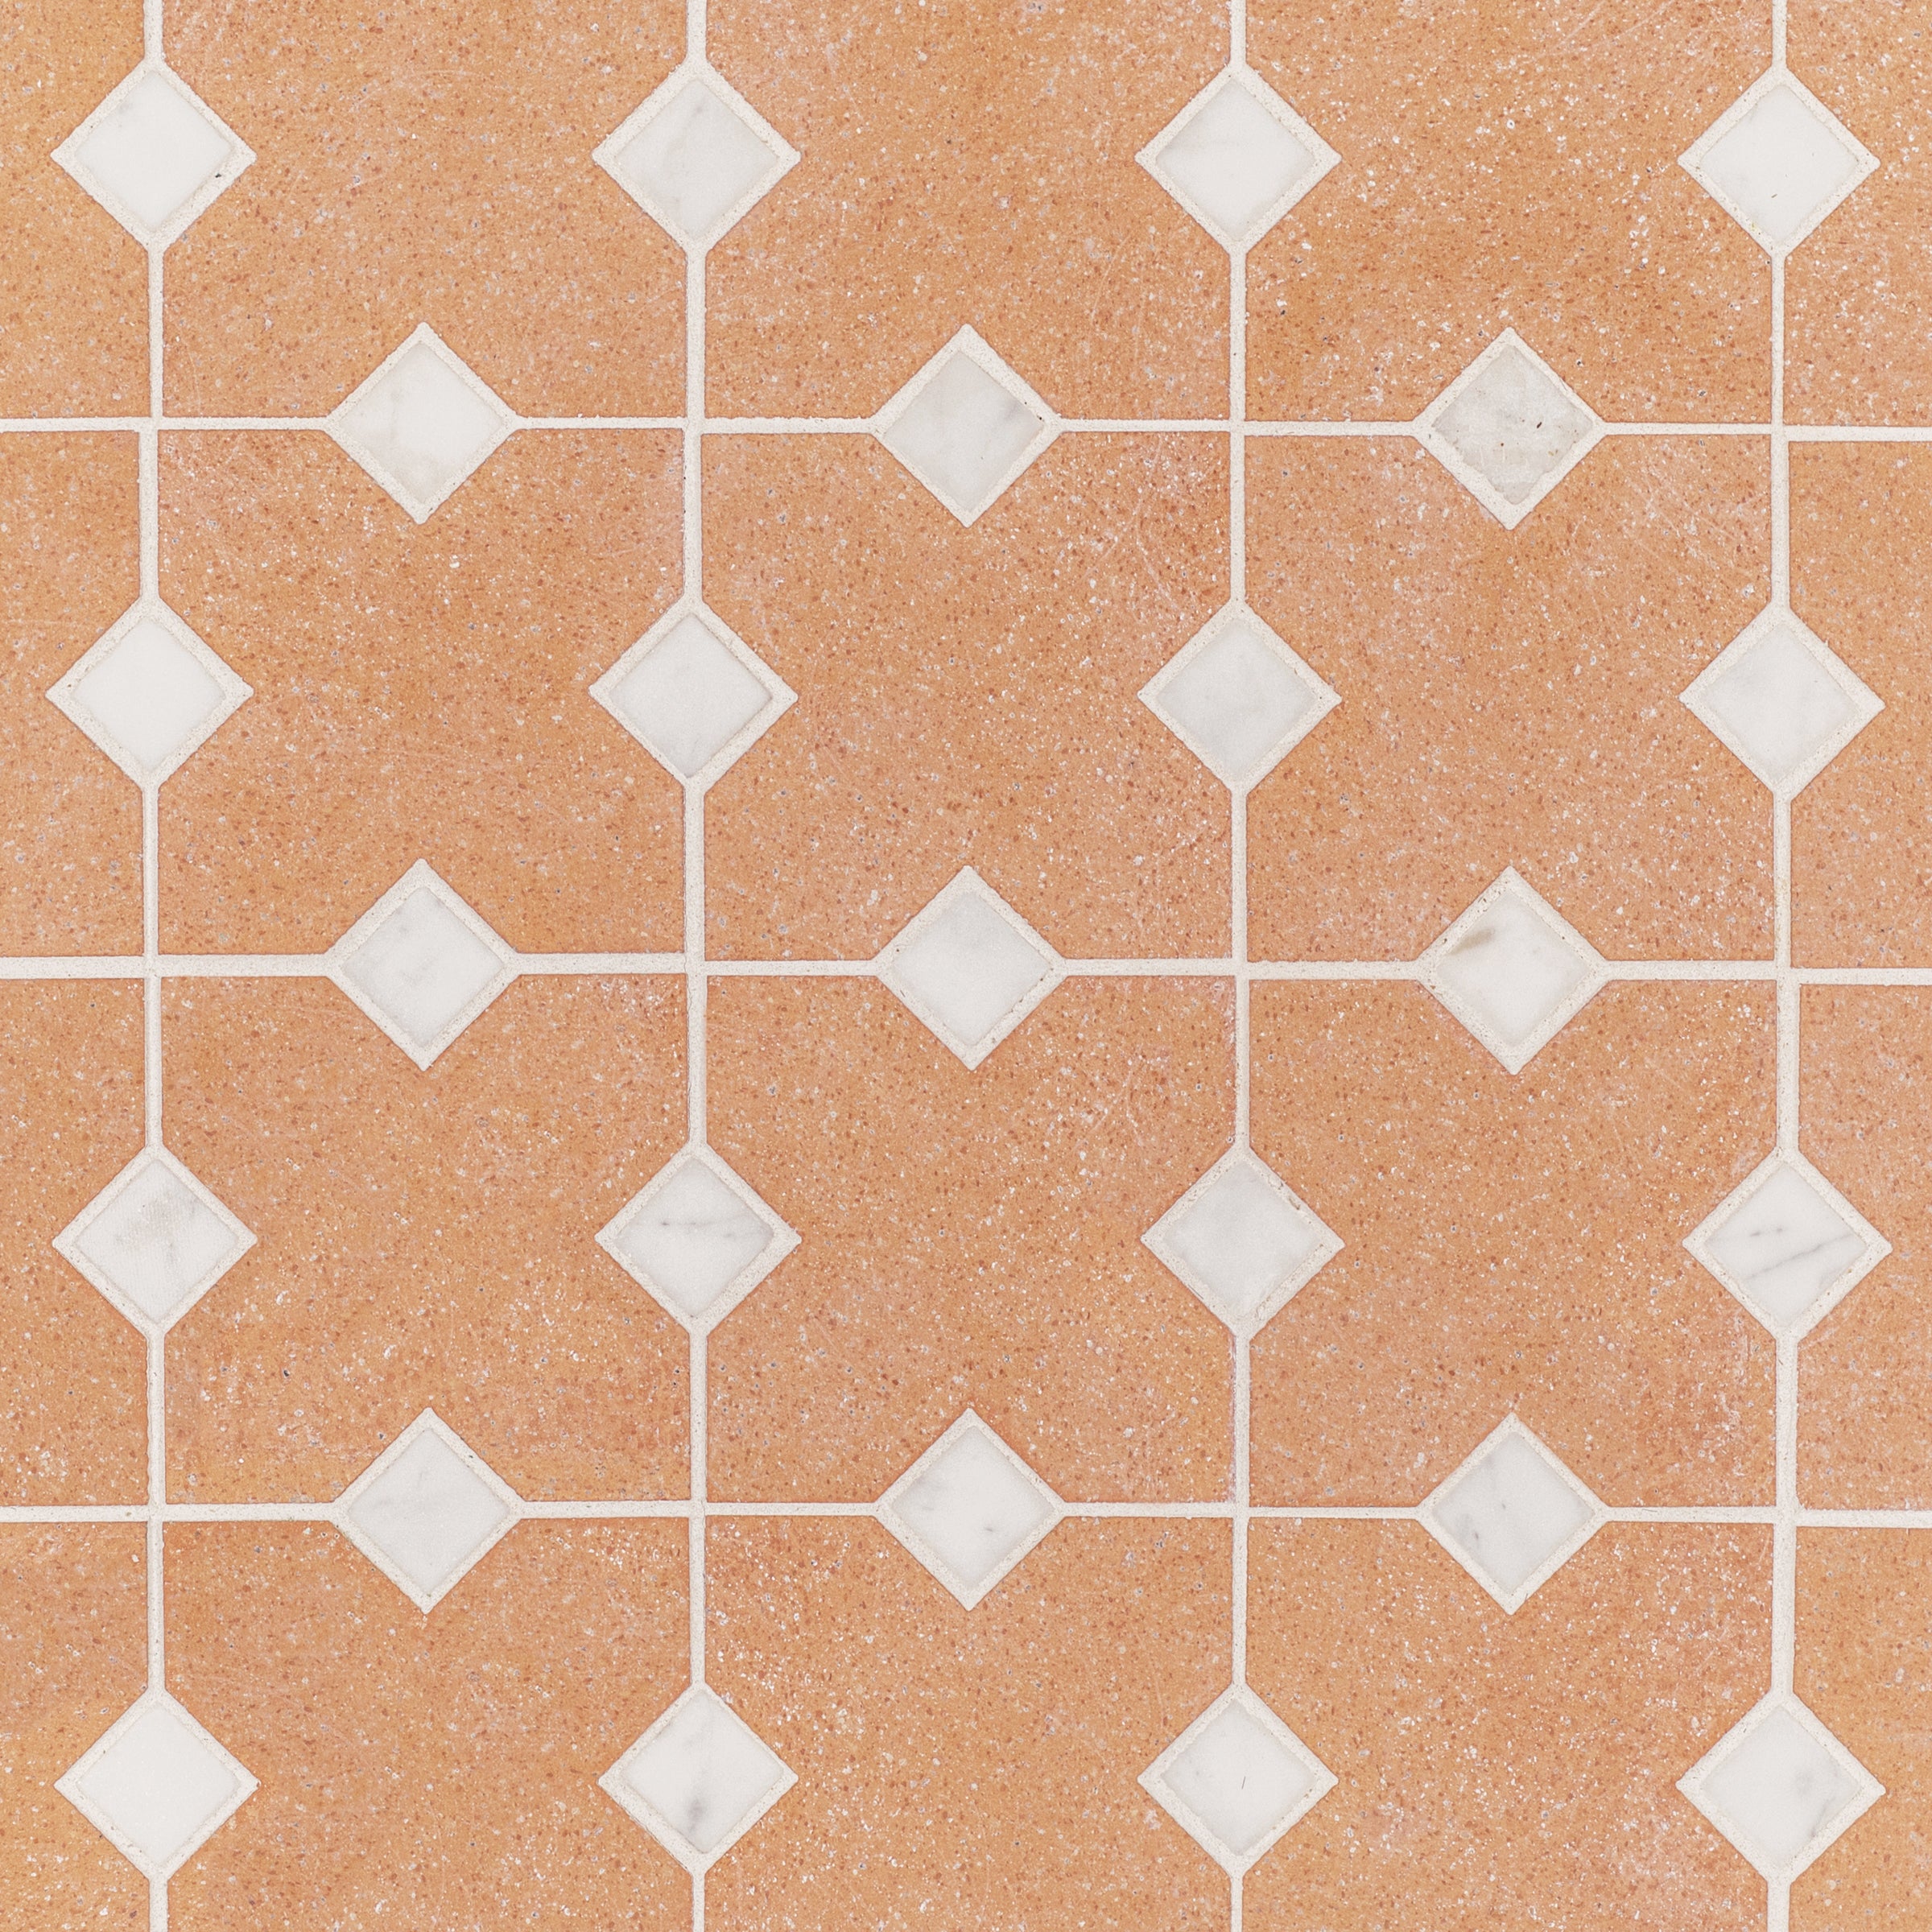
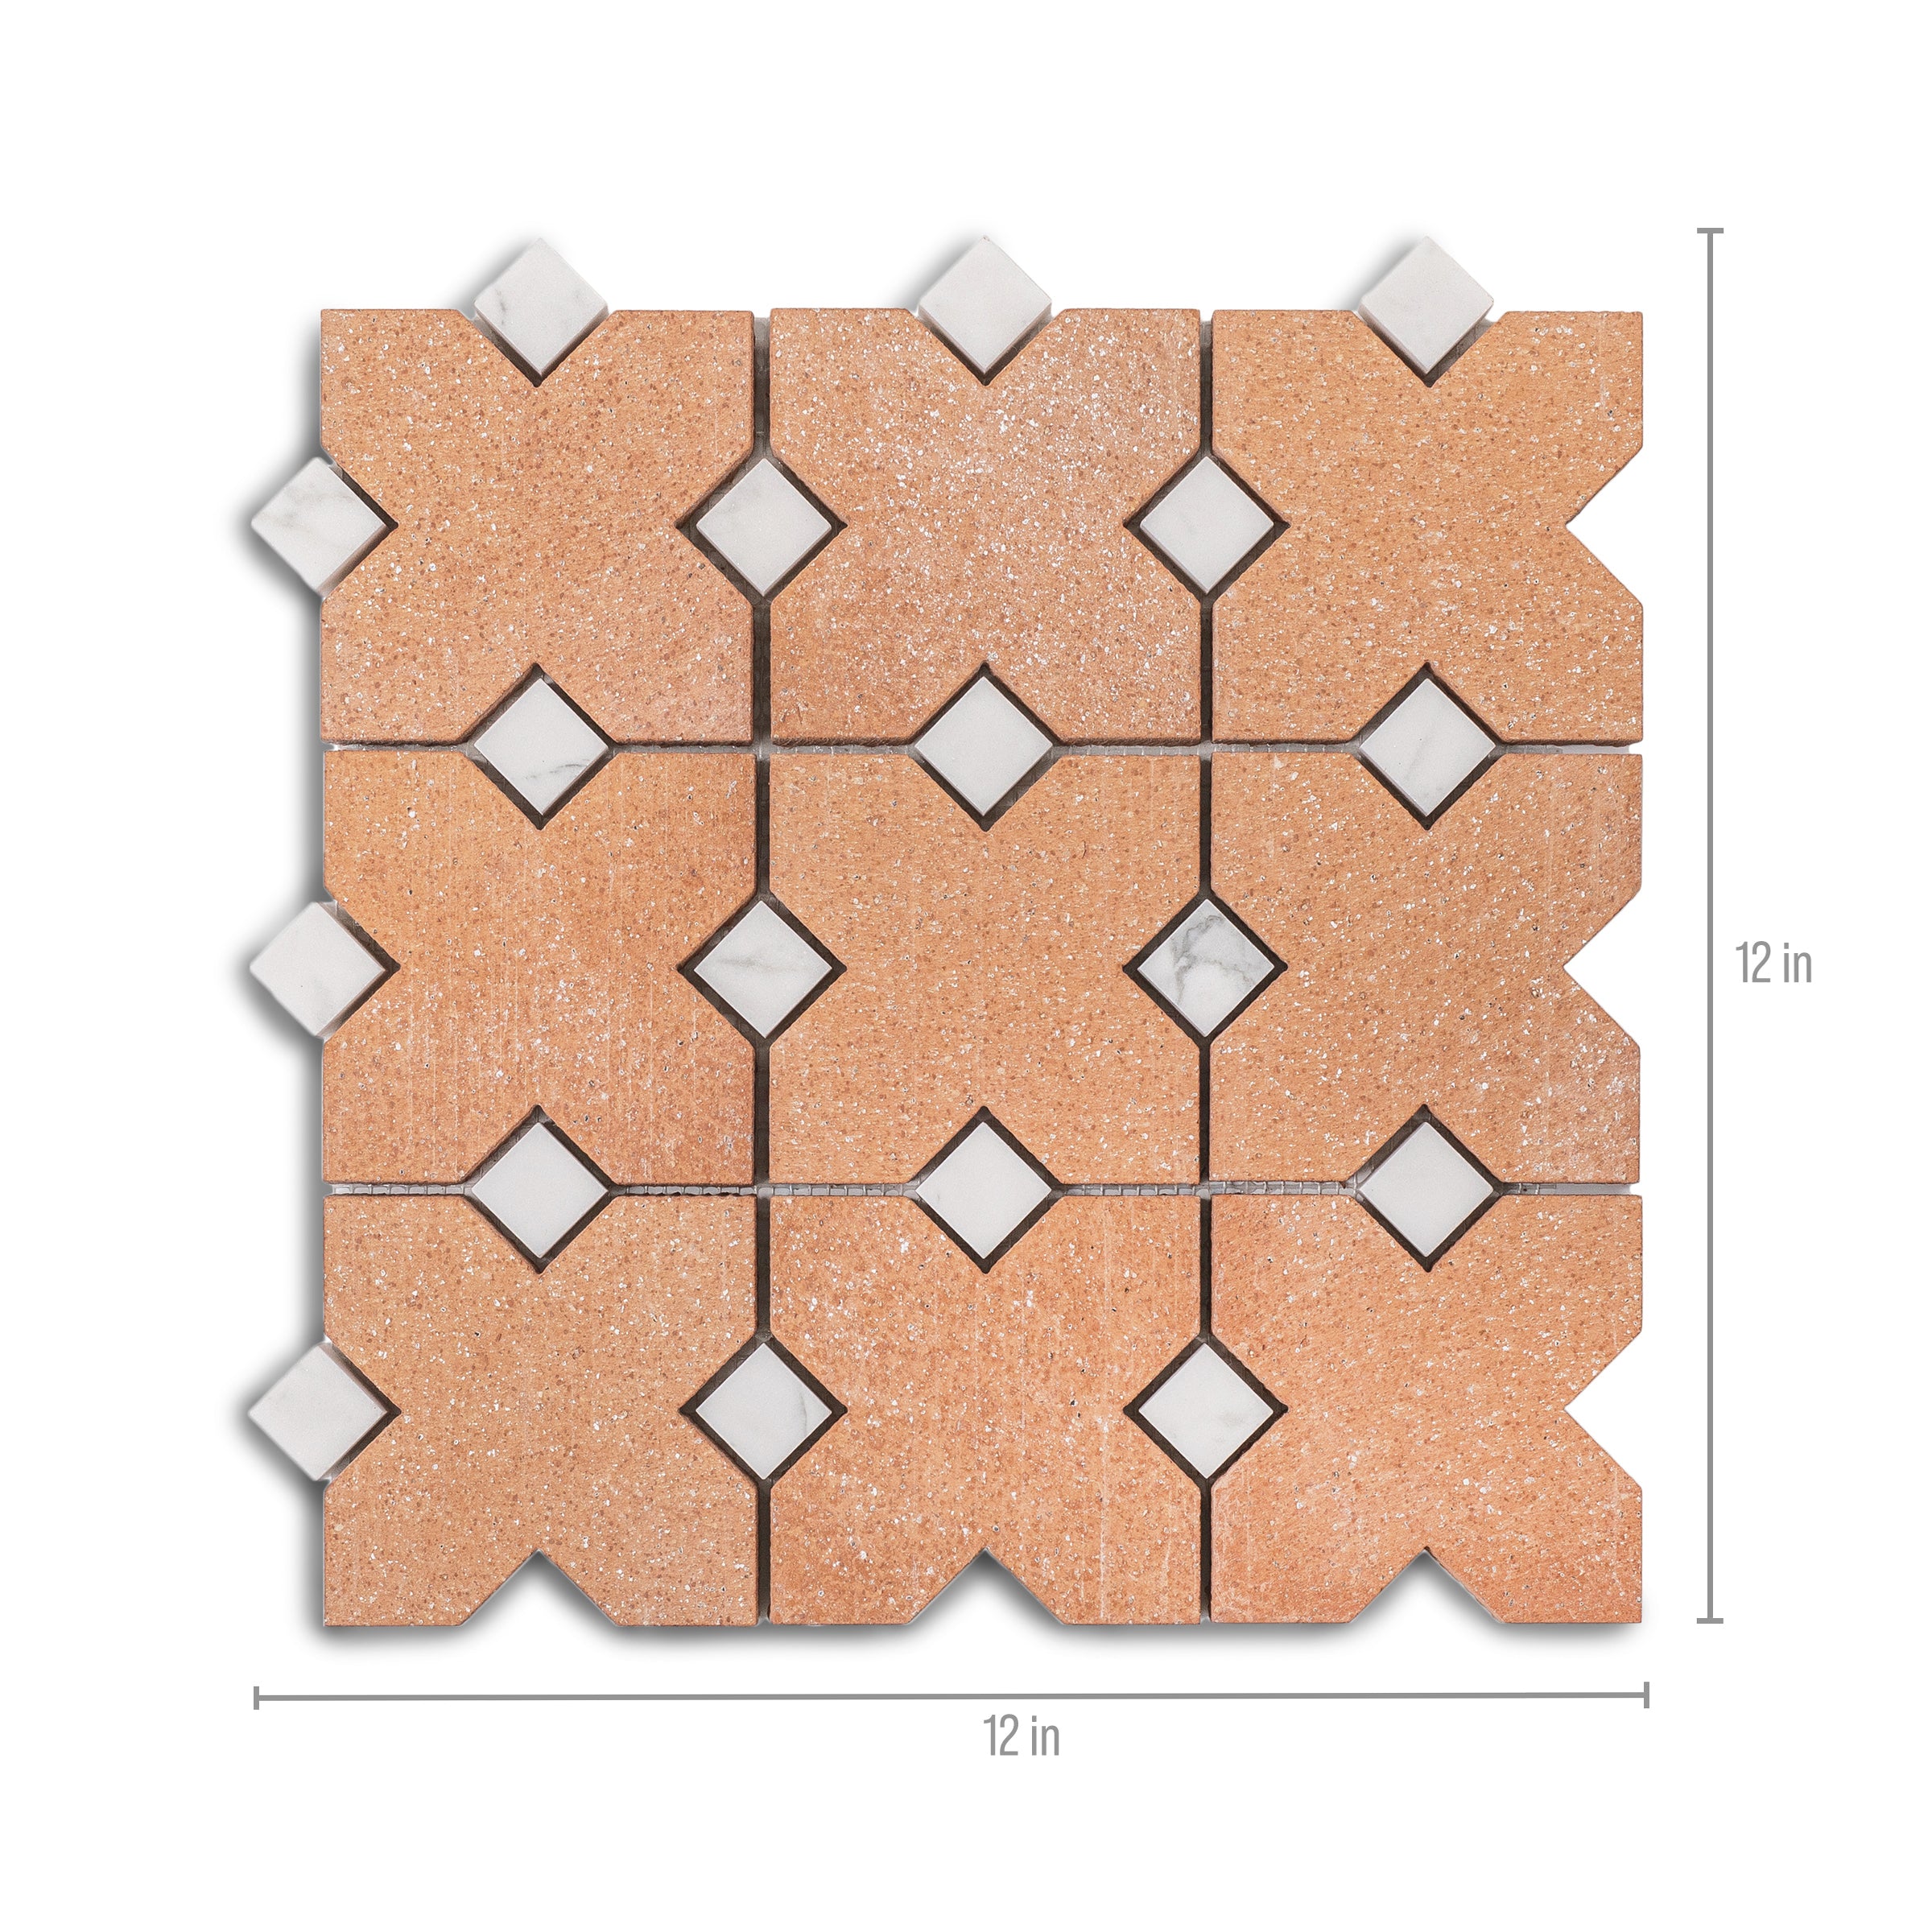
Star & Cross Classic Terracotta Tile


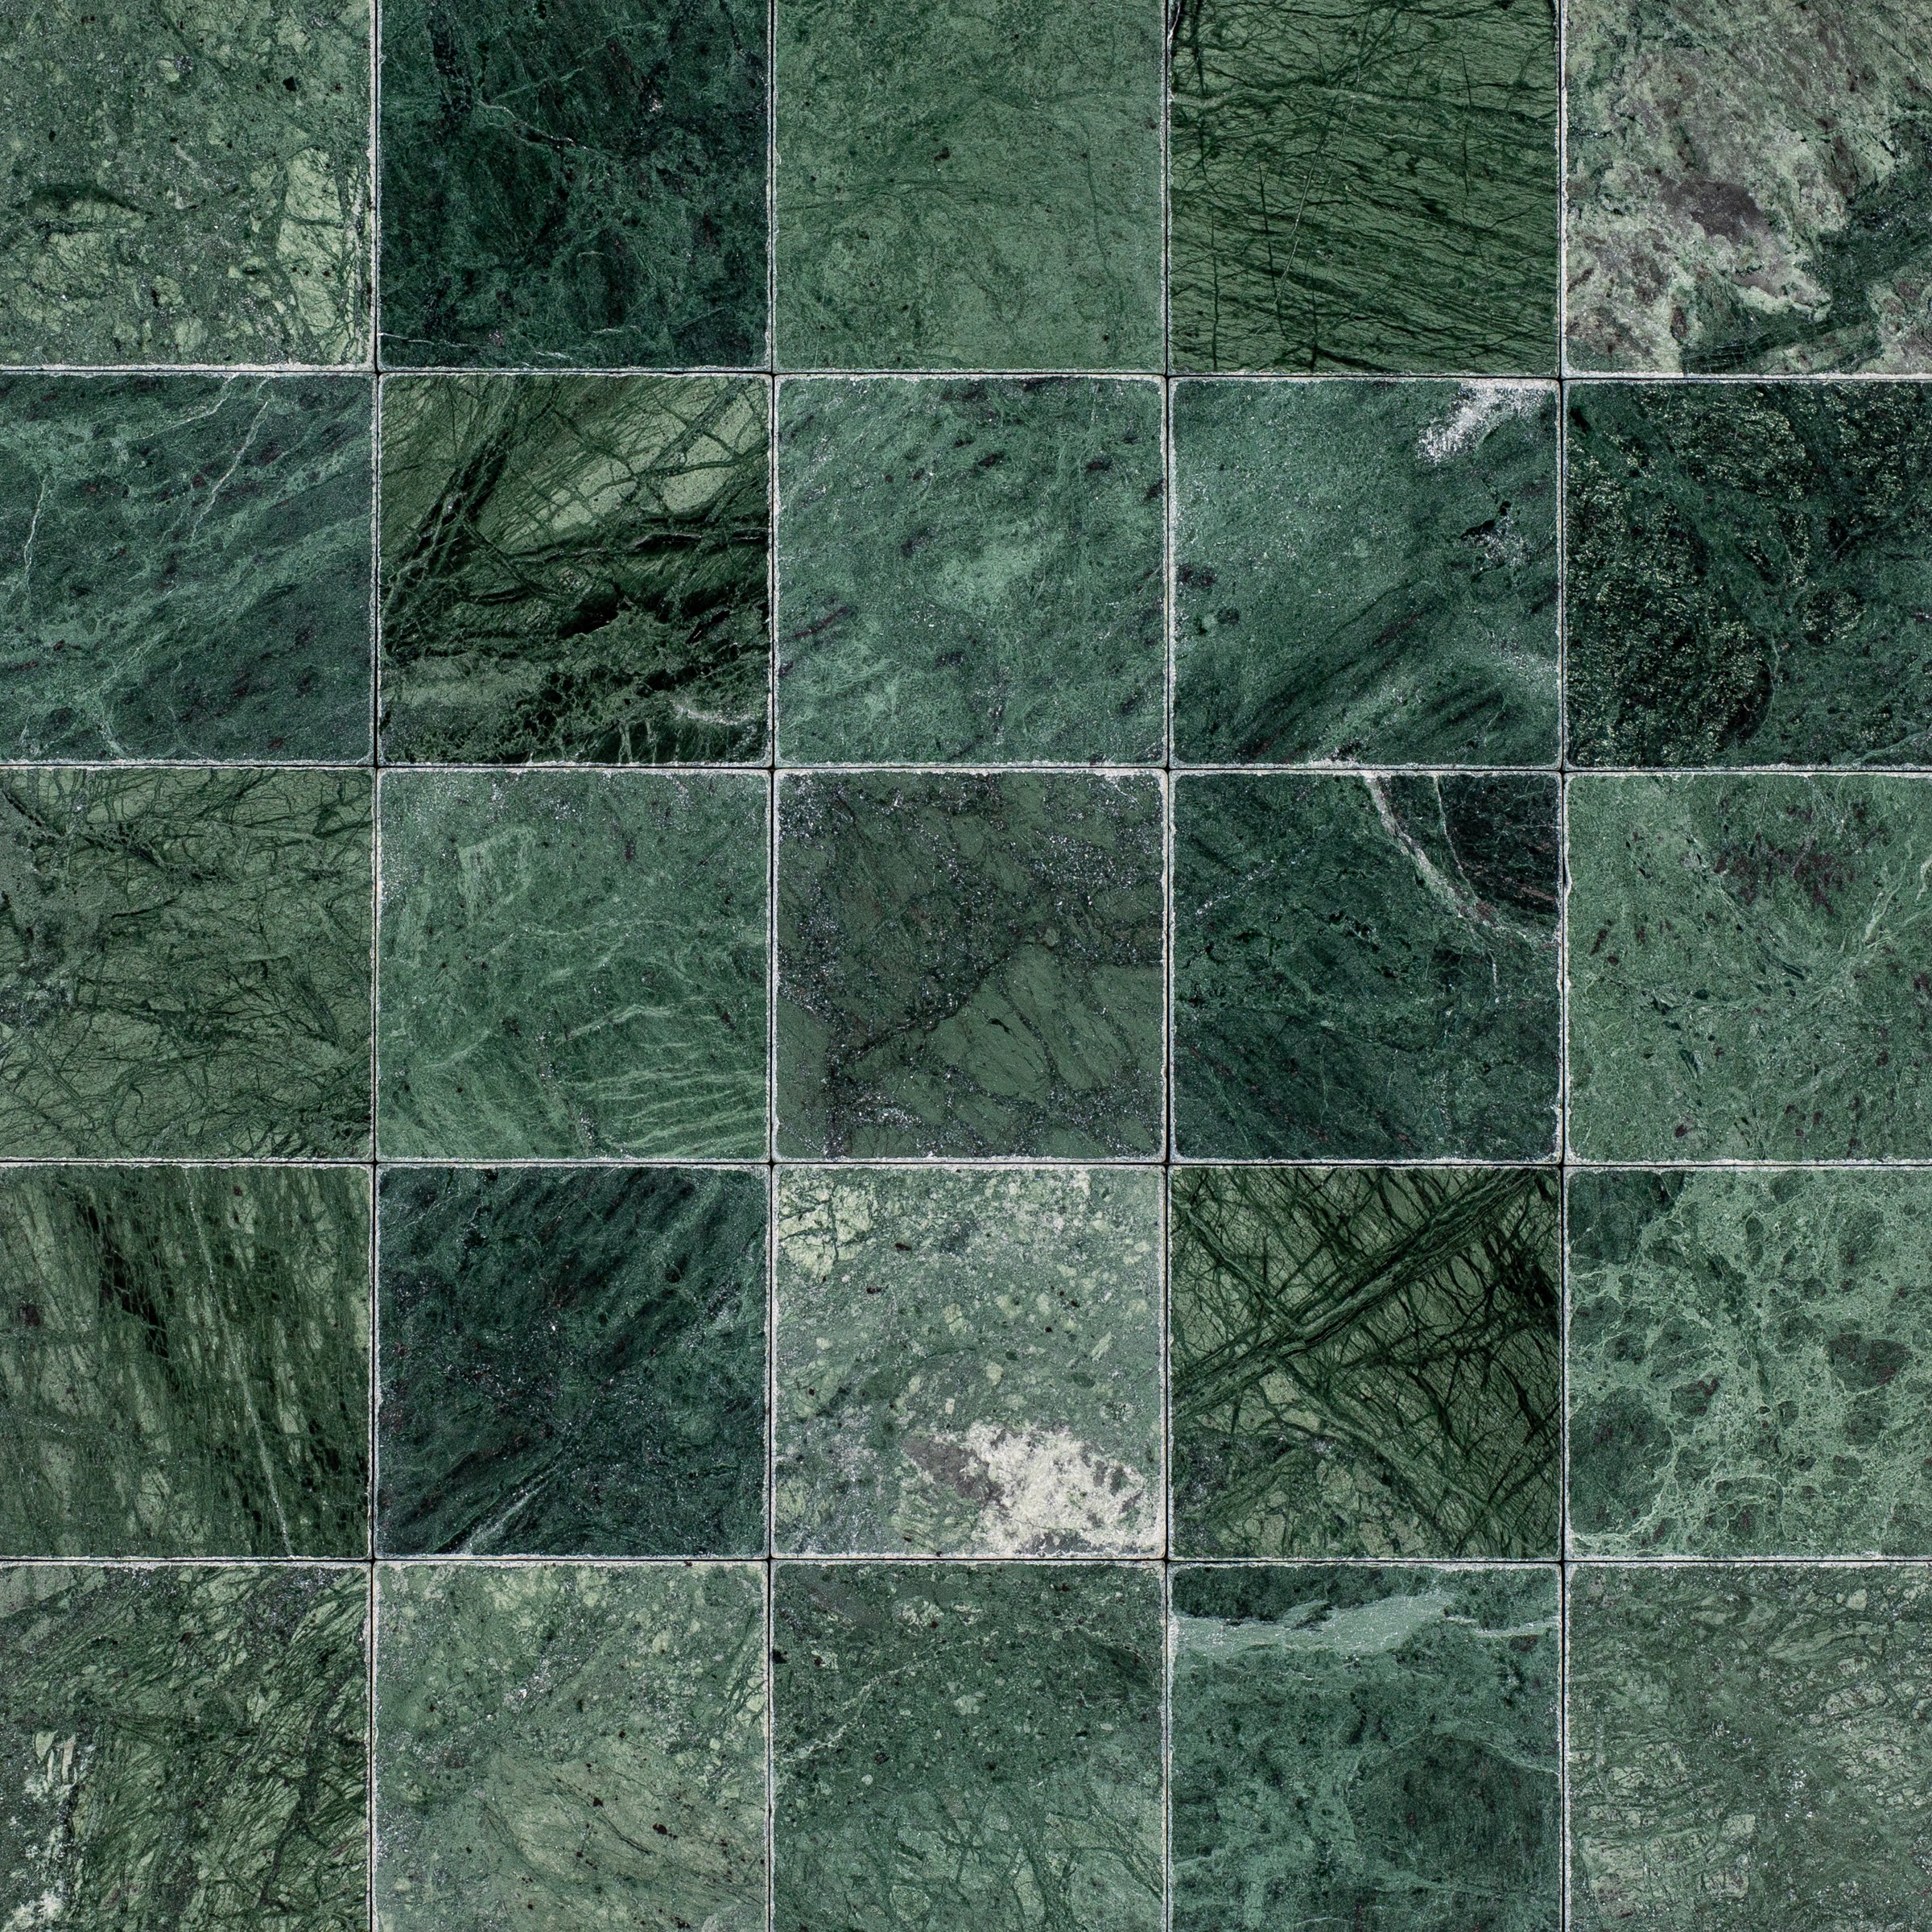
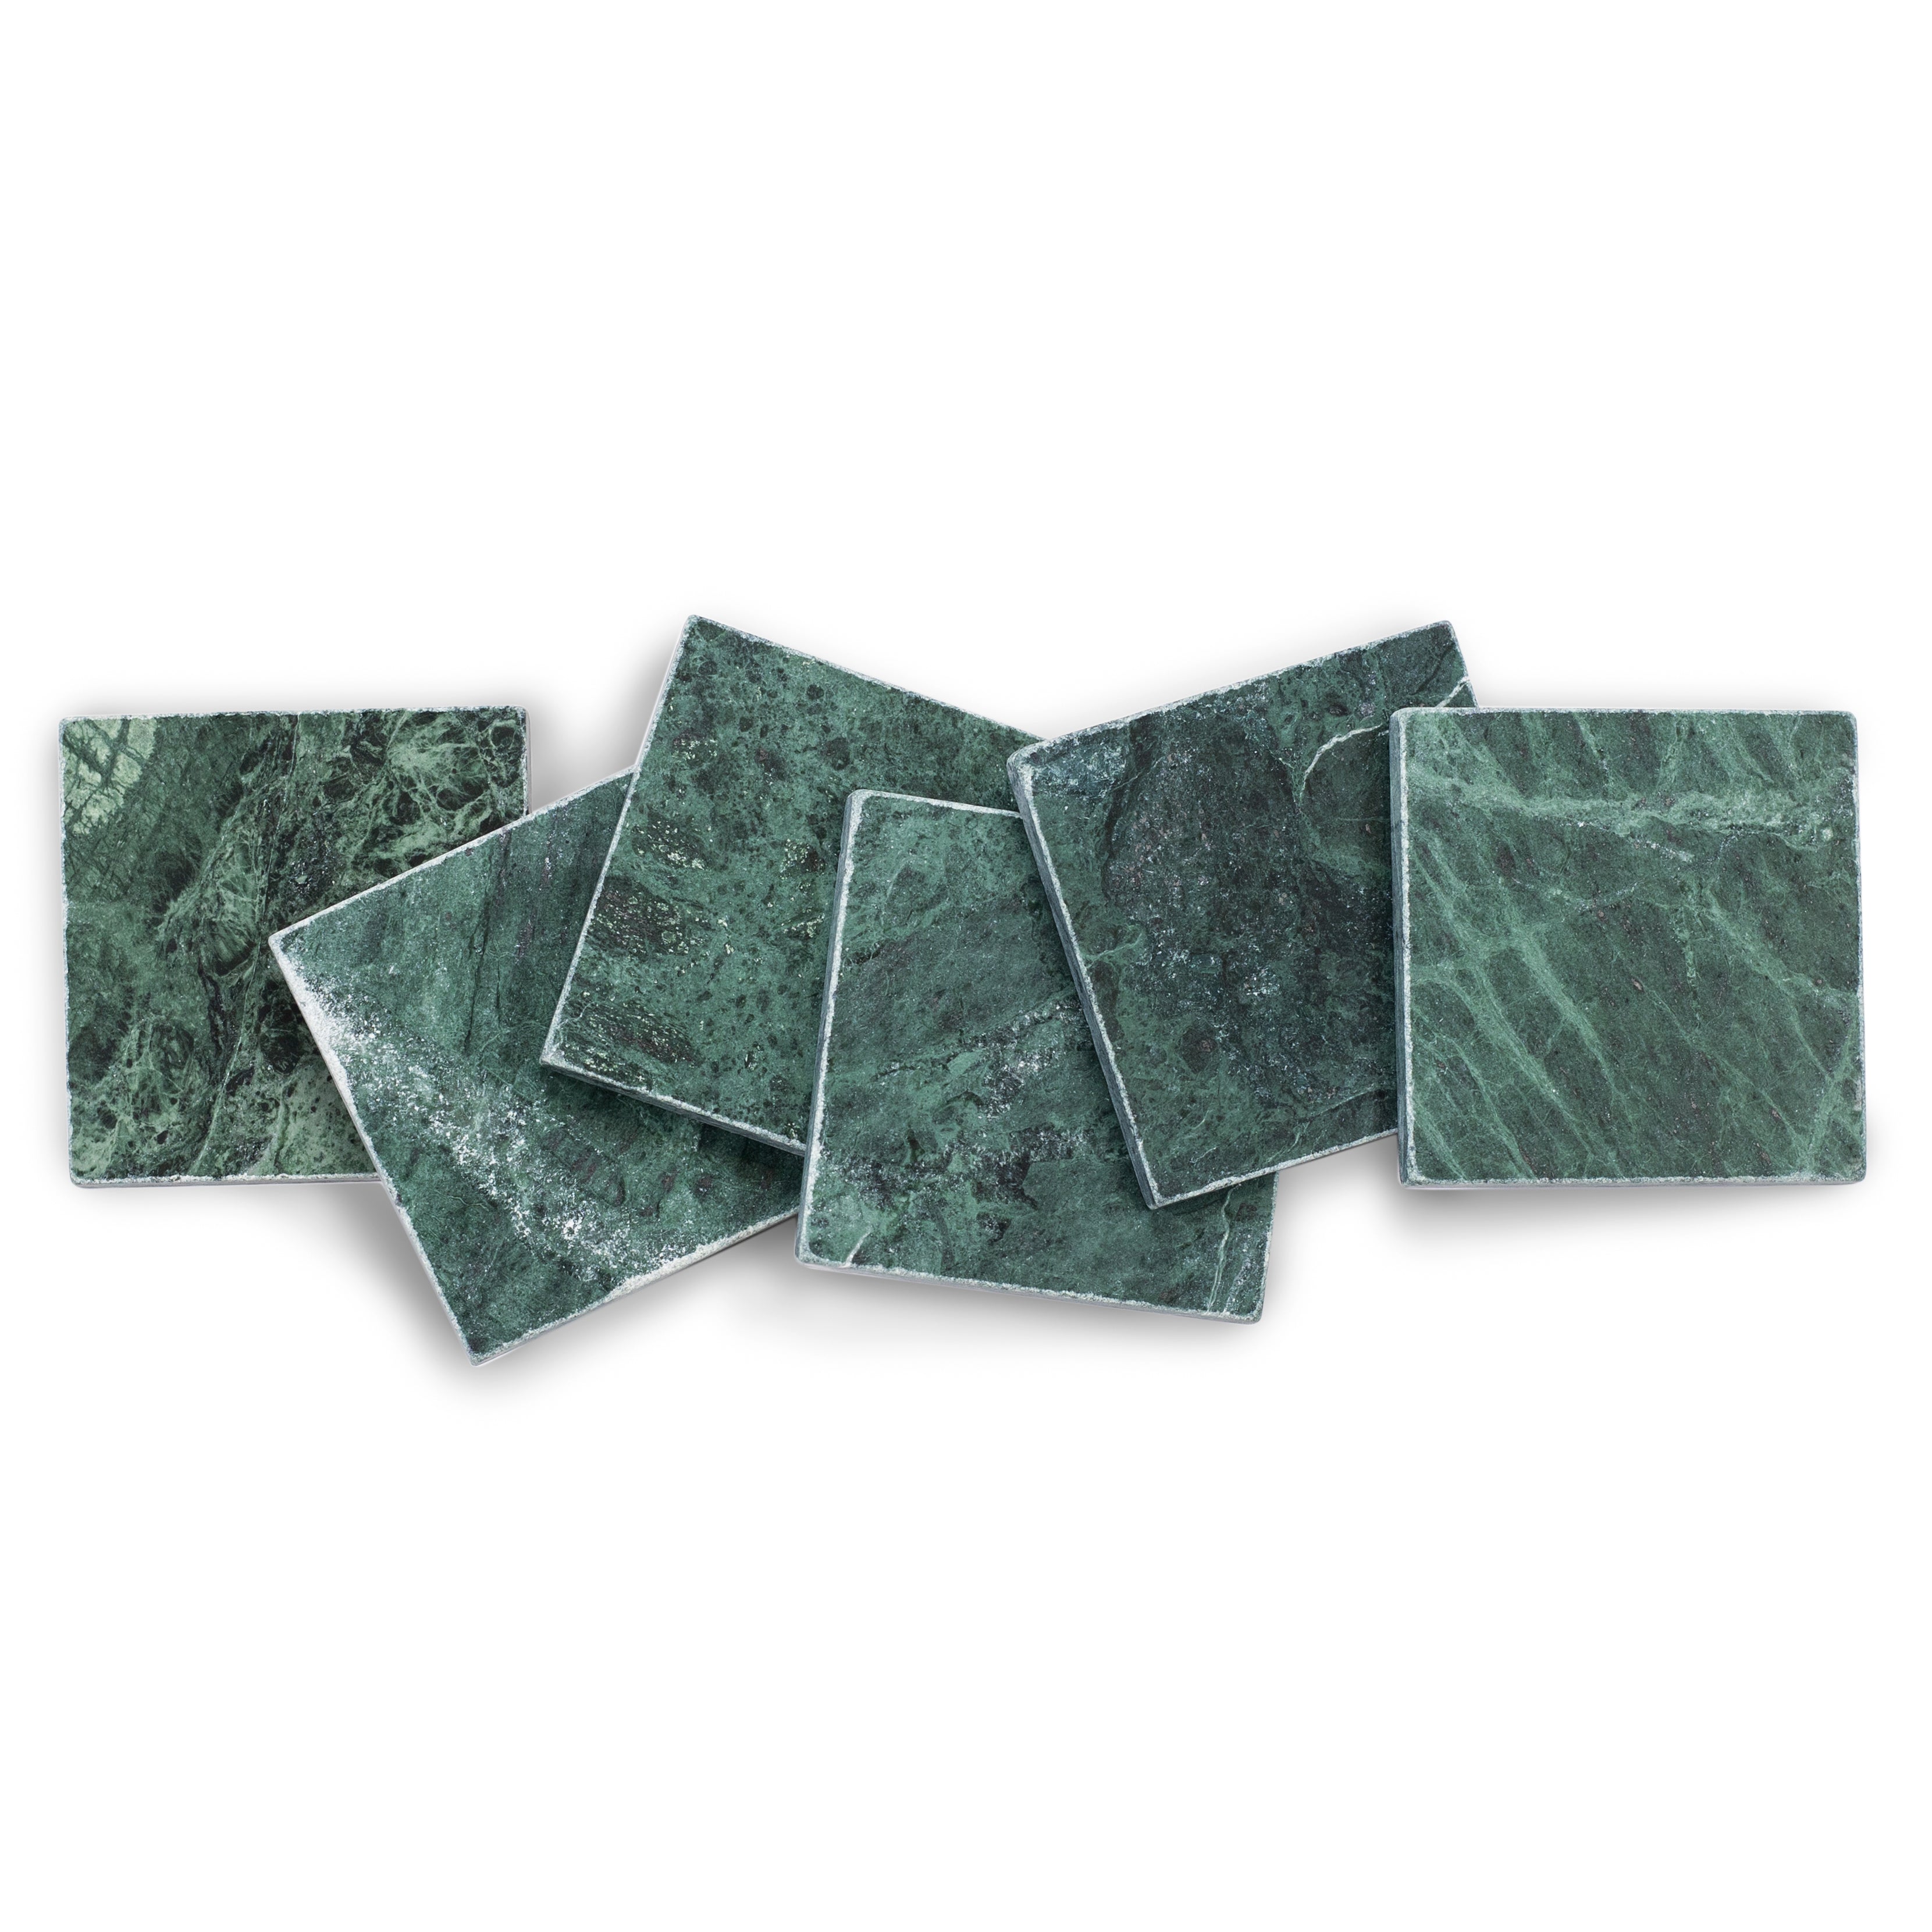
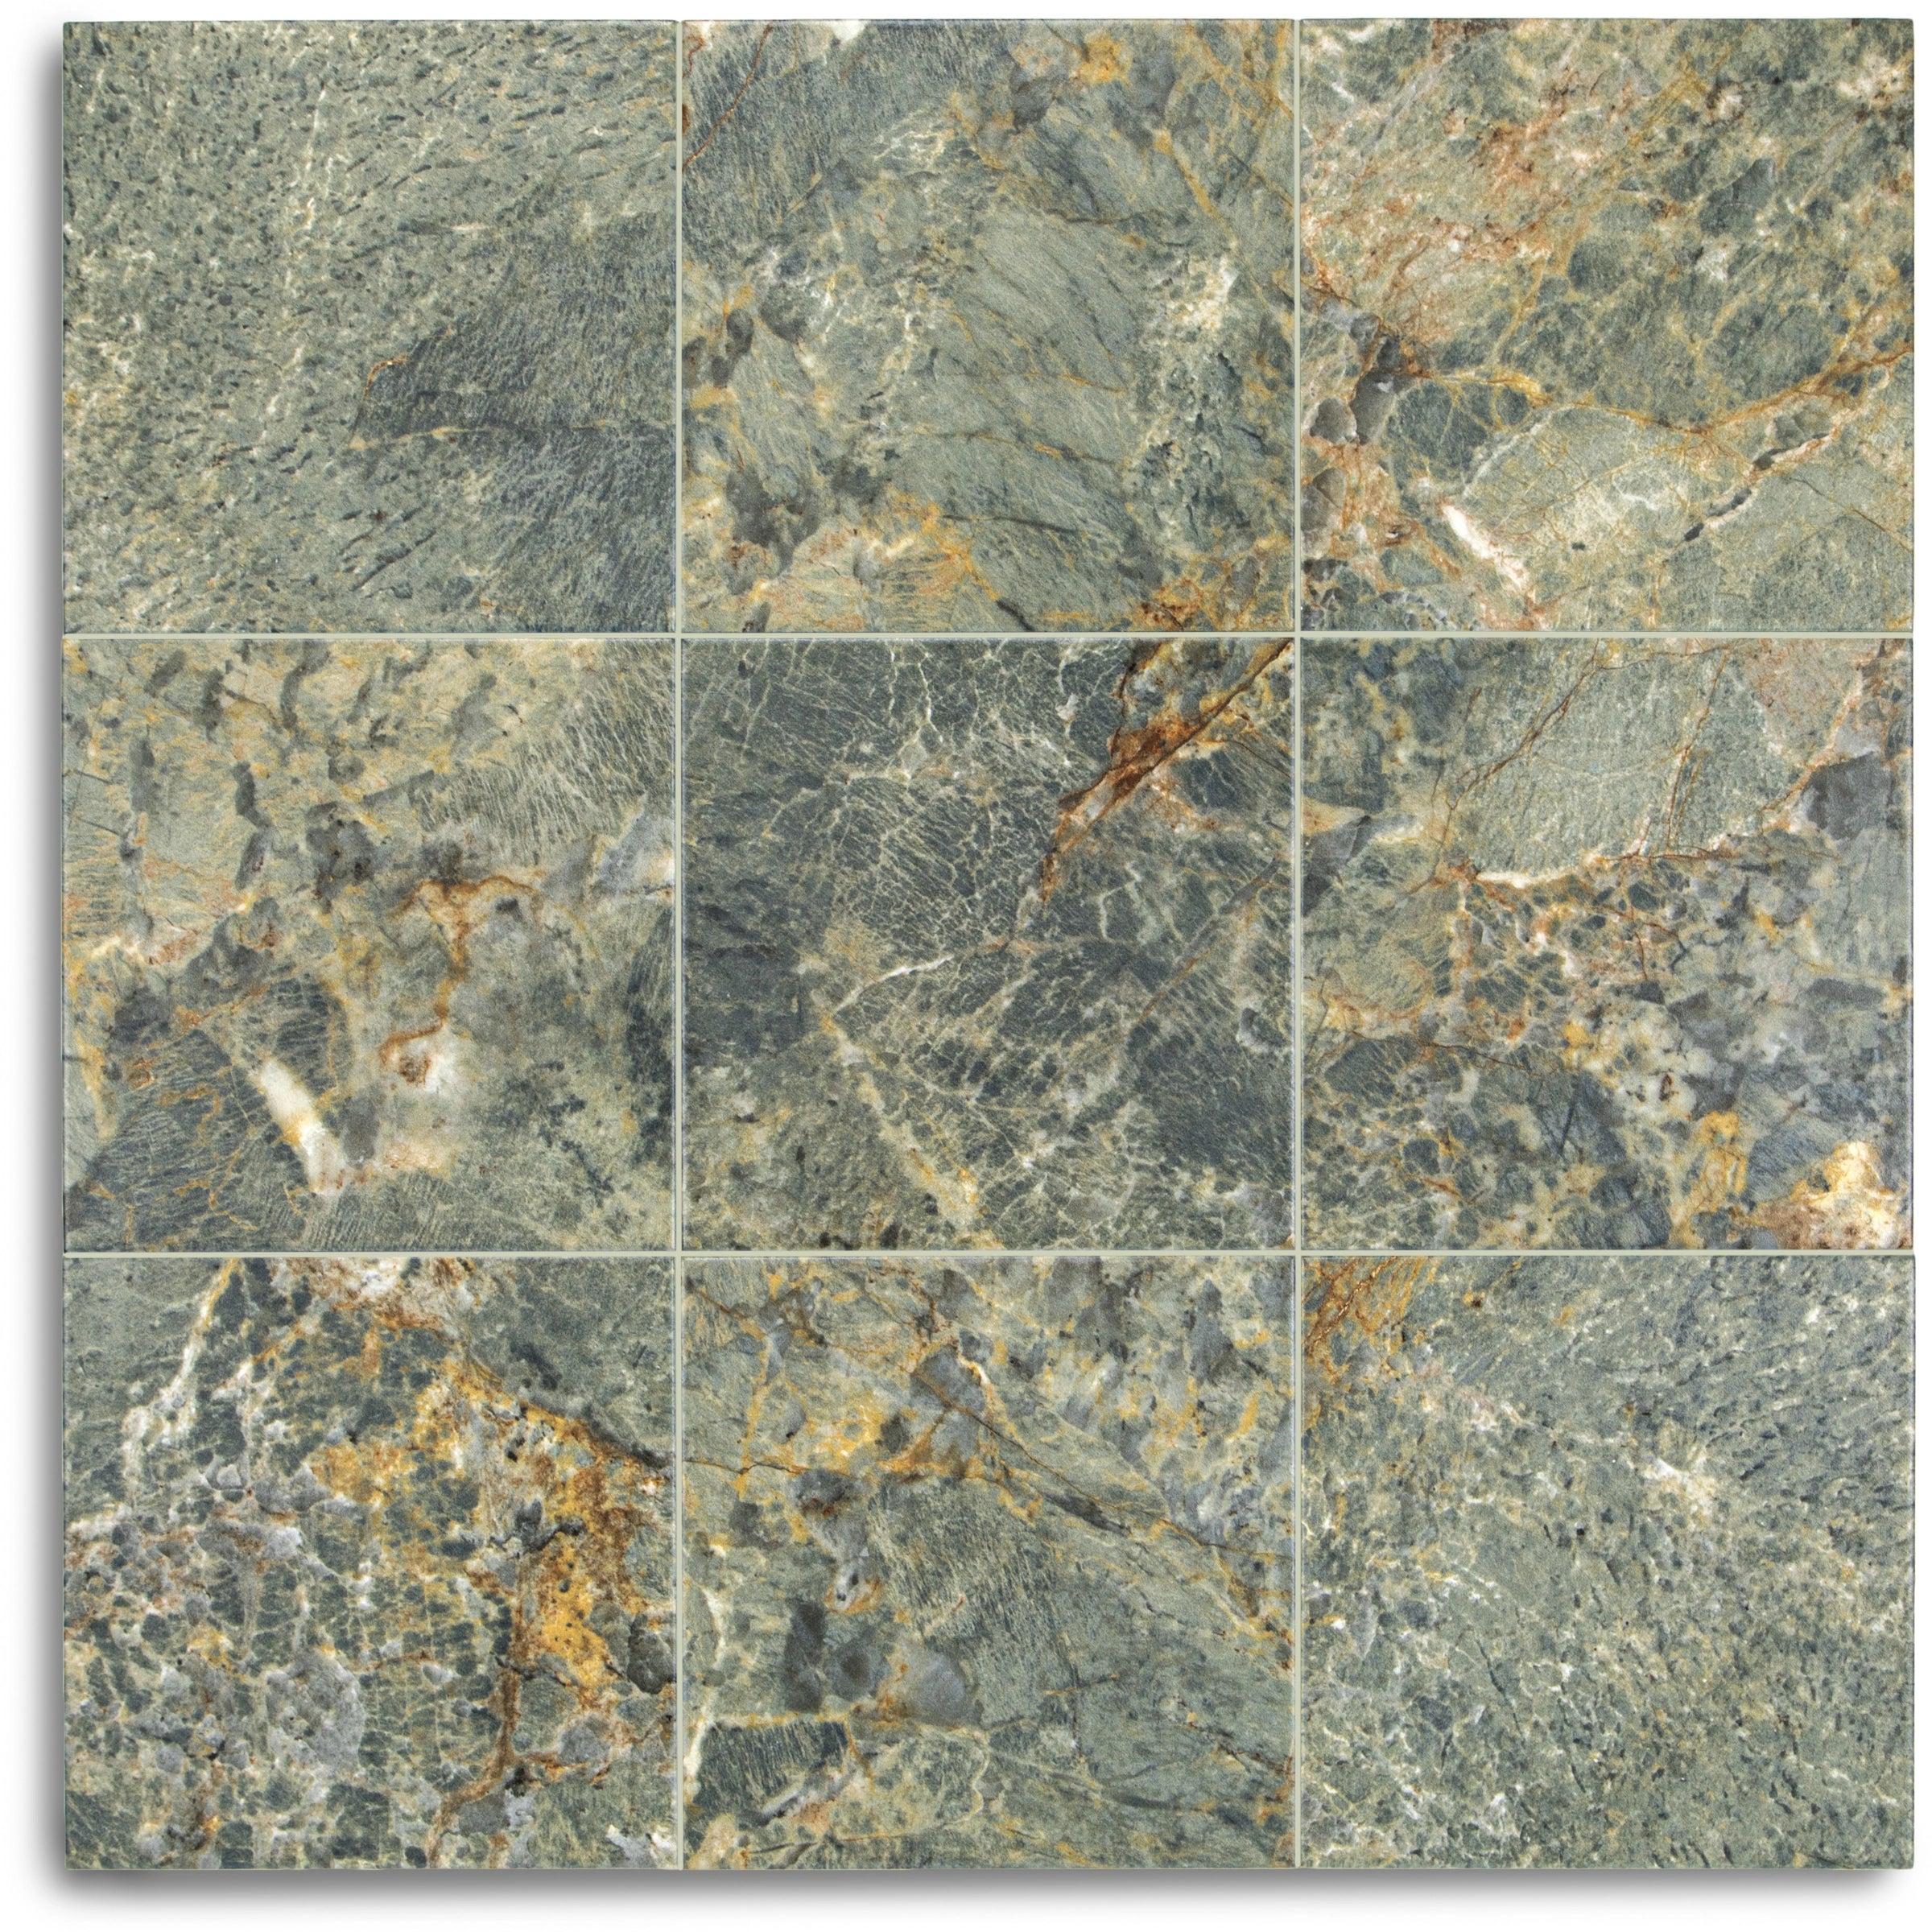
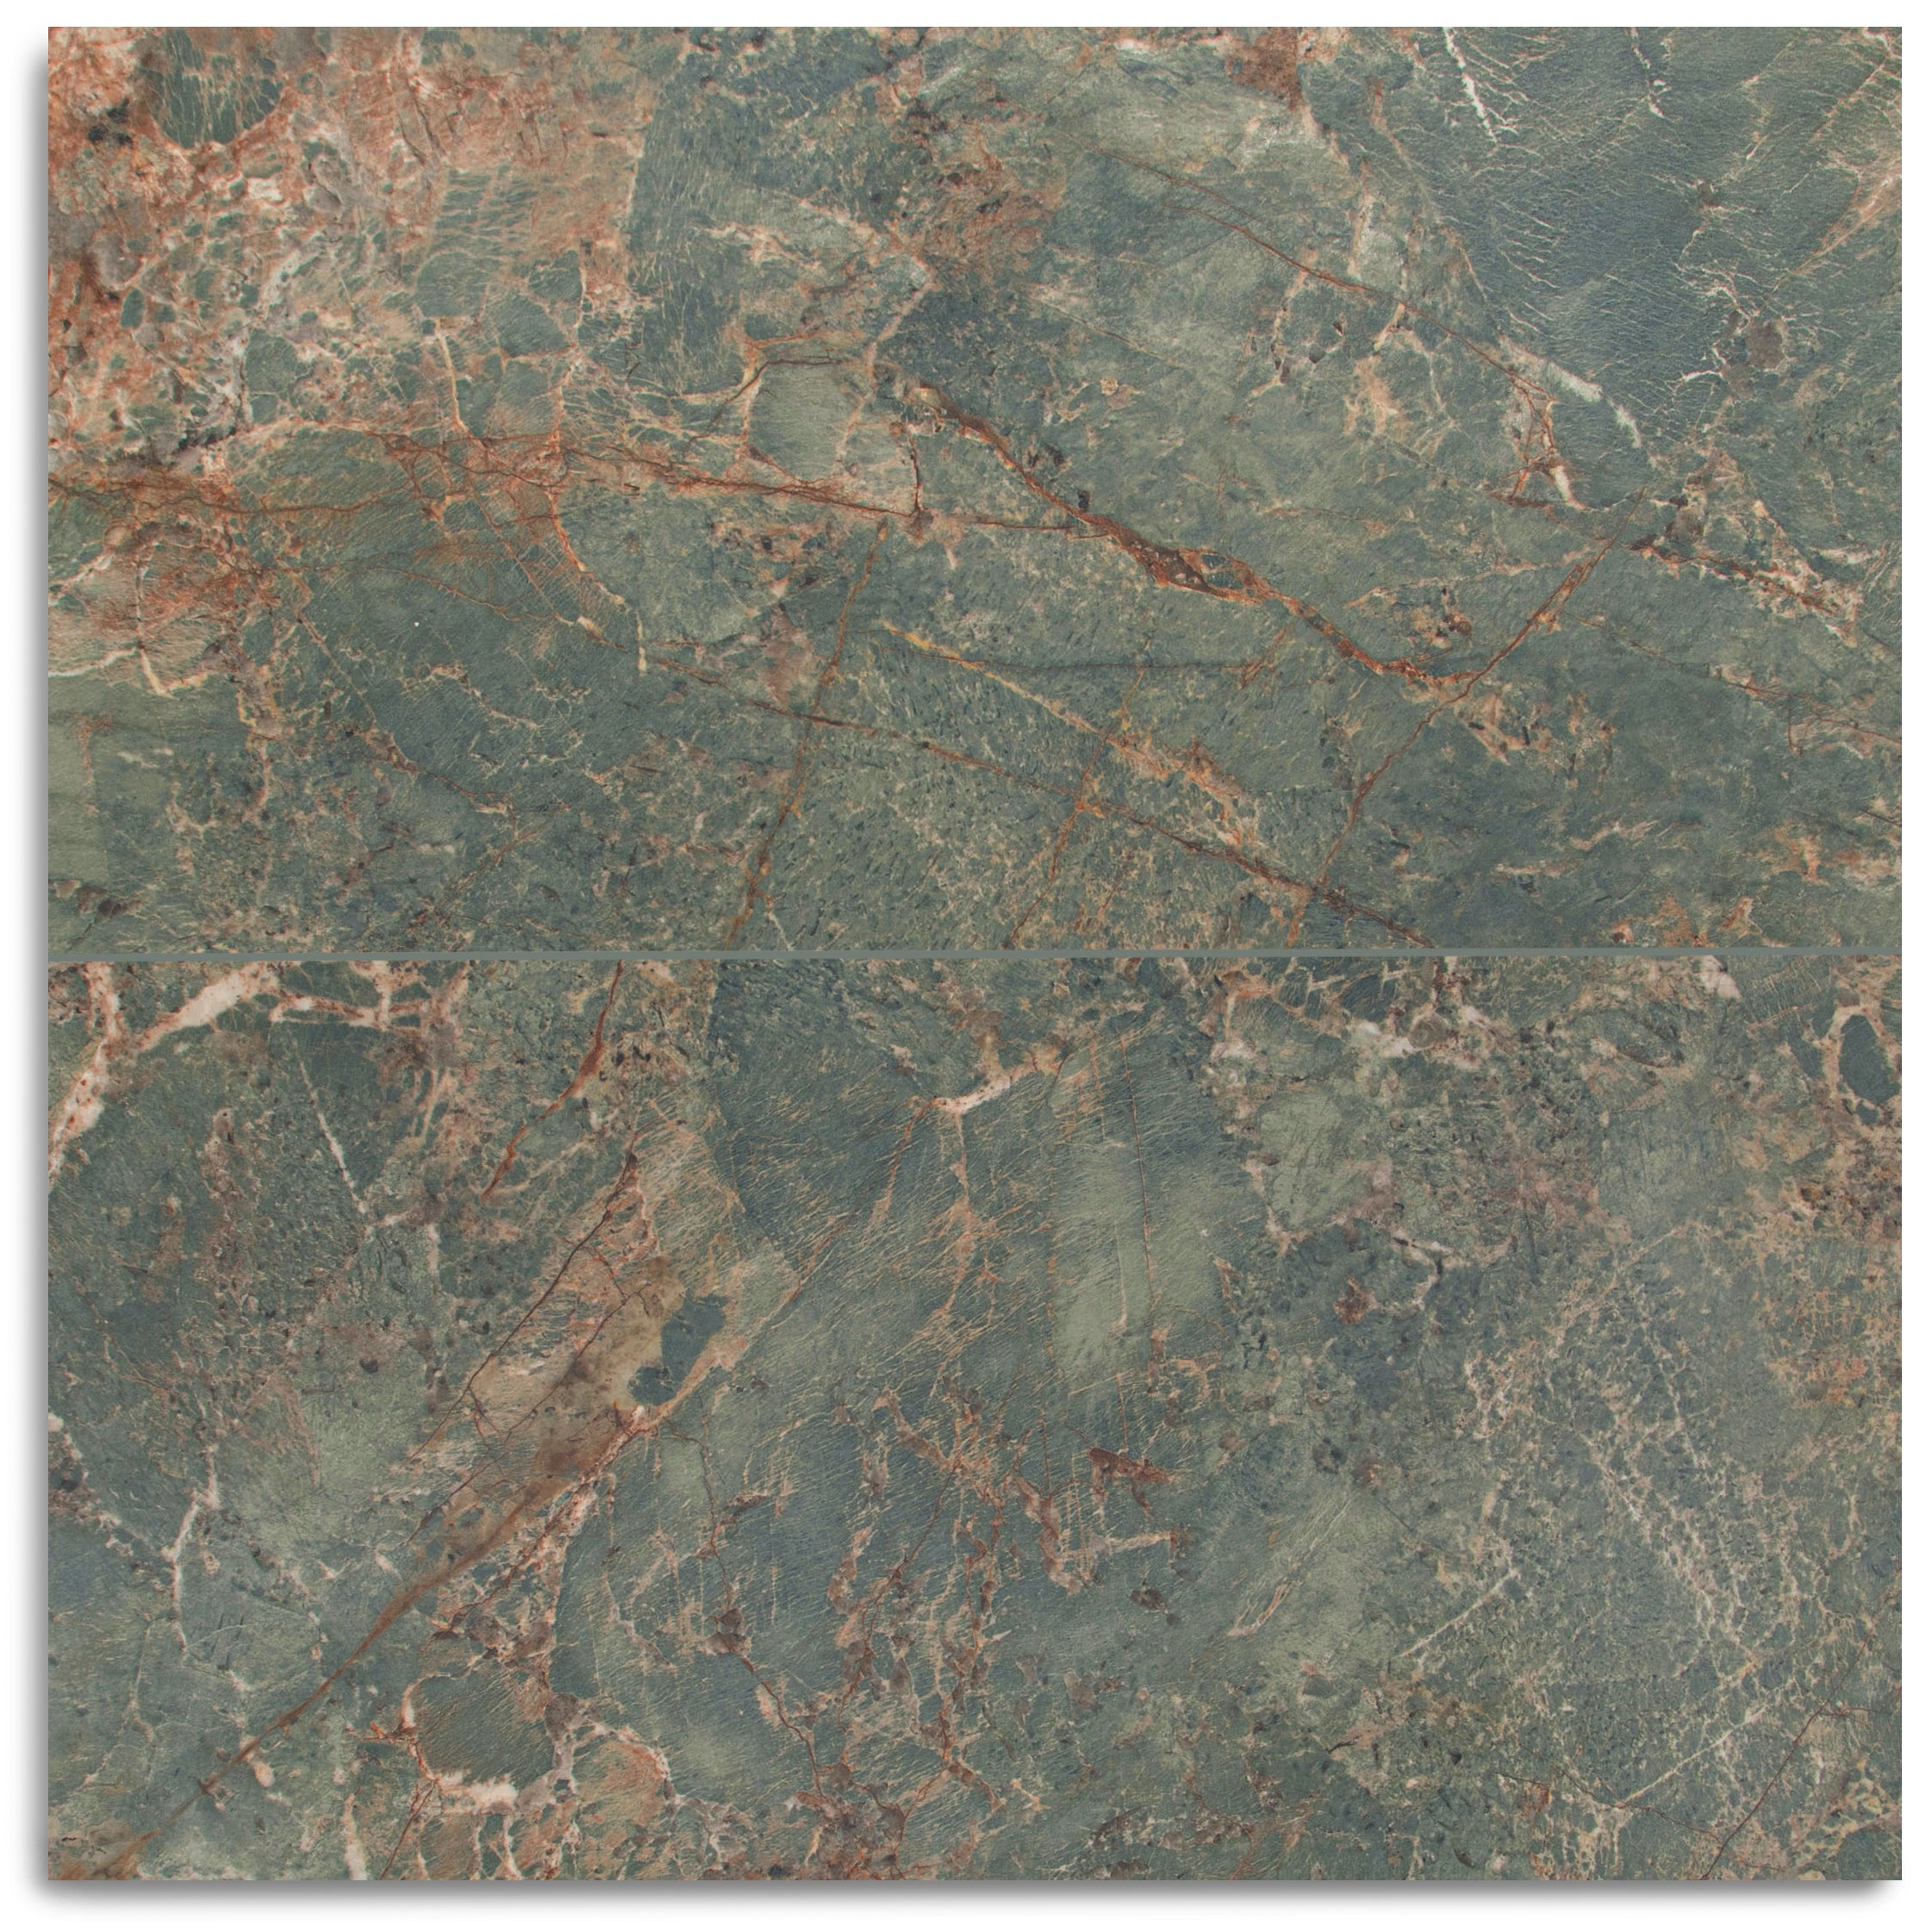
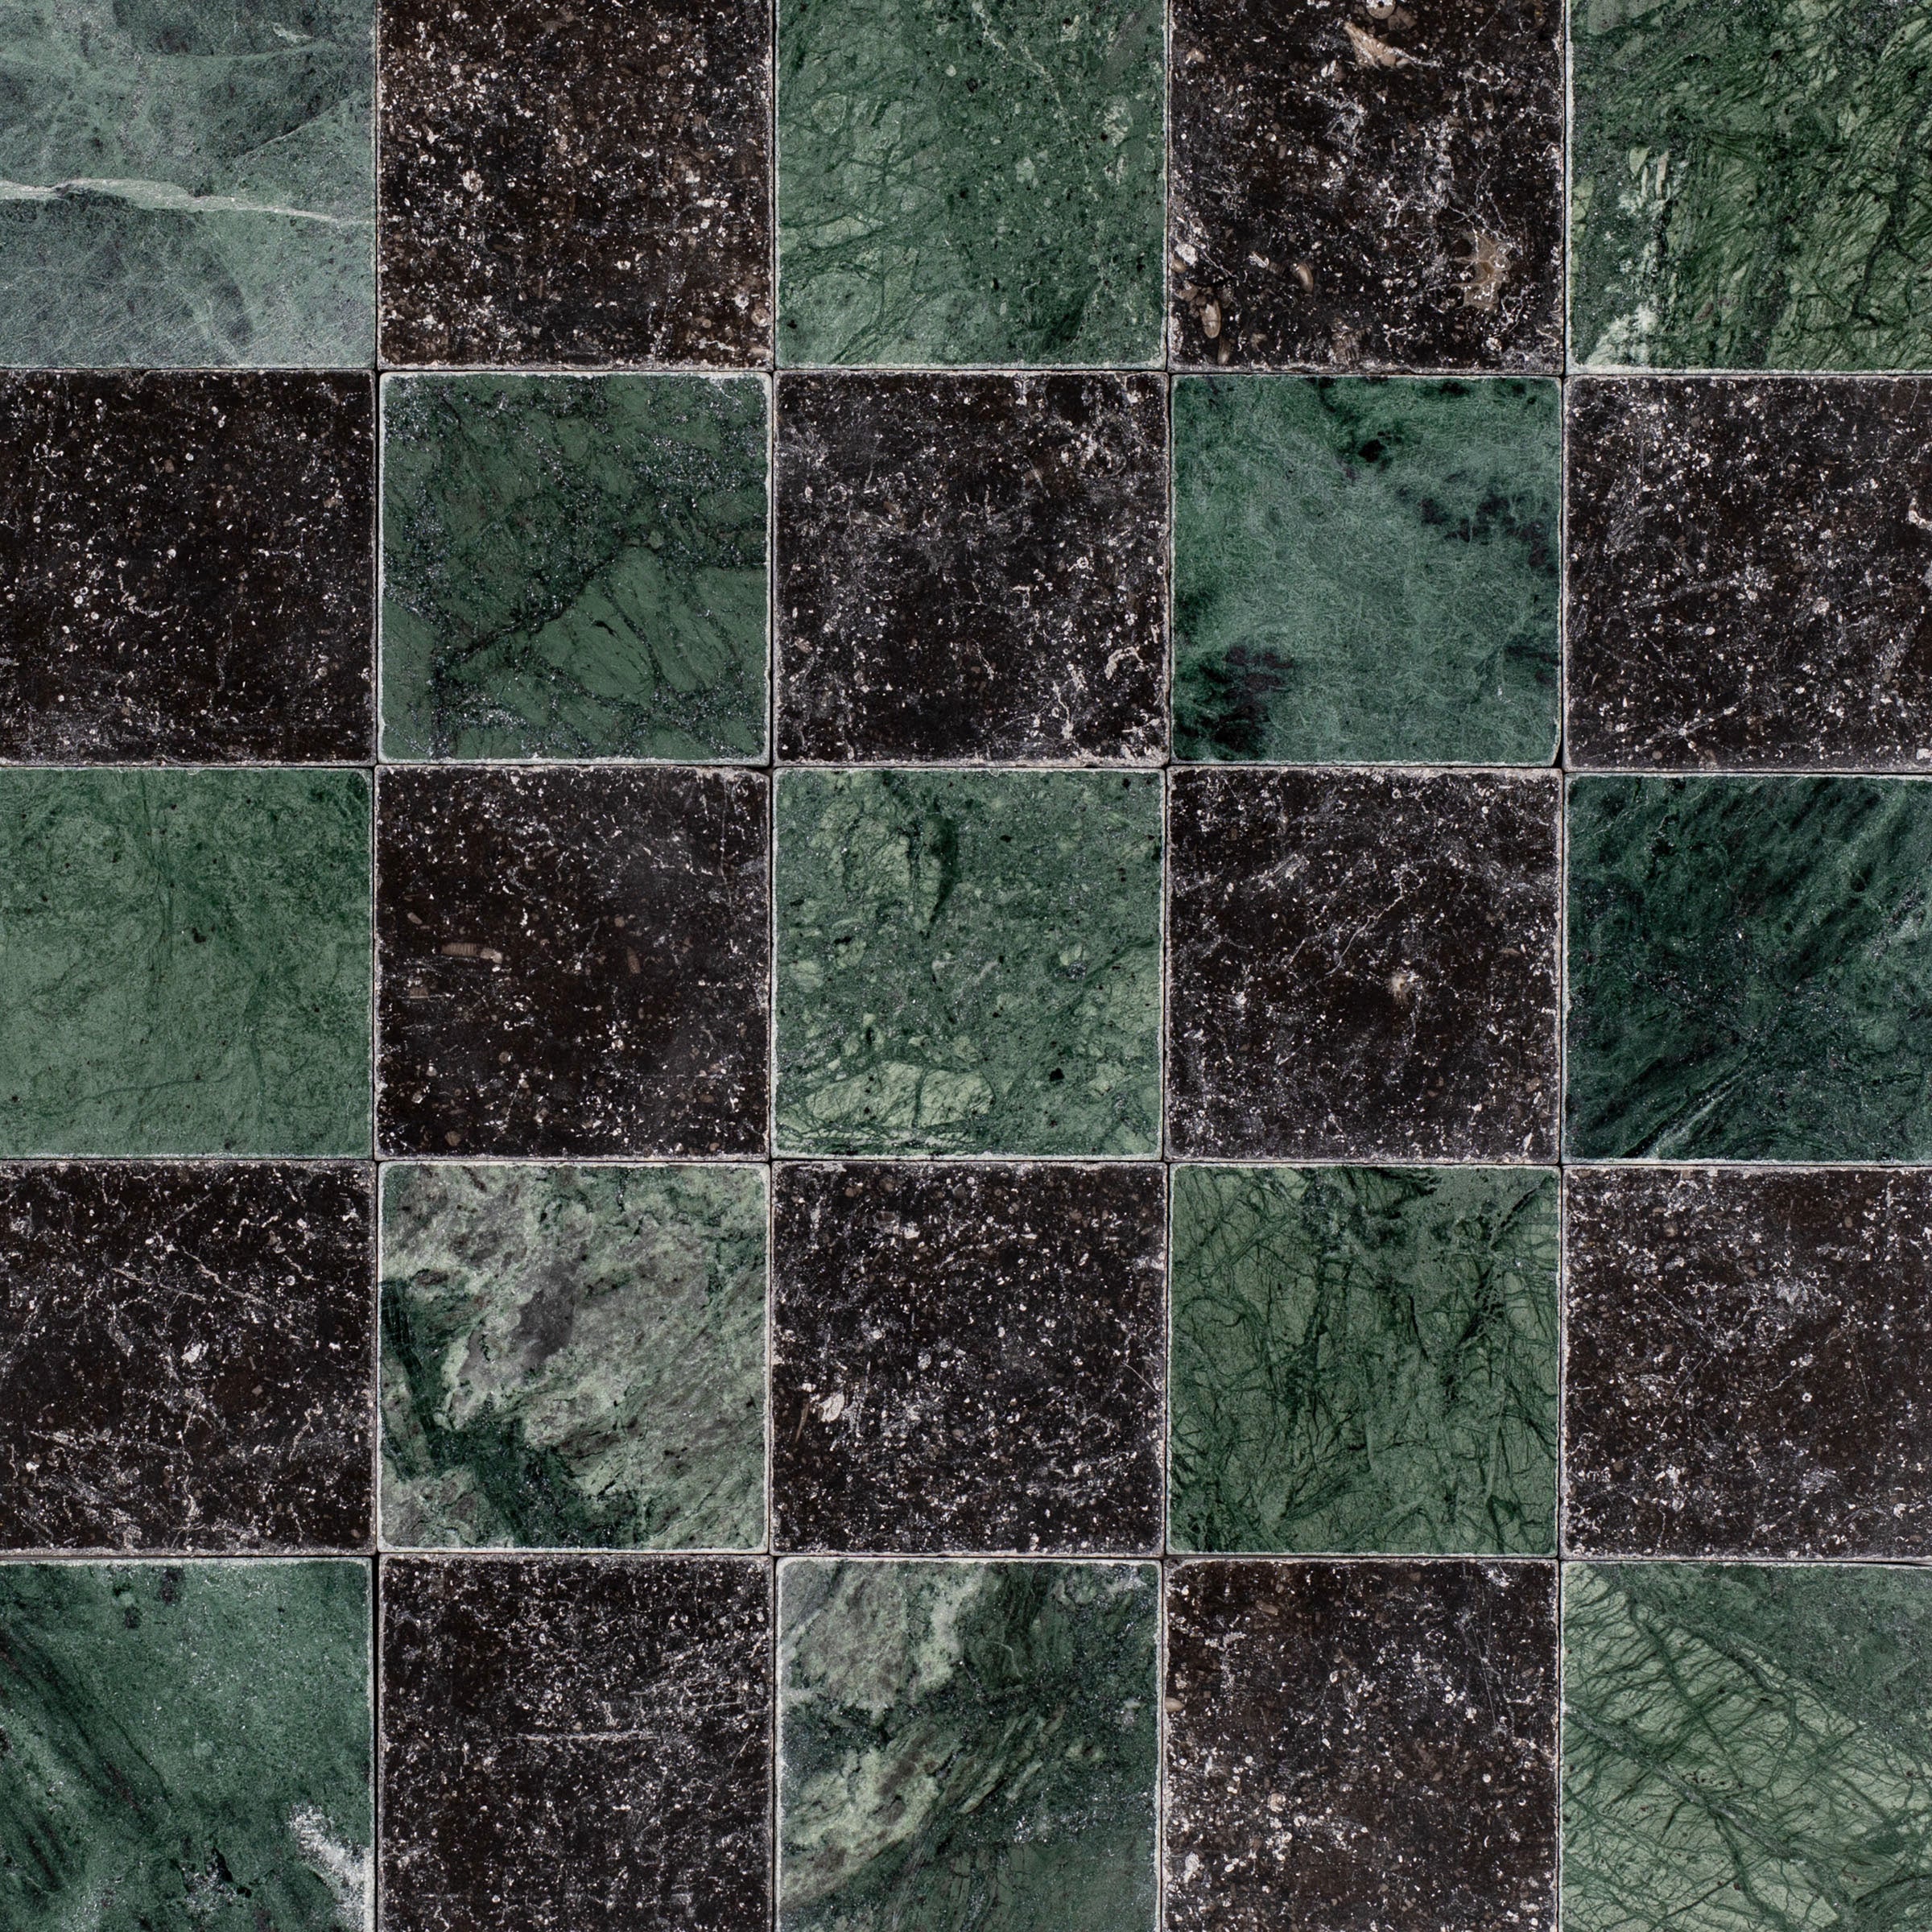
Verde Guatemala Tumbled Marble Tile

Crema Terracotta Look Matte Porcelain Tile


Chocolate 2" Hexagon Textured Terracotta Mosaic

Black Multi-Color Matte Porcelain Tile
Carrara Running Bond Marble Mosaic
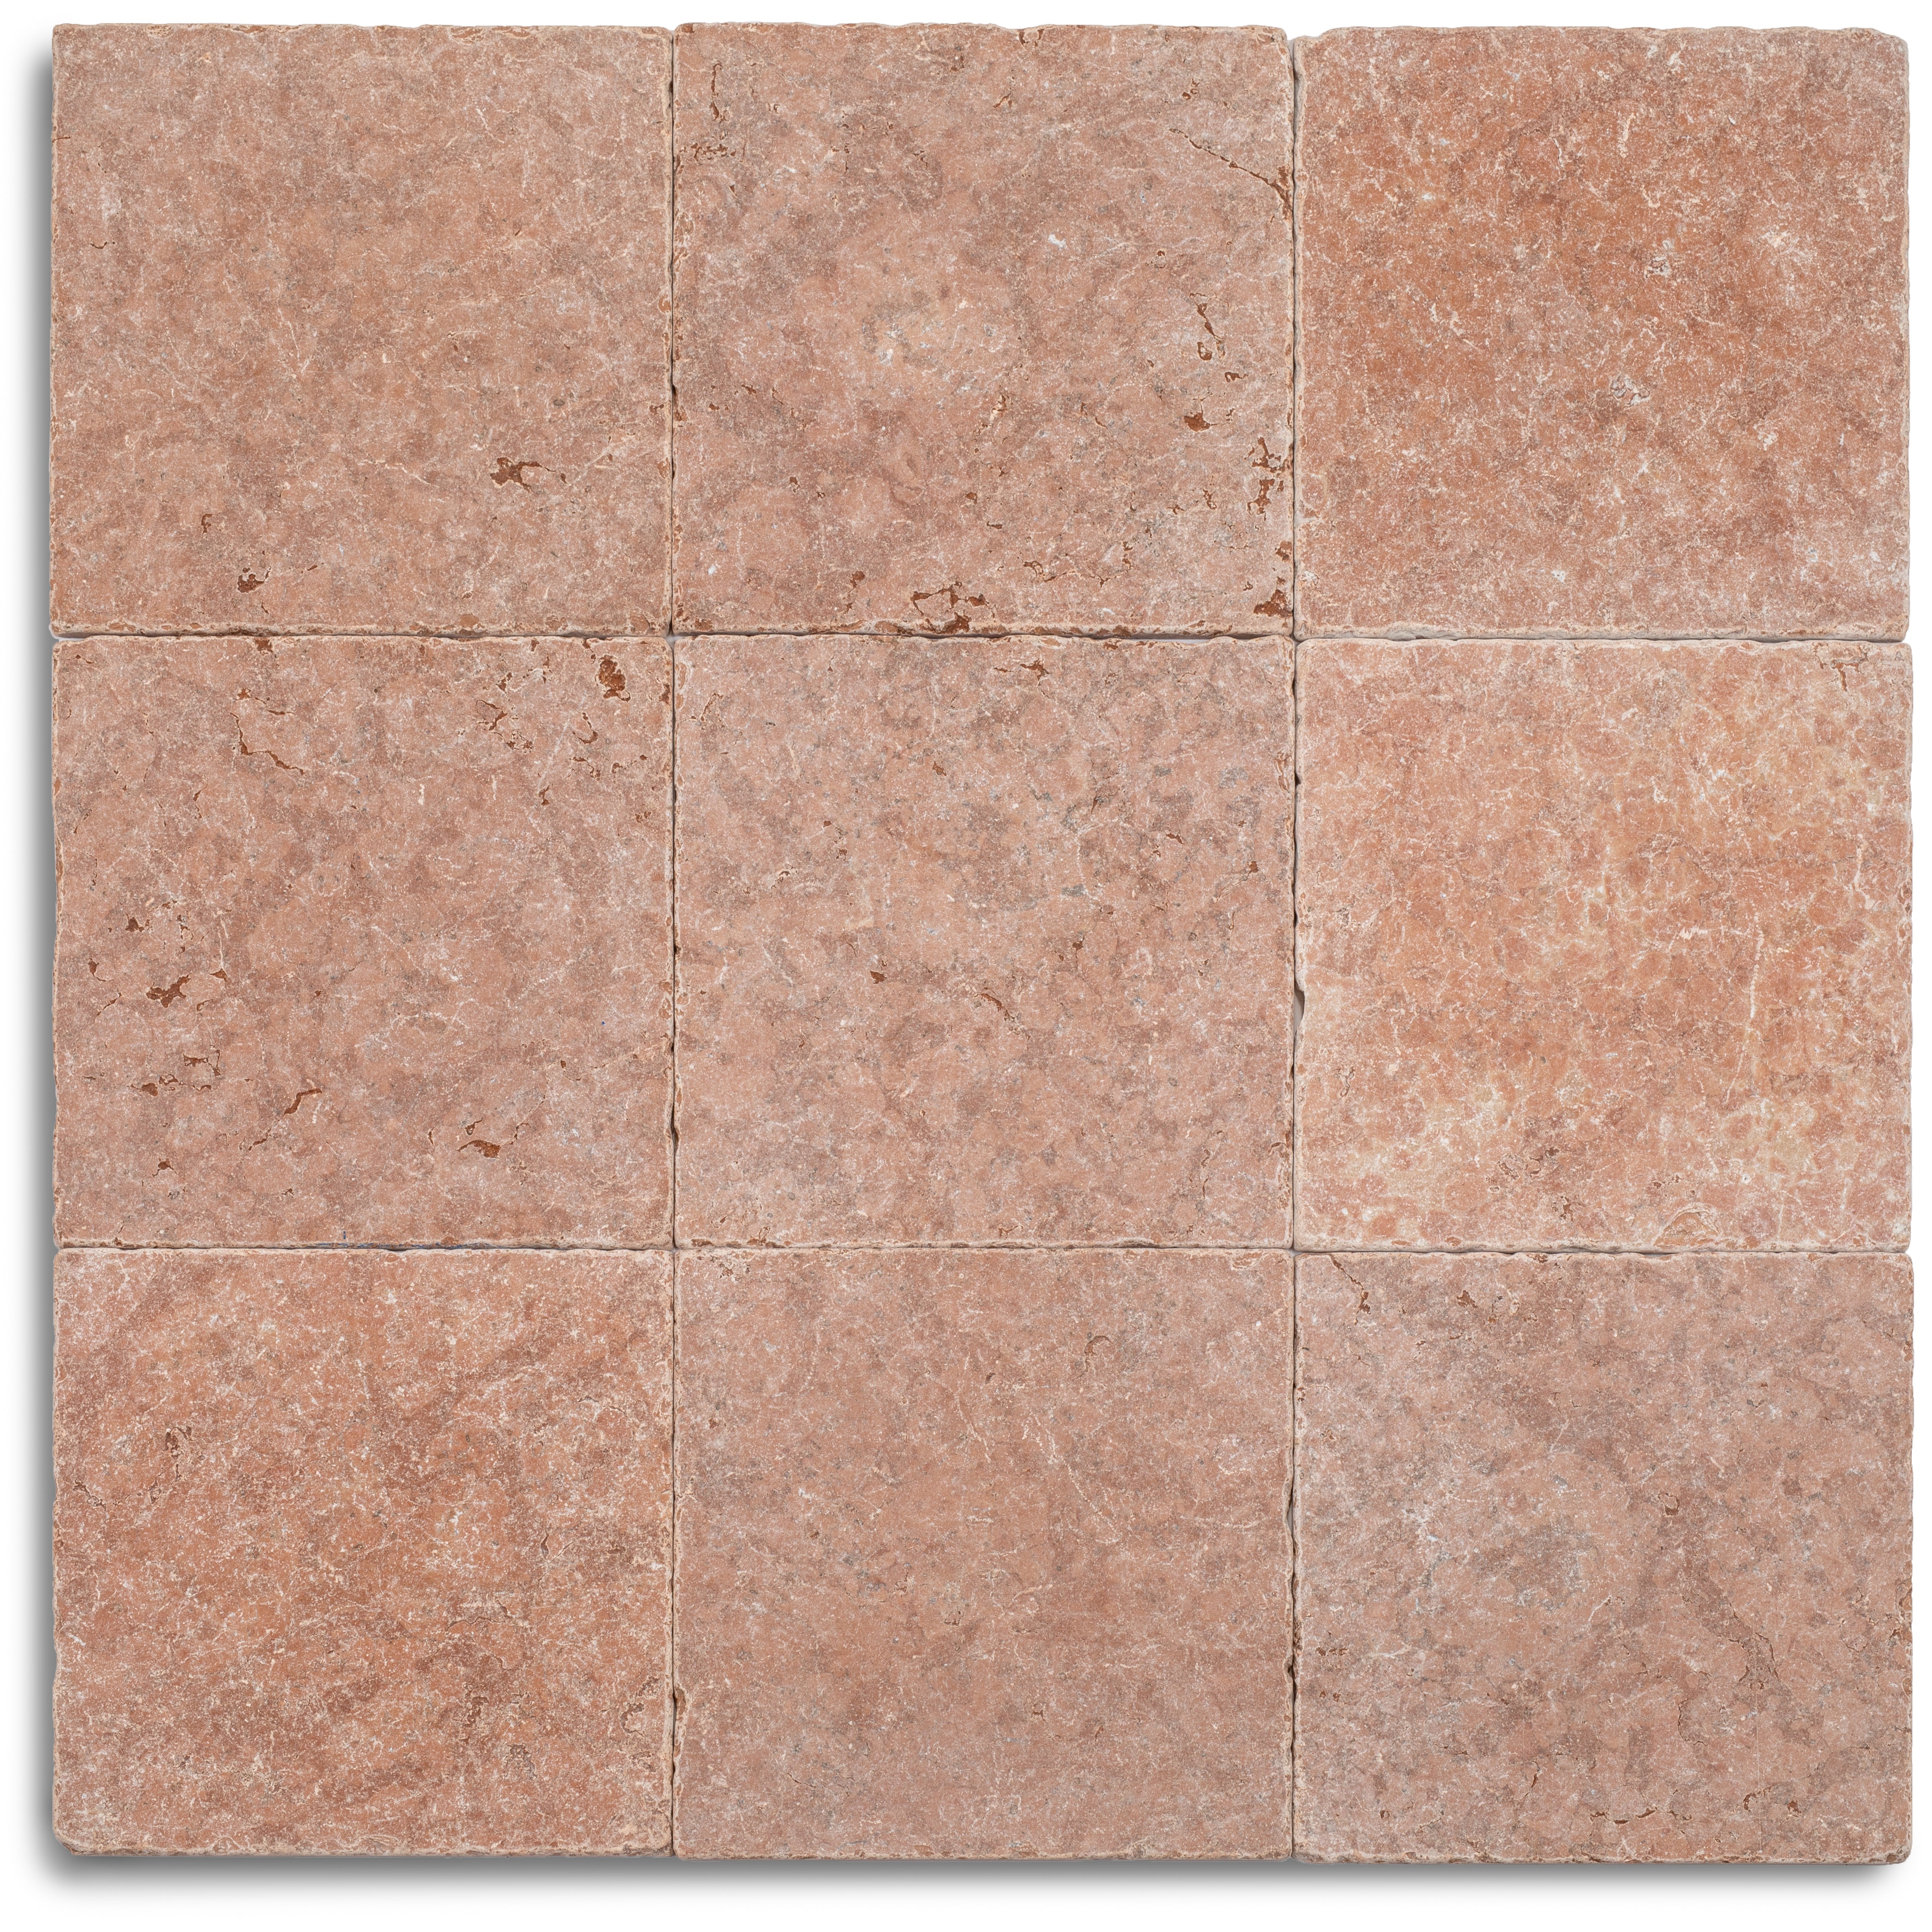
Desert Tea Tumbled Marble Tile


Calacatta Running Bond Marble Mosaic
White & Ecru Octagon Zellige Mosaic
Cotto Deco Terracotta Look Matte Porcelain Tile
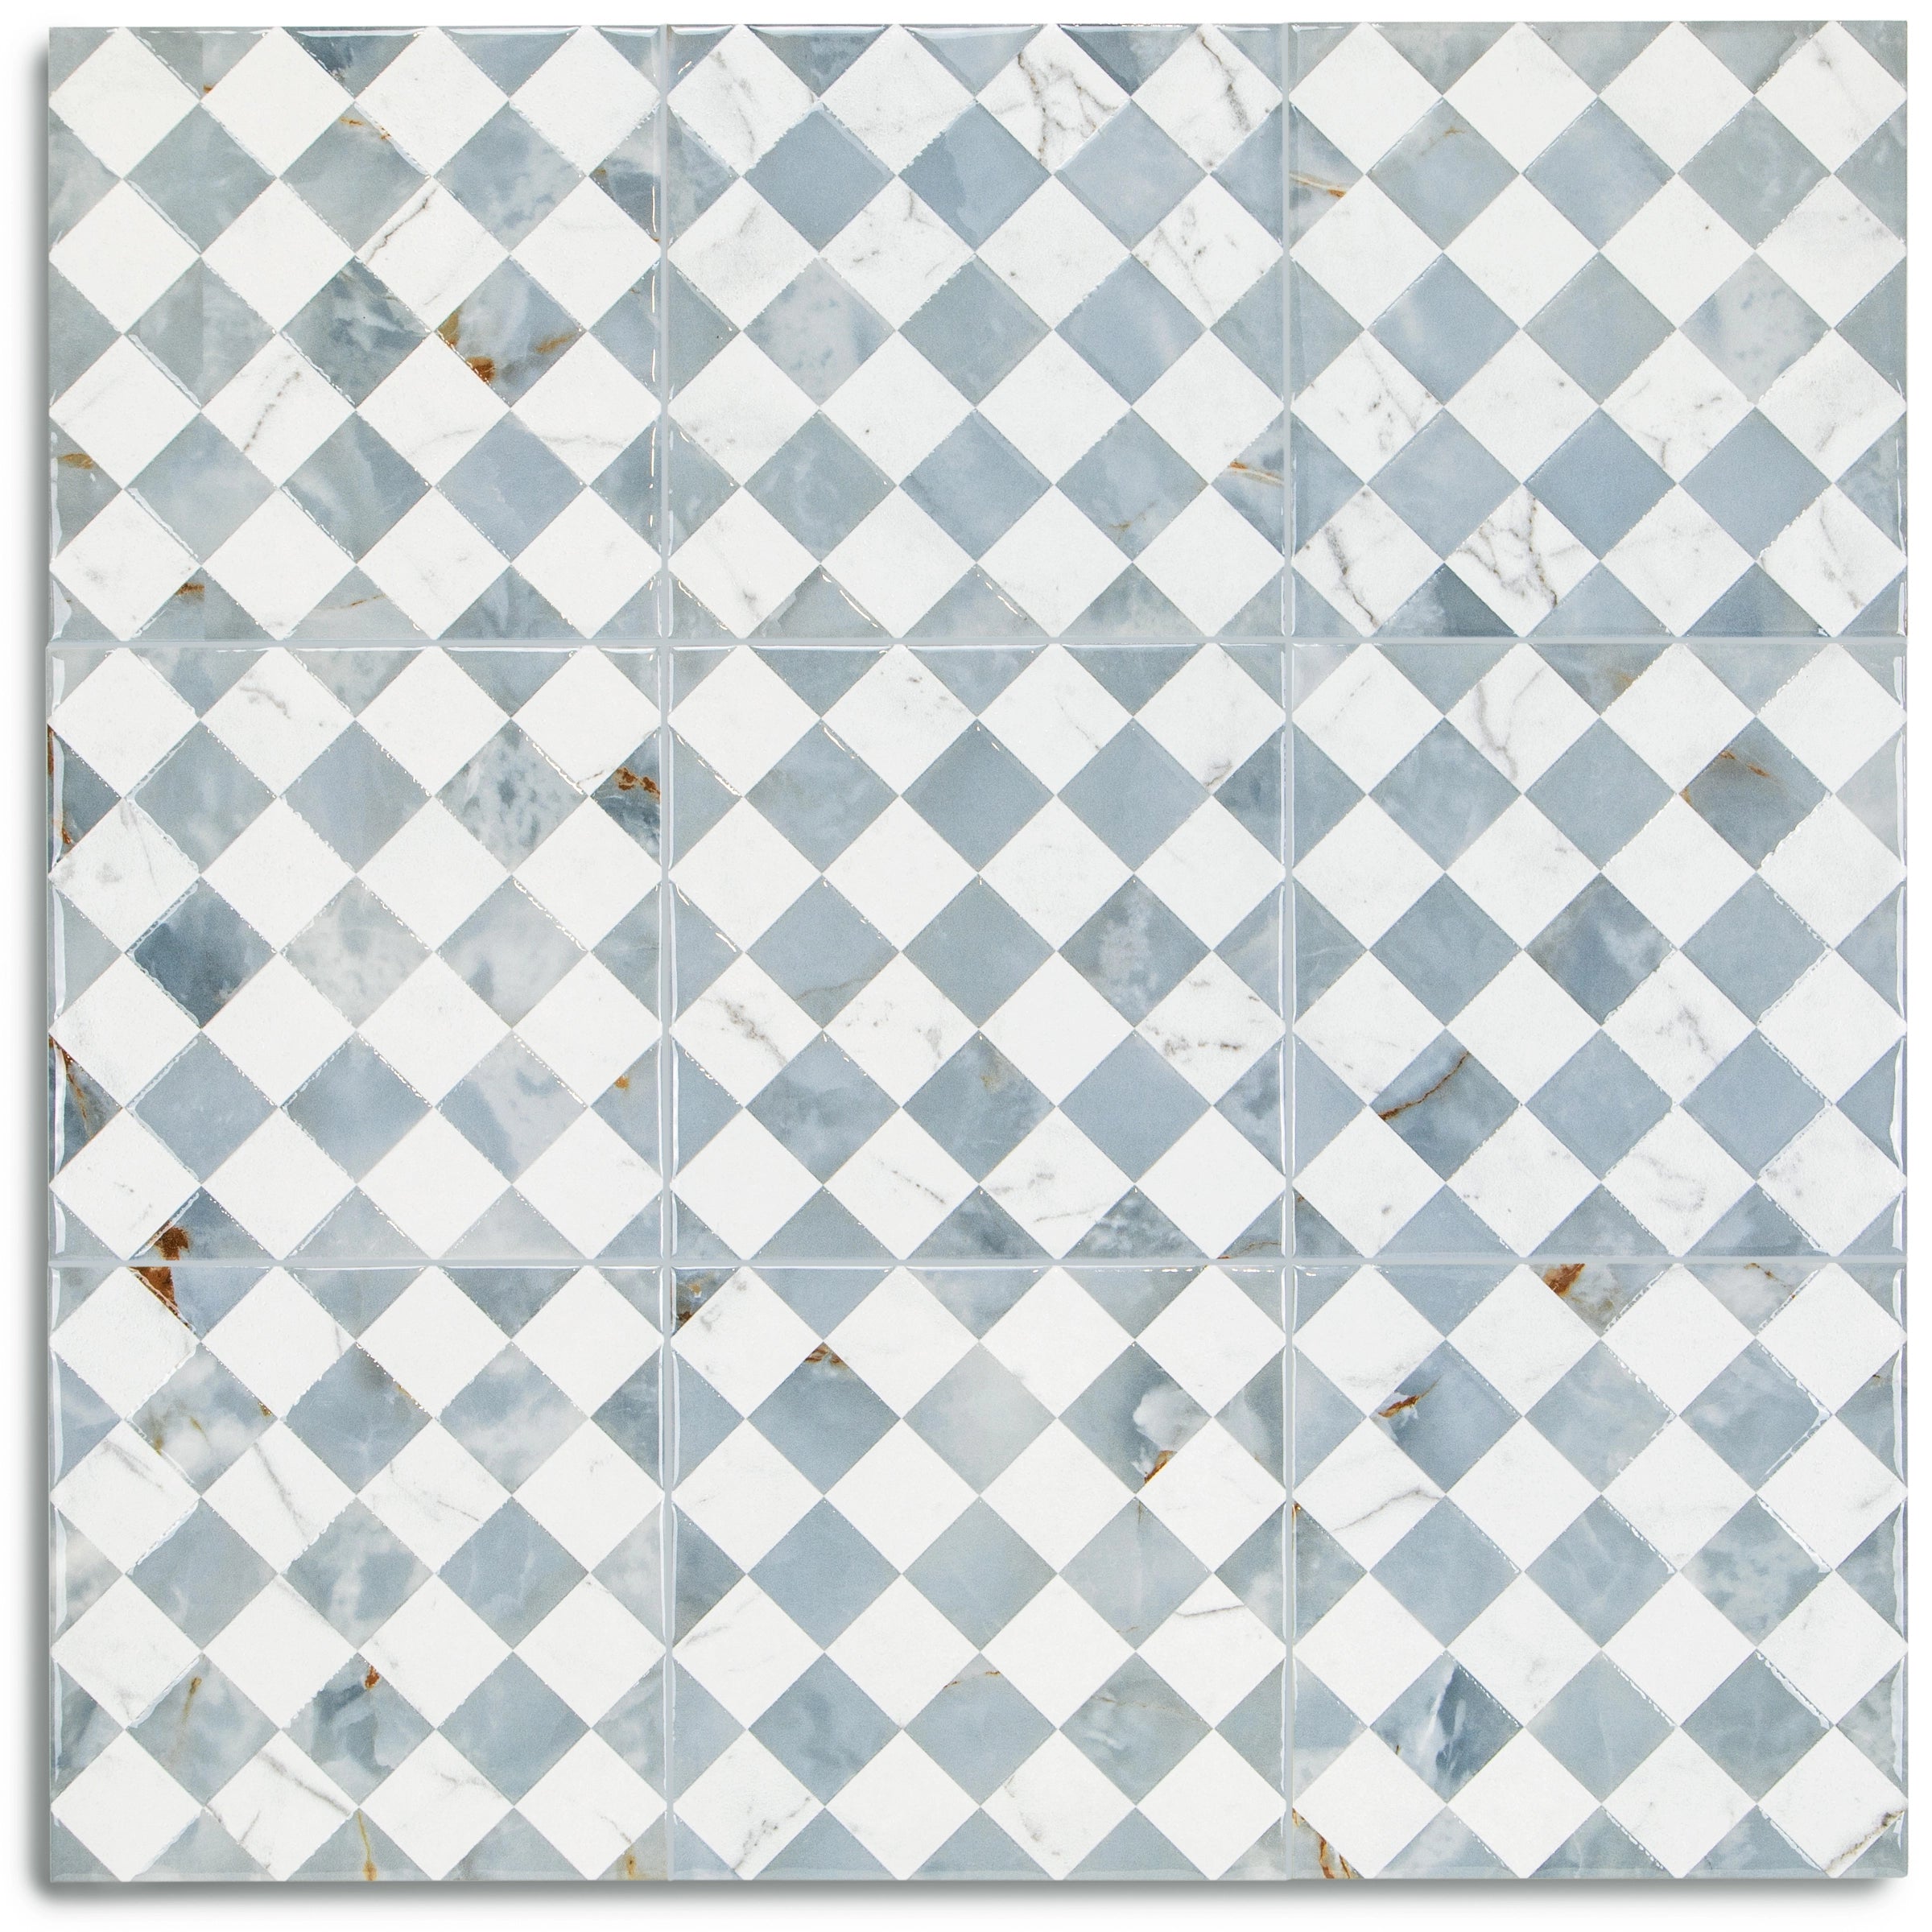
Thassos, Carrara, Bardiglio Gingham Marble Mosaic
White & Ecru 2x2 Zellige Checkerboard Mosaic
Unglazed & White Octagon Zellige Mosaic


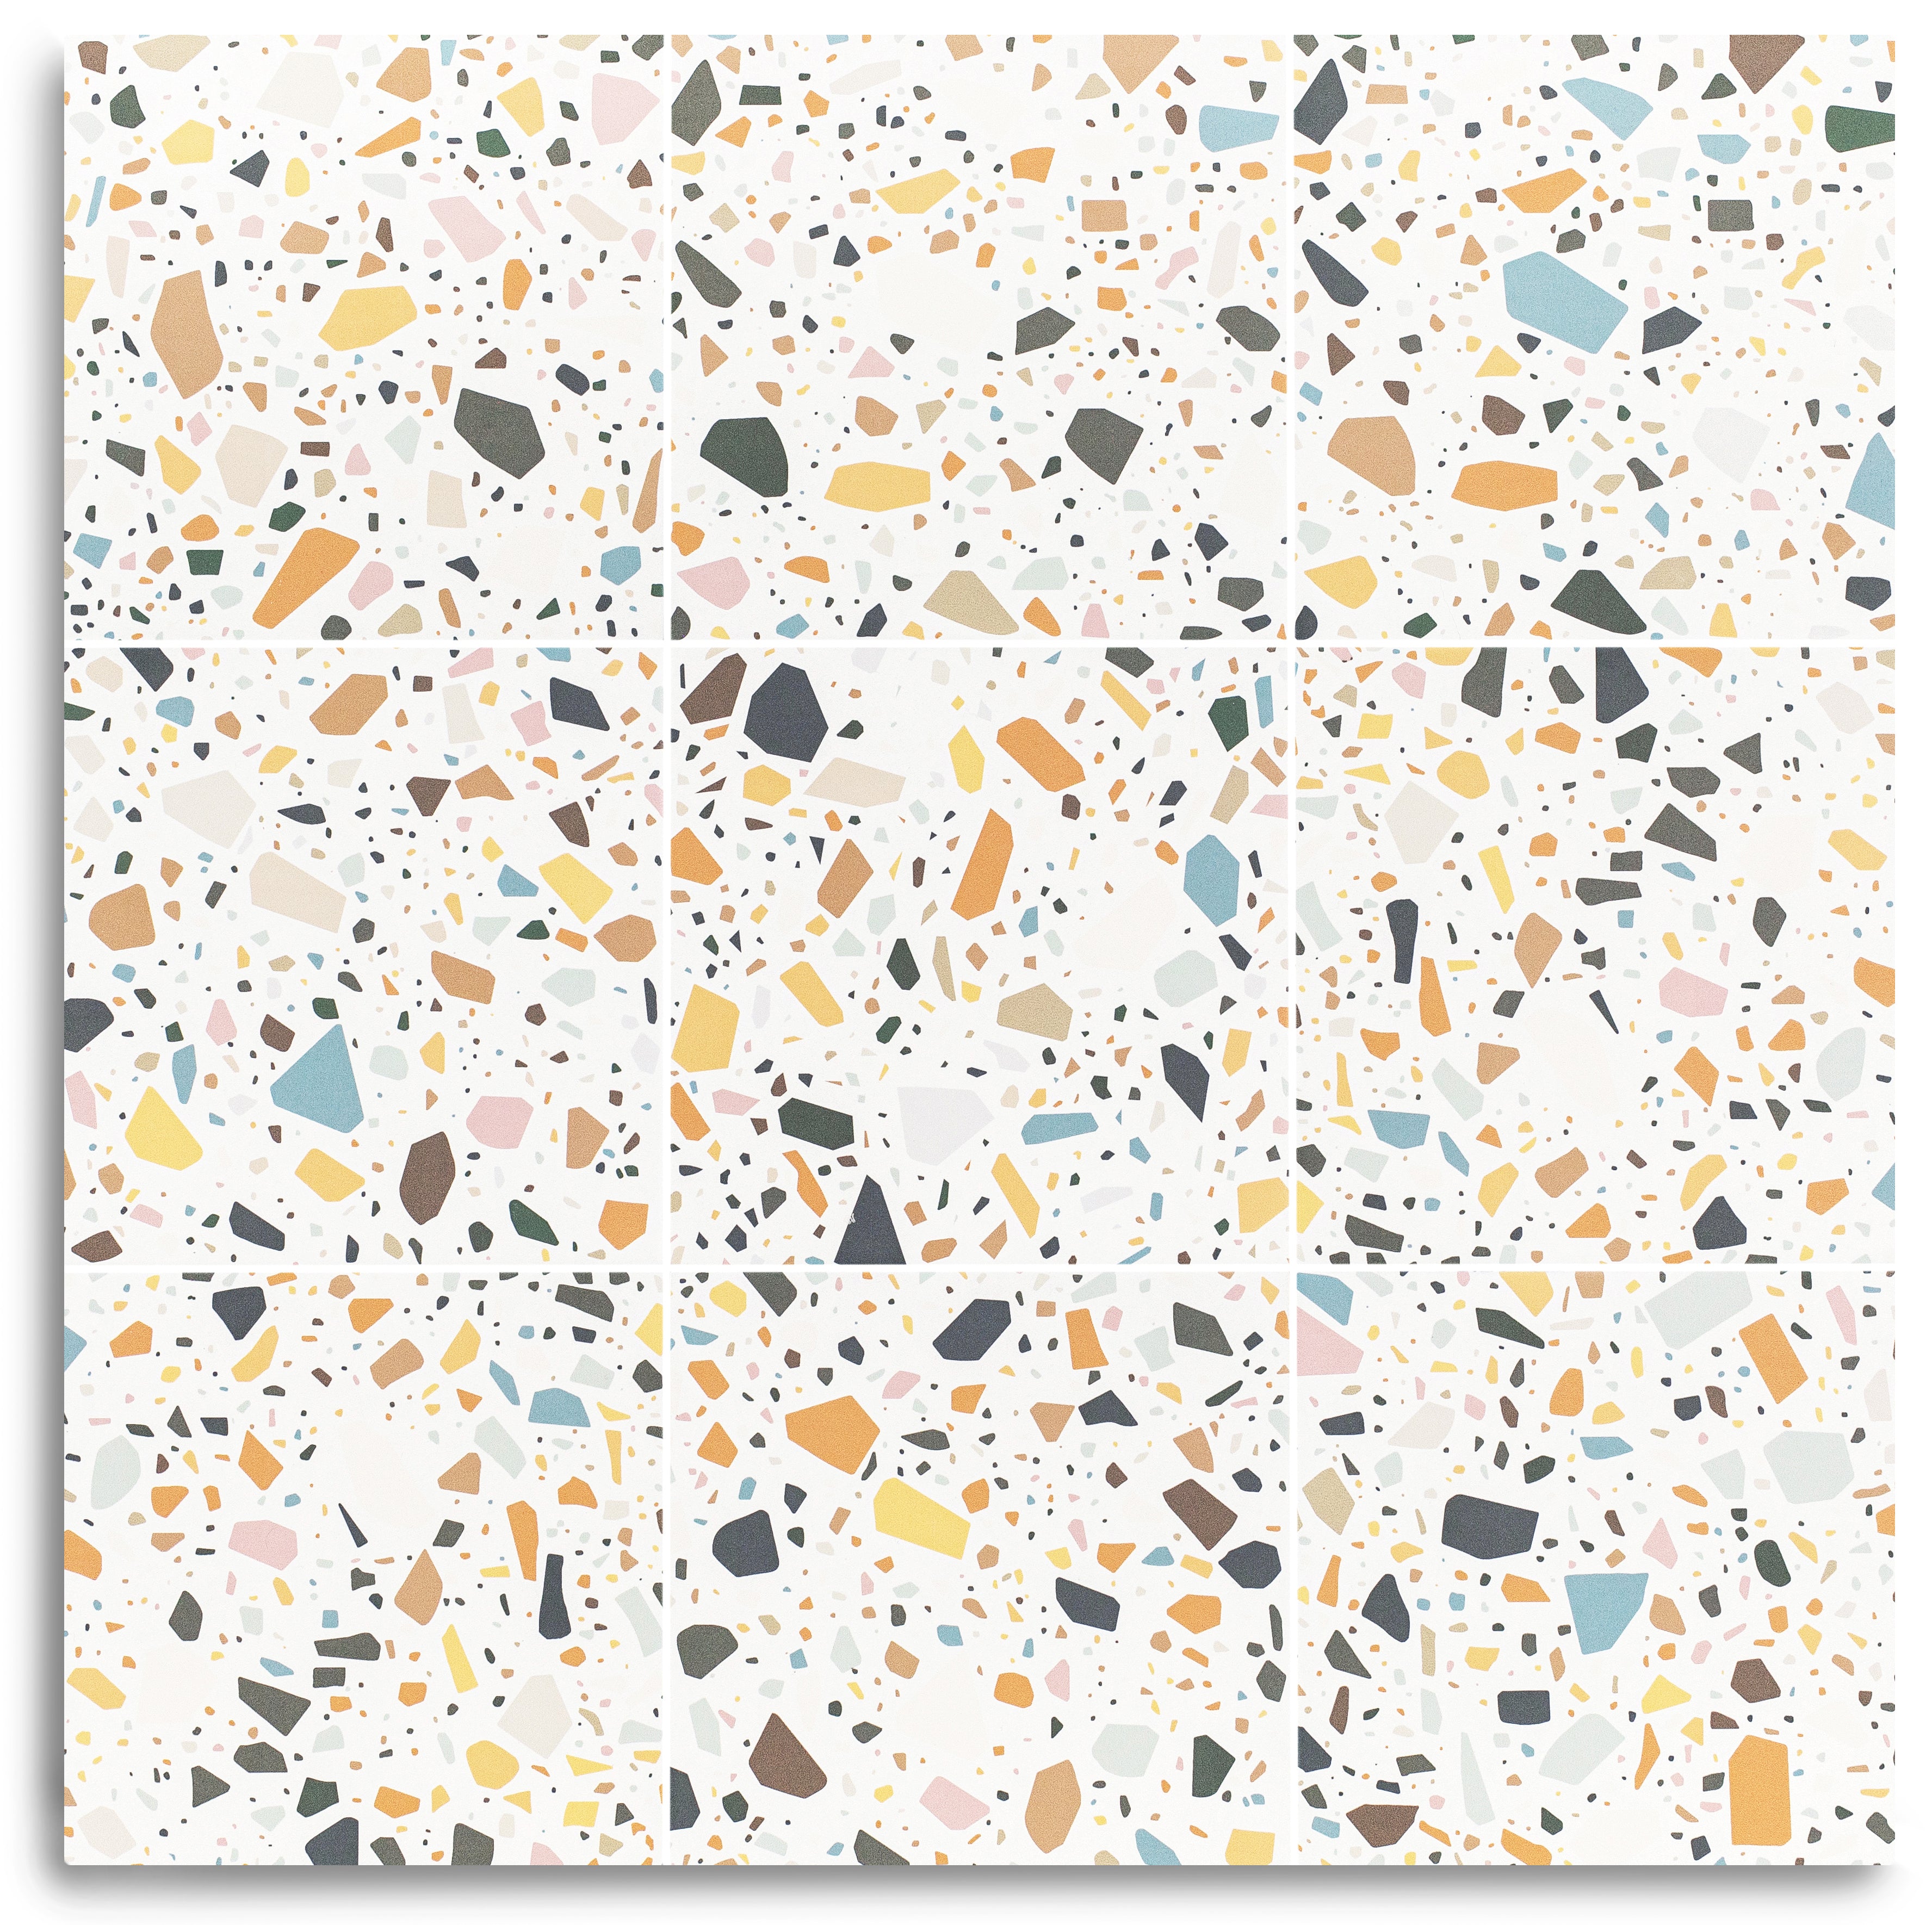
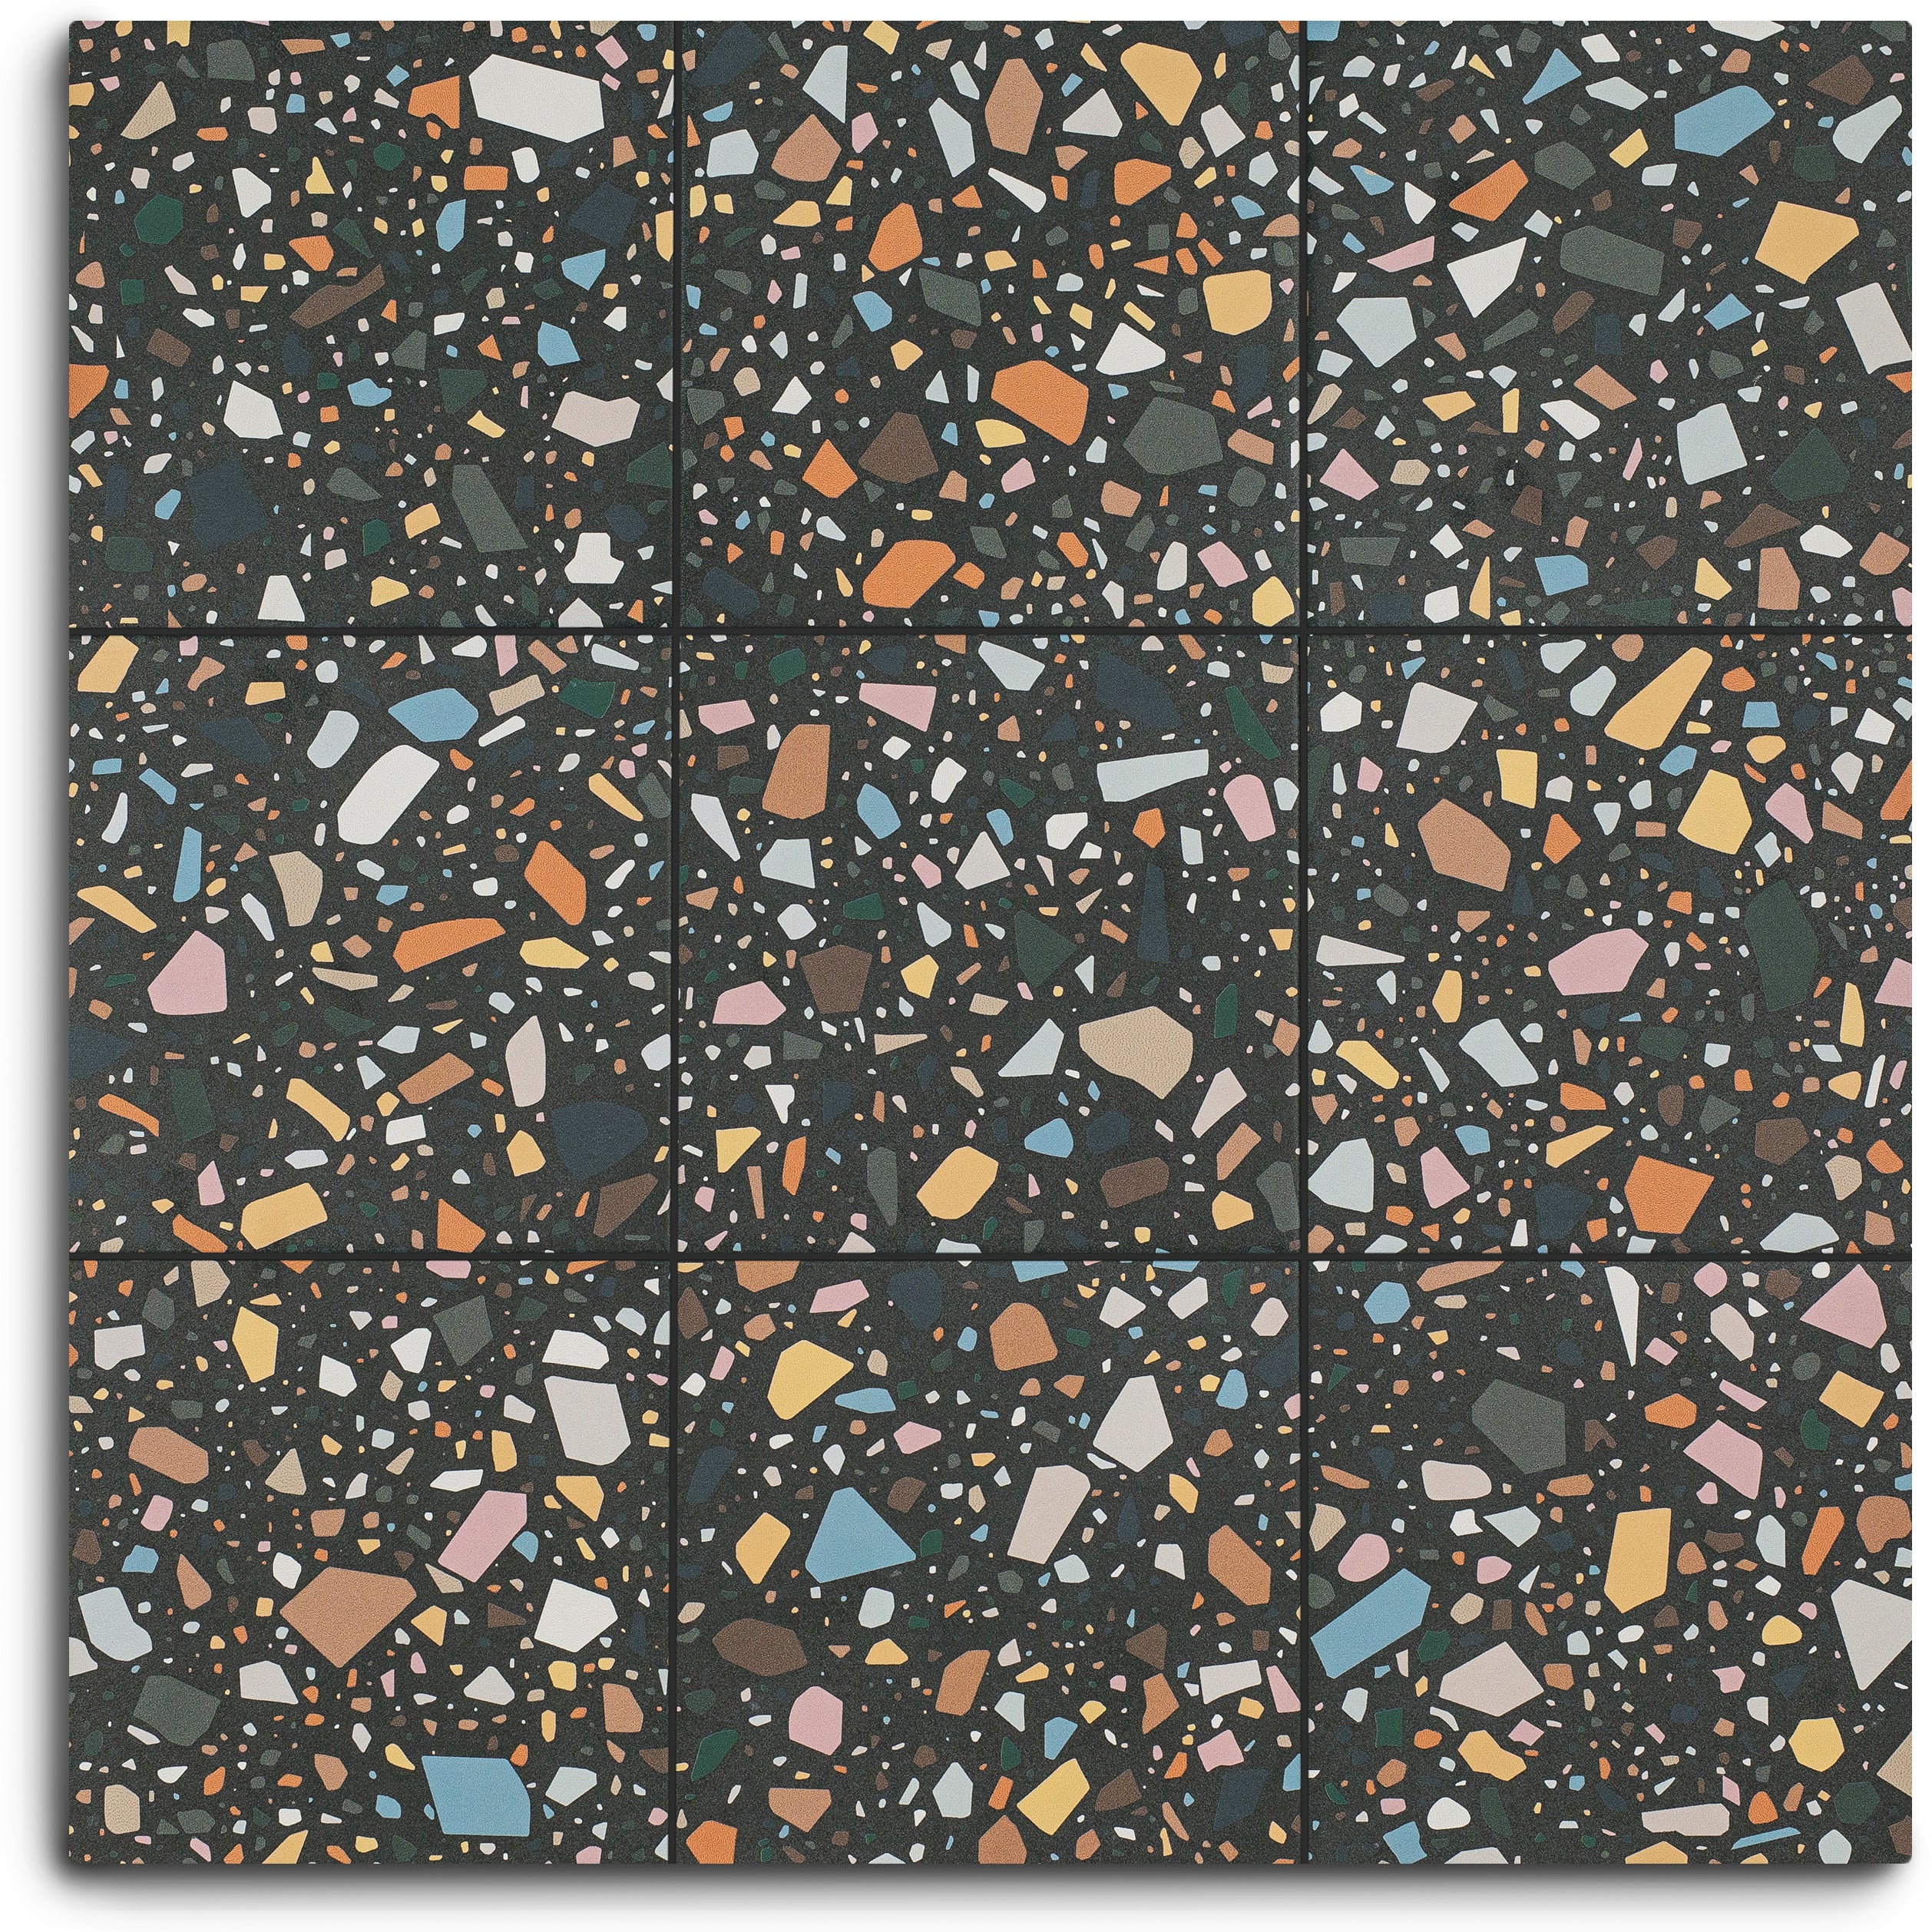
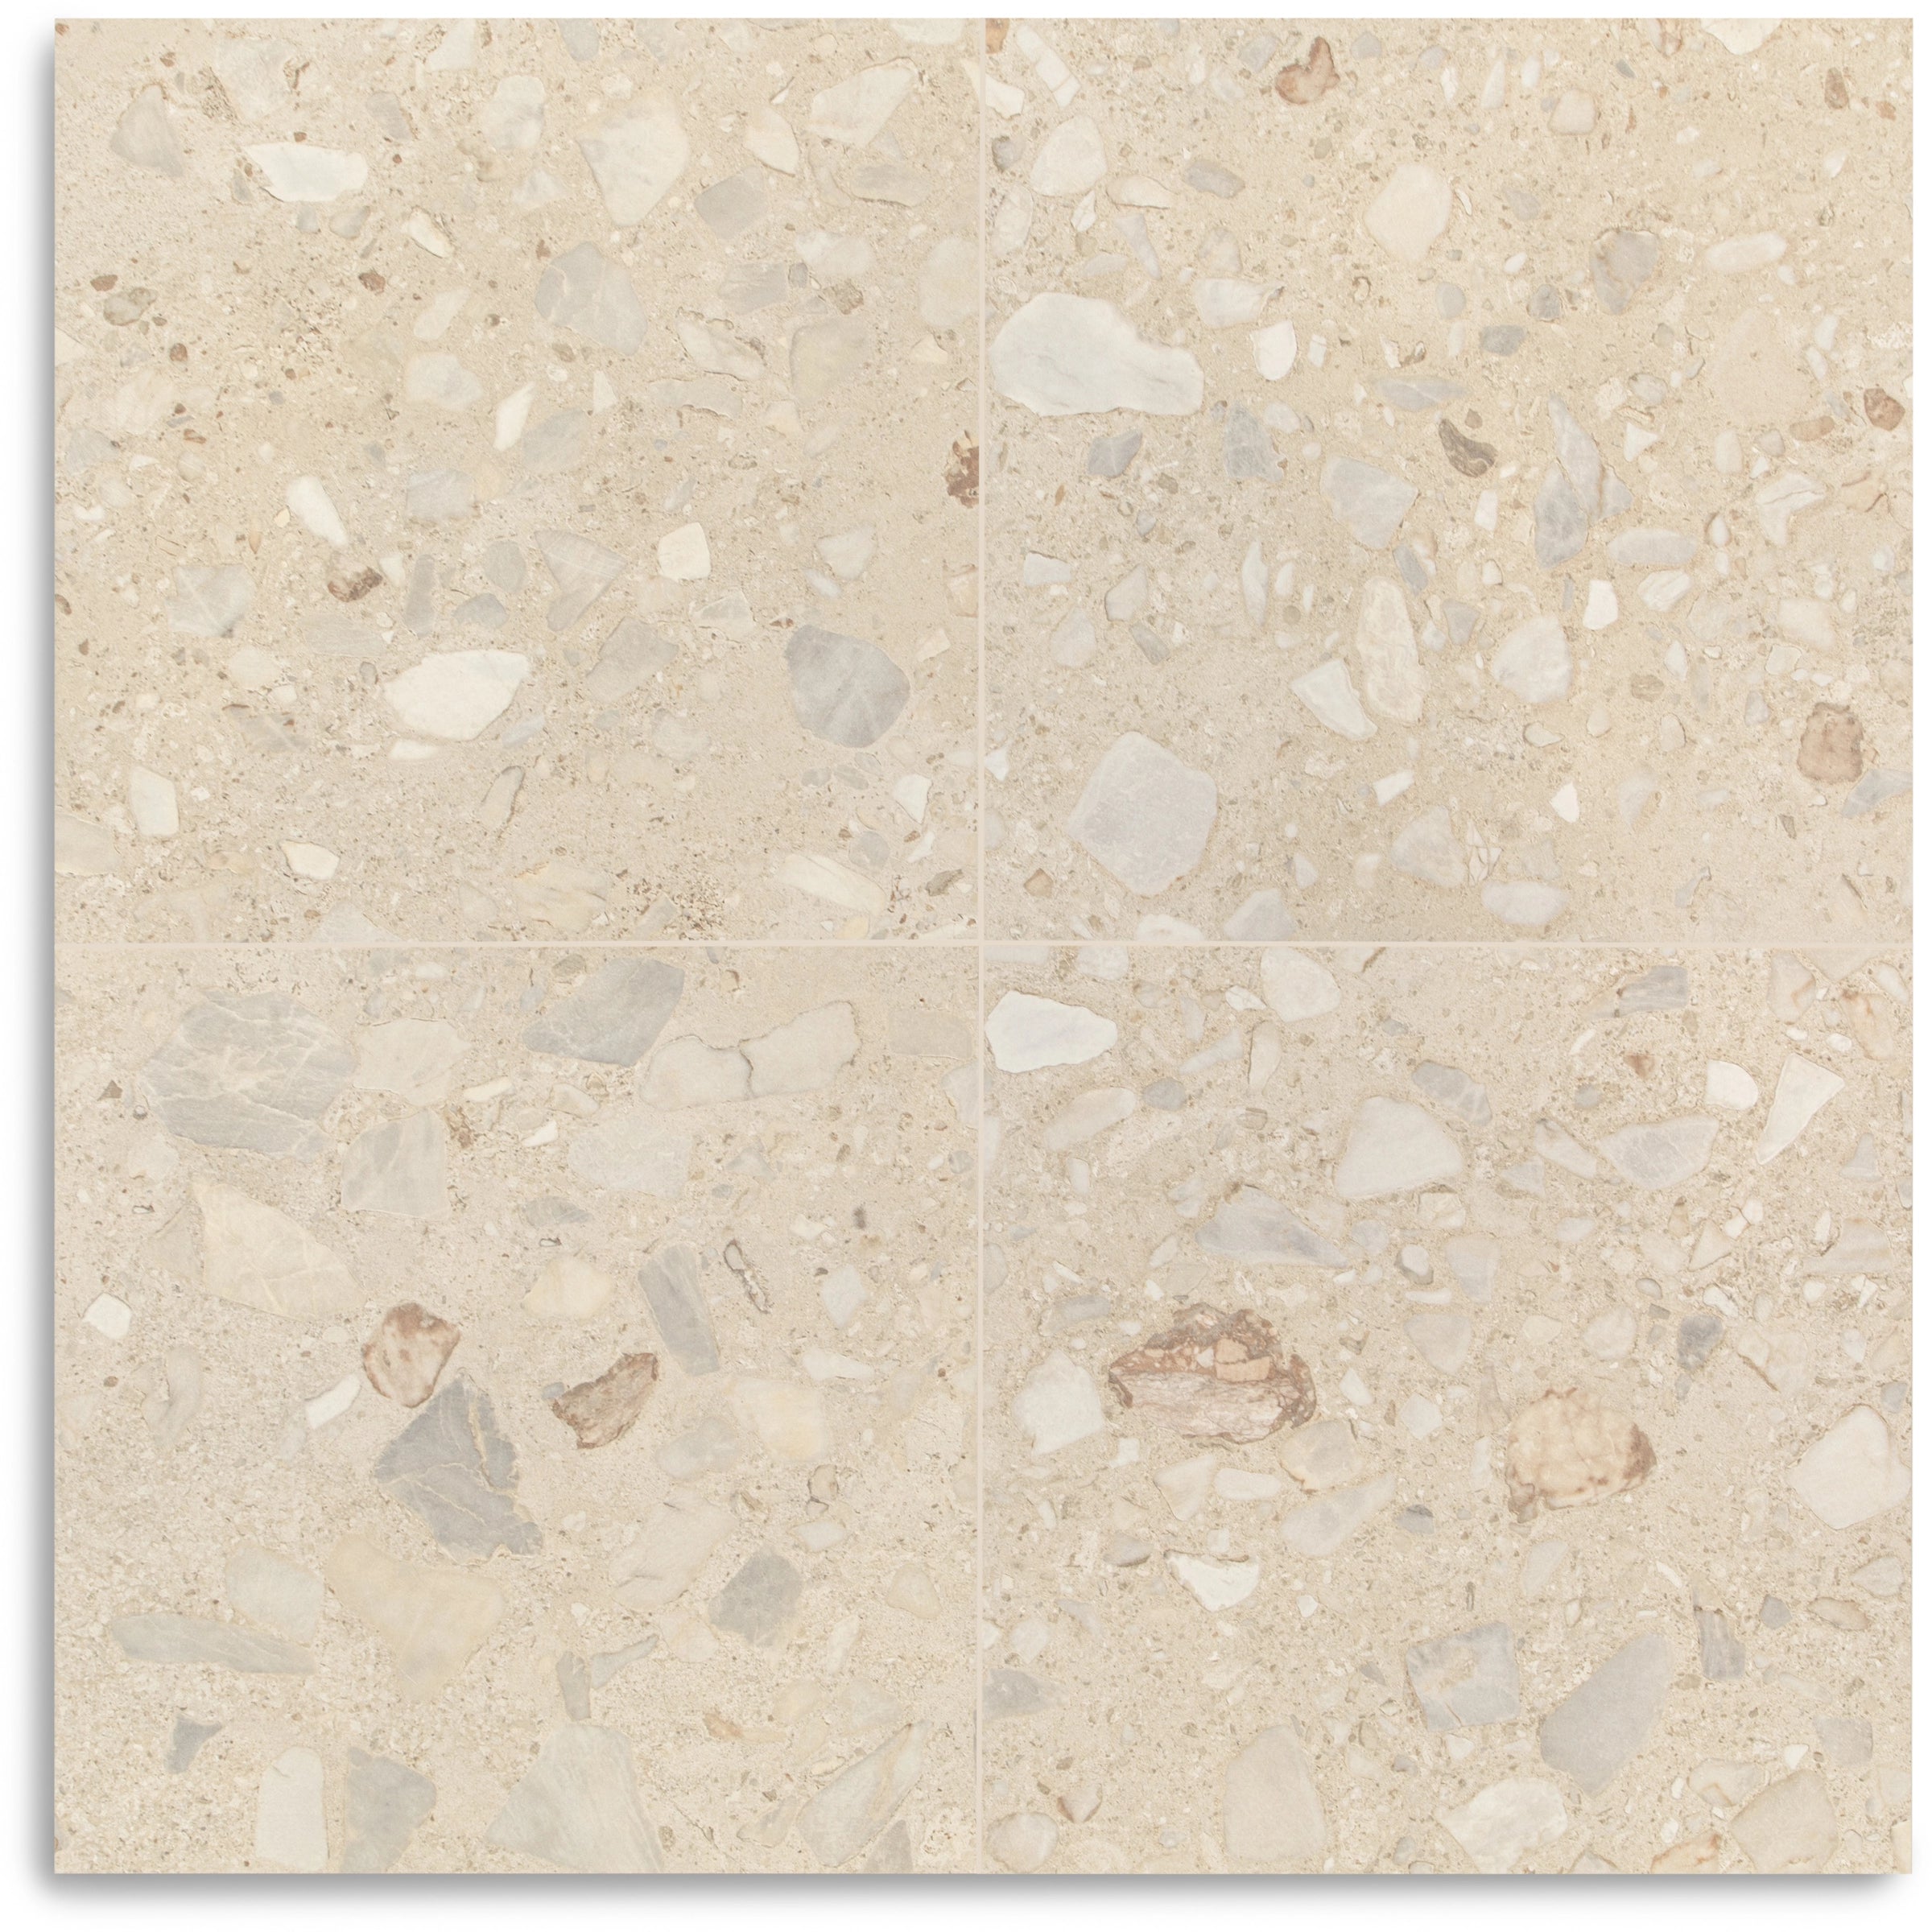
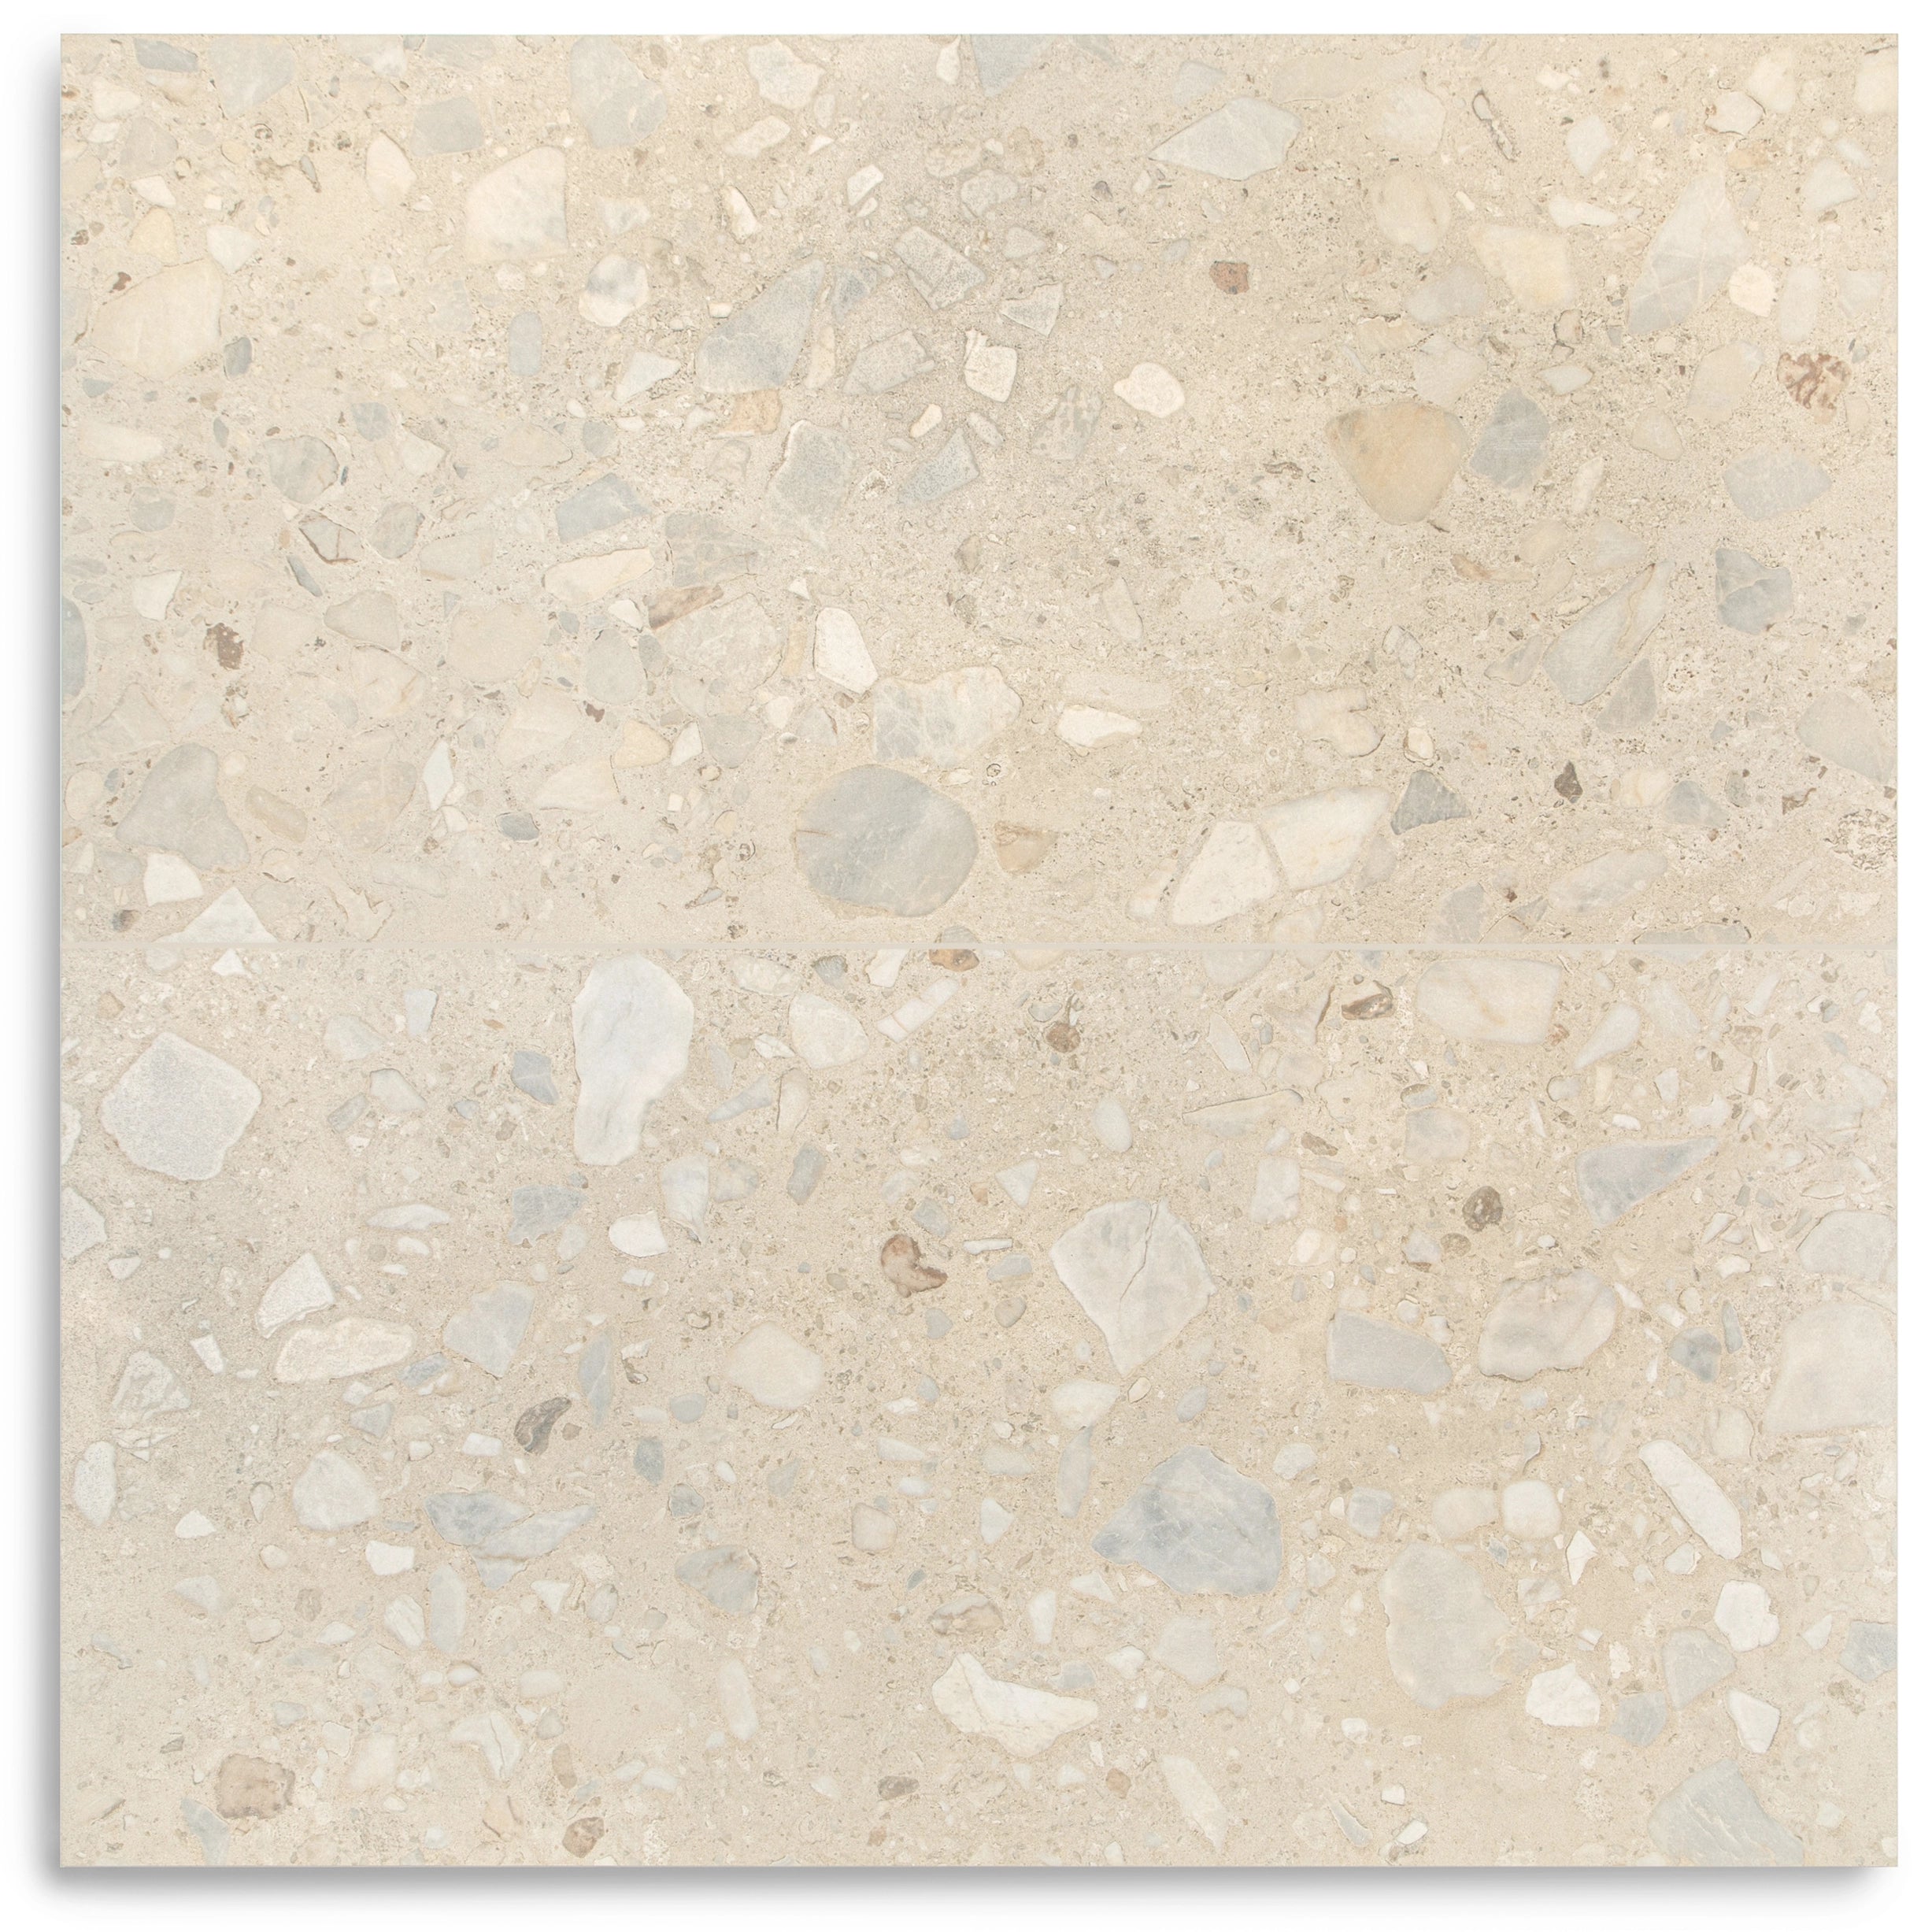
Murano Honed Italian Terrazzo Tile

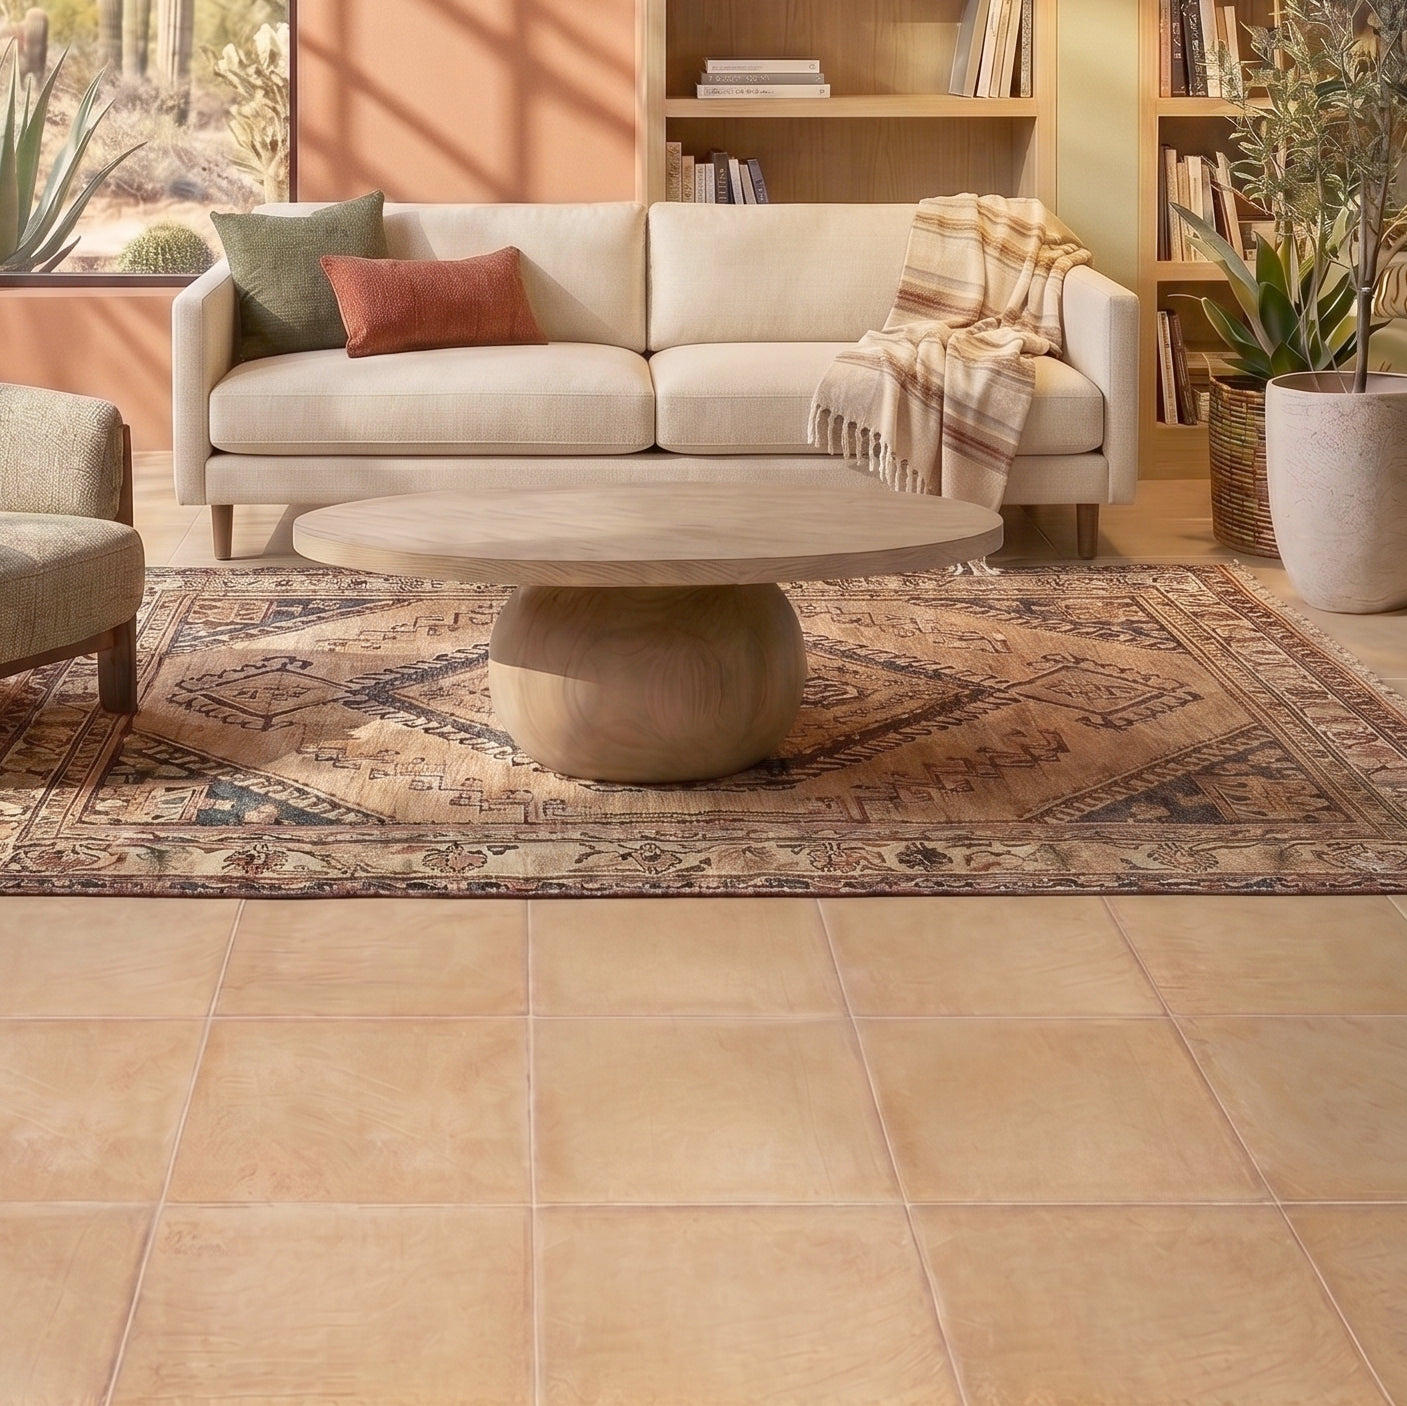
Cotto Terracotta Look Matte Porcelain Tile
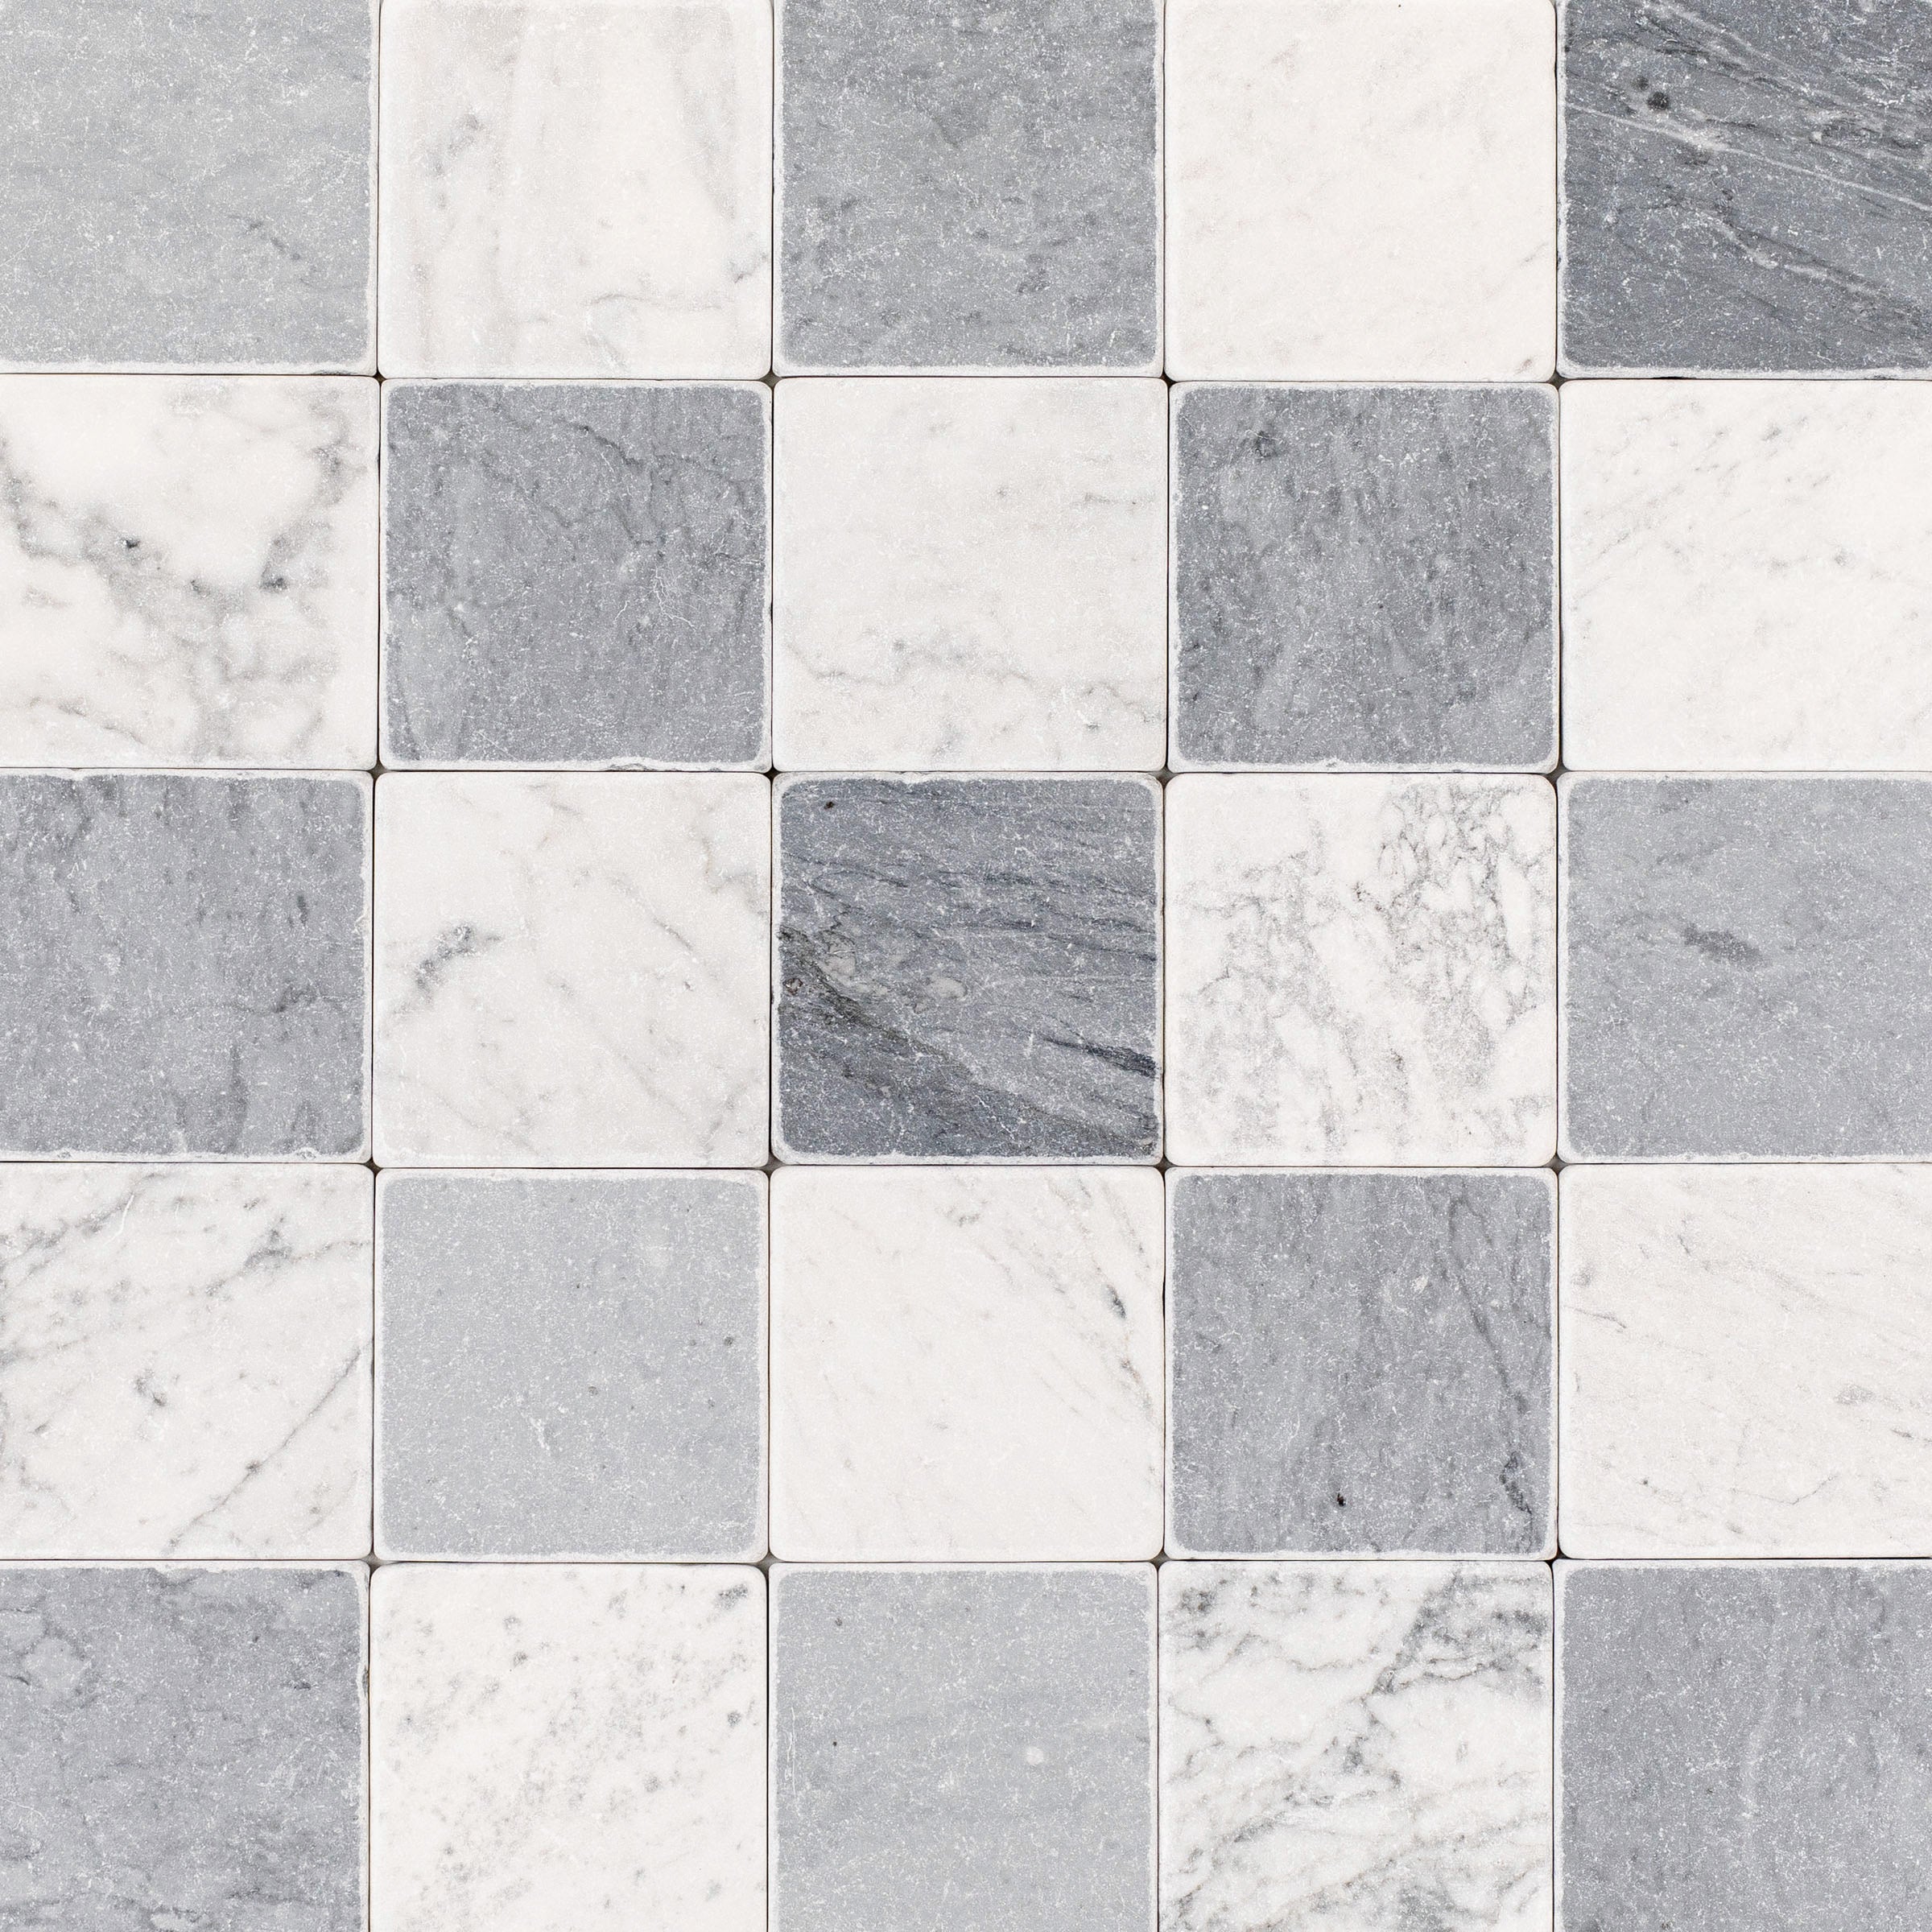

Carrara Bardiglio Tumbled Stone Checkerboard
Chiaro Deco Terracotta Look Matte Porcelain Tile
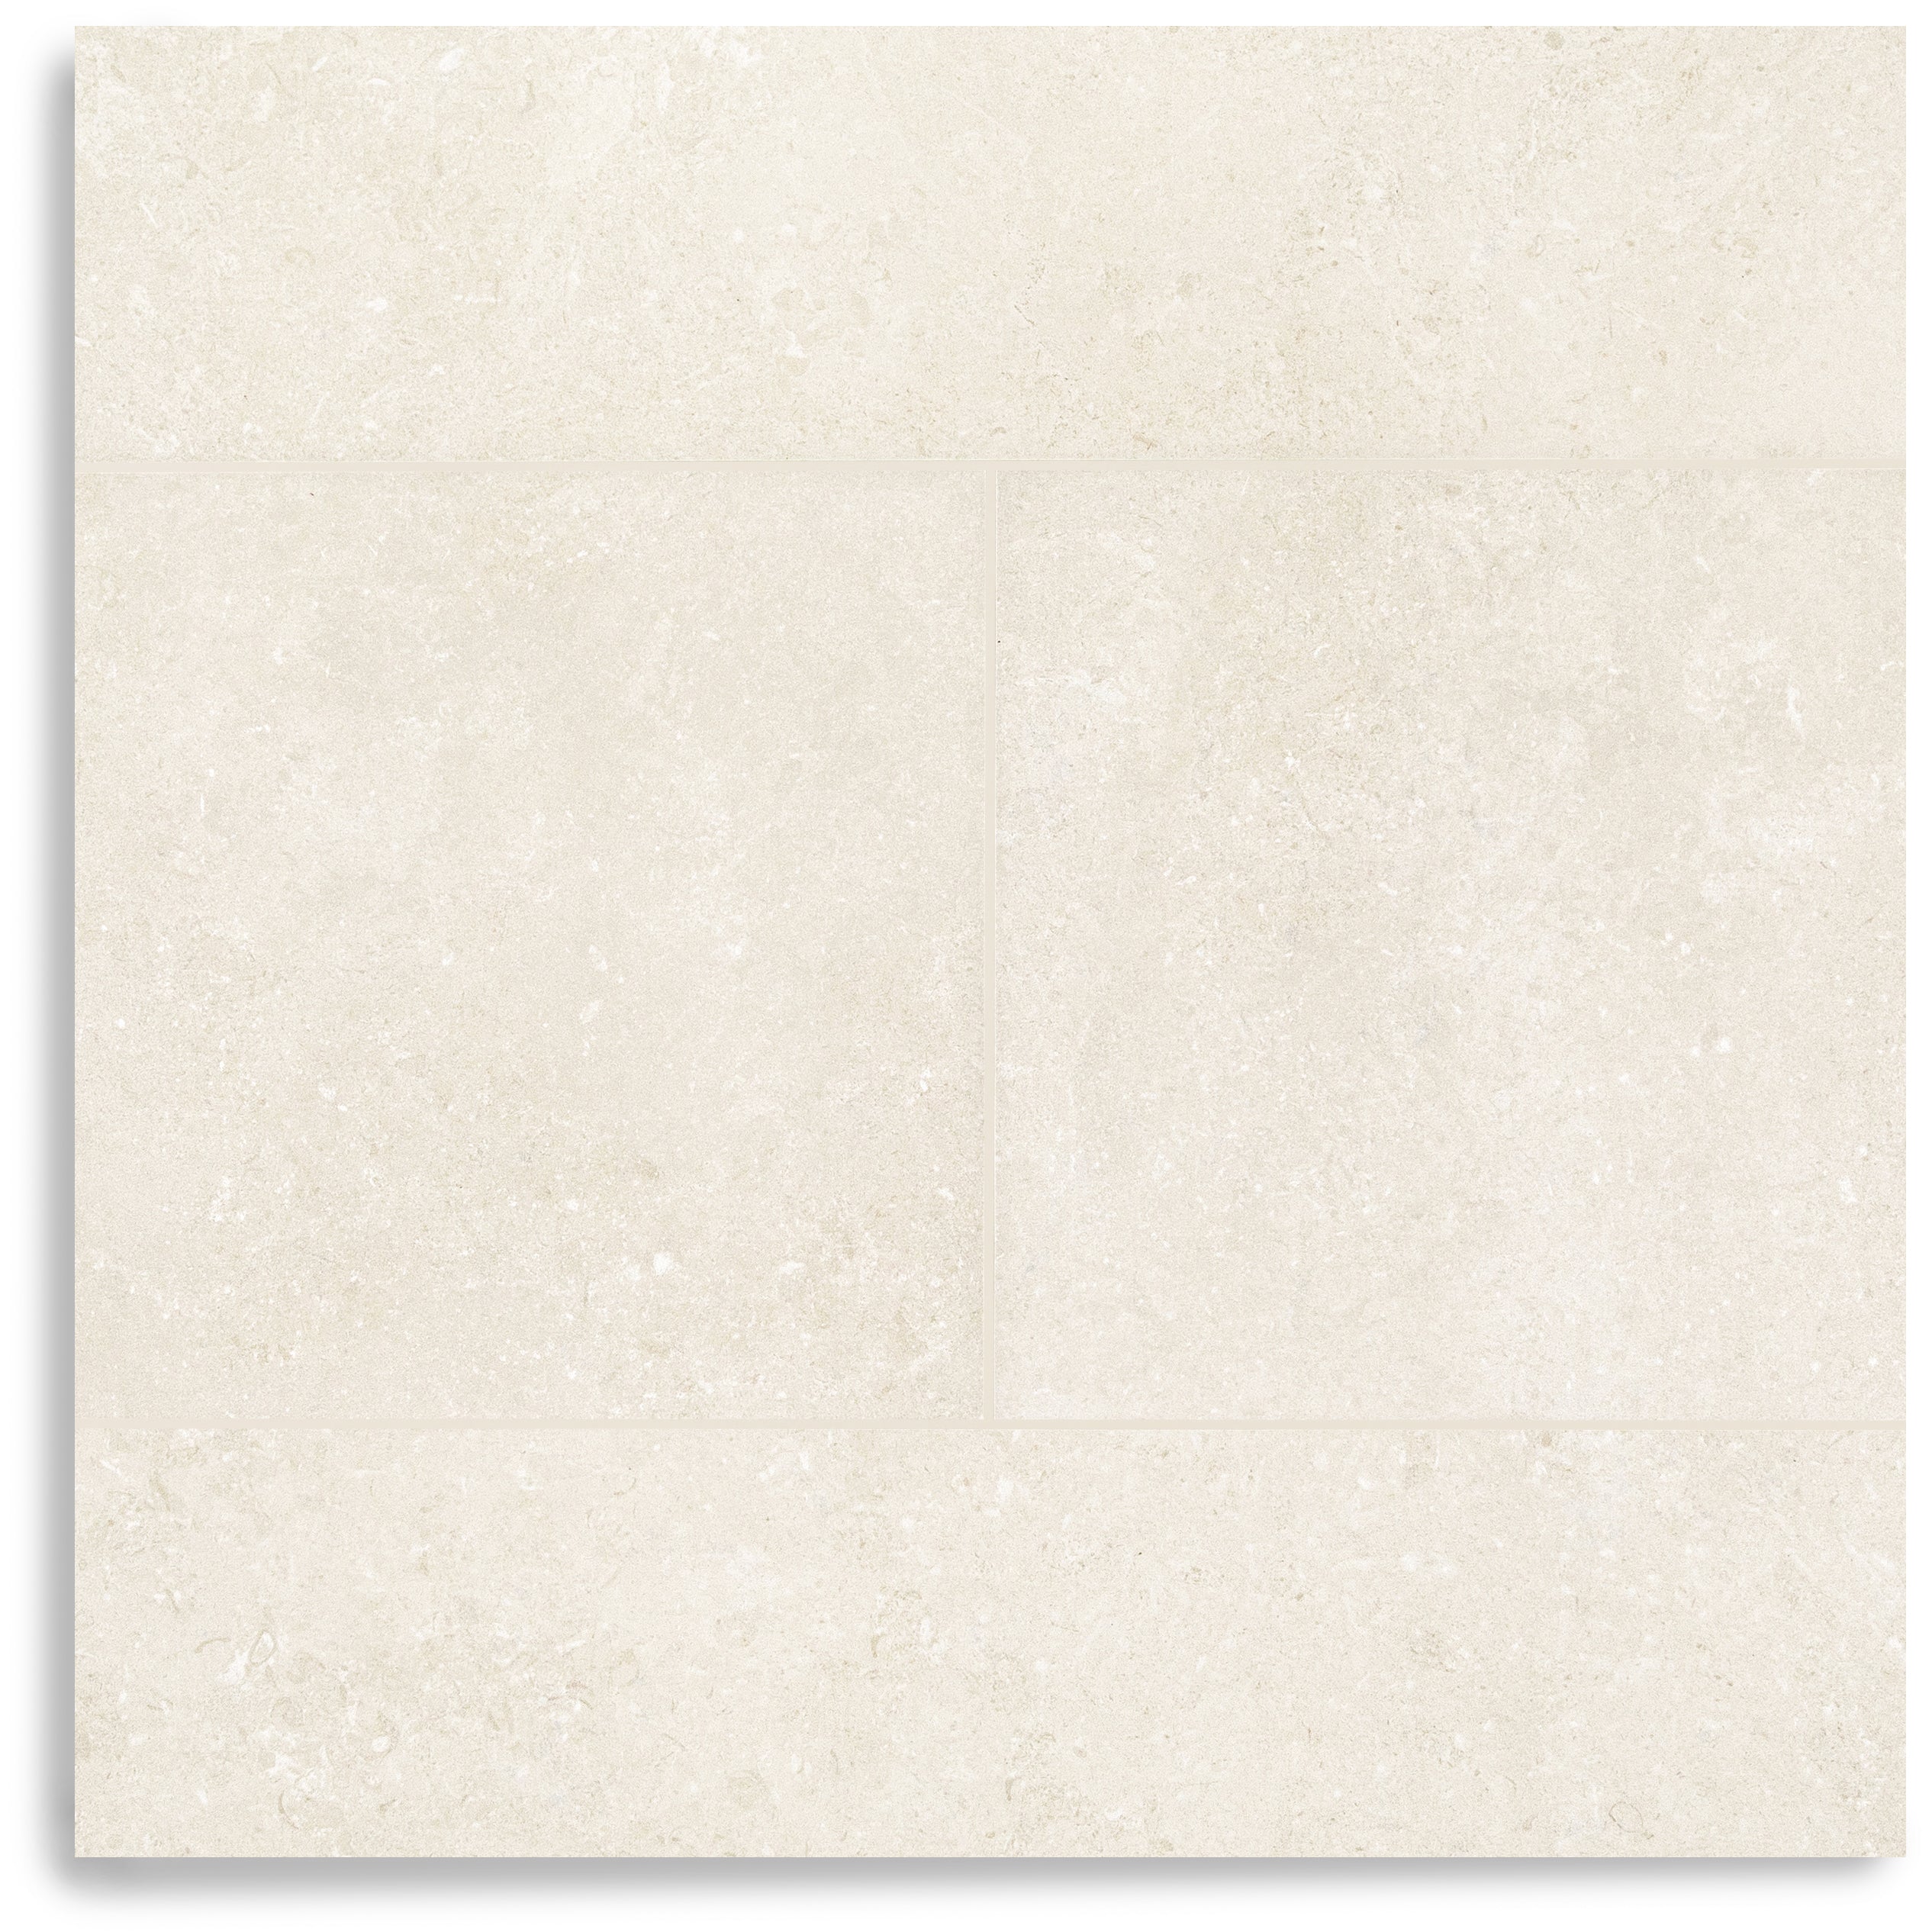
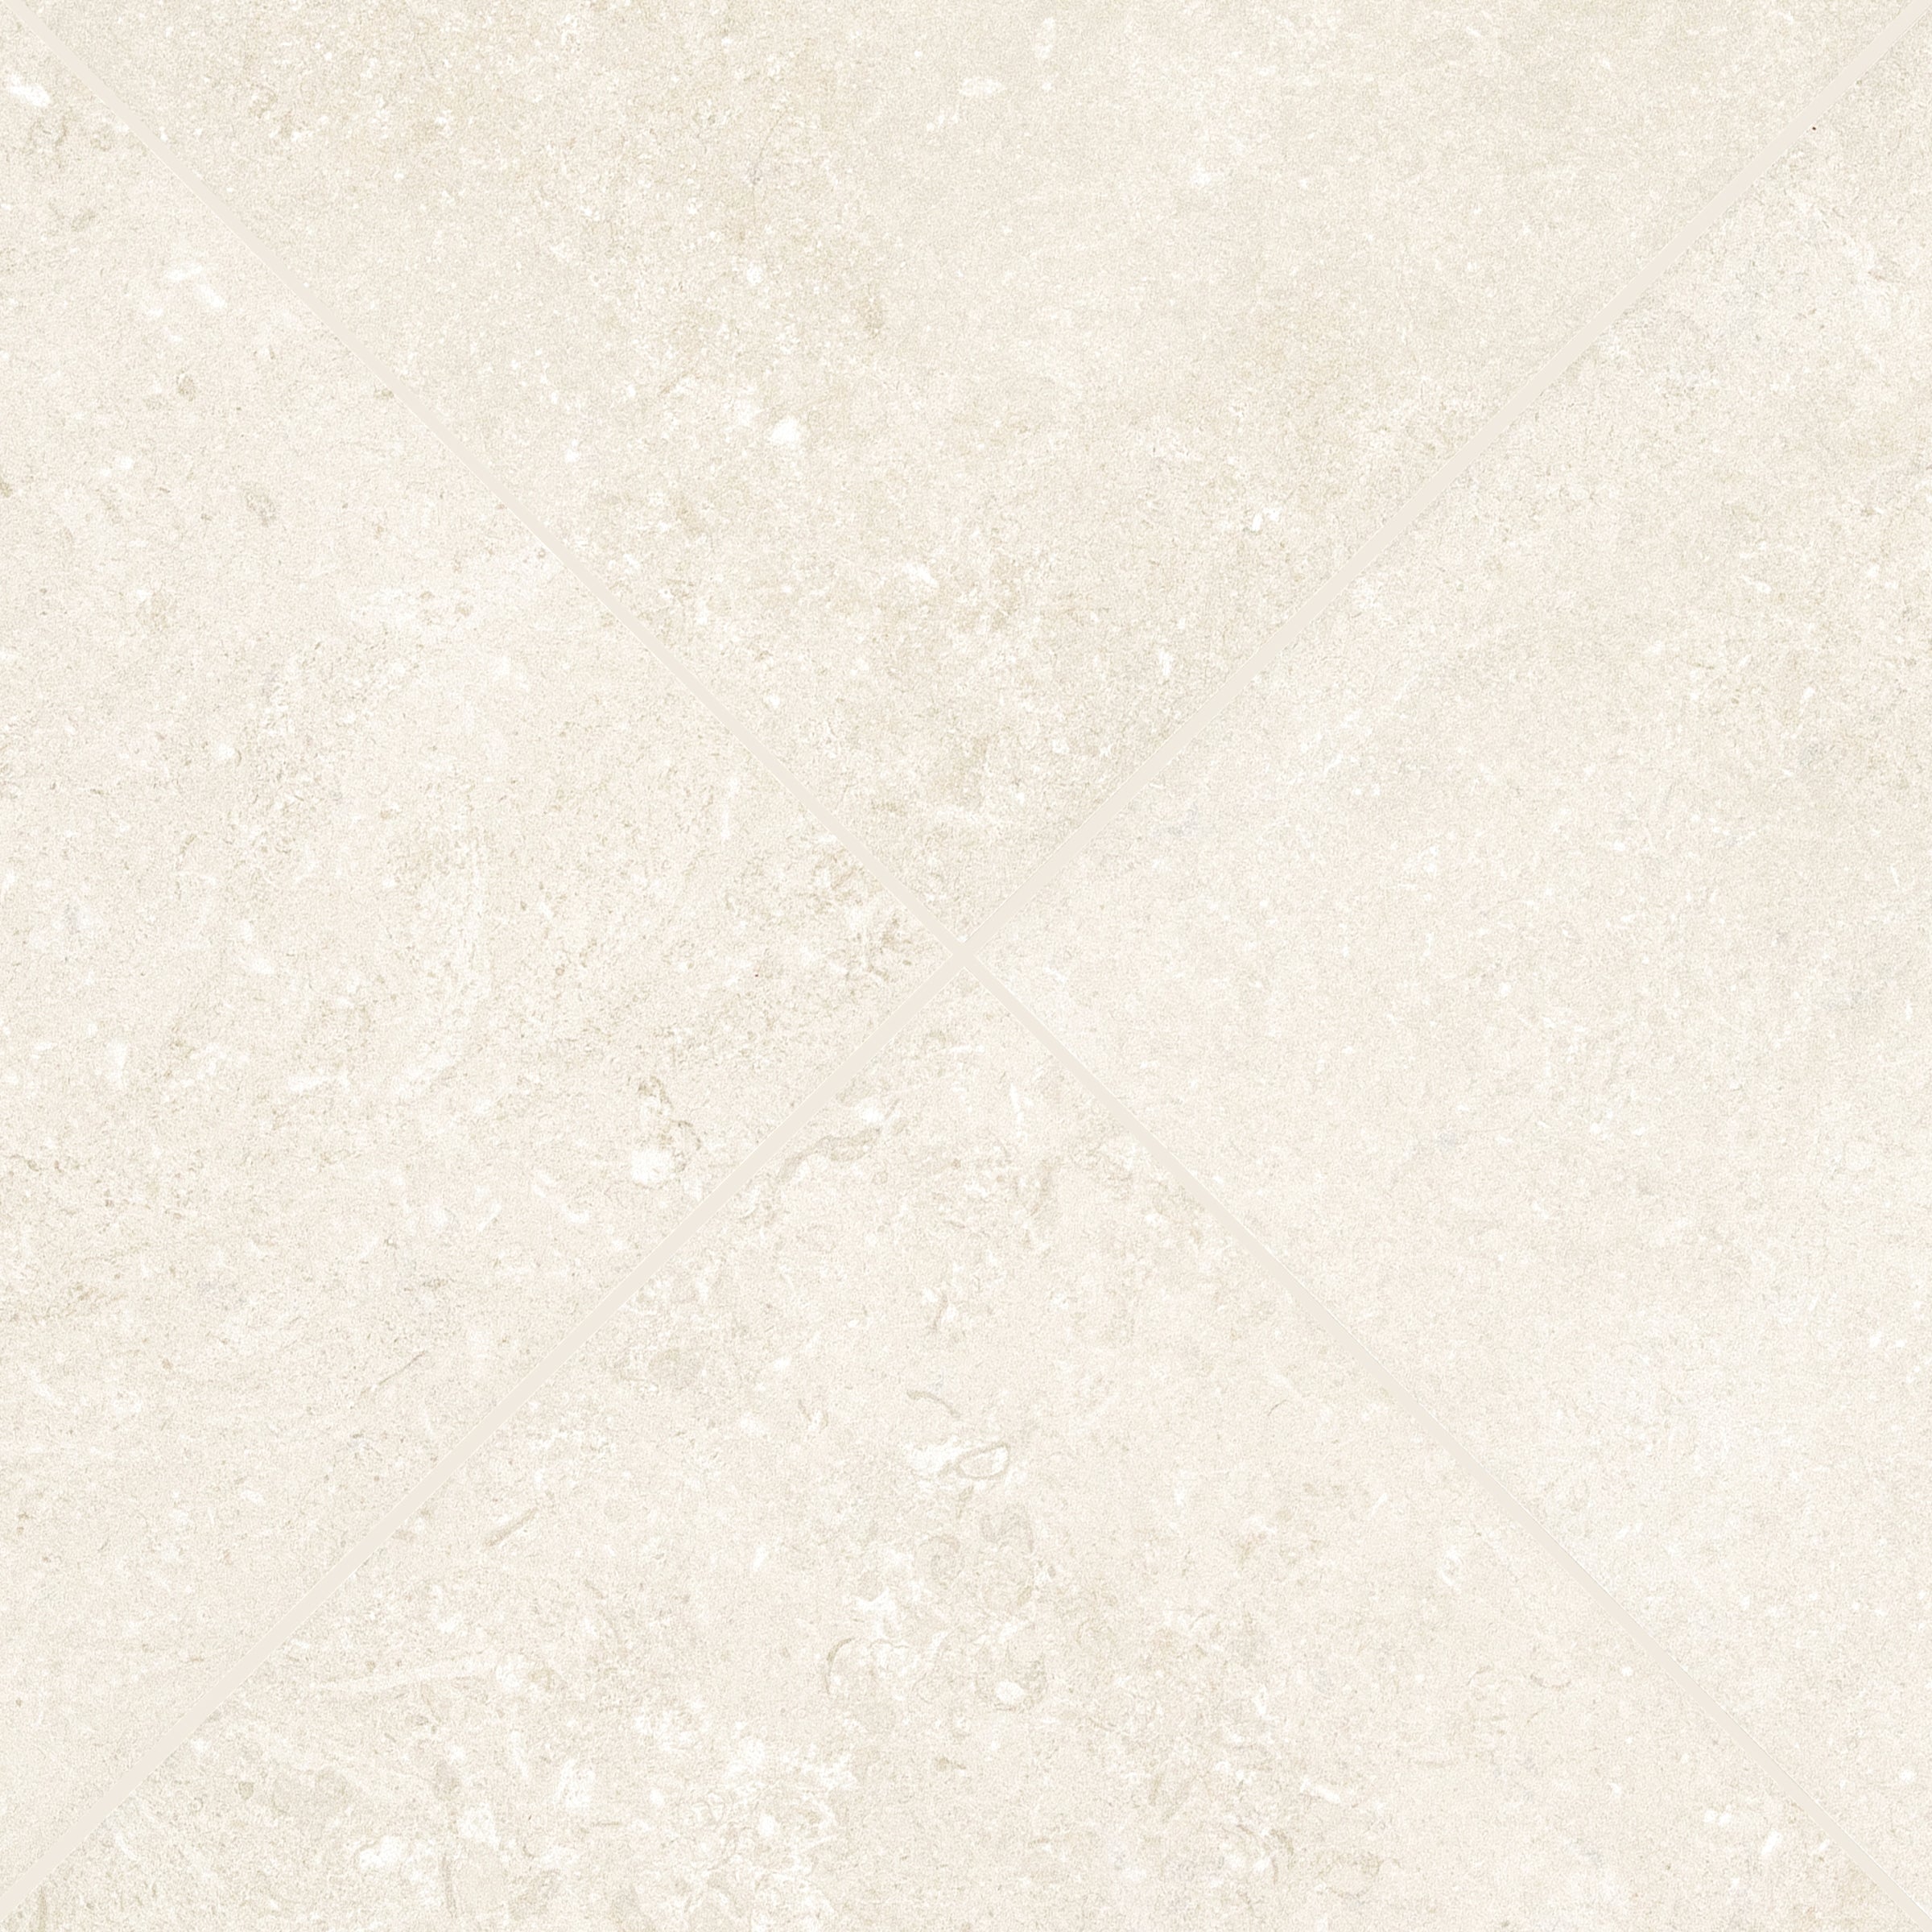
Cream Limestone Look 3D Matte Porcelain Tile


White & Black Octagon Zellige Mosaic
Beige Limestone Look 3D Matte Porcelain Tile


Apple 12x24 3D Glossy Porcelain Tile
Rosso Verona Tumbled Marble Tile
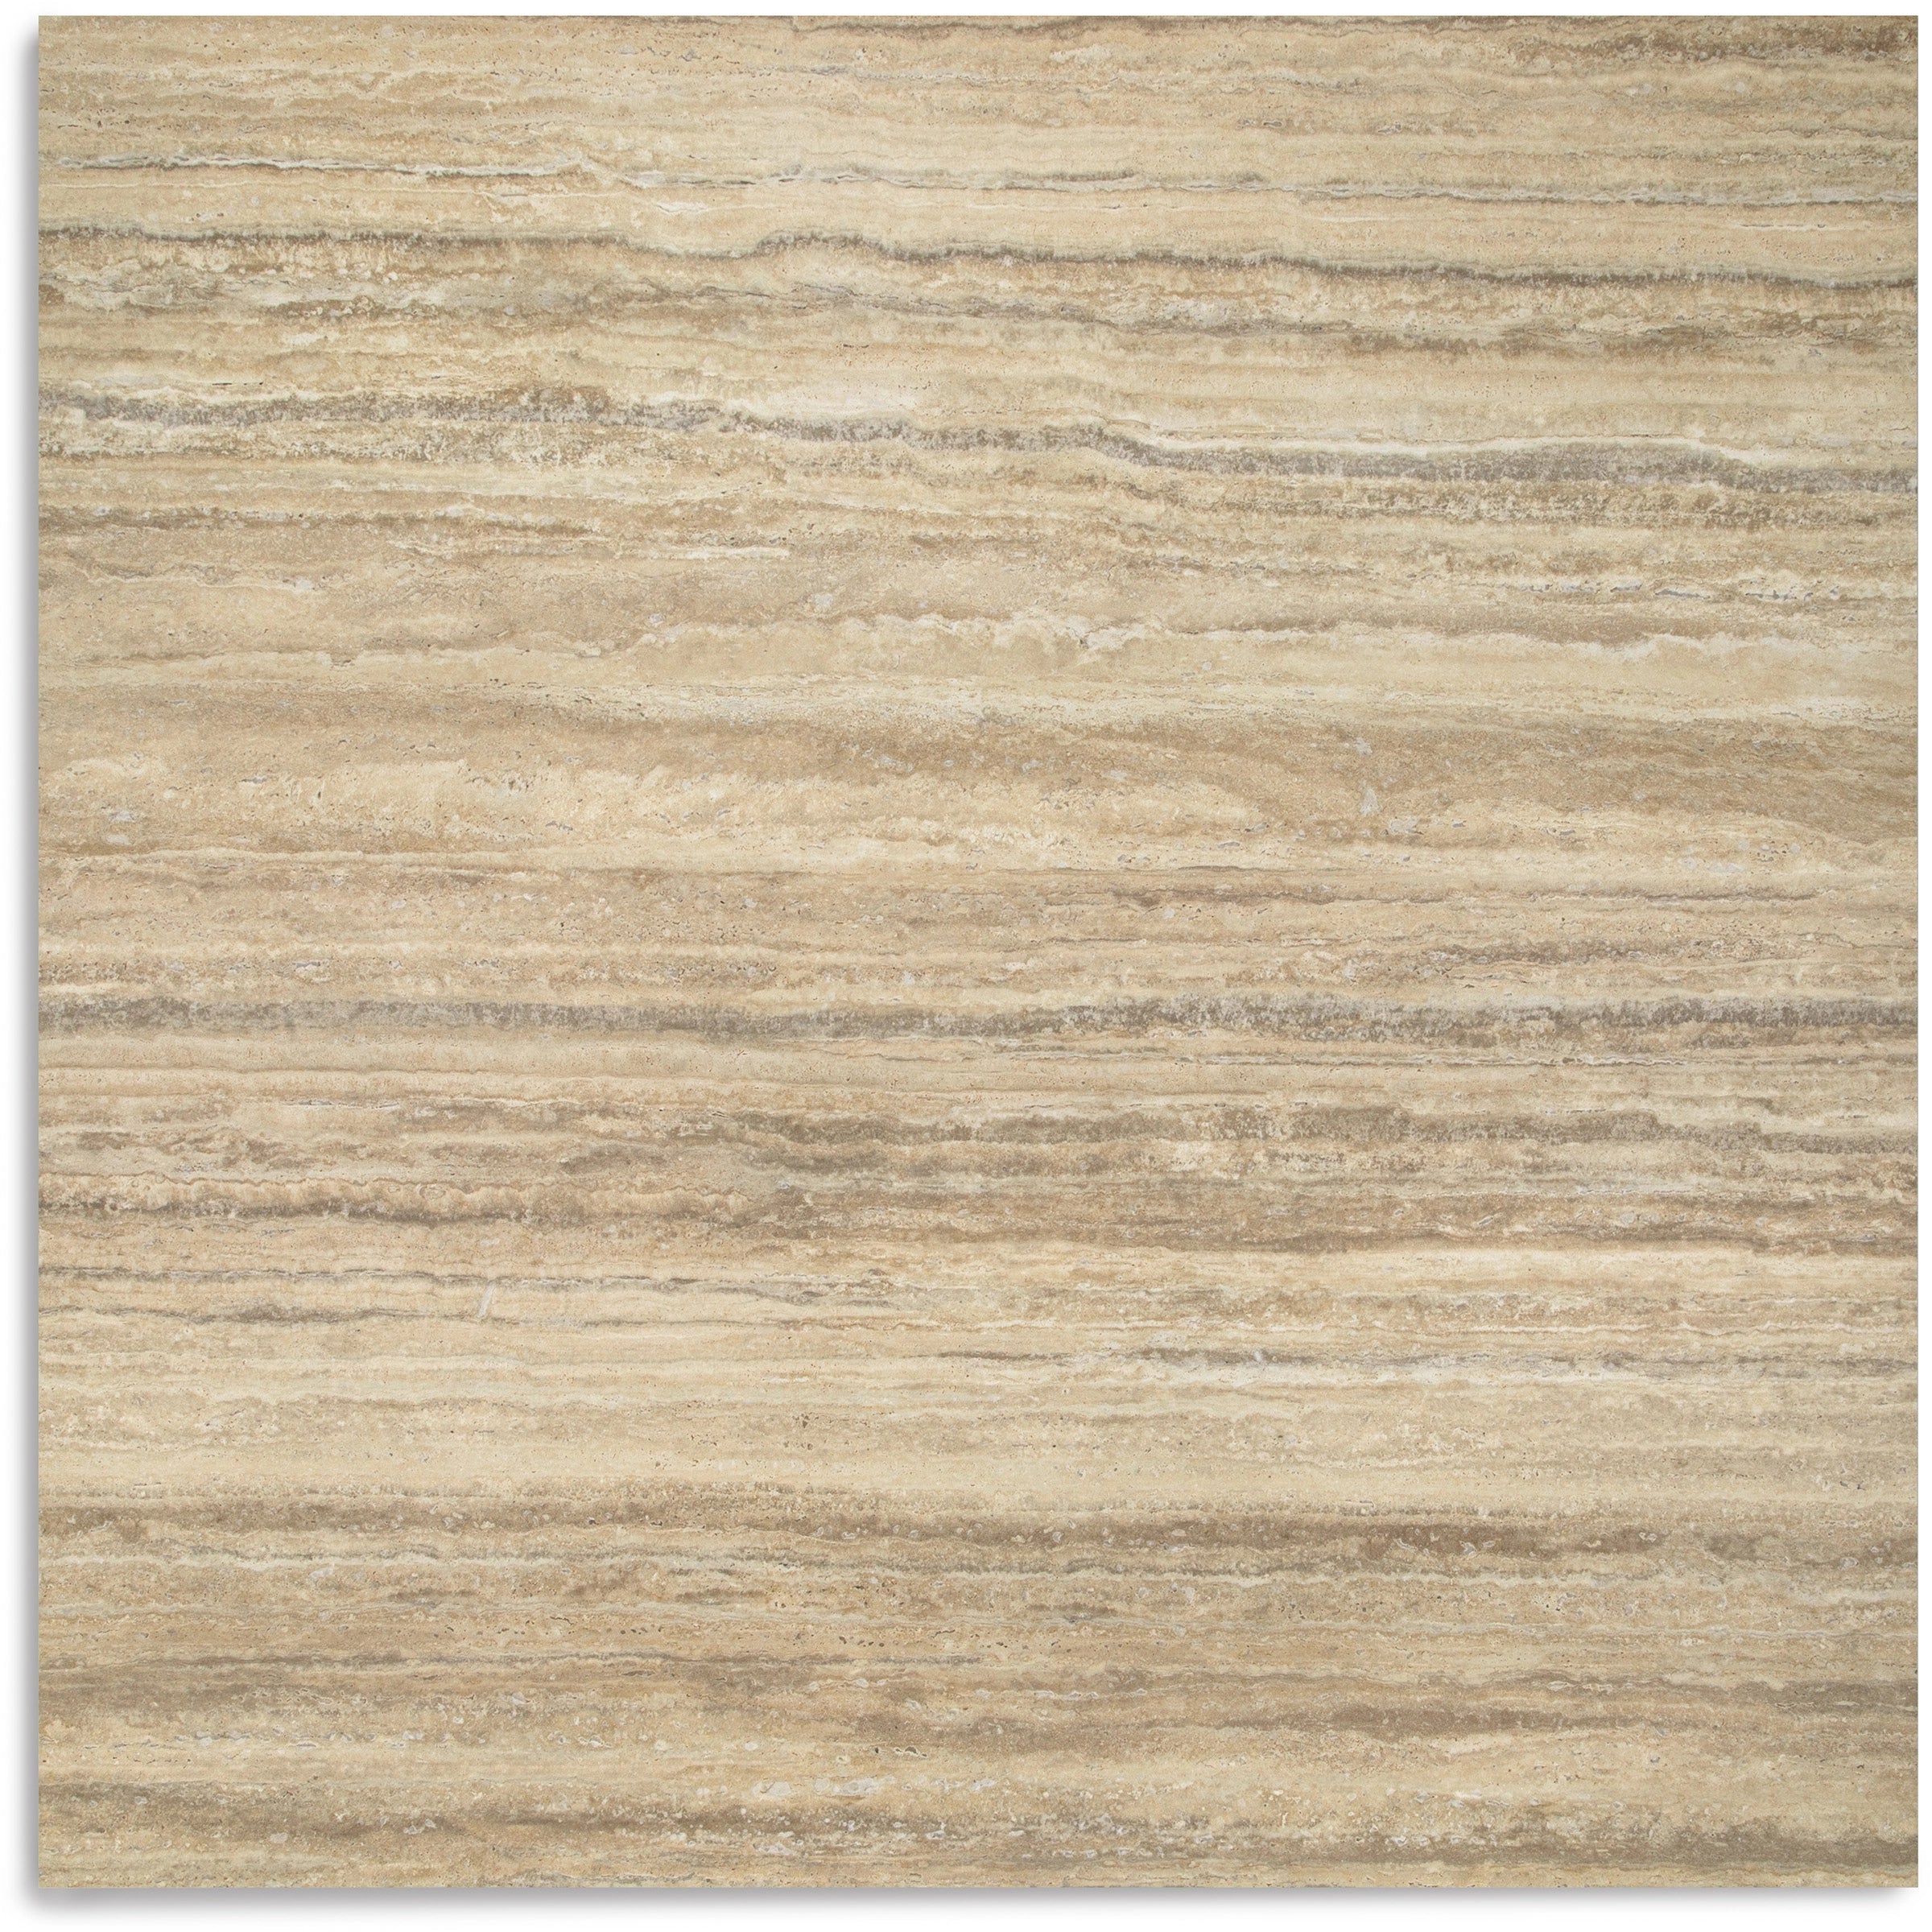
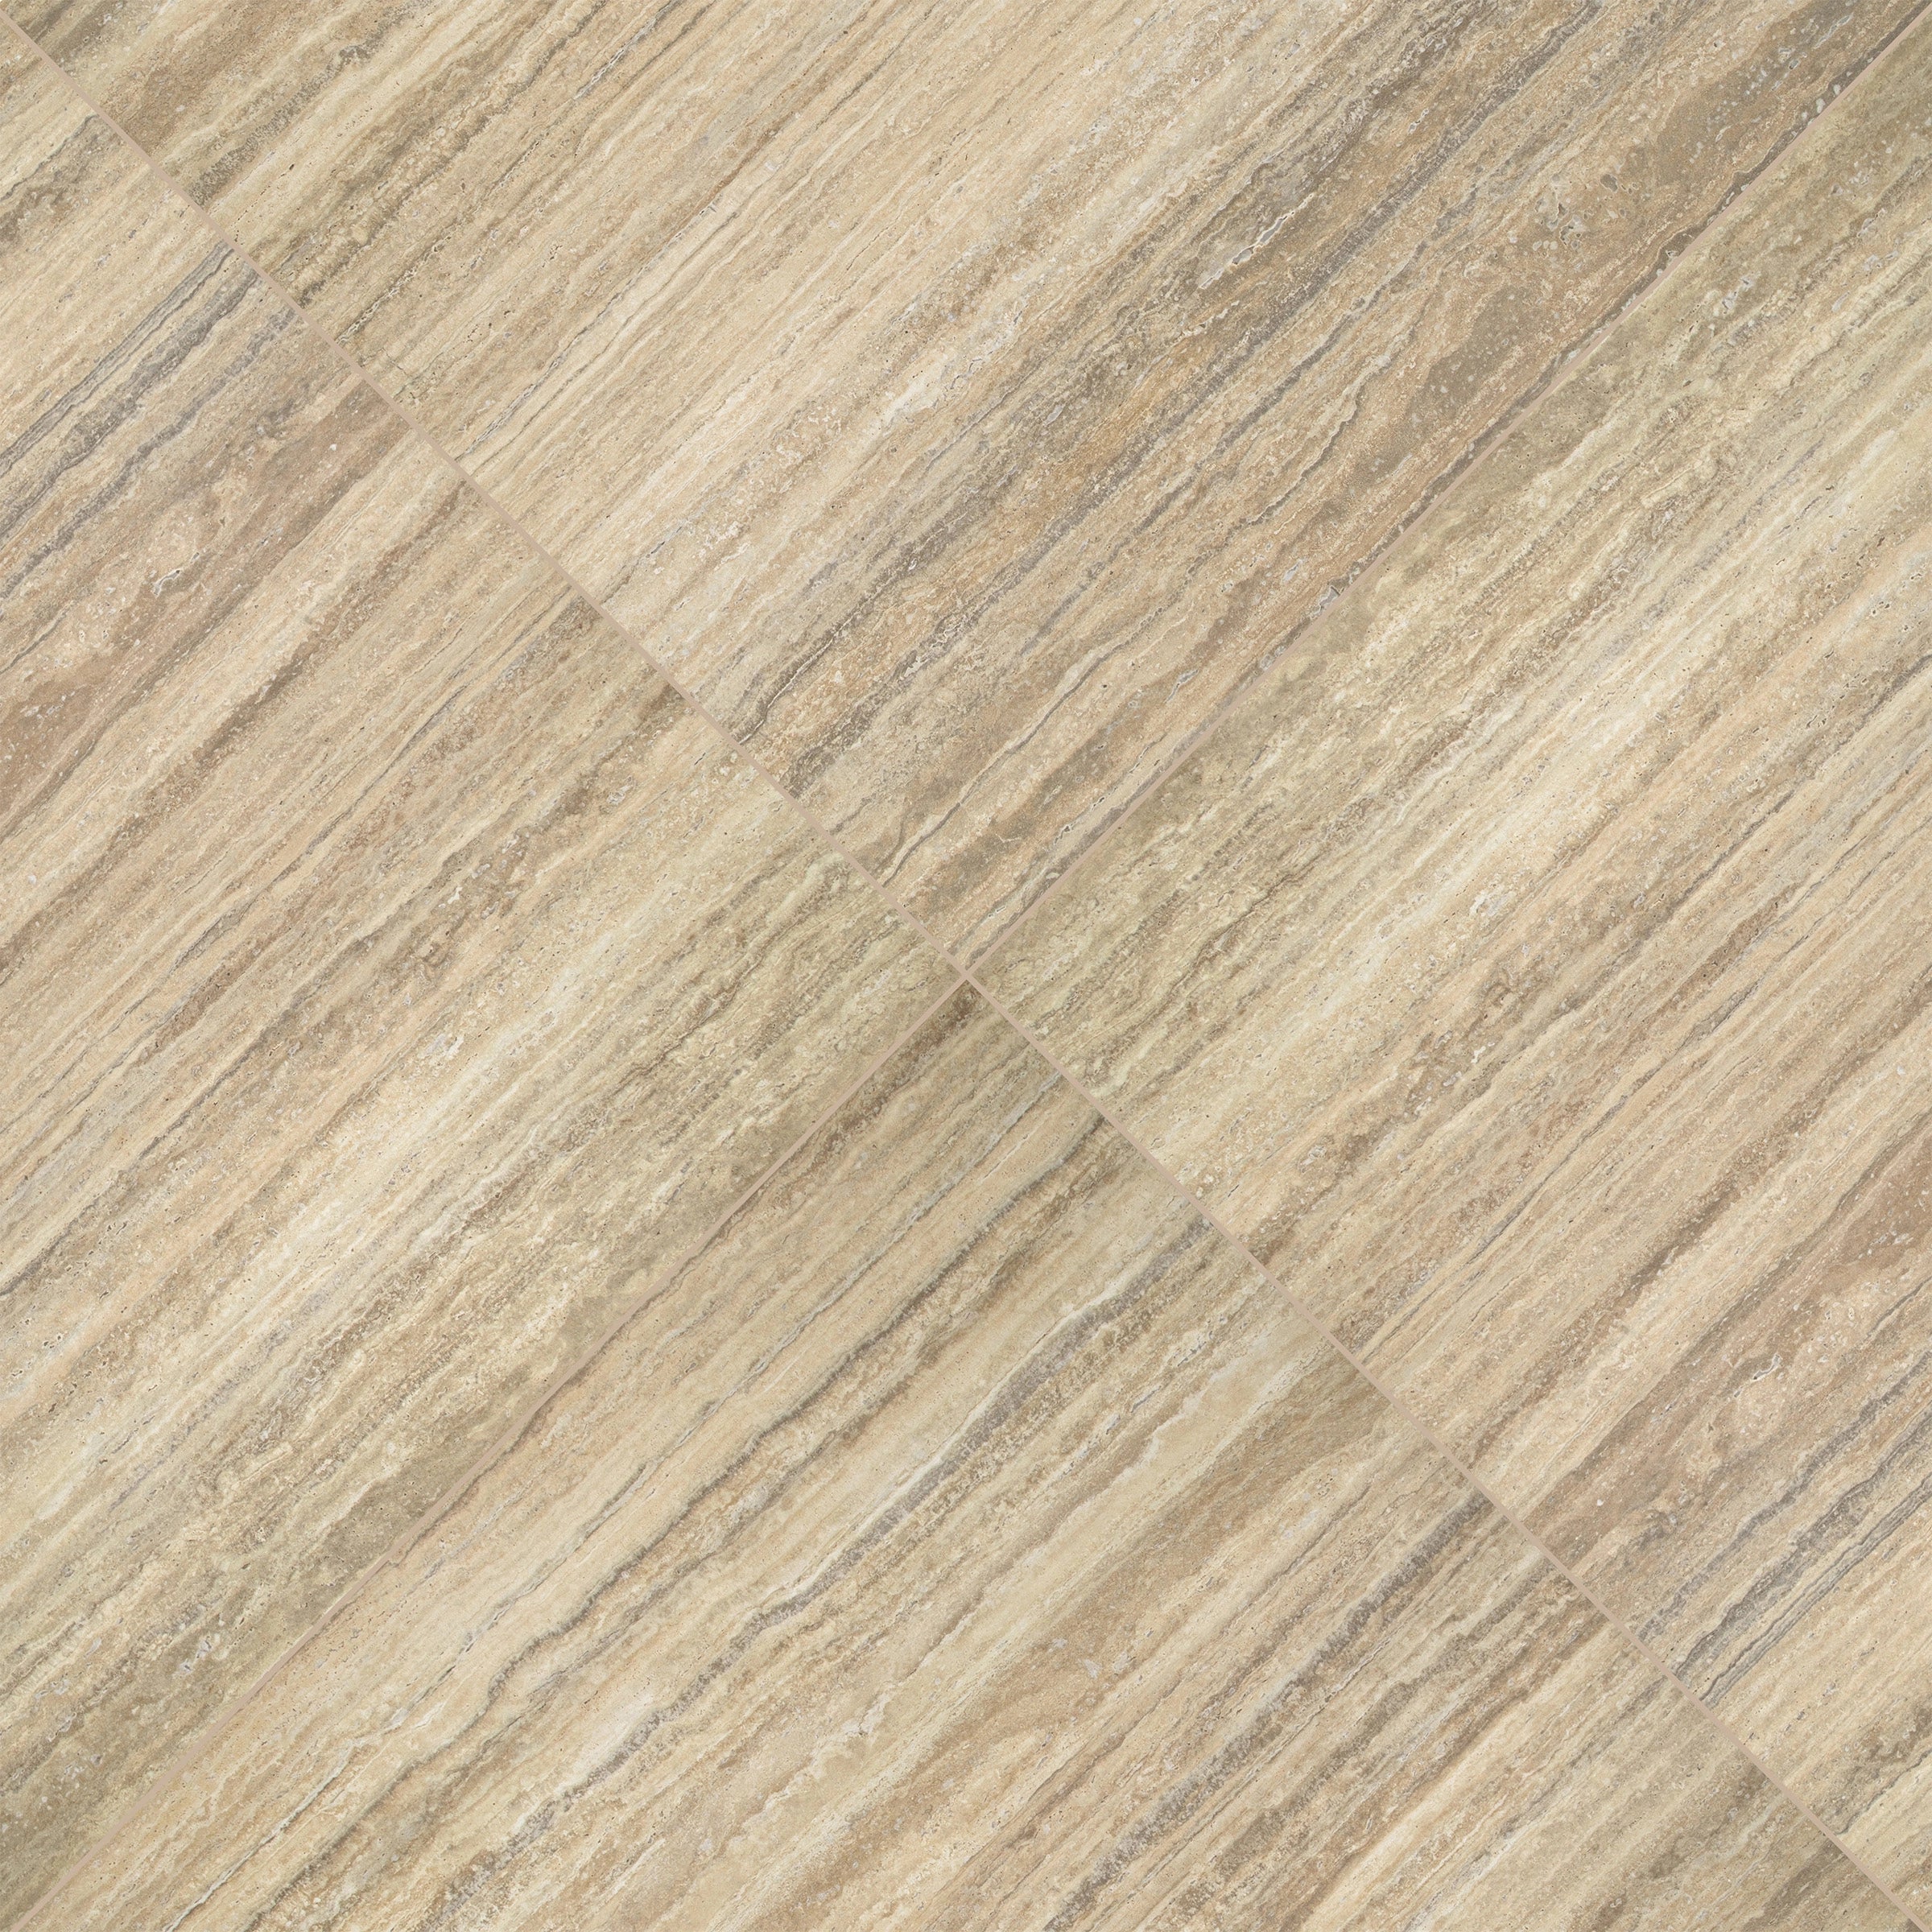
Travertino Moka Stone Look Porcelain Tile
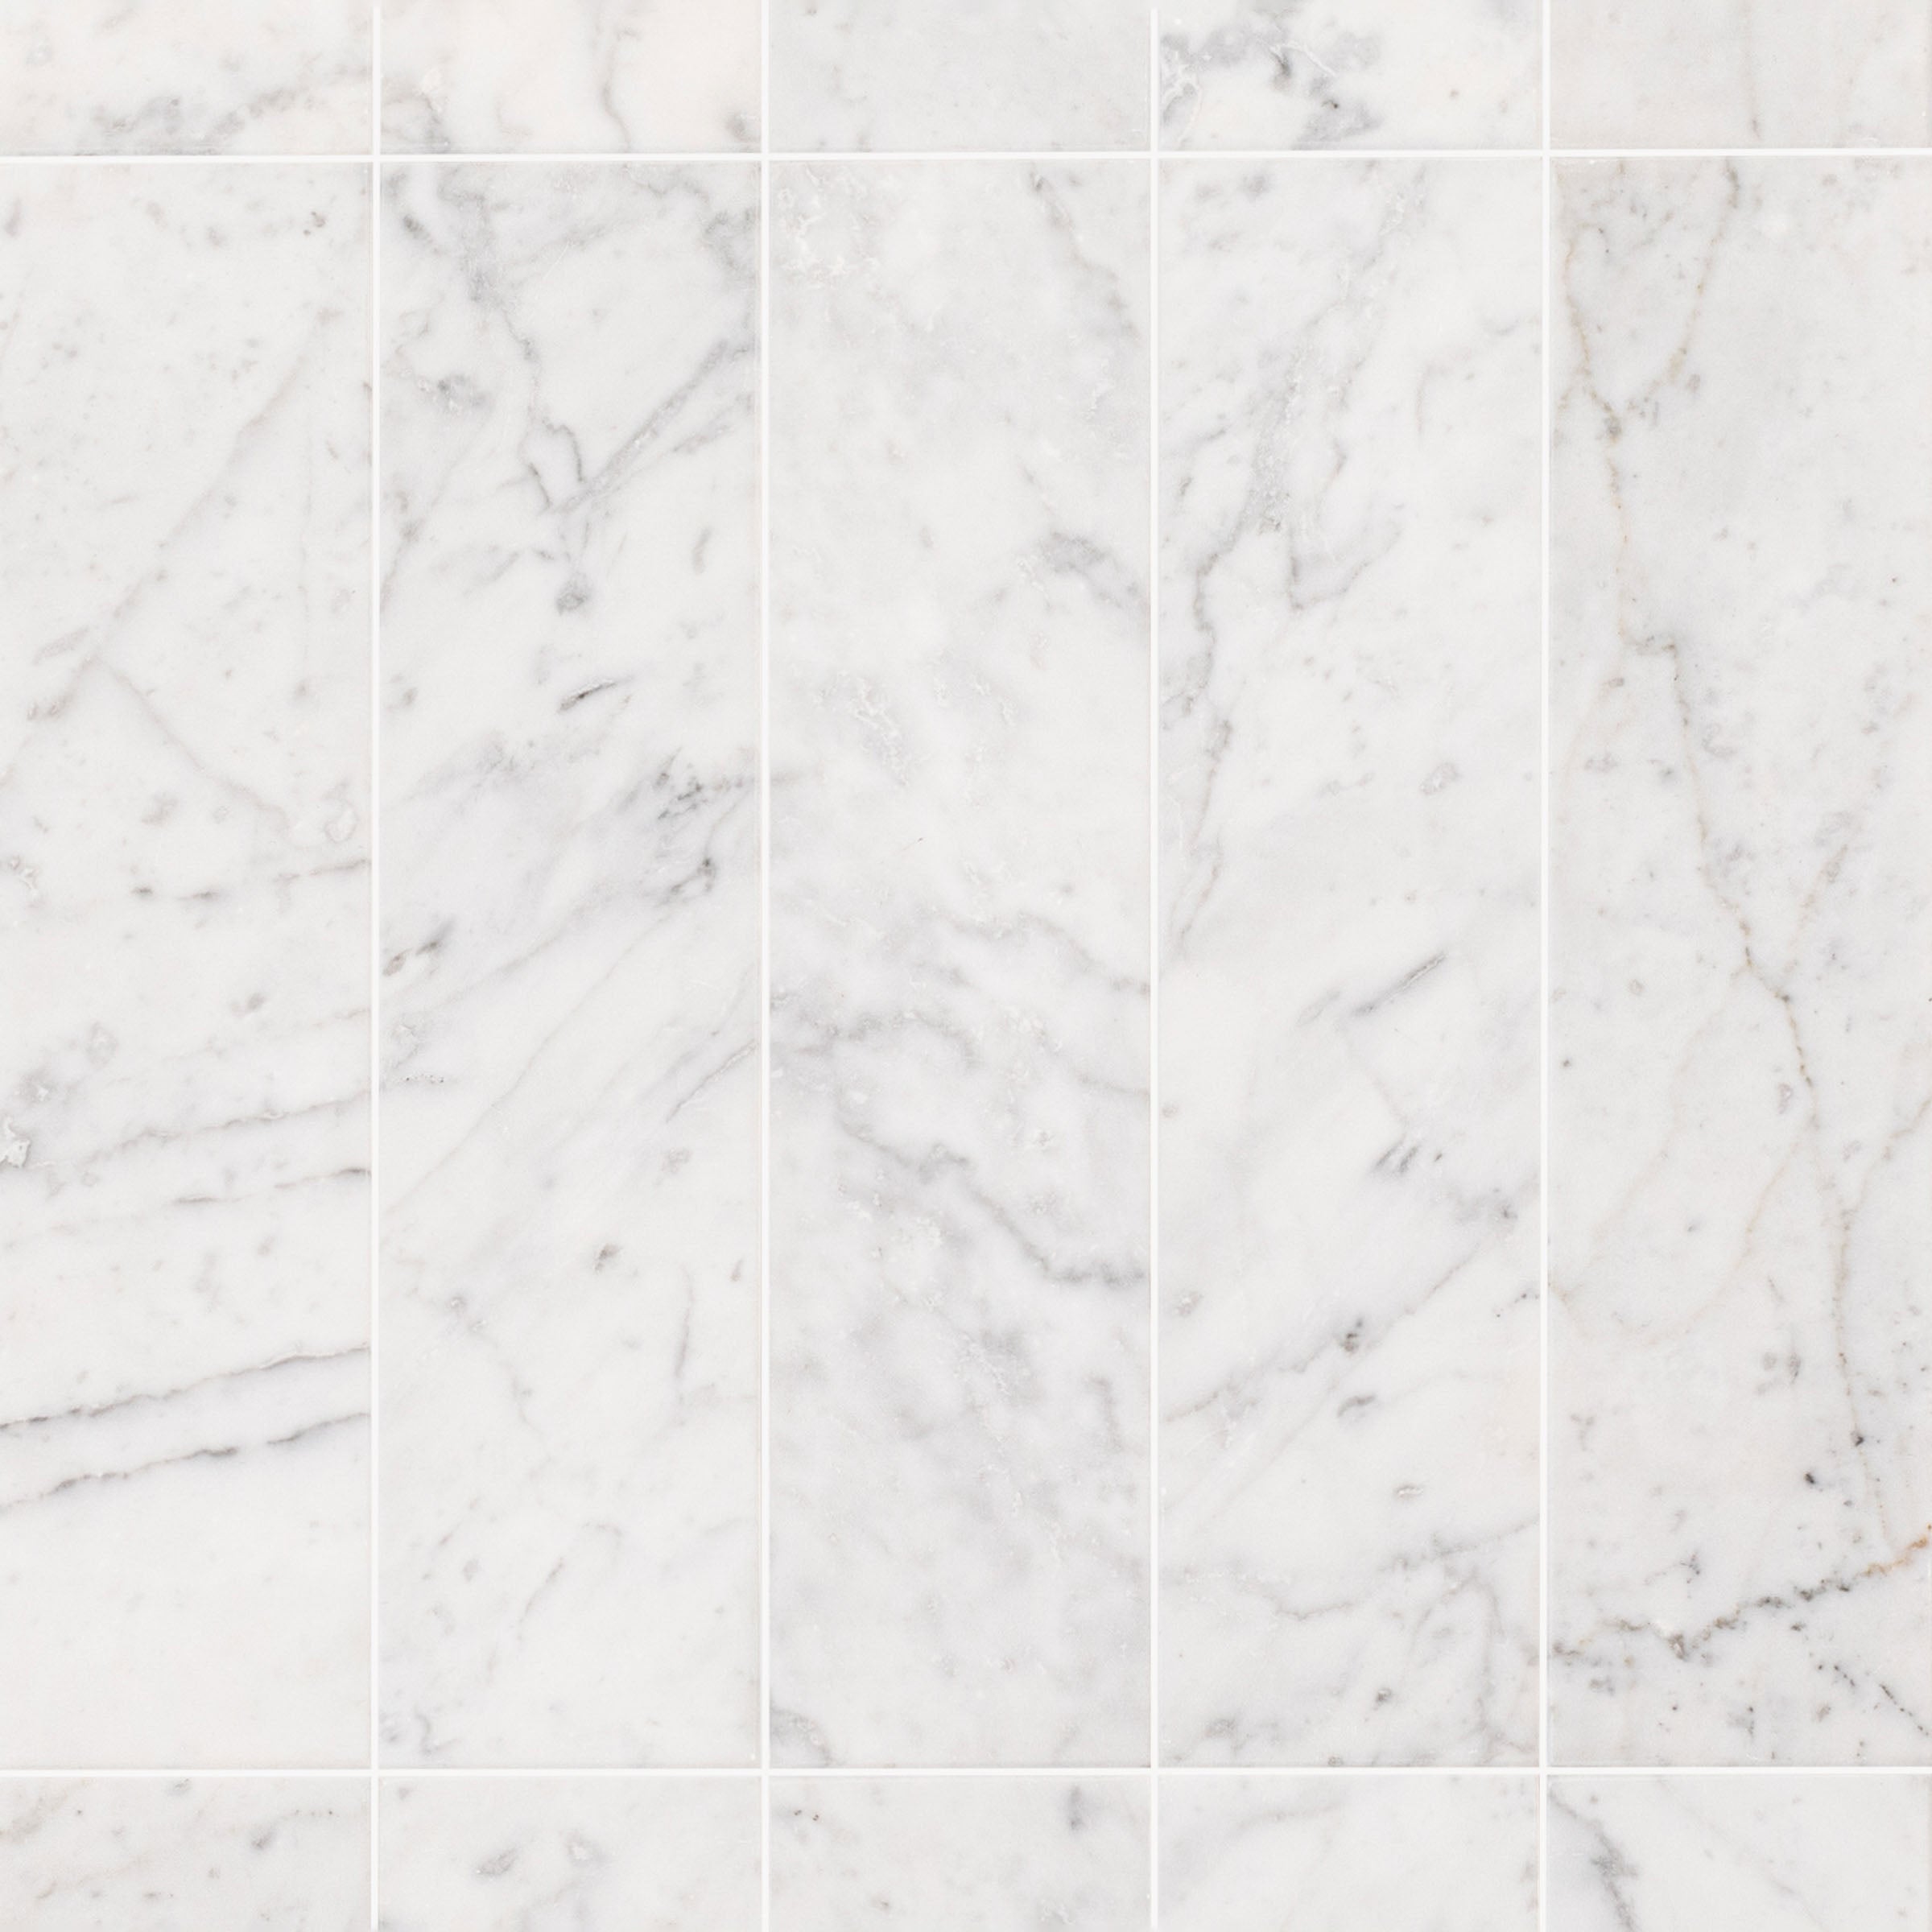
Bianco Carrara Honed Marble Tile
Travertino 3D Matte Porcelain Tile
Amazzonite Matte Marble Look Porcelain Tile


Cream 12x24 3D Gloss Porcelain Tile
Natura Terracotta Look Matte Porcelain Tile
White Multi-Color Matte Porcelain Tile
Rosso Verona 1x1 Hand Chipped Marble Mosaic


Navy 12x24 3D Gloss Porcelain Tile
Almond Cement Look Matte Porcelain Tile
Cream 2x2 Forma Porcelain Mosaic
White & Ecru Octagon Zellige Mosaic
Thassos, Carrara, Bardiglio Gingham Marble Mosaic
Cotto Deco Terracotta Look Matte Porcelain Tile
White & Ecru 2x2 Zellige Checkerboard Mosaic
Unglazed & White Octagon Zellige Mosaic
Murano Honed Italian Terrazzo Tile
Cotto Terracotta Look Matte Porcelain Tile
Carrara Bardiglio Tumbled Stone Checkerboard
Chiaro Deco Terracotta Look Matte Porcelain Tile
Cream Limestone Look 3D Matte Porcelain Tile
White & Black Octagon Zellige Mosaic
Beige Limestone Look 3D Matte Porcelain Tile
Apple 12x24 3D Glossy Porcelain Tile
Rosso Verona Tumbled Marble Tile
Bianco Carrara Honed Marble Tile
Travertino Moka Stone Look Porcelain Tile
Travertino 3D Matte Porcelain Tile
Cream 12x24 3D Gloss Porcelain Tile
Natura Terracotta Look Matte Porcelain Tile
Rosso Verona 1x1 Hand Chipped Marble Mosaic
Amazzonite Matte Marble Look Porcelain Tile
White Multi-Color Matte Porcelain Tile
Navy 12x24 3D Gloss Porcelain Tile
Bianco Carrara Octagon w/ Nero Marquina Dot Mosaic
White & Ecru Octagon Zellige Mosaic
Thassos, Carrara, Bardiglio Gingham Marble Mosaic
Cotto Deco Terracotta Look Matte Porcelain Tile
White & Ecru 2x2 Zellige Checkerboard Mosaic
Unglazed & White Octagon Zellige Mosaic
Murano Honed Italian Terrazzo Tile
Cotto Terracotta Look Matte Porcelain Tile
Carrara Bardiglio Tumbled Stone Checkerboard
Chiaro Deco Terracotta Look Matte Porcelain Tile
Cream Limestone Look 3D Matte Porcelain Tile
White & Black Octagon Zellige Mosaic
Beige Limestone Look 3D Matte Porcelain Tile
Rosso Verona Tumbled Marble Tile
Travertino Moka Stone Look Porcelain Tile
Bianco Carrara Honed Marble Tile
Travertino 3D Matte Porcelain Tile
Rosso Verona 1x1 Hand Chipped Marble Mosaic
Amazzonite Matte Marble Look Porcelain Tile
White Multi-Color Matte Porcelain Tile
Natura Terracotta Look Matte Porcelain Tile

Spider Gold Matte Marble Look Porcelain Tile
Cream 2x2 Forma Porcelain Mosaic
Cotto 2x2 Forma Porcelain Mosaic
Bianco Carrara Octagon w/ Nero Marquina Dot Mosaic
Almond Cement Look Matte Porcelain Tile
White Paradise Marble Look Porcelain Tile
Star & Cross Classic Terracotta Tile
Bardiglio Desert Tea Tumbled Stone Checker Stripe
Breccia Capraia 3D Mable Look Porcelain Tile
White & Ecru Octagon Zellige Mosaic
Thassos, Carrara, Bardiglio Gingham Marble Mosaic
Cotto Deco Terracotta Look Matte Porcelain Tile
White & Ecru 2x2 Zellige Checkerboard Mosaic
Unglazed & White Octagon Zellige Mosaic
Murano Honed Italian Terrazzo Tile
Cotto Terracotta Look Matte Porcelain Tile
Carrara Bardiglio Tumbled Stone Checkerboard
Chiaro Deco Terracotta Look Matte Porcelain Tile
Cream Limestone Look 3D Matte Porcelain Tile
White & Black Octagon Zellige Mosaic
Beige Limestone Look 3D Matte Porcelain Tile
Apple 12x24 3D Glossy Porcelain Tile
Rosso Verona Tumbled Marble Tile
Travertino Moka Stone Look Porcelain Tile
Bianco Carrara Honed Marble Tile
Travertino 3D Matte Porcelain Tile
Rosso Verona 1x1 Hand Chipped Marble Mosaic
Amazzonite Matte Marble Look Porcelain Tile
Cream 12x24 3D Gloss Porcelain Tile
Natura Terracotta Look Matte Porcelain Tile
White Multi-Color Matte Porcelain Tile
Bianco Carrara Octagon w/ Nero Marquina Dot Mosaic
Navy 12x24 3D Gloss Porcelain Tile
Almond Cement Look Matte Porcelain Tile
White & Ecru Octagon Zellige Mosaic
Thassos, Carrara, Bardiglio Gingham Marble Mosaic
Cotto Deco Terracotta Look Matte Porcelain Tile
White & Ecru 2x2 Zellige Checkerboard Mosaic
Unglazed & White Octagon Zellige Mosaic
Murano Honed Italian Terrazzo Tile
Carrara Bardiglio Tumbled Stone Checkerboard
Chiaro Deco Terracotta Look Matte Porcelain Tile
Cream Limestone Look 3D Matte Porcelain Tile
White & Black Octagon Zellige Mosaic
Beige Limestone Look 3D Matte Porcelain Tile
Apple 12x24 3D Glossy Porcelain Tile
Rosso Verona Tumbled Marble Tile
Bianco Carrara Honed Marble Tile
Travertino 3D Matte Porcelain Tile
Travertino Moka Stone Look Porcelain Tile
Rosso Verona 1x1 Hand Chipped Marble Mosaic
Amazzonite Matte Marble Look Porcelain Tile
Cream 12x24 3D Gloss Porcelain Tile
Natura Terracotta Look Matte Porcelain Tile
White Multi-Color Matte Porcelain Tile
Almond Cement Look Matte Porcelain Tile
Bianco Carrara Octagon w/ Nero Marquina Dot Mosaic
Navy 12x24 3D Gloss Porcelain Tile
White & Ecru Octagon Zellige Mosaic
Thassos, Carrara, Bardiglio Gingham Marble Mosaic
Cotto Deco Terracotta Look Matte Porcelain Tile
White & Ecru 2x2 Zellige Checkerboard Mosaic
Unglazed & White Octagon Zellige Mosaic
Murano Honed Italian Terrazzo Tile
Cotto Terracotta Look Matte Porcelain Tile
Chiaro Deco Terracotta Look Matte Porcelain Tile
Carrara Bardiglio Tumbled Stone Checkerboard
Cream Limestone Look 3D Matte Porcelain Tile
White & Black Octagon Zellige Mosaic
Beige Limestone Look 3D Matte Porcelain Tile
Apple 12x24 3D Glossy Porcelain Tile
Rosso Verona Tumbled Marble Tile
Travertino Moka Stone Look Porcelain Tile
Bianco Carrara Honed Marble Tile
Travertino 3D Matte Porcelain Tile
Rosso Verona 1x1 Hand Chipped Marble Mosaic
Amazzonite Matte Marble Look Porcelain Tile
Cream 12x24 3D Gloss Porcelain Tile
Natura Terracotta Look Matte Porcelain Tile
White Multi-Color Matte Porcelain Tile
Bianco Carrara Octagon w/ Nero Marquina Dot Mosaic
Navy 12x24 3D Gloss Porcelain Tile
Bianco Carrara Honed Marble Tile
Carrara 1x1 Hand Chipped Marble Mosaic
Carrara Honed Basketweave Marble Mosaic
Carrara Running Bond Marble Mosaic
Calacatta 1x1 Hand Chipped Marble Mosaic
Calacatta Running Bond Marble Mosaic
Grigio Pearla 1x1 Hand Chipped Marble Mosaic
Bianco Carrara Octagon w/ Nero Marquina Dot Mosaic
Thassos, Carrara, Bardiglio Gingham Marble Mosaic
Rosso Verona 1x1 Hand Chipped Marble Mosaic

Calacatta Honed Italian Terrazzo Tile

Torcello Honed Italian Terrazzo Tile
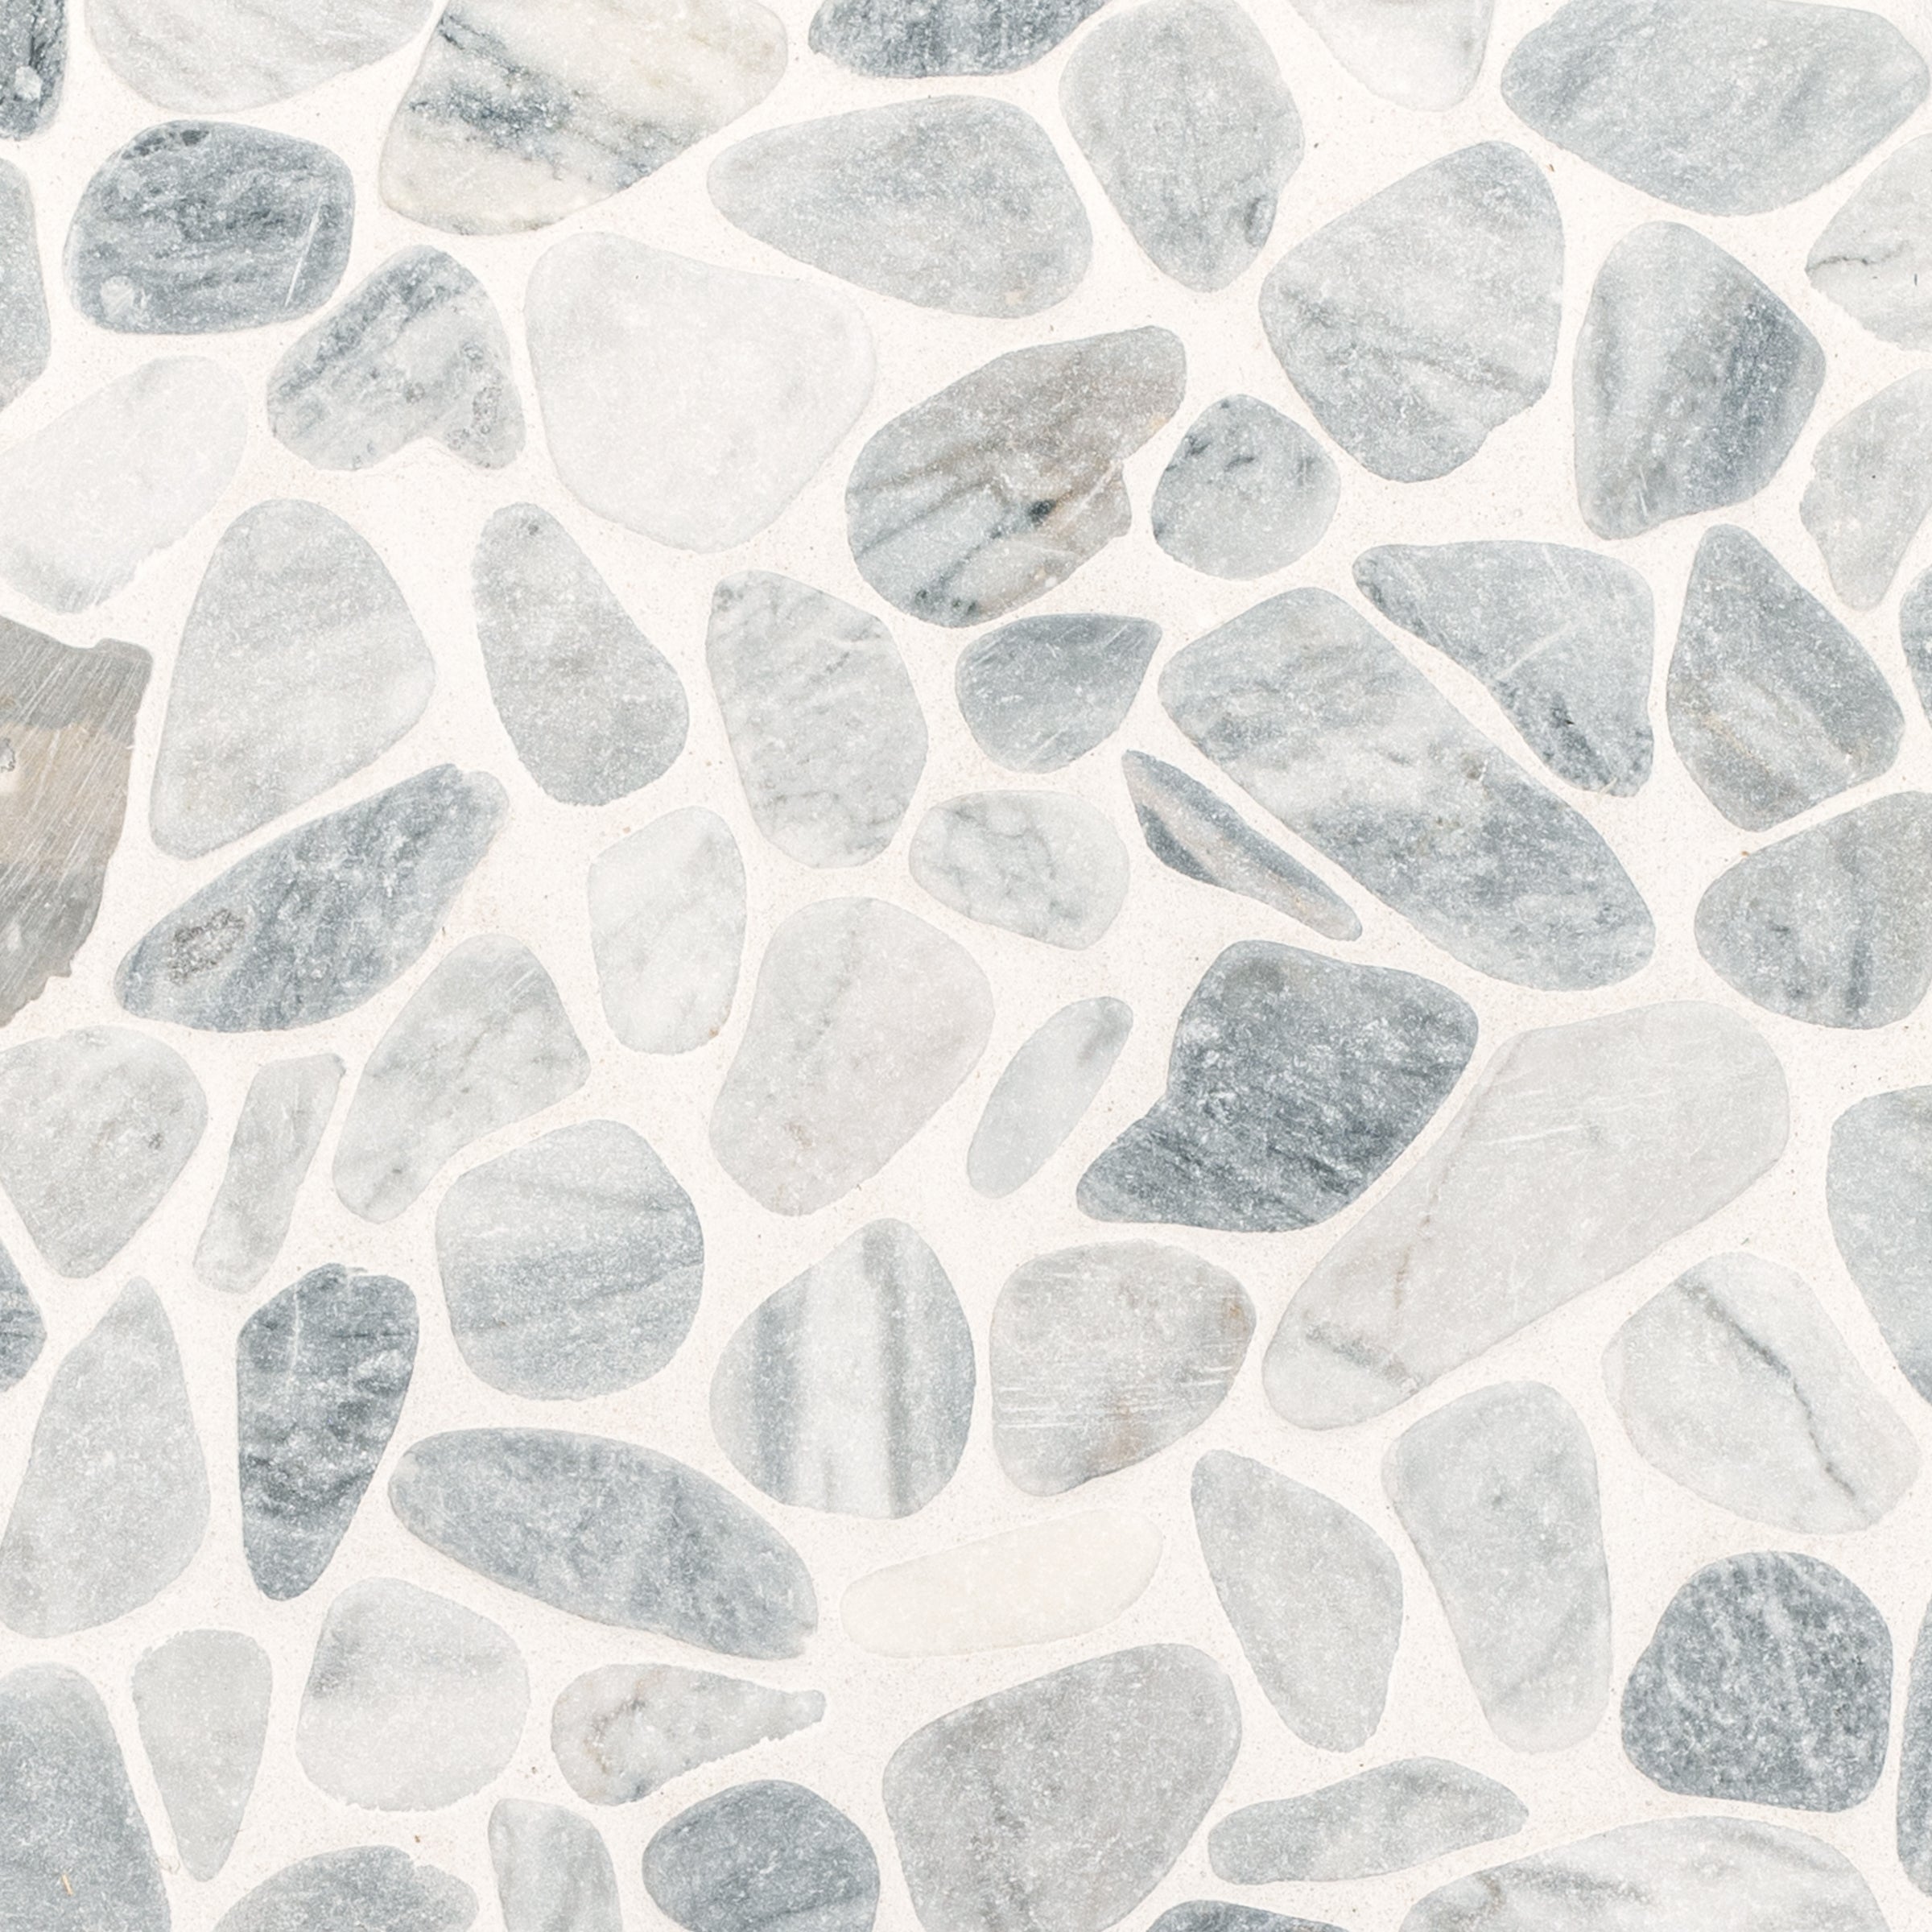
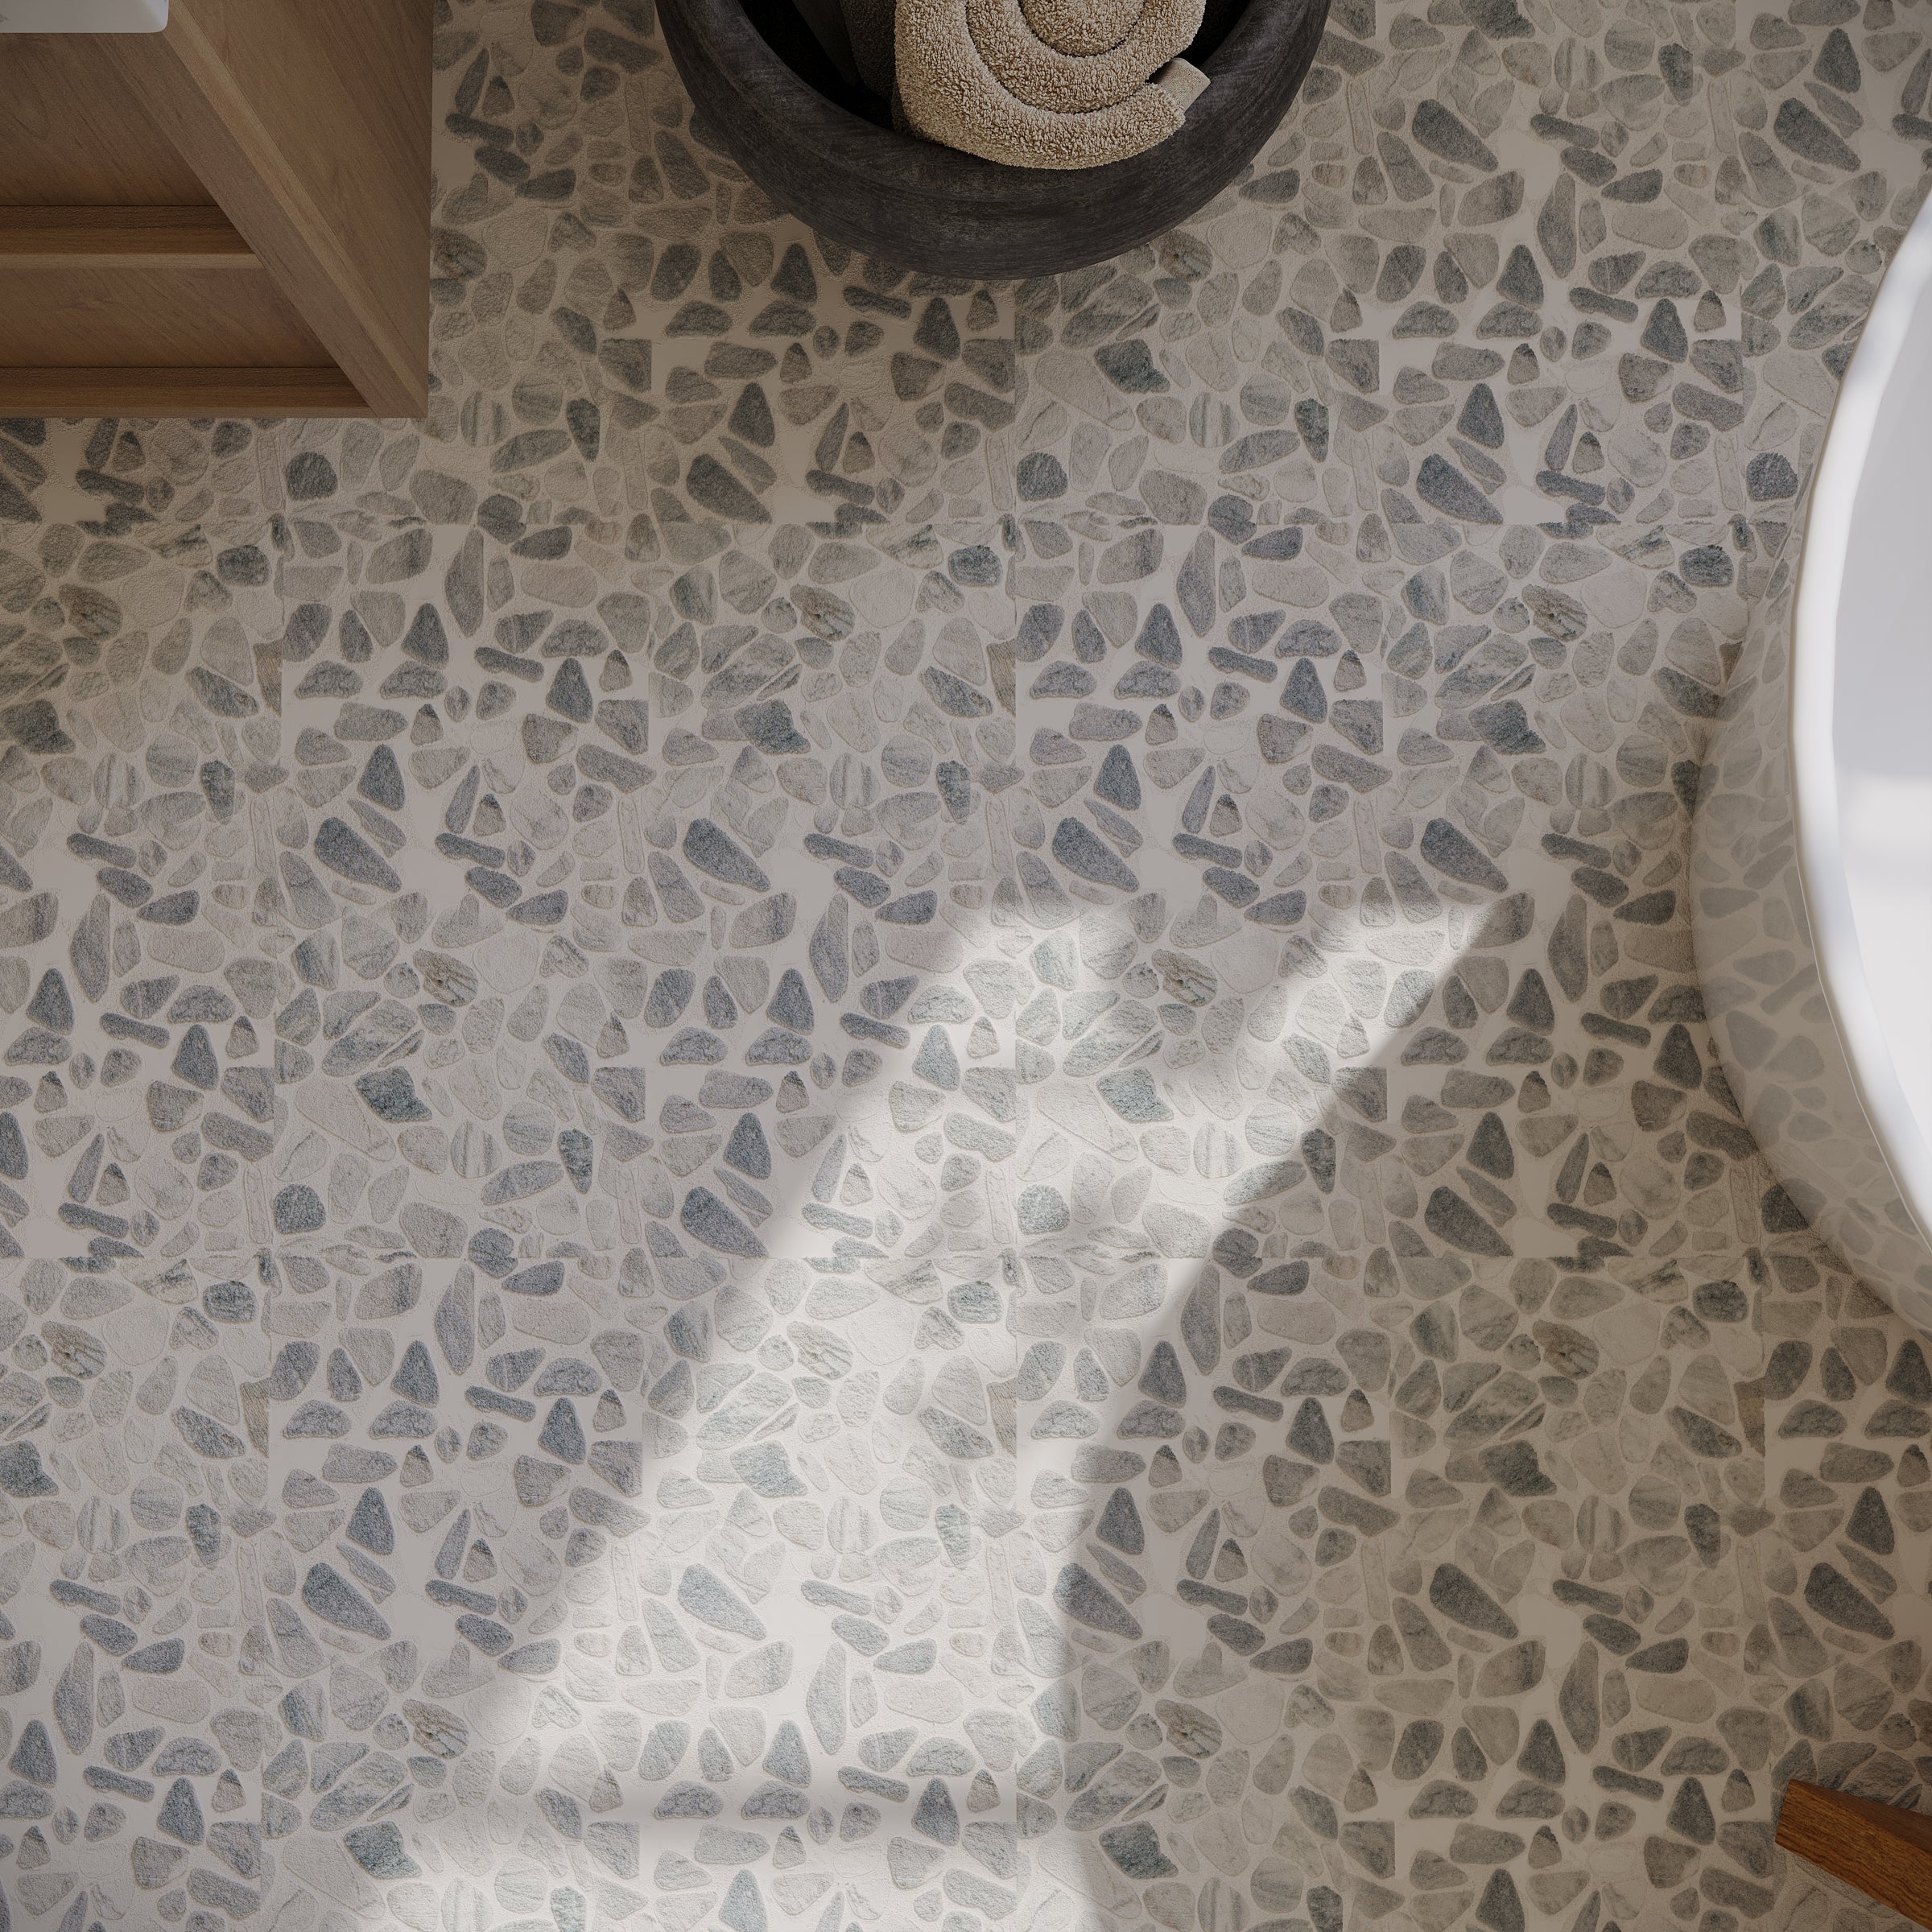
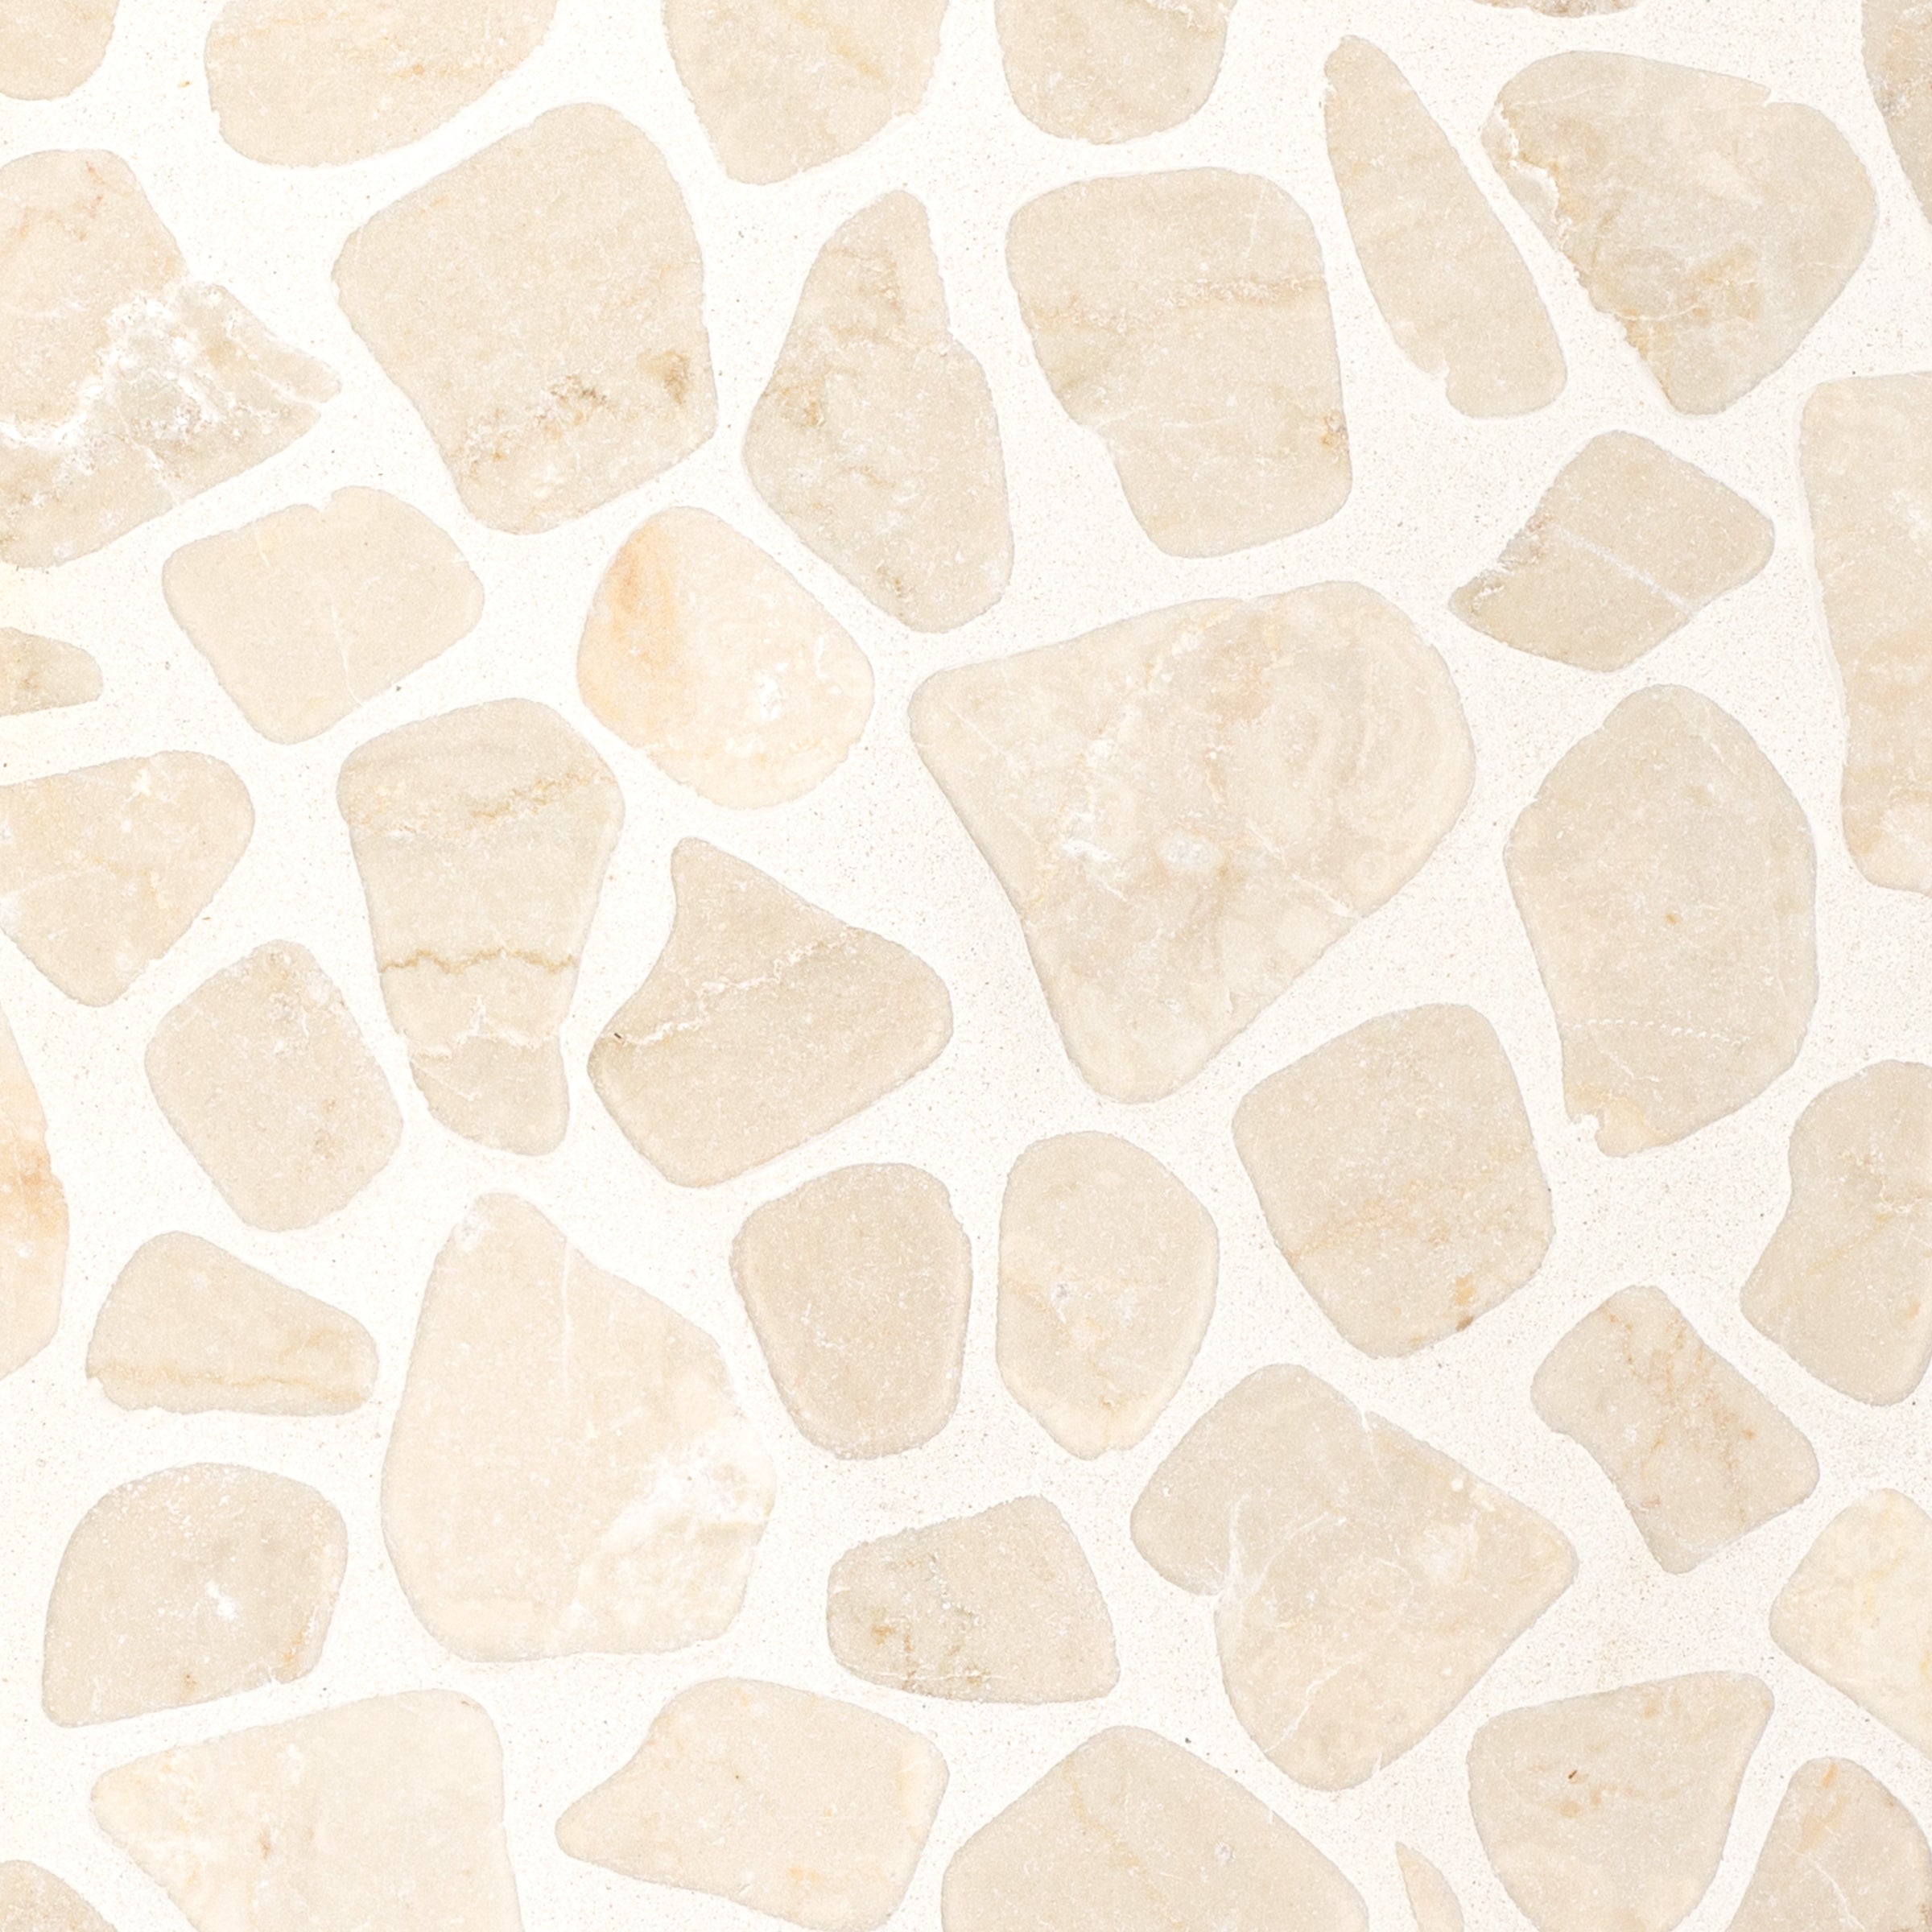
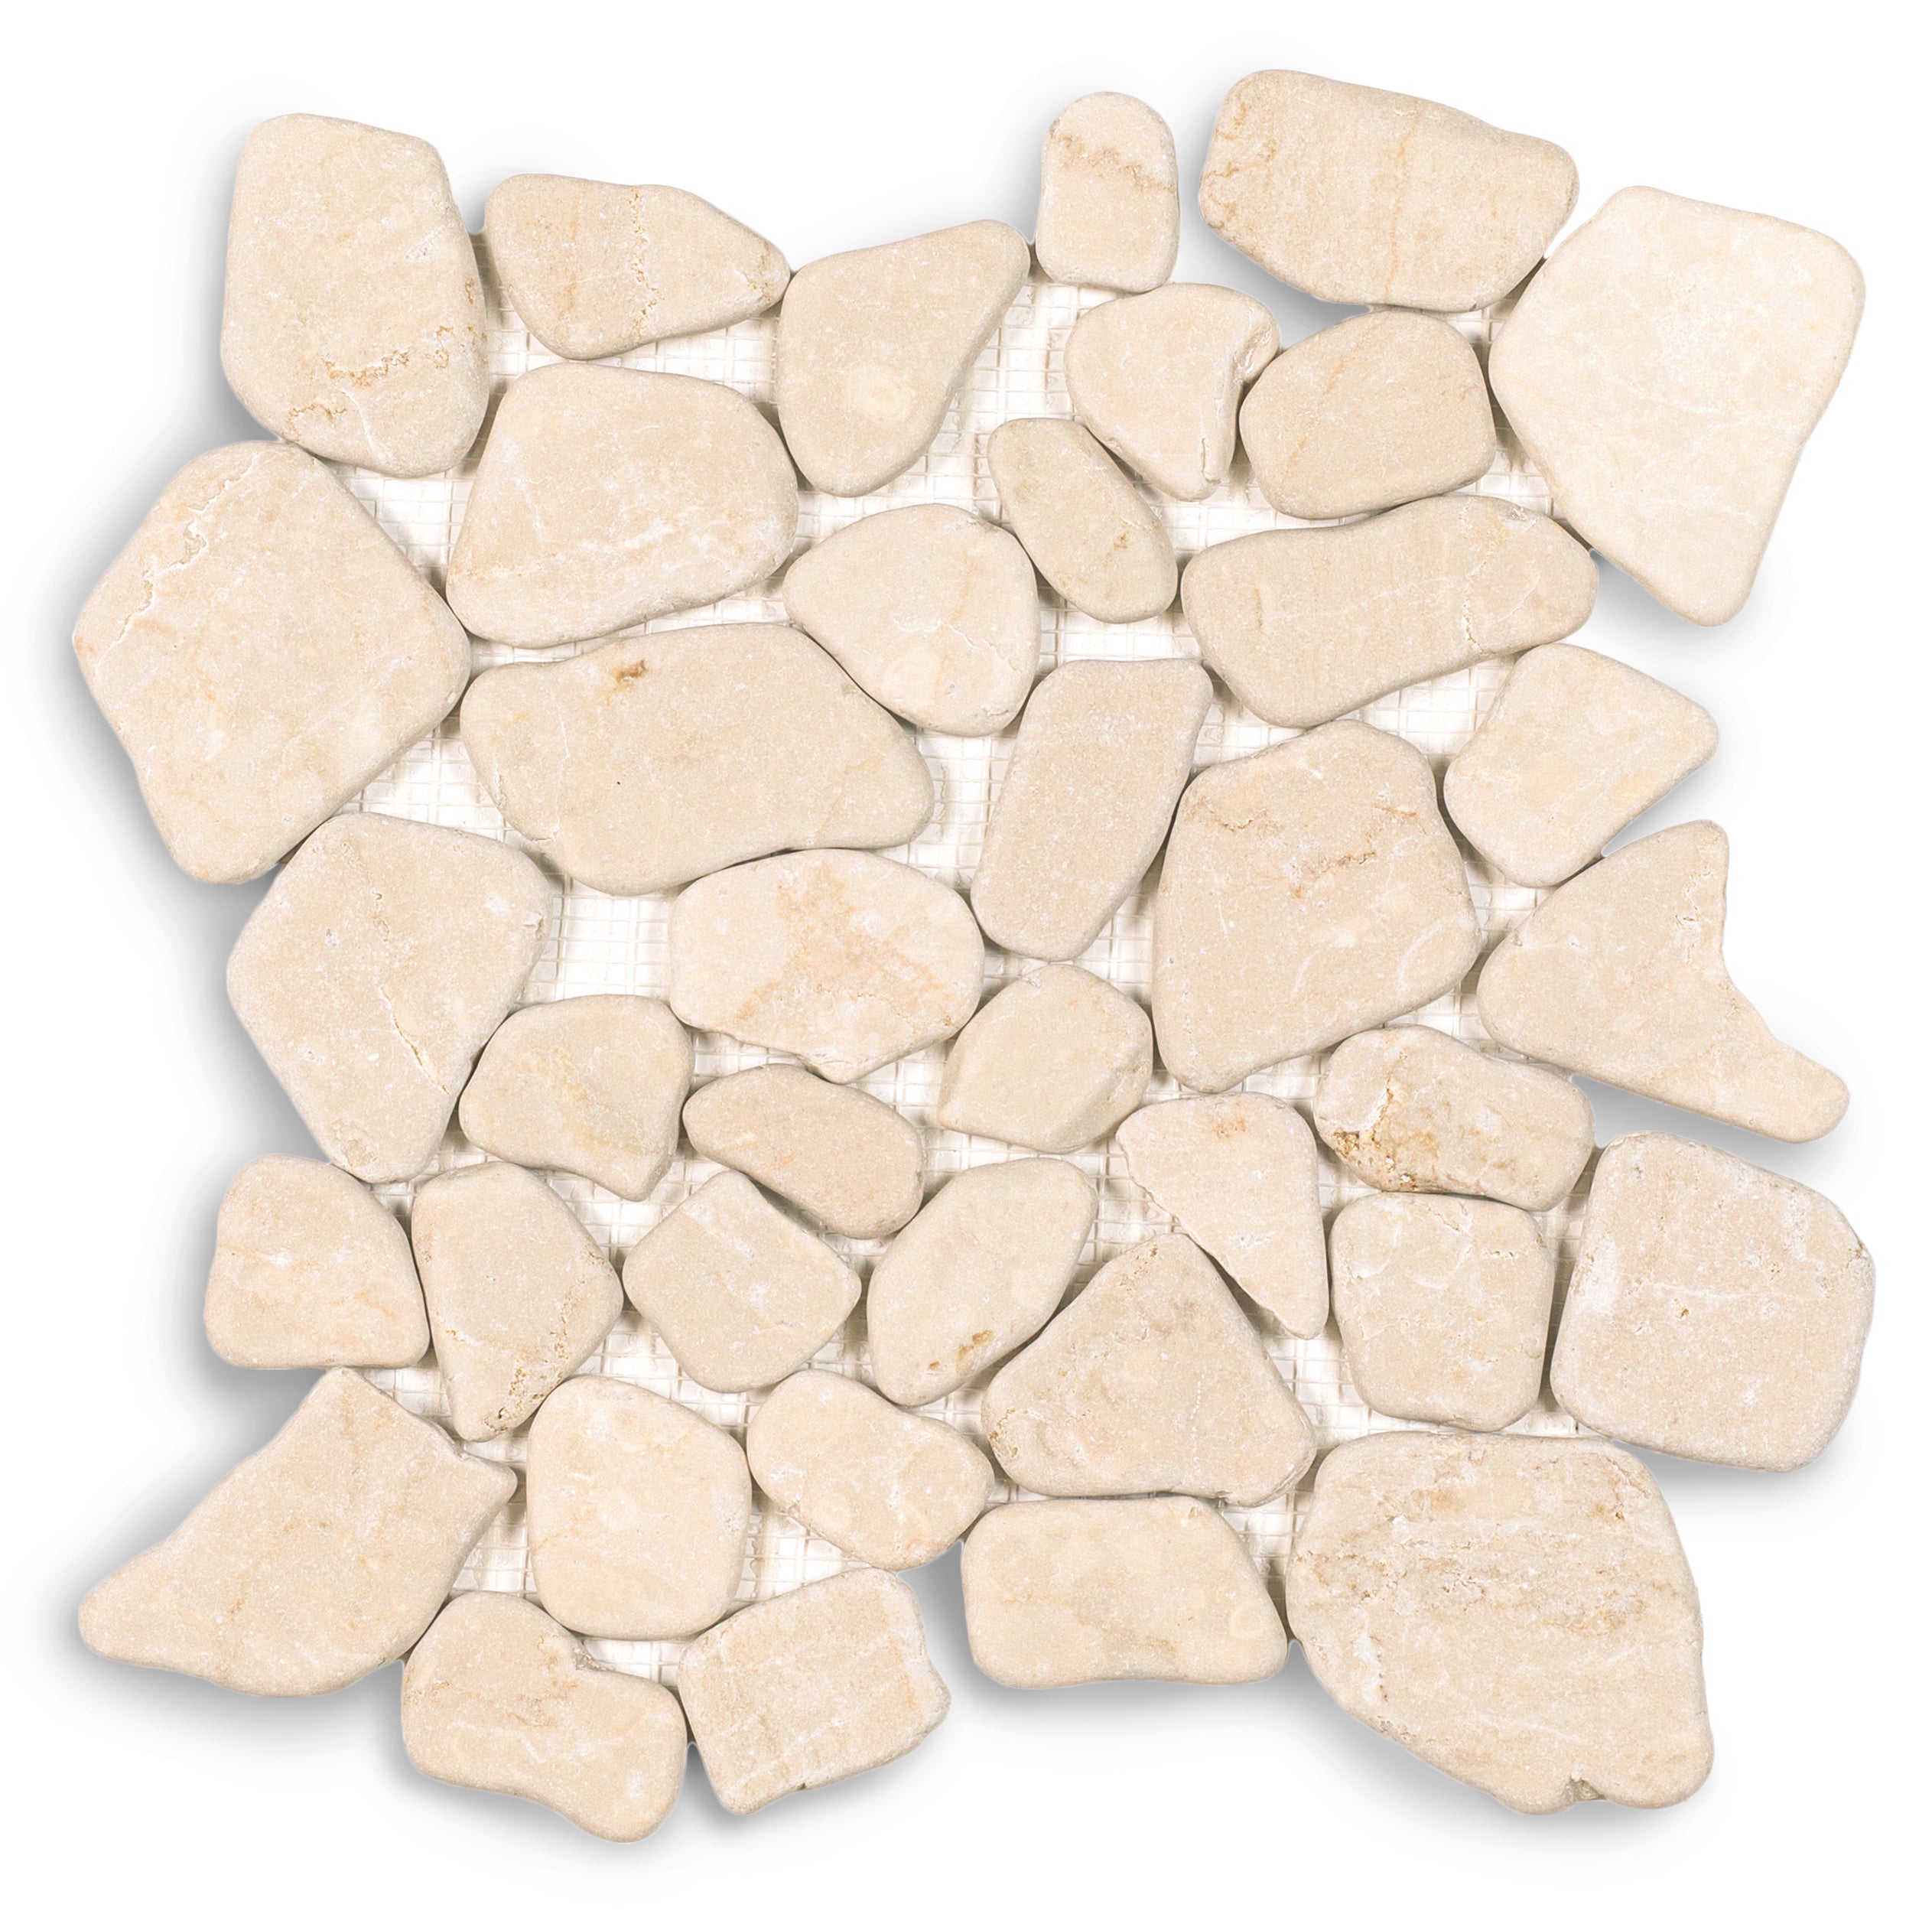
Bardiglio Tumbled Pebble Mosaic
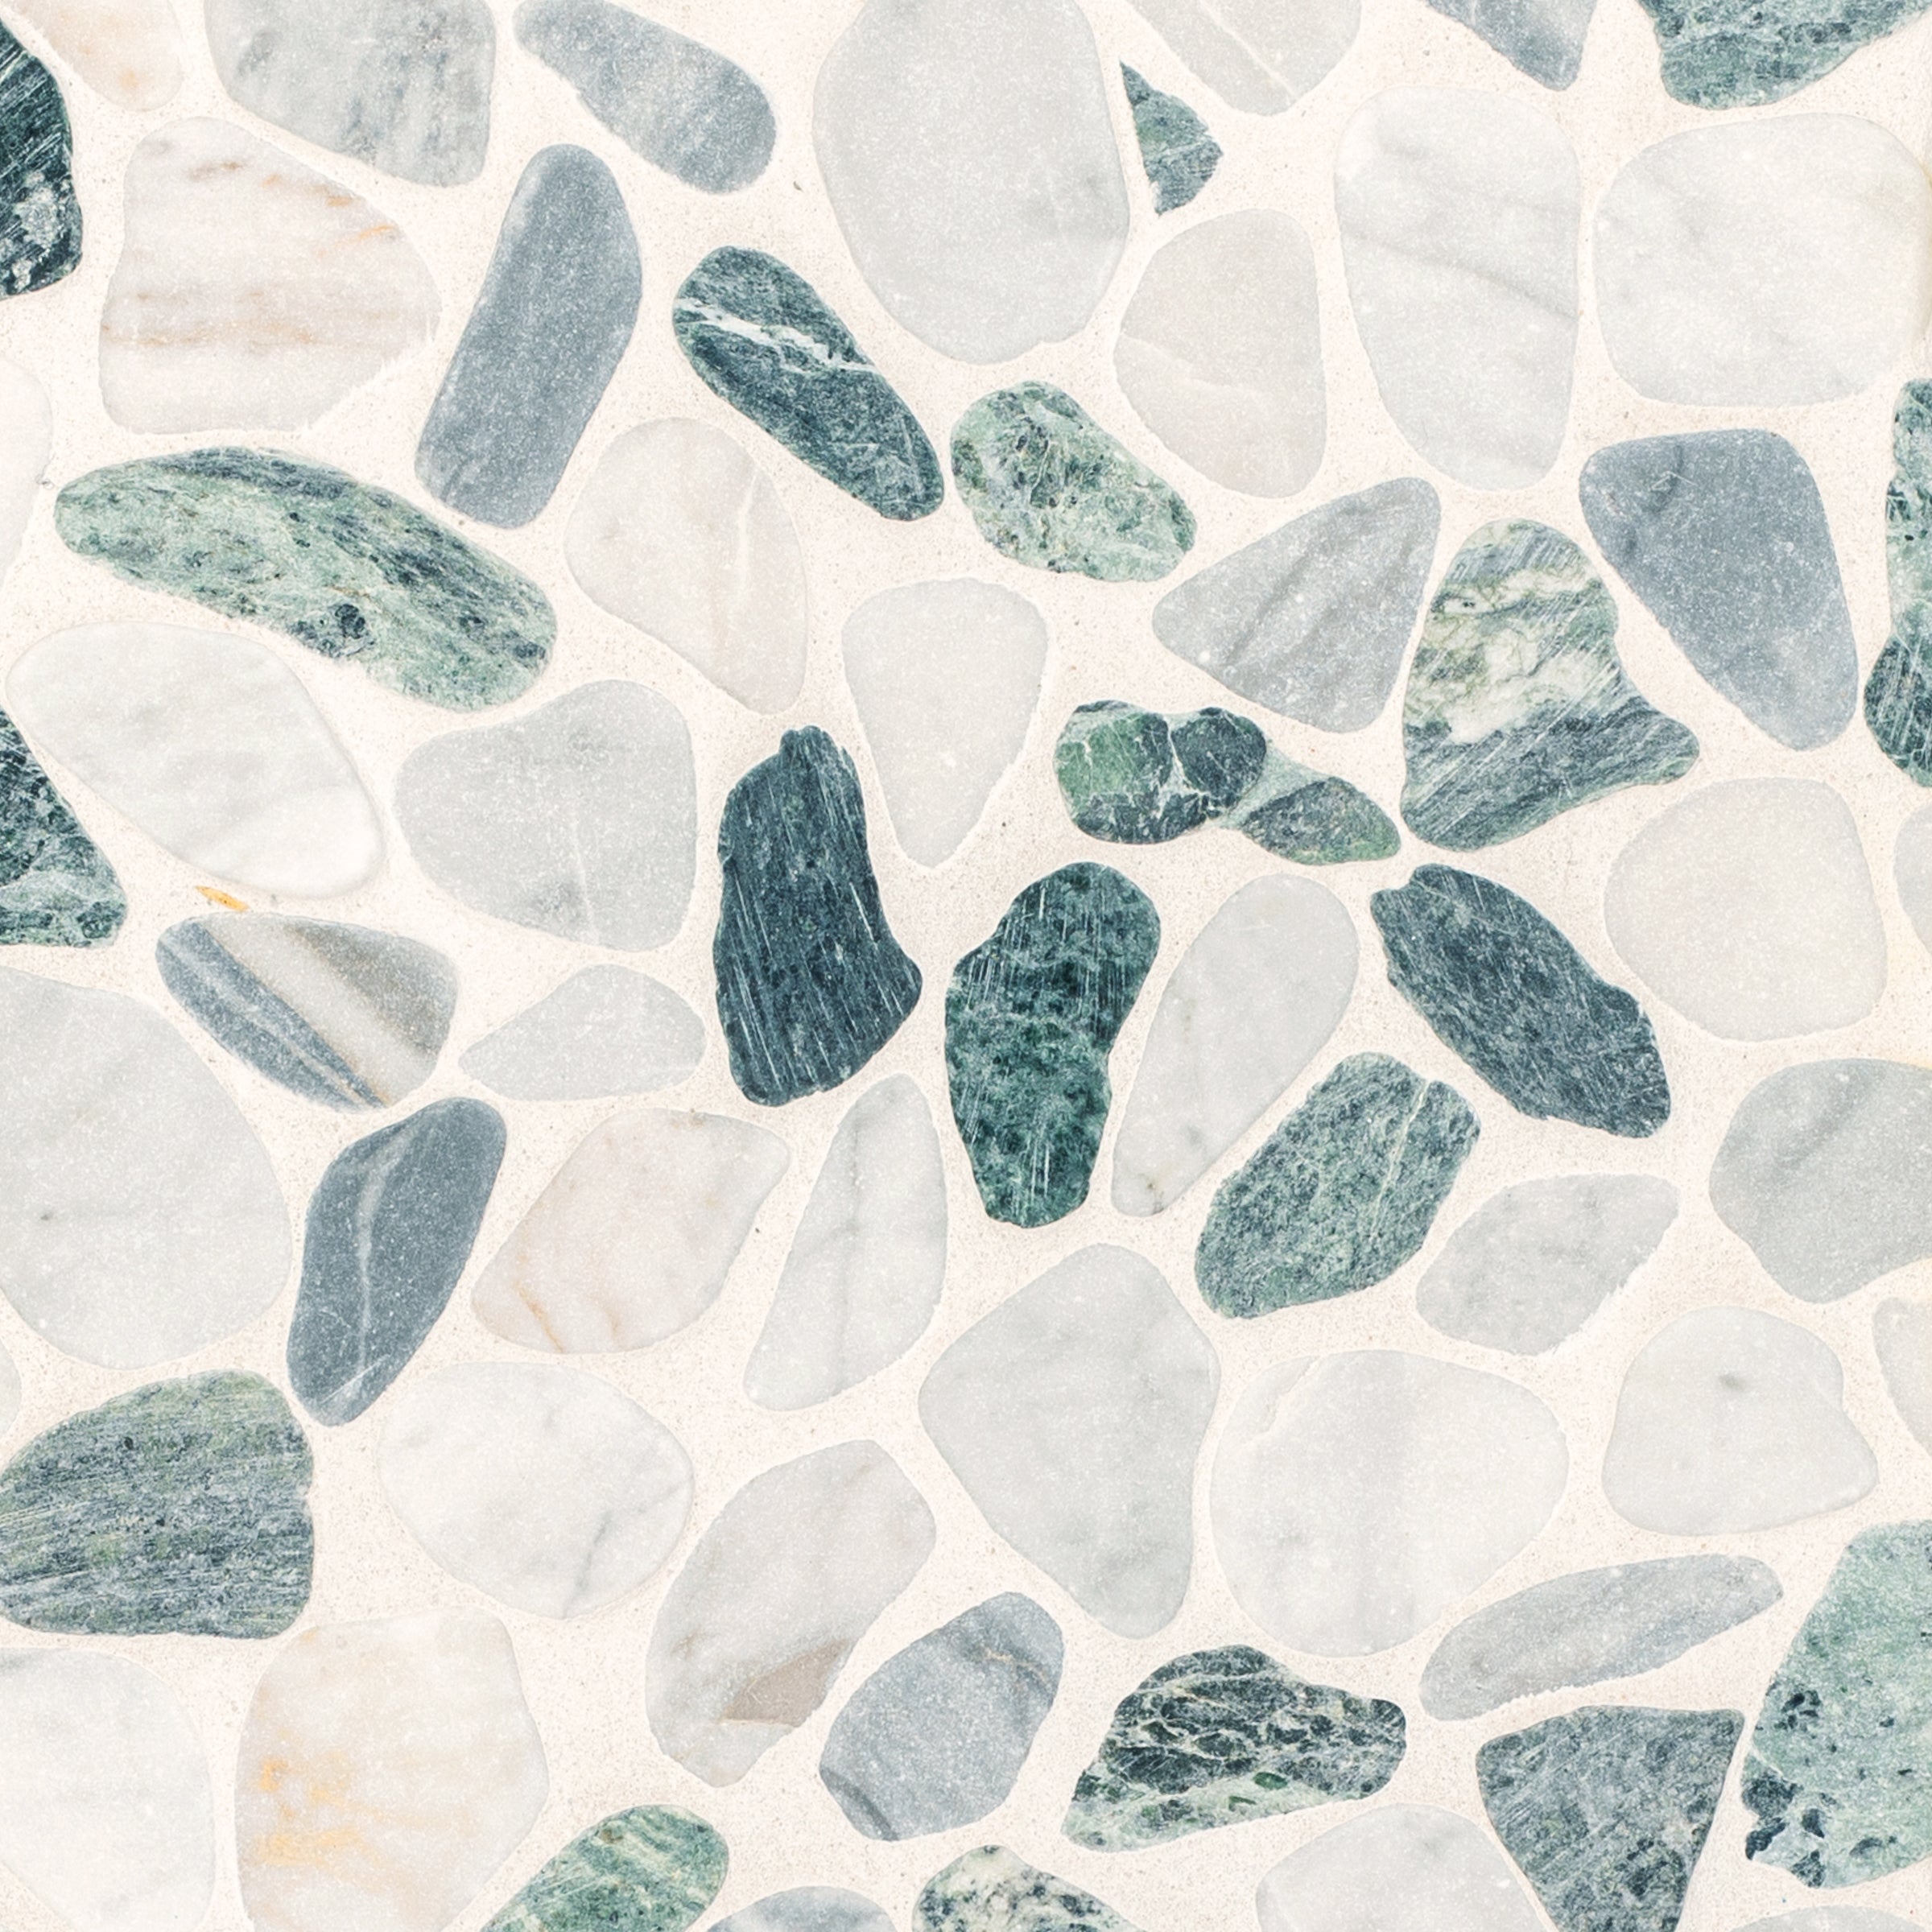
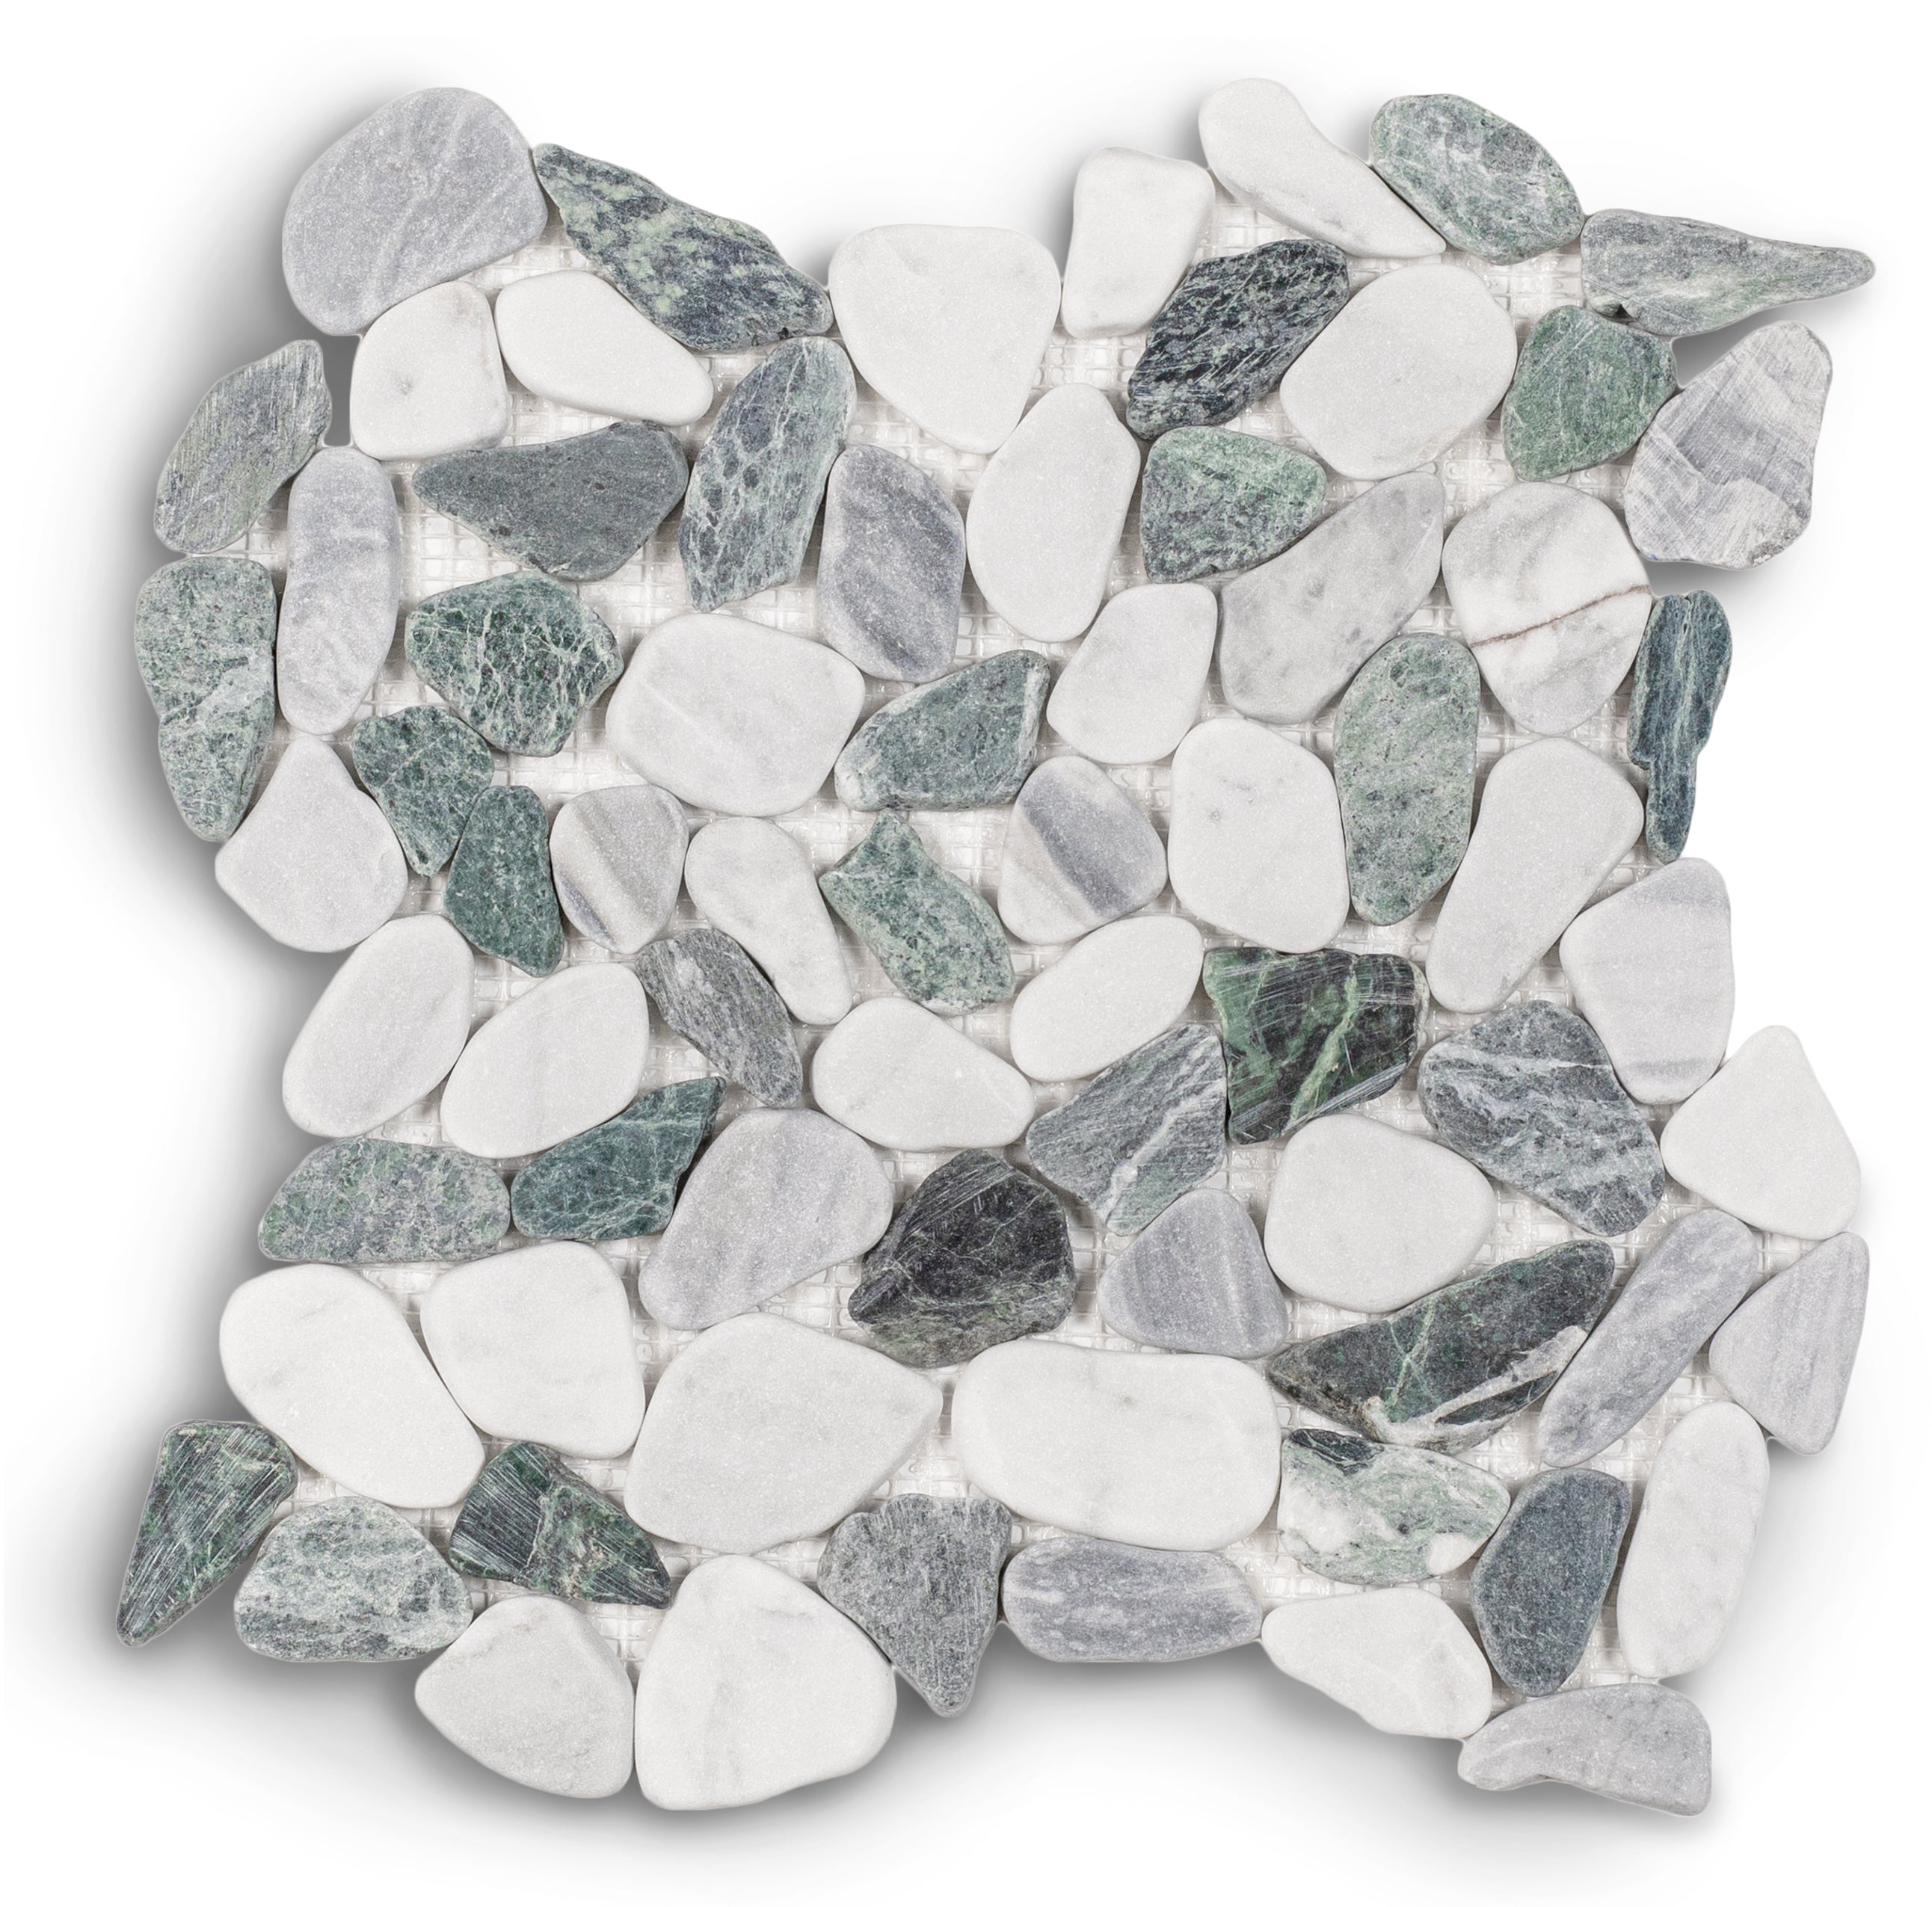
Carrara, Verde, Bardiglio Tumbled Pebble Mosaic
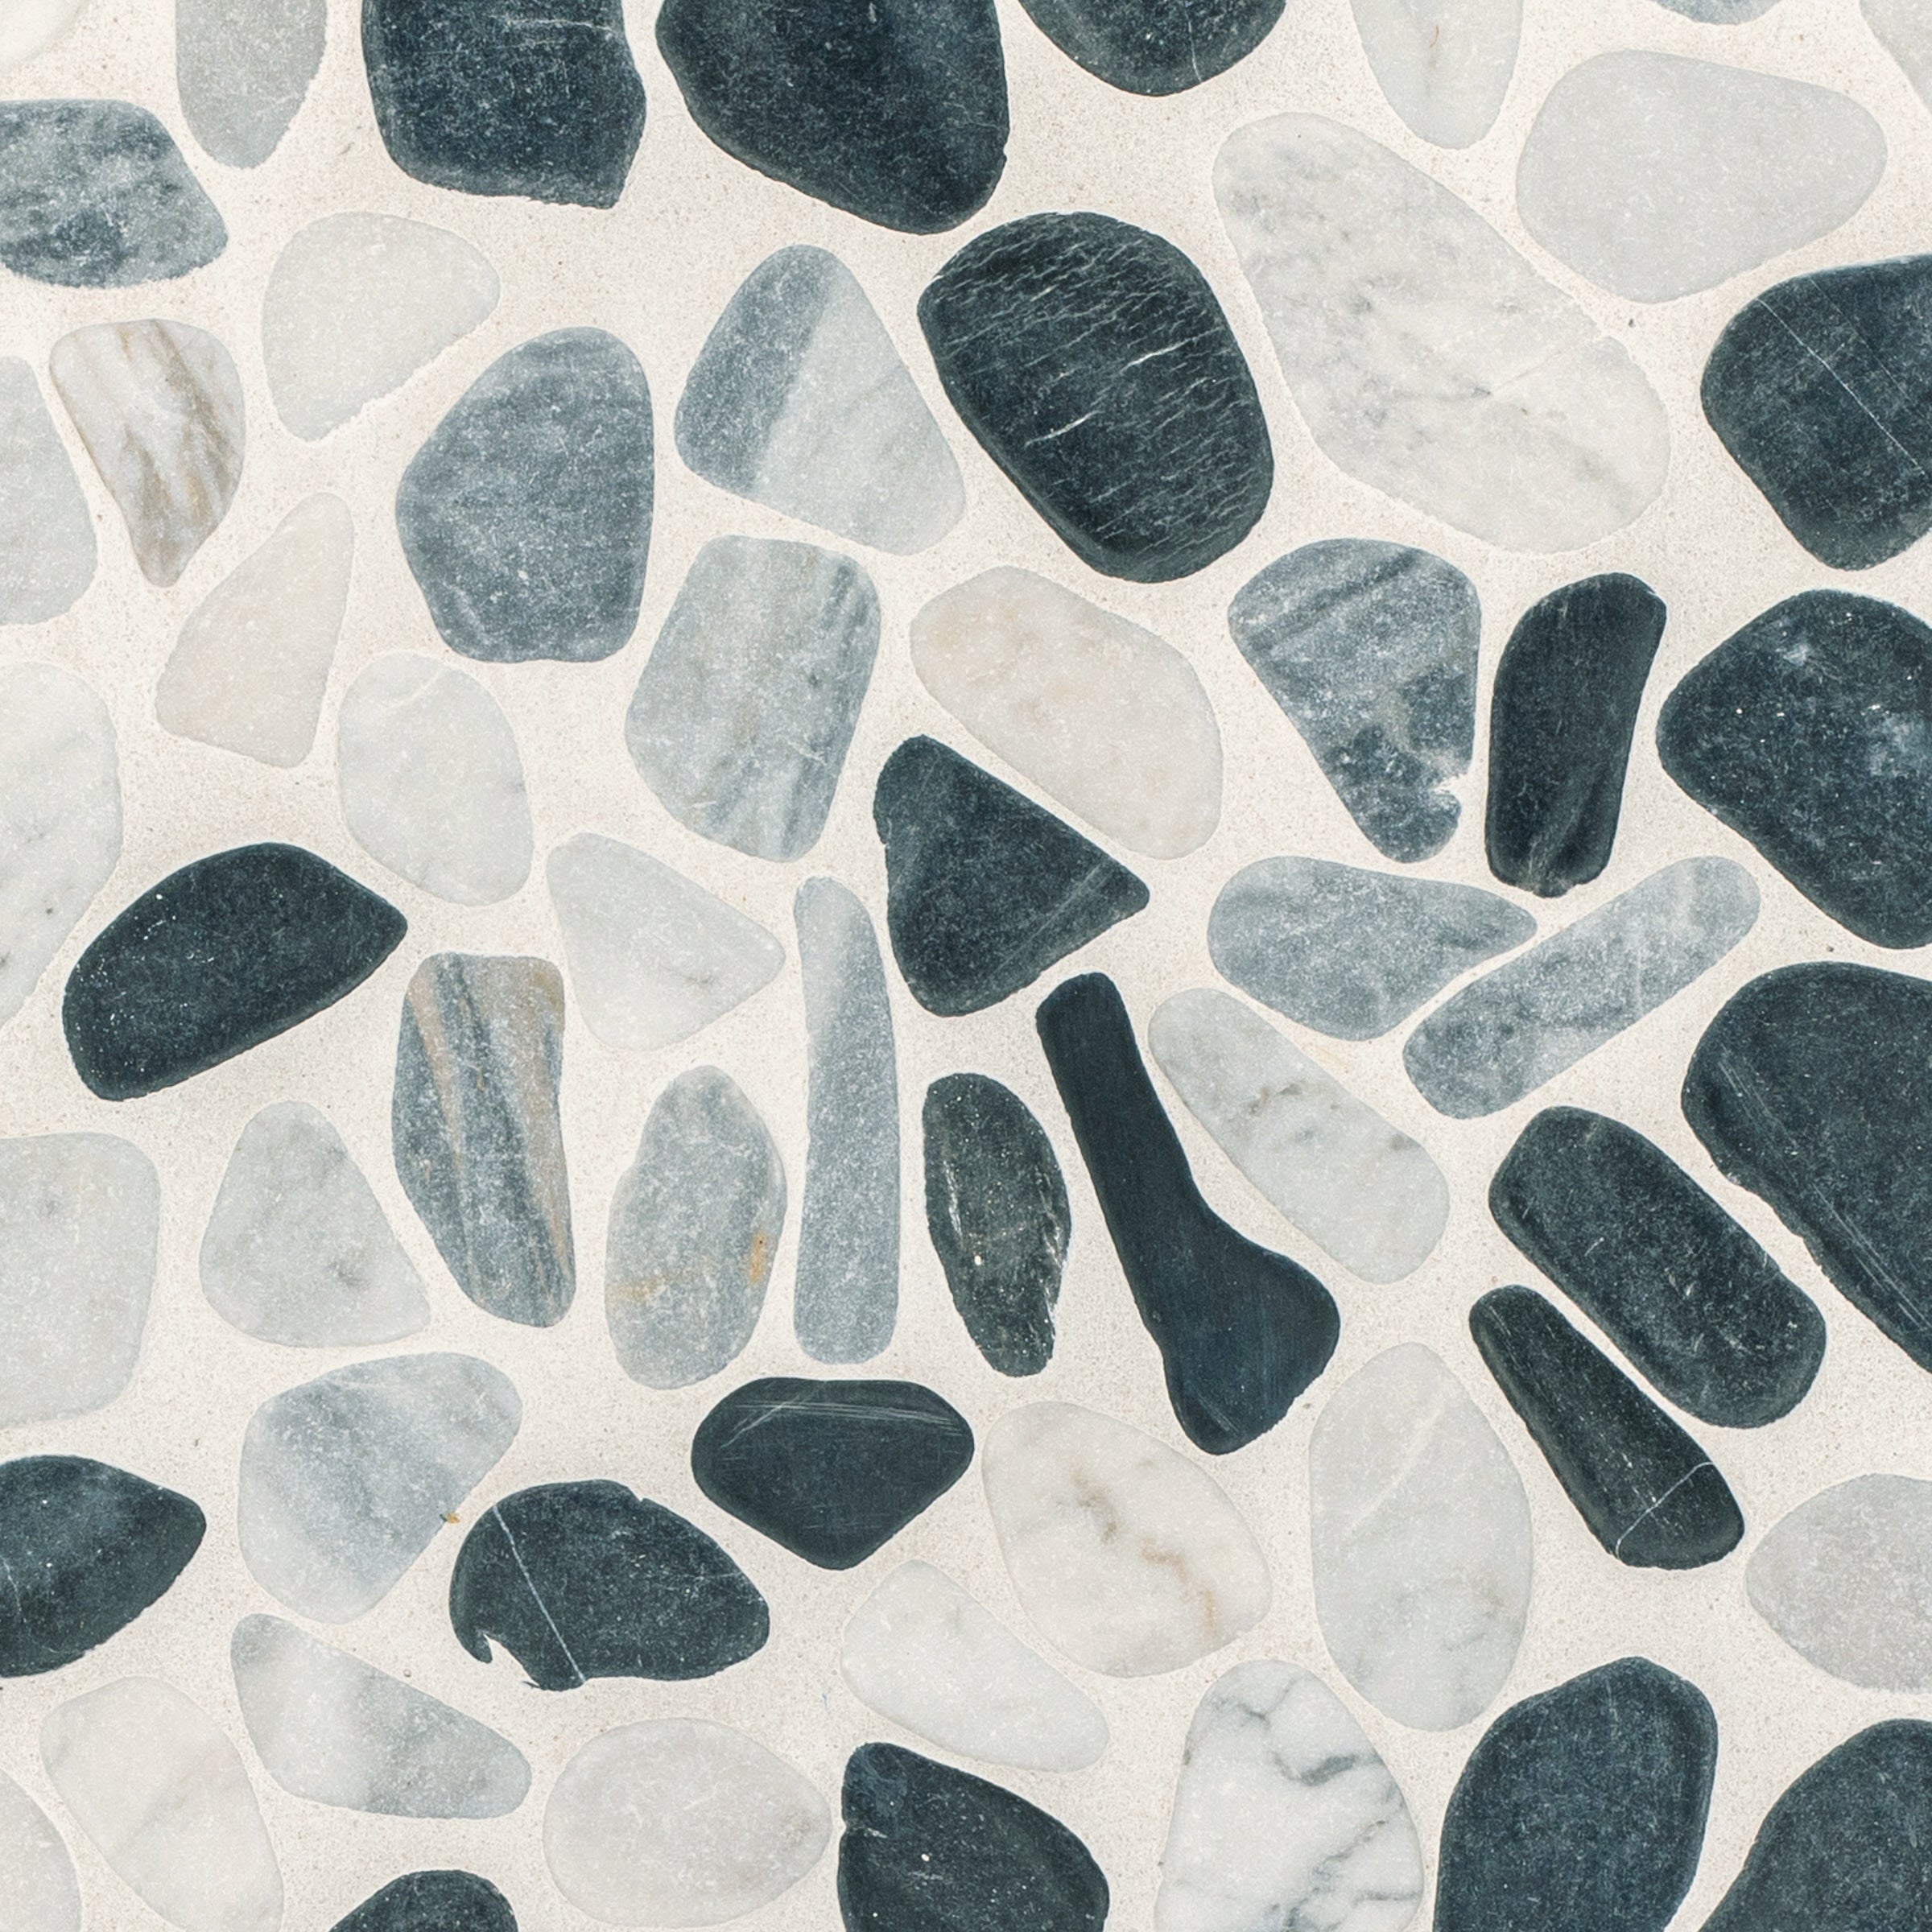
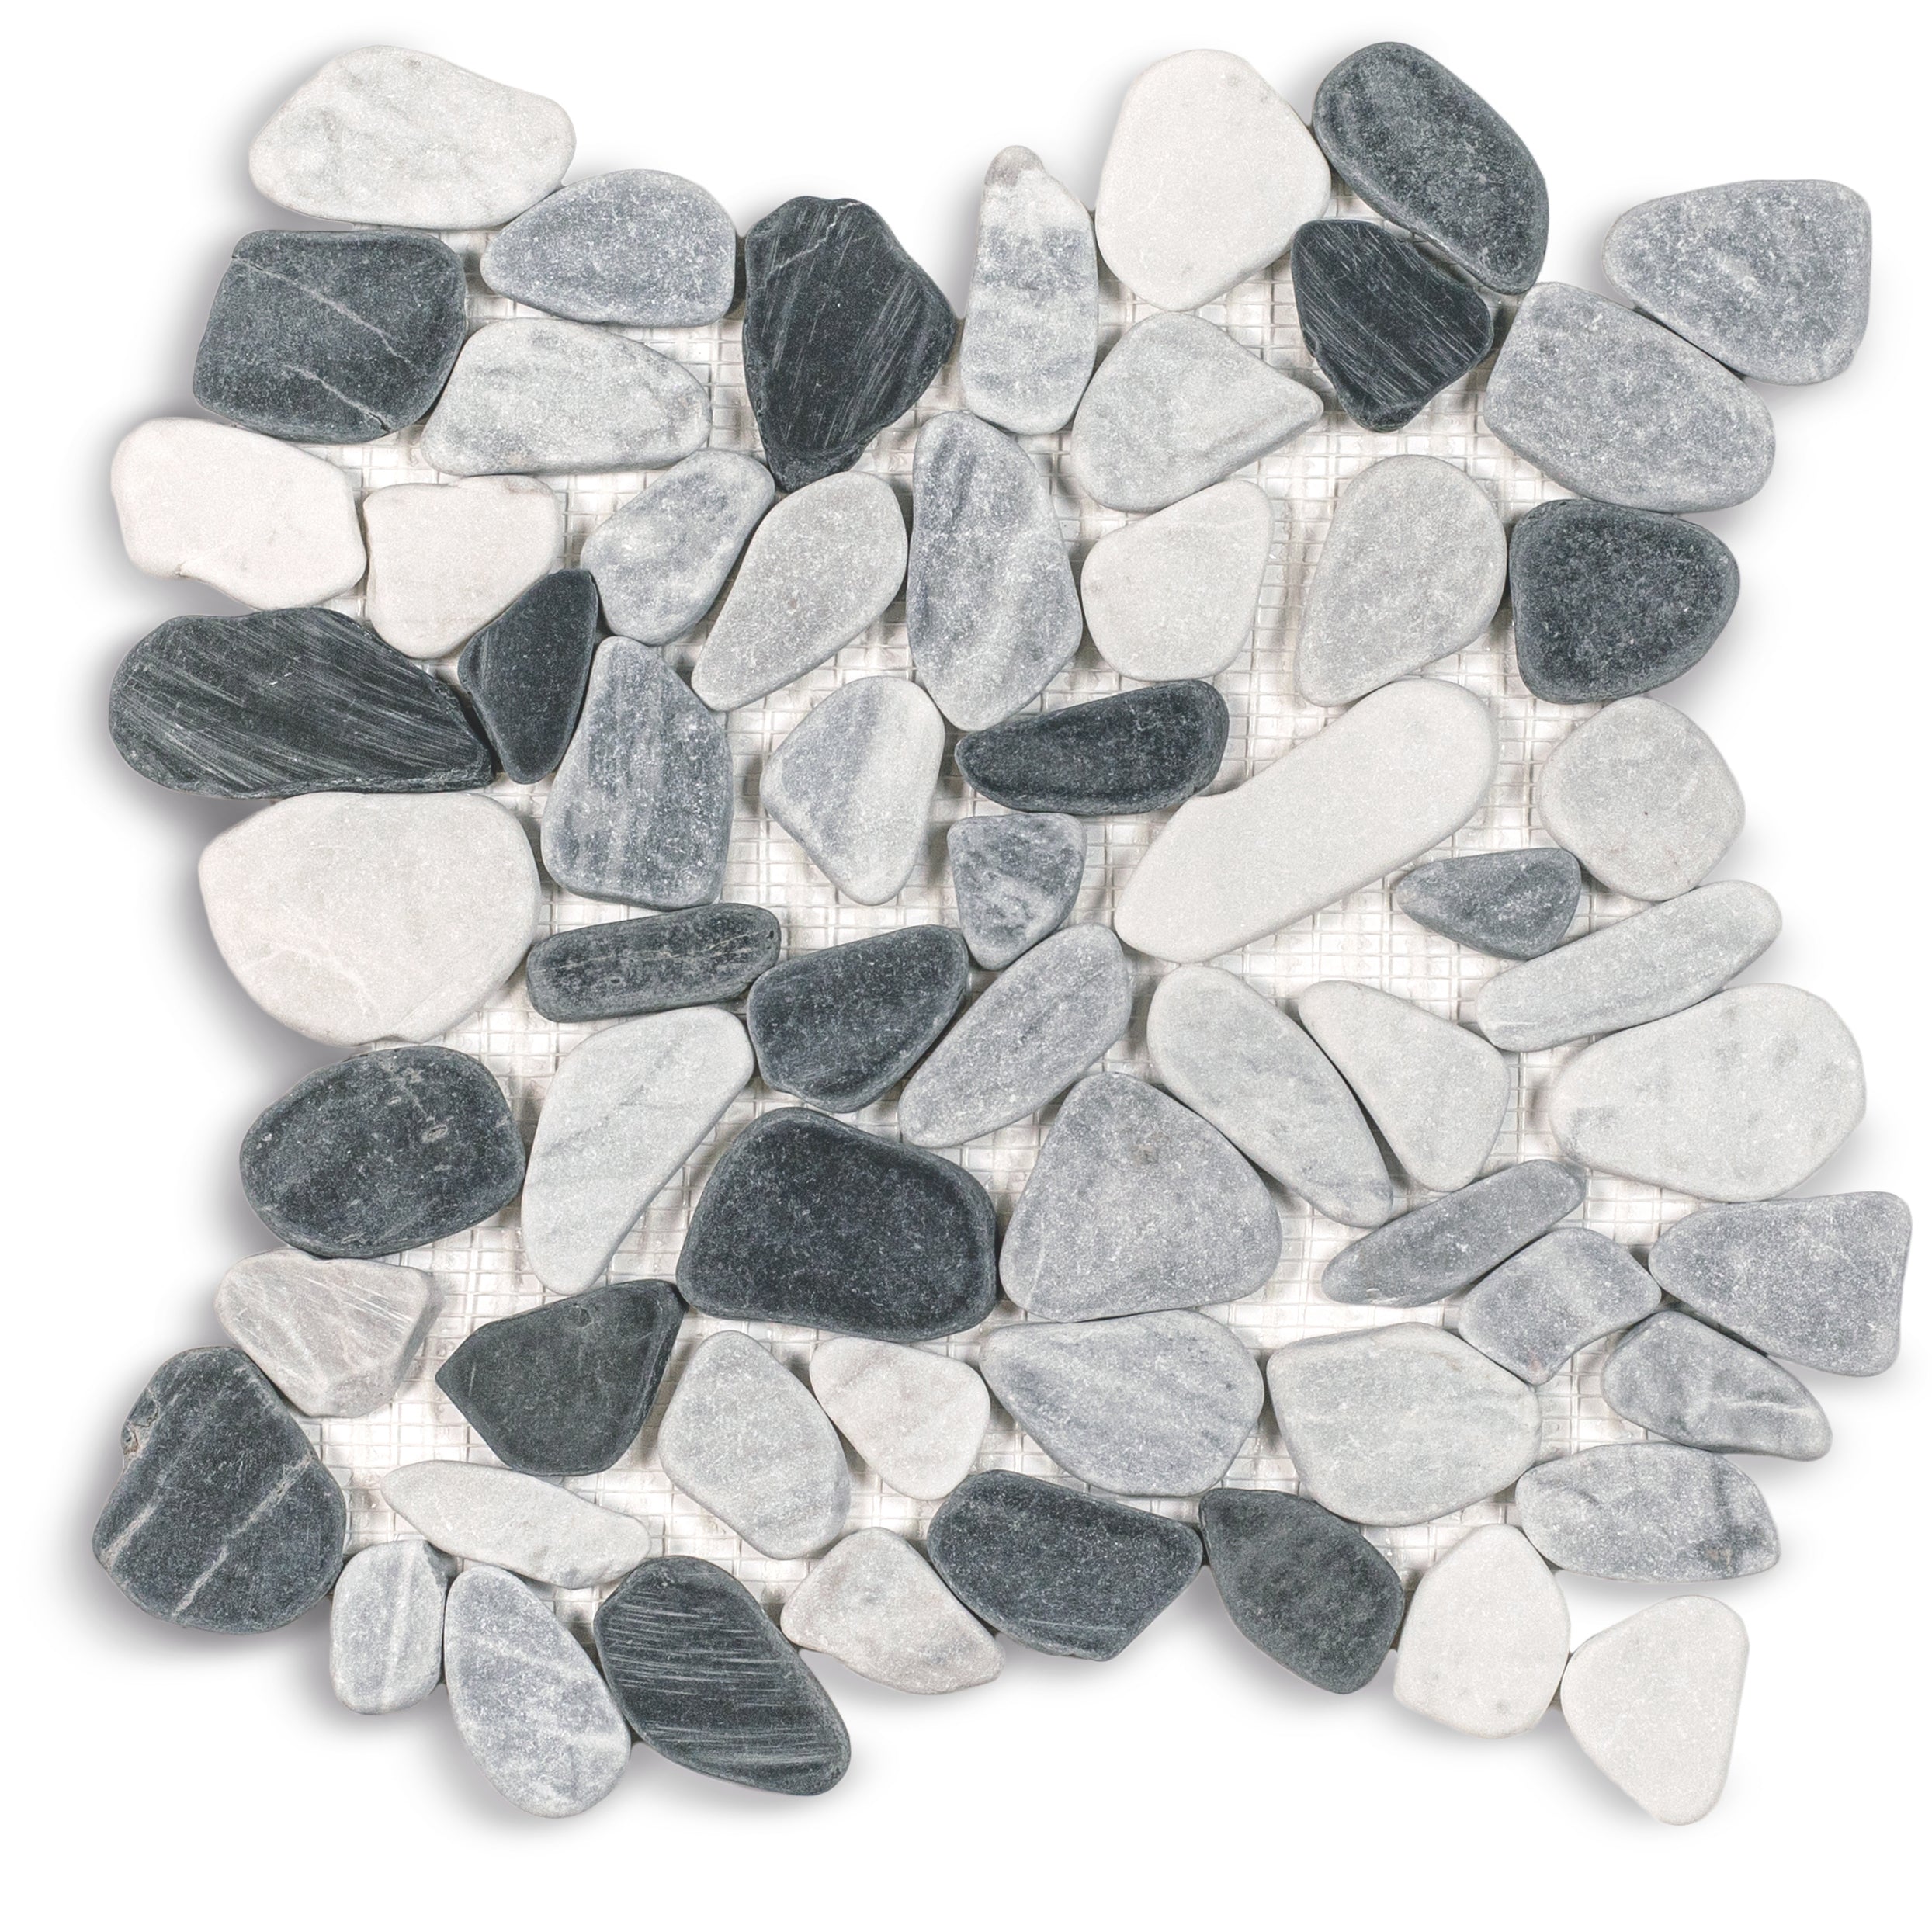
Carrara, Nero, Bardiglio Tumbled Pebble Mosaic
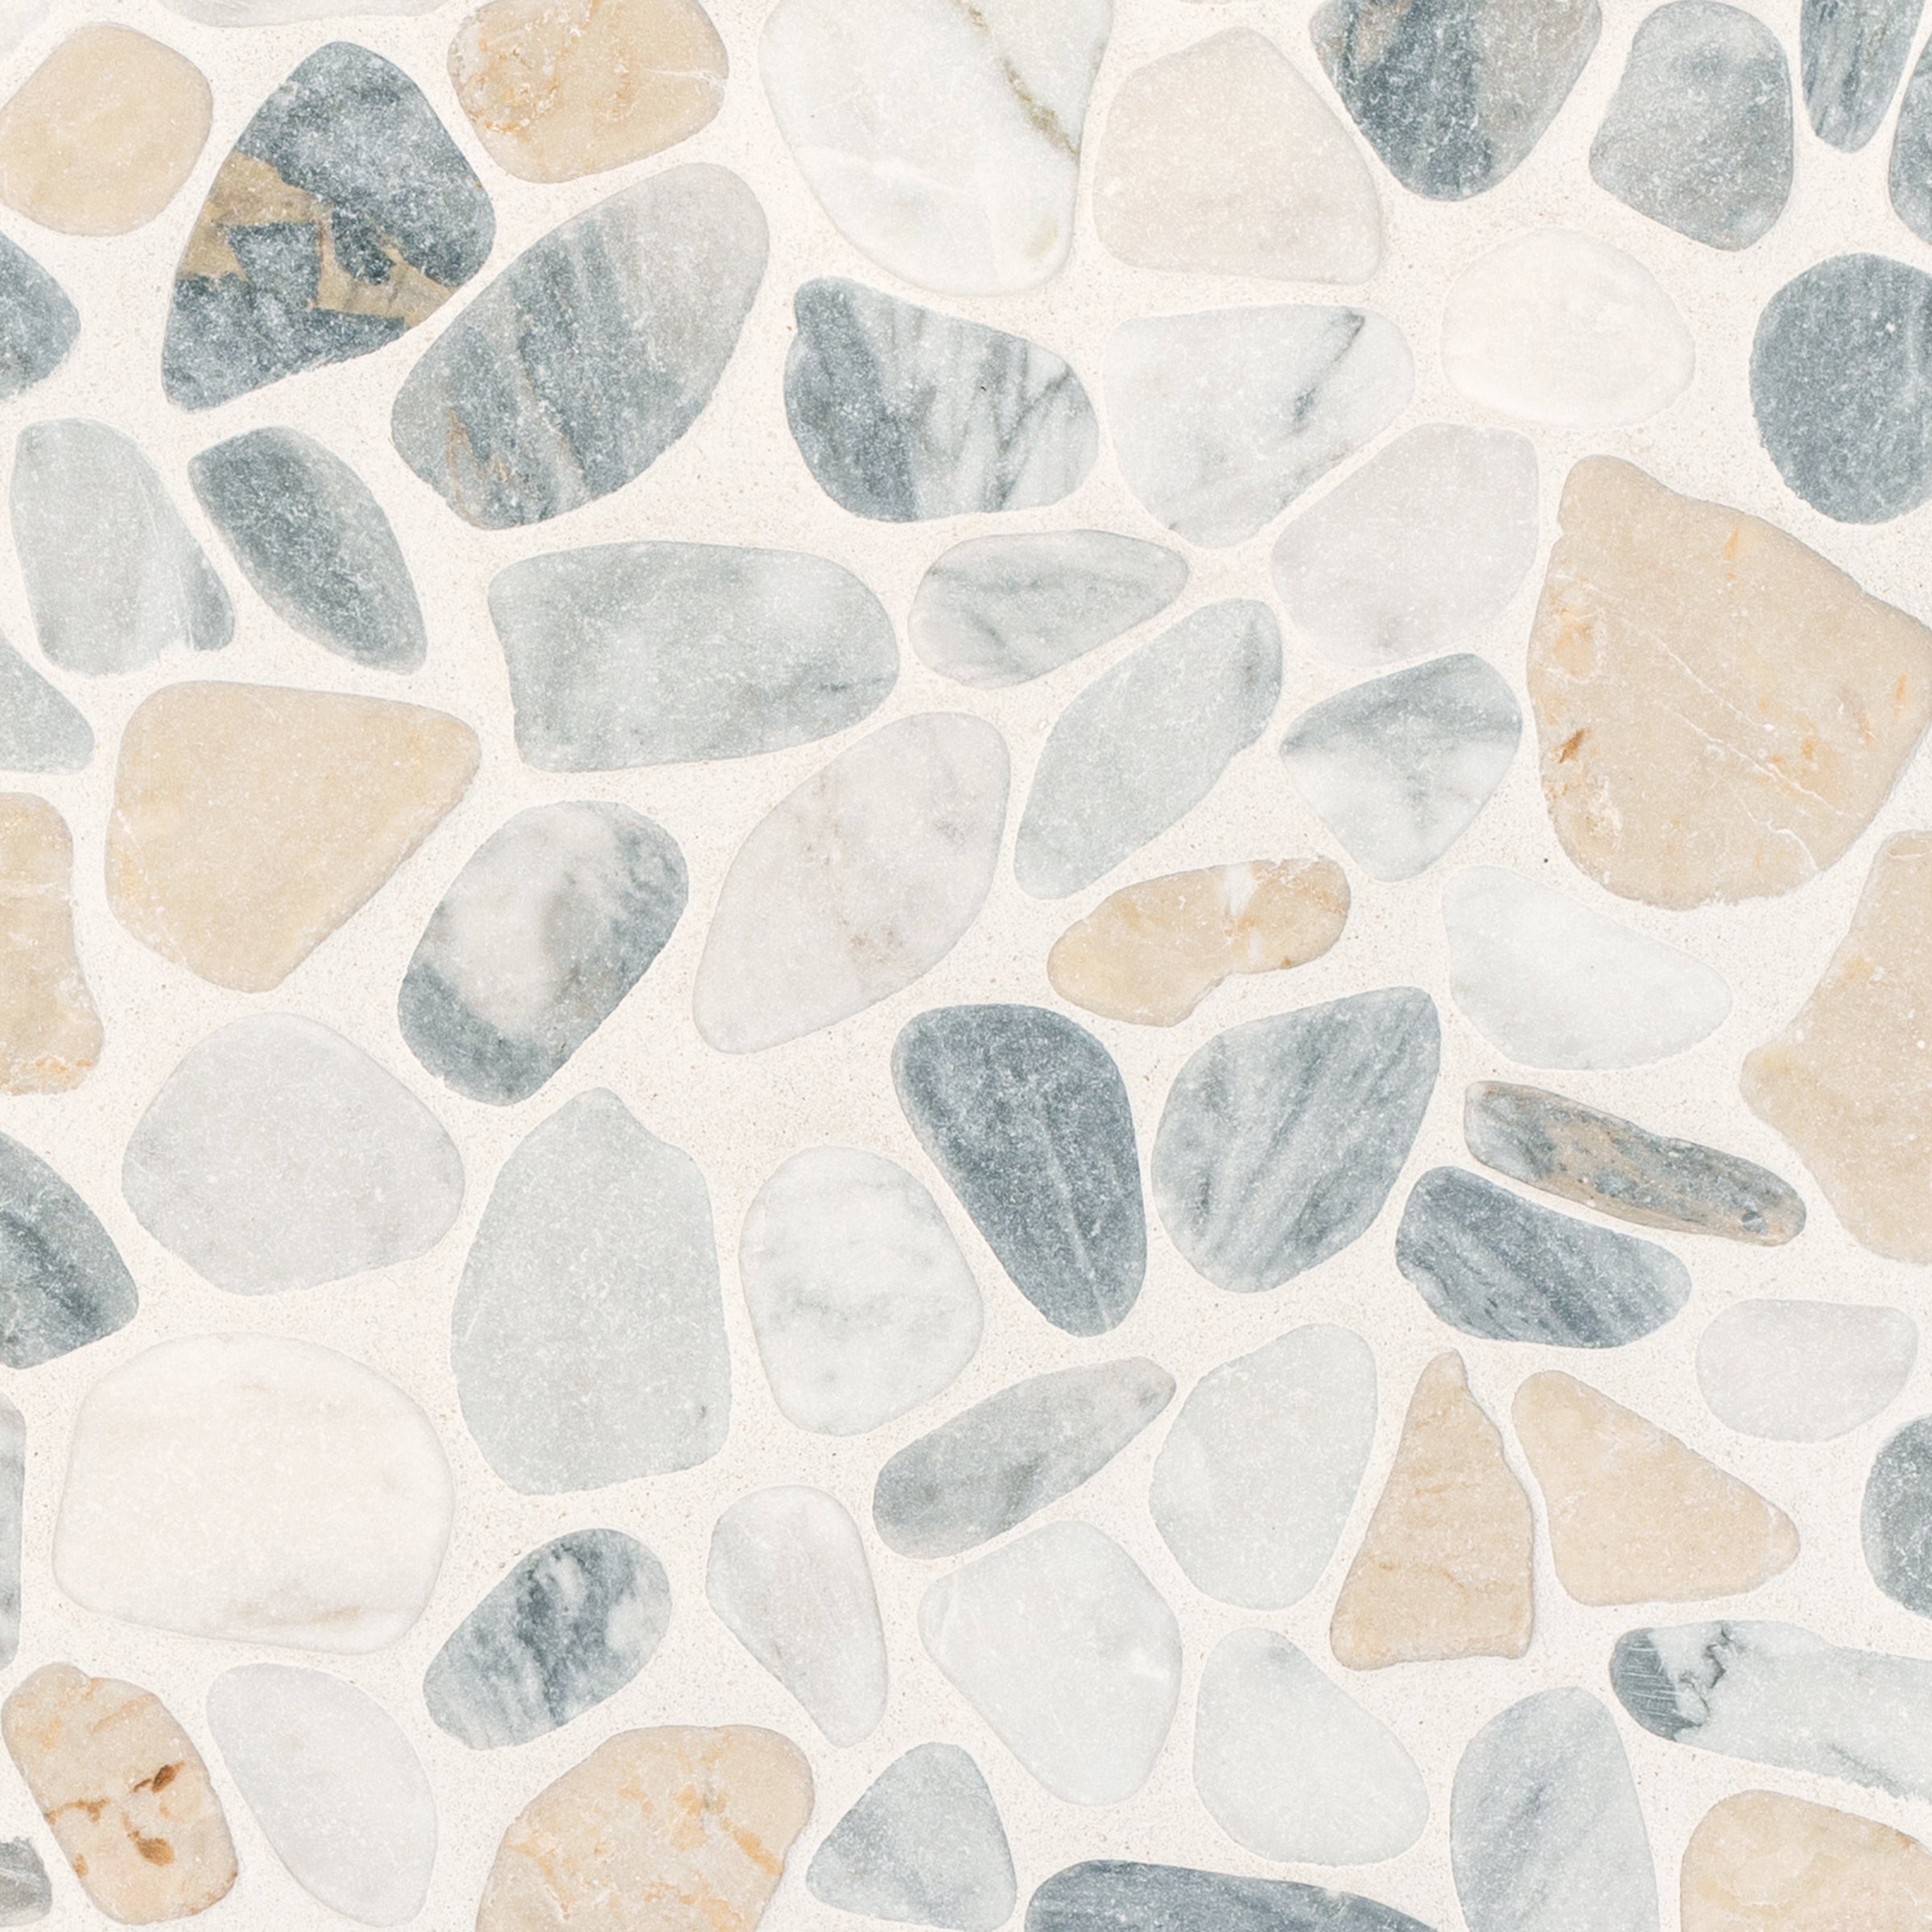
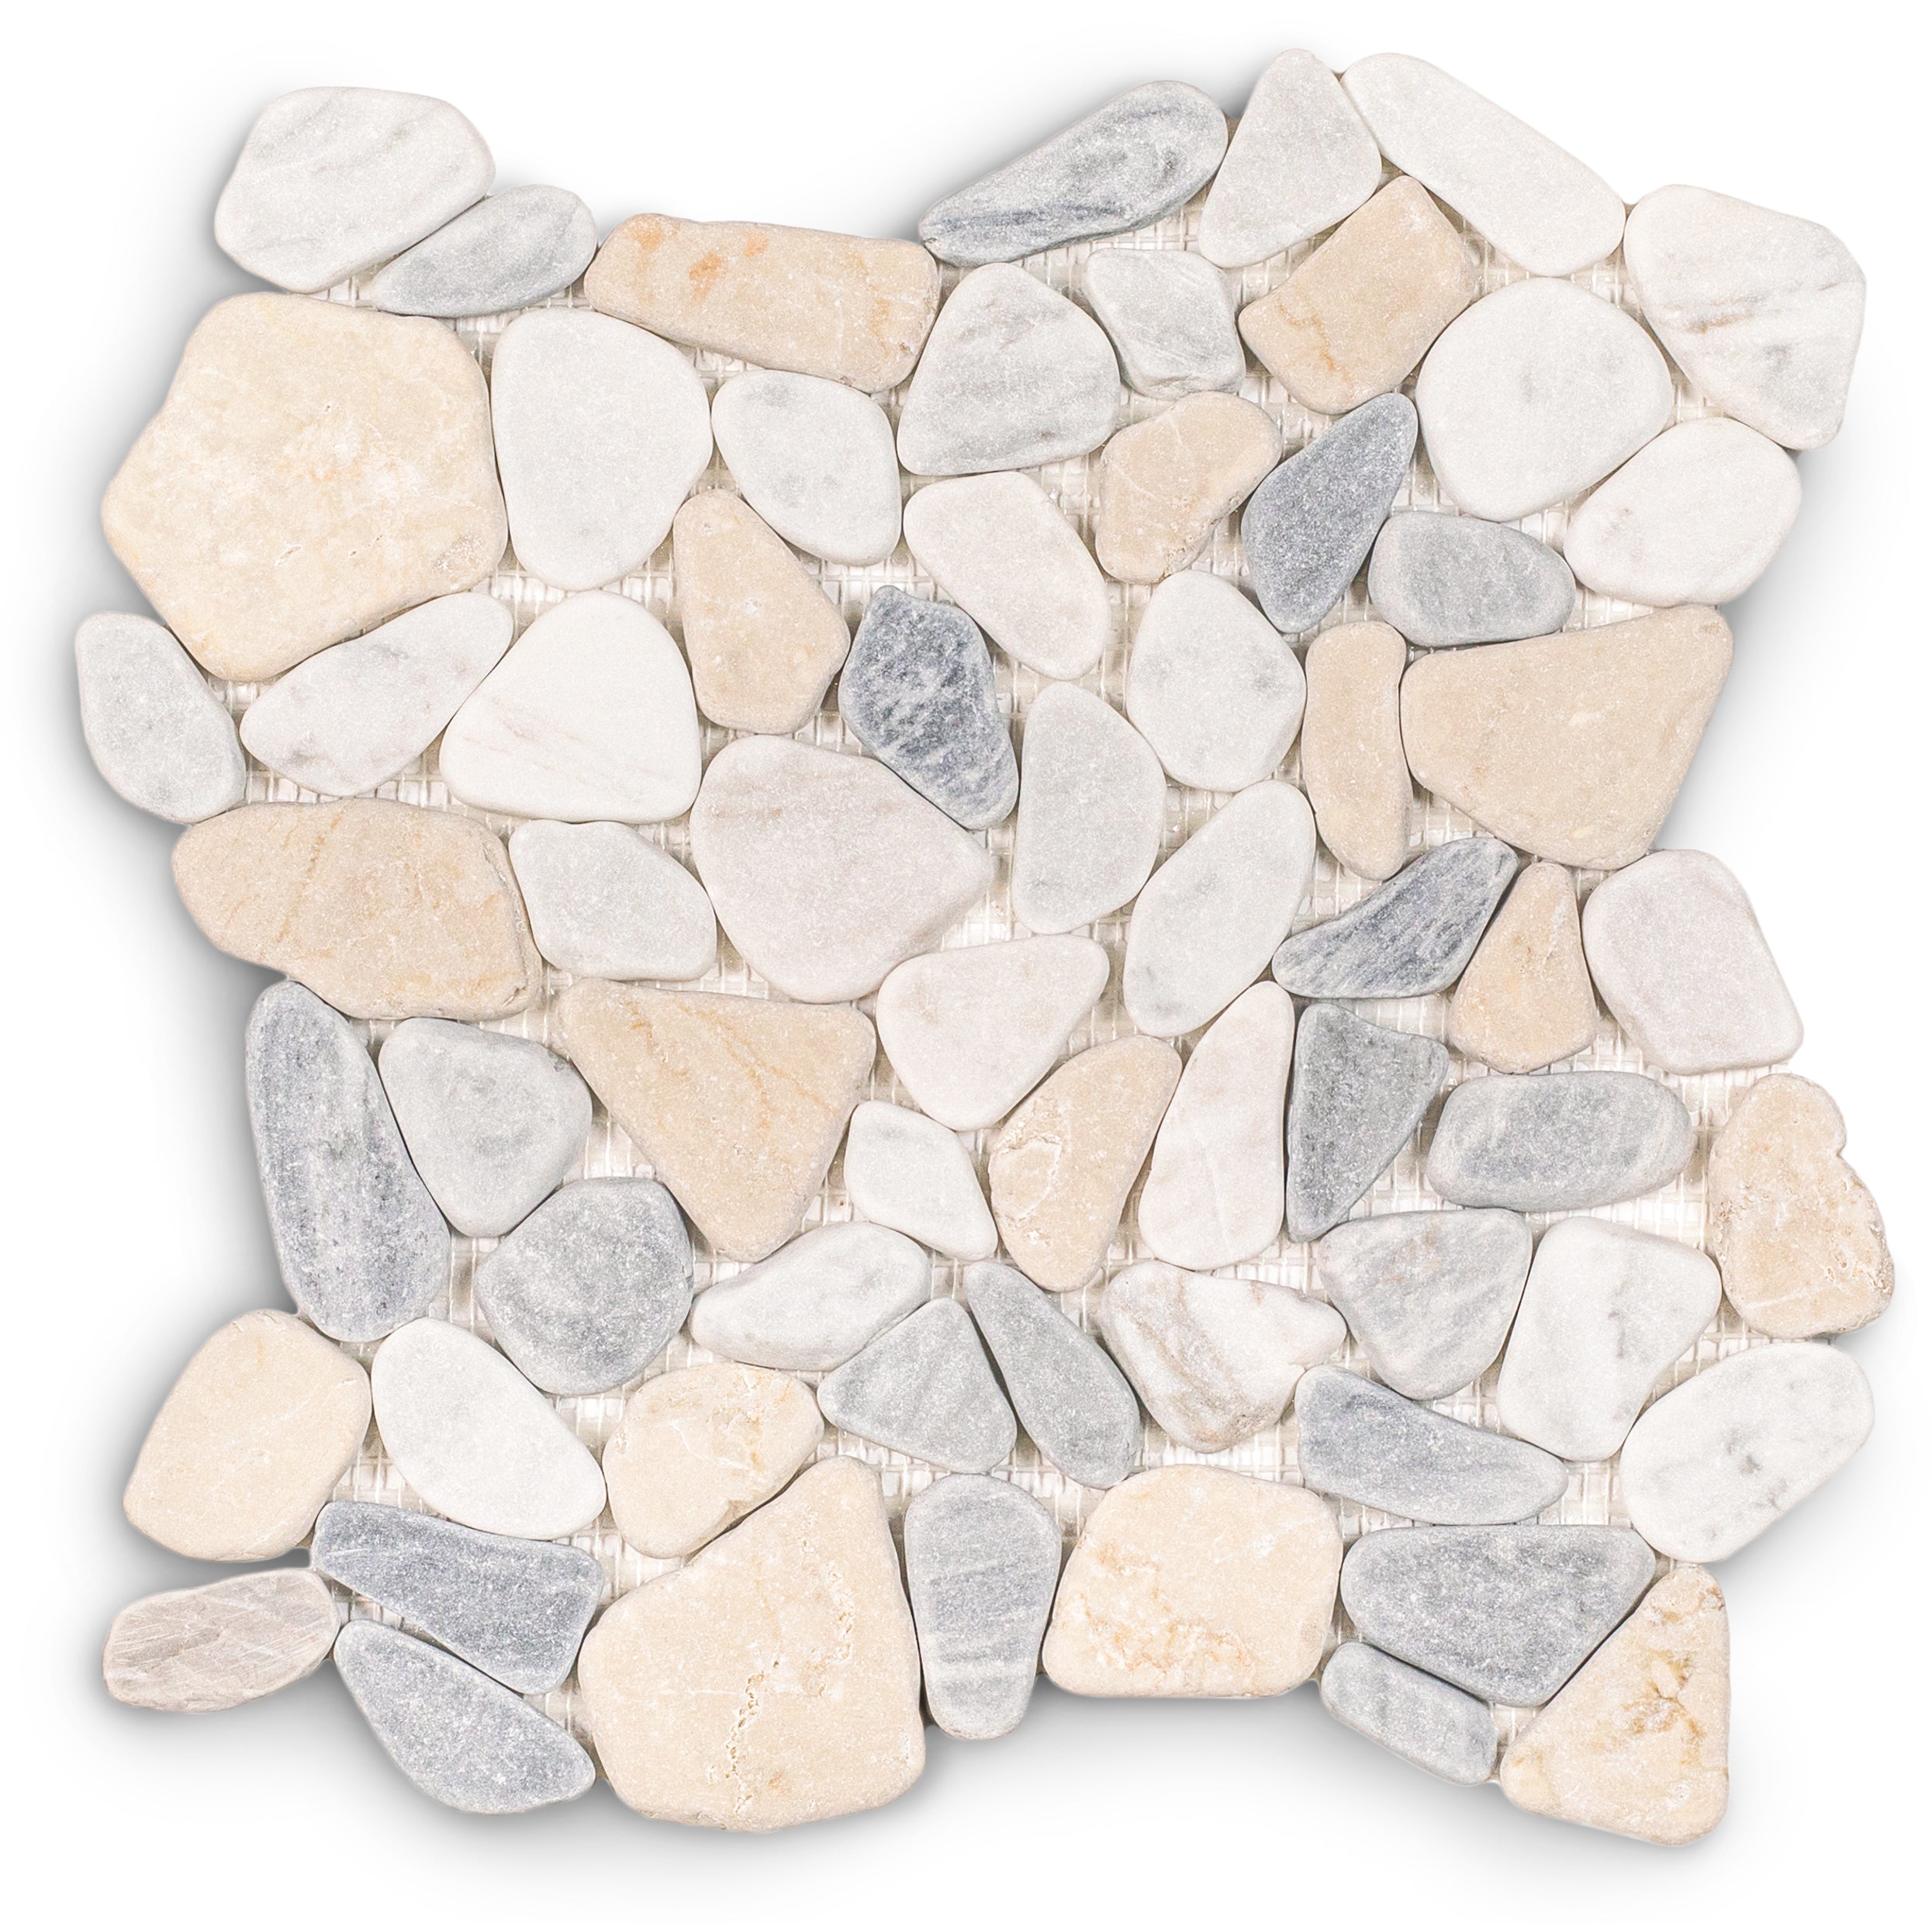
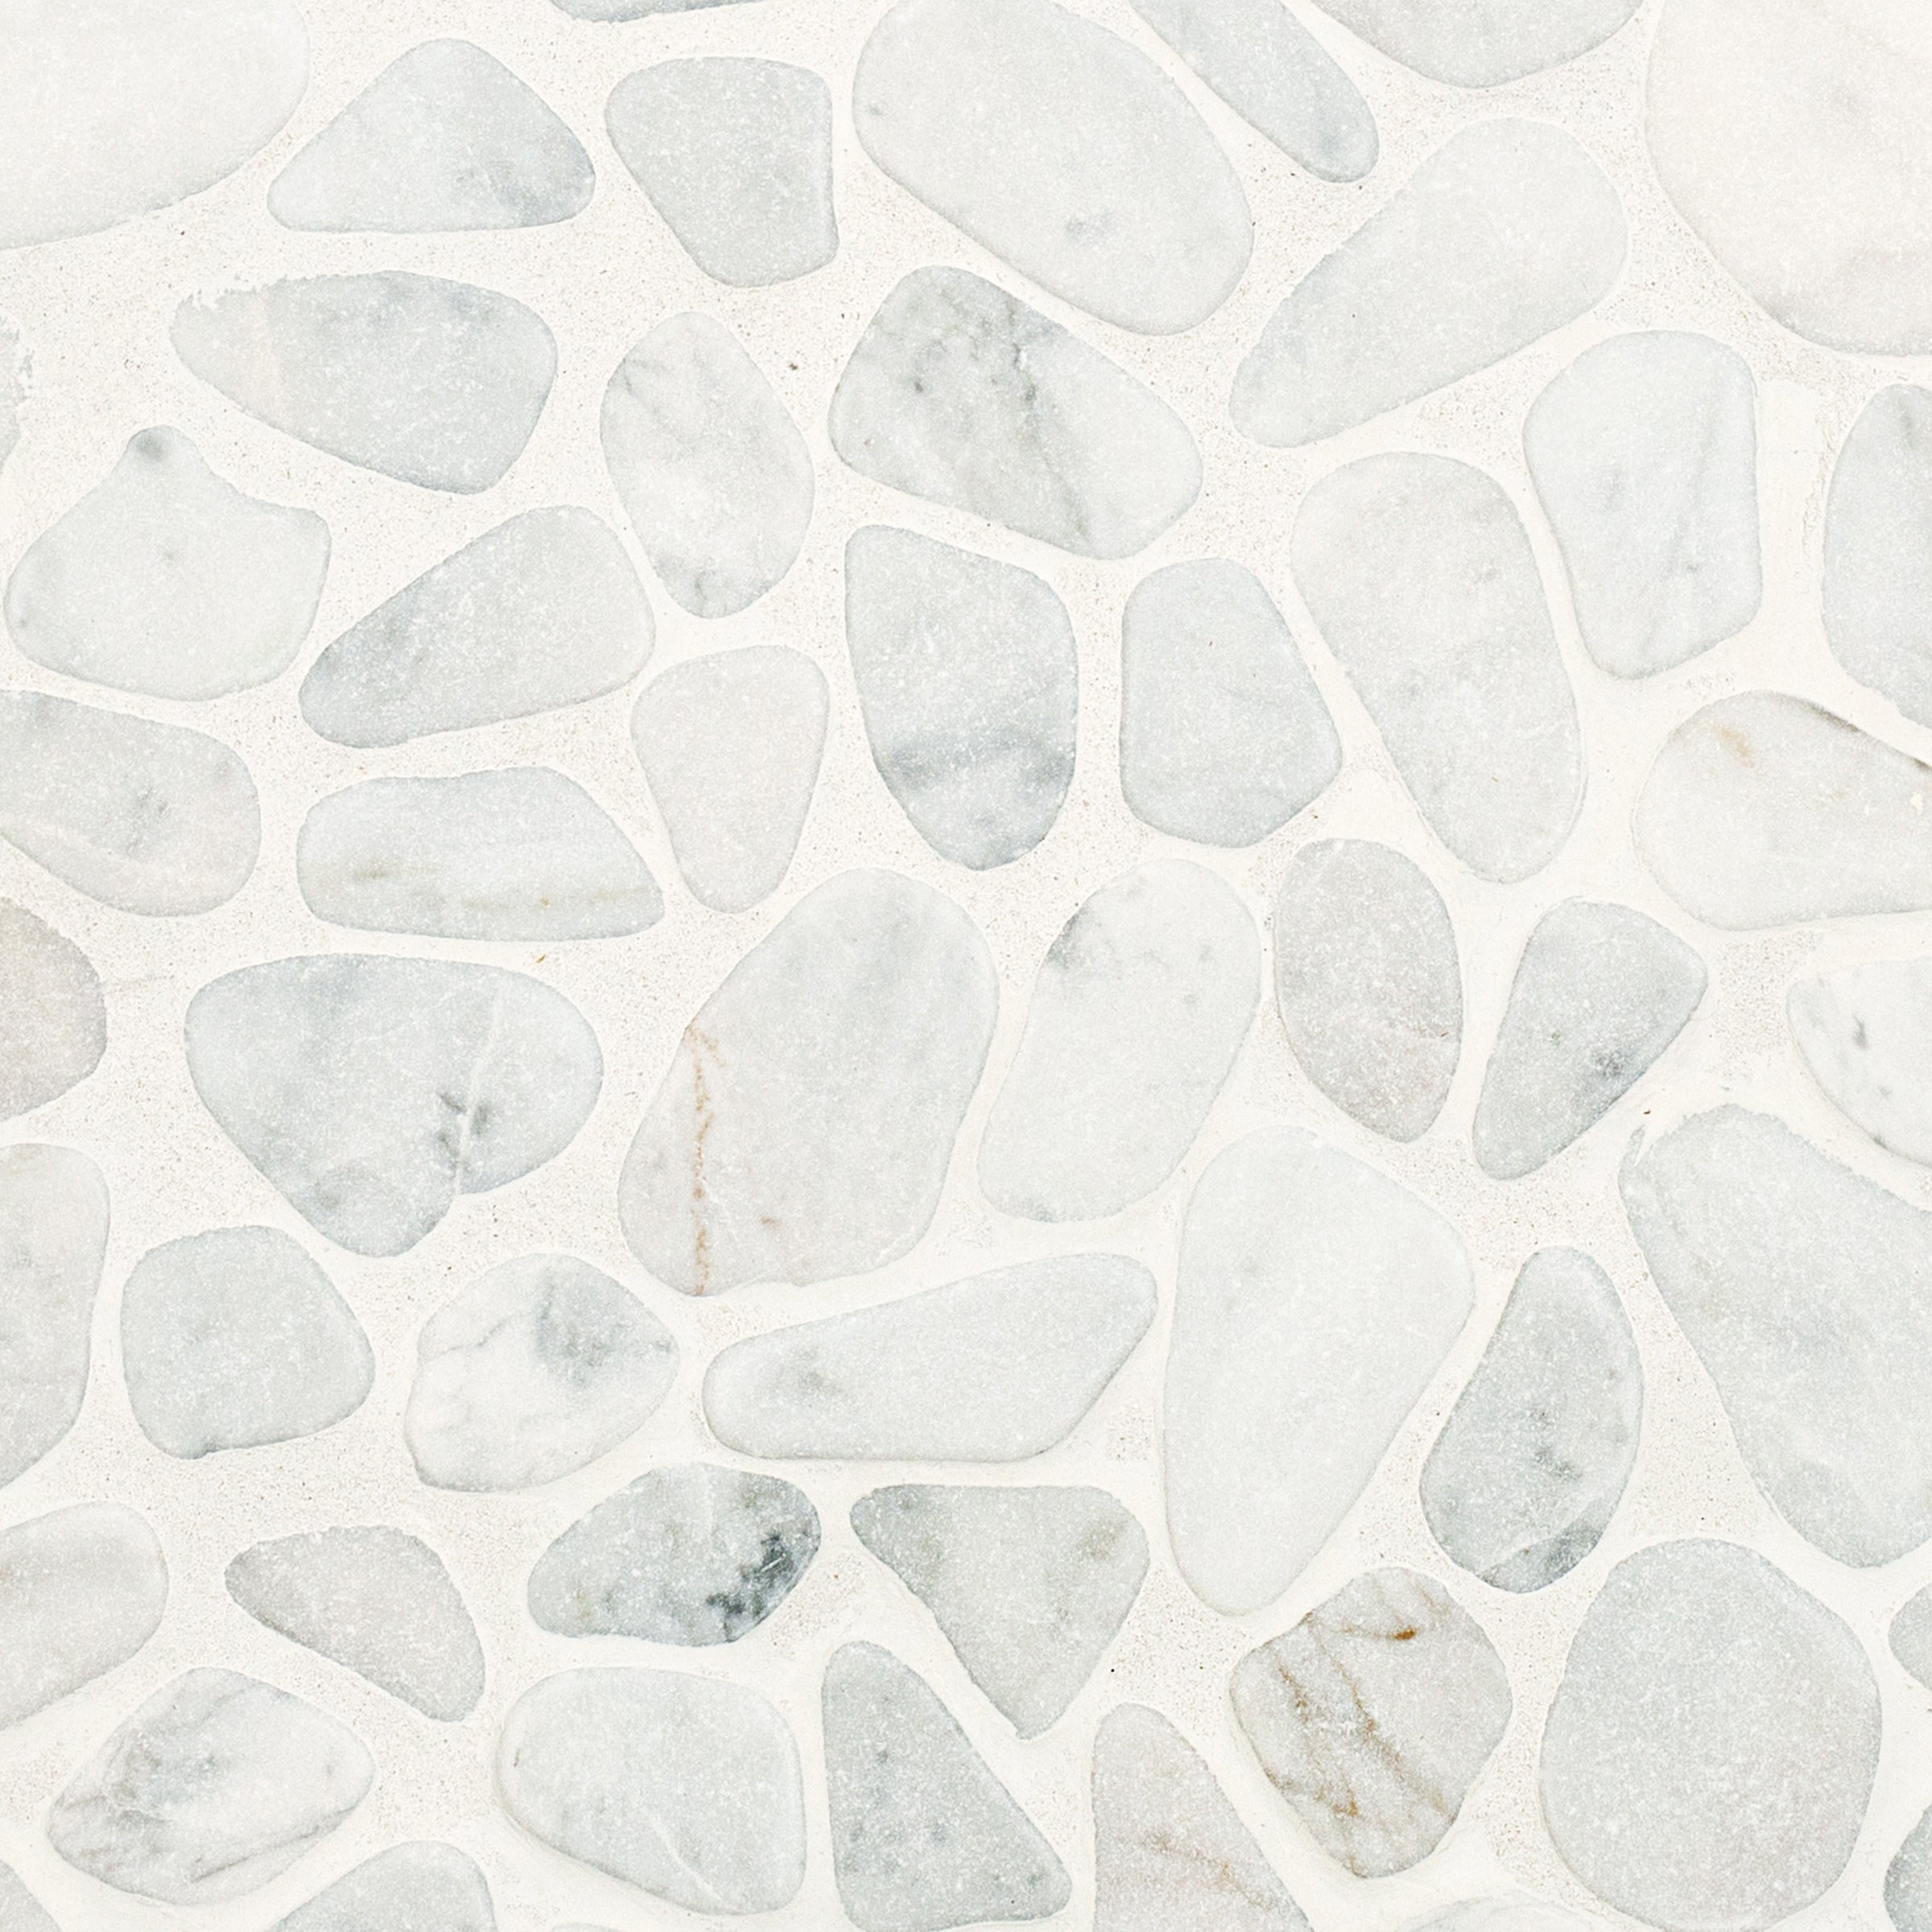
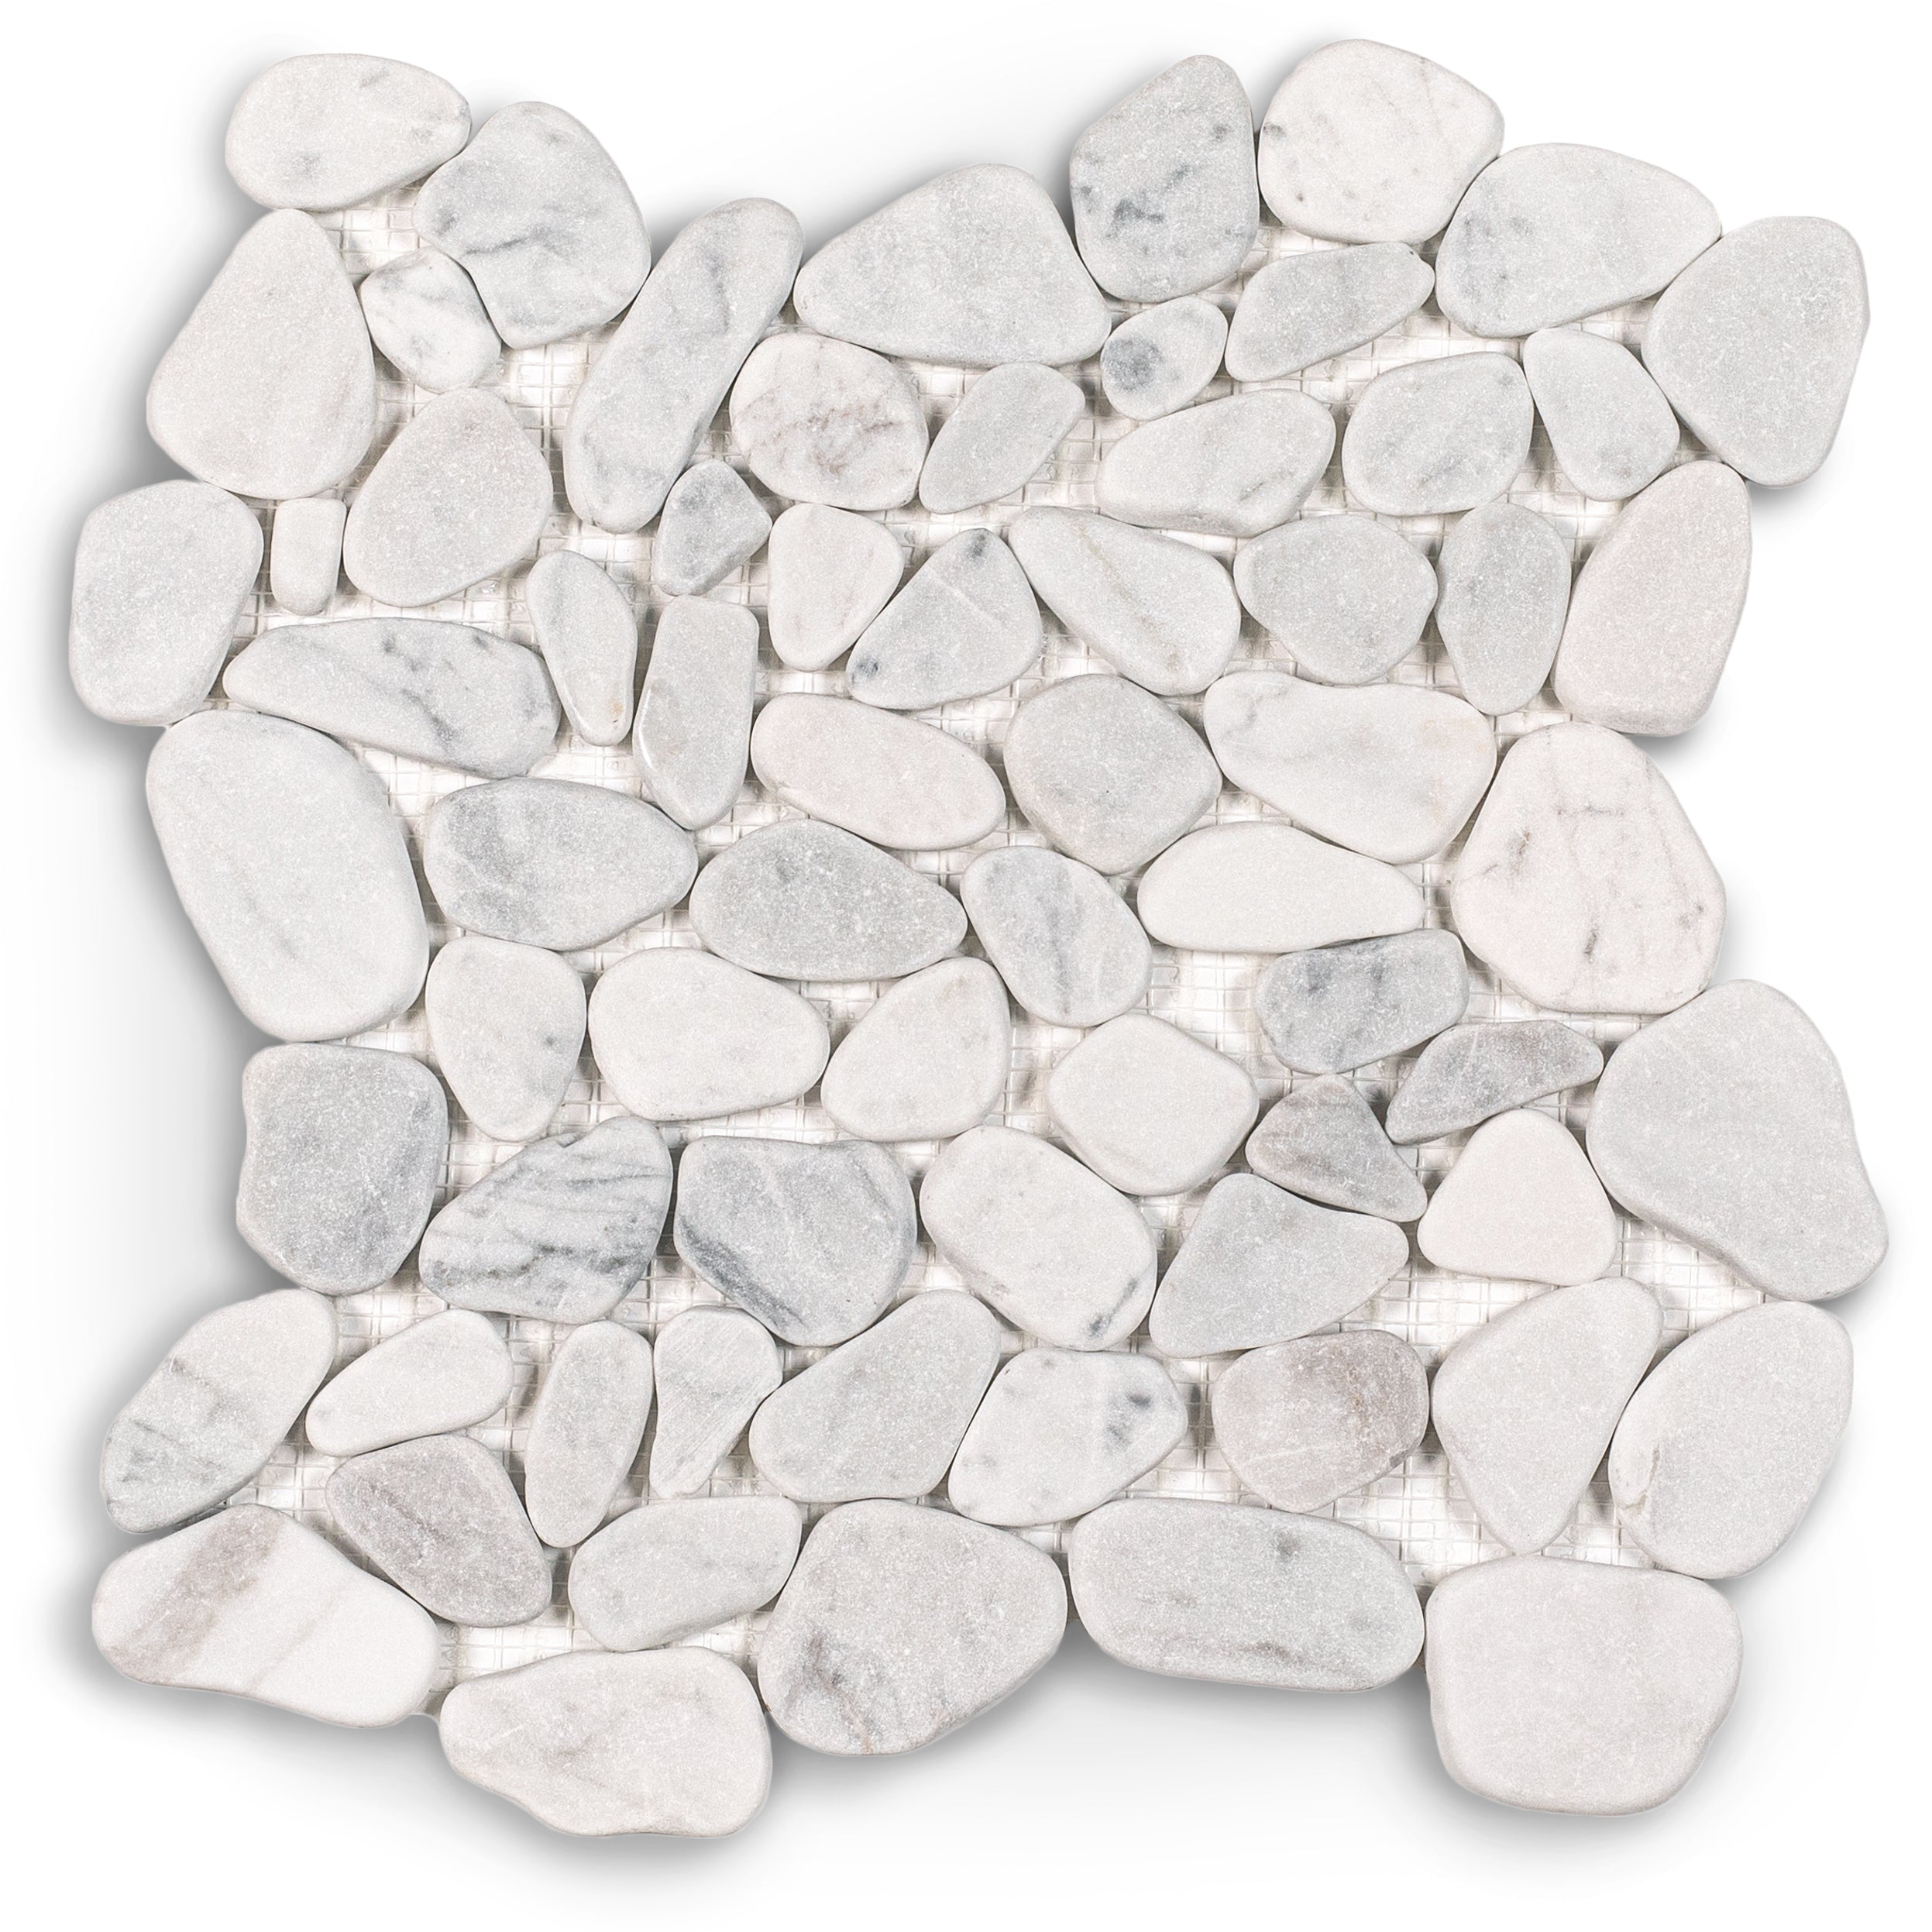
Carrara, Crema, Bardiglio Tumbled Pebble Mosaic
Rosso Verona Tumbled Marble Tile
Desert Tea Tumbled Marble Tile
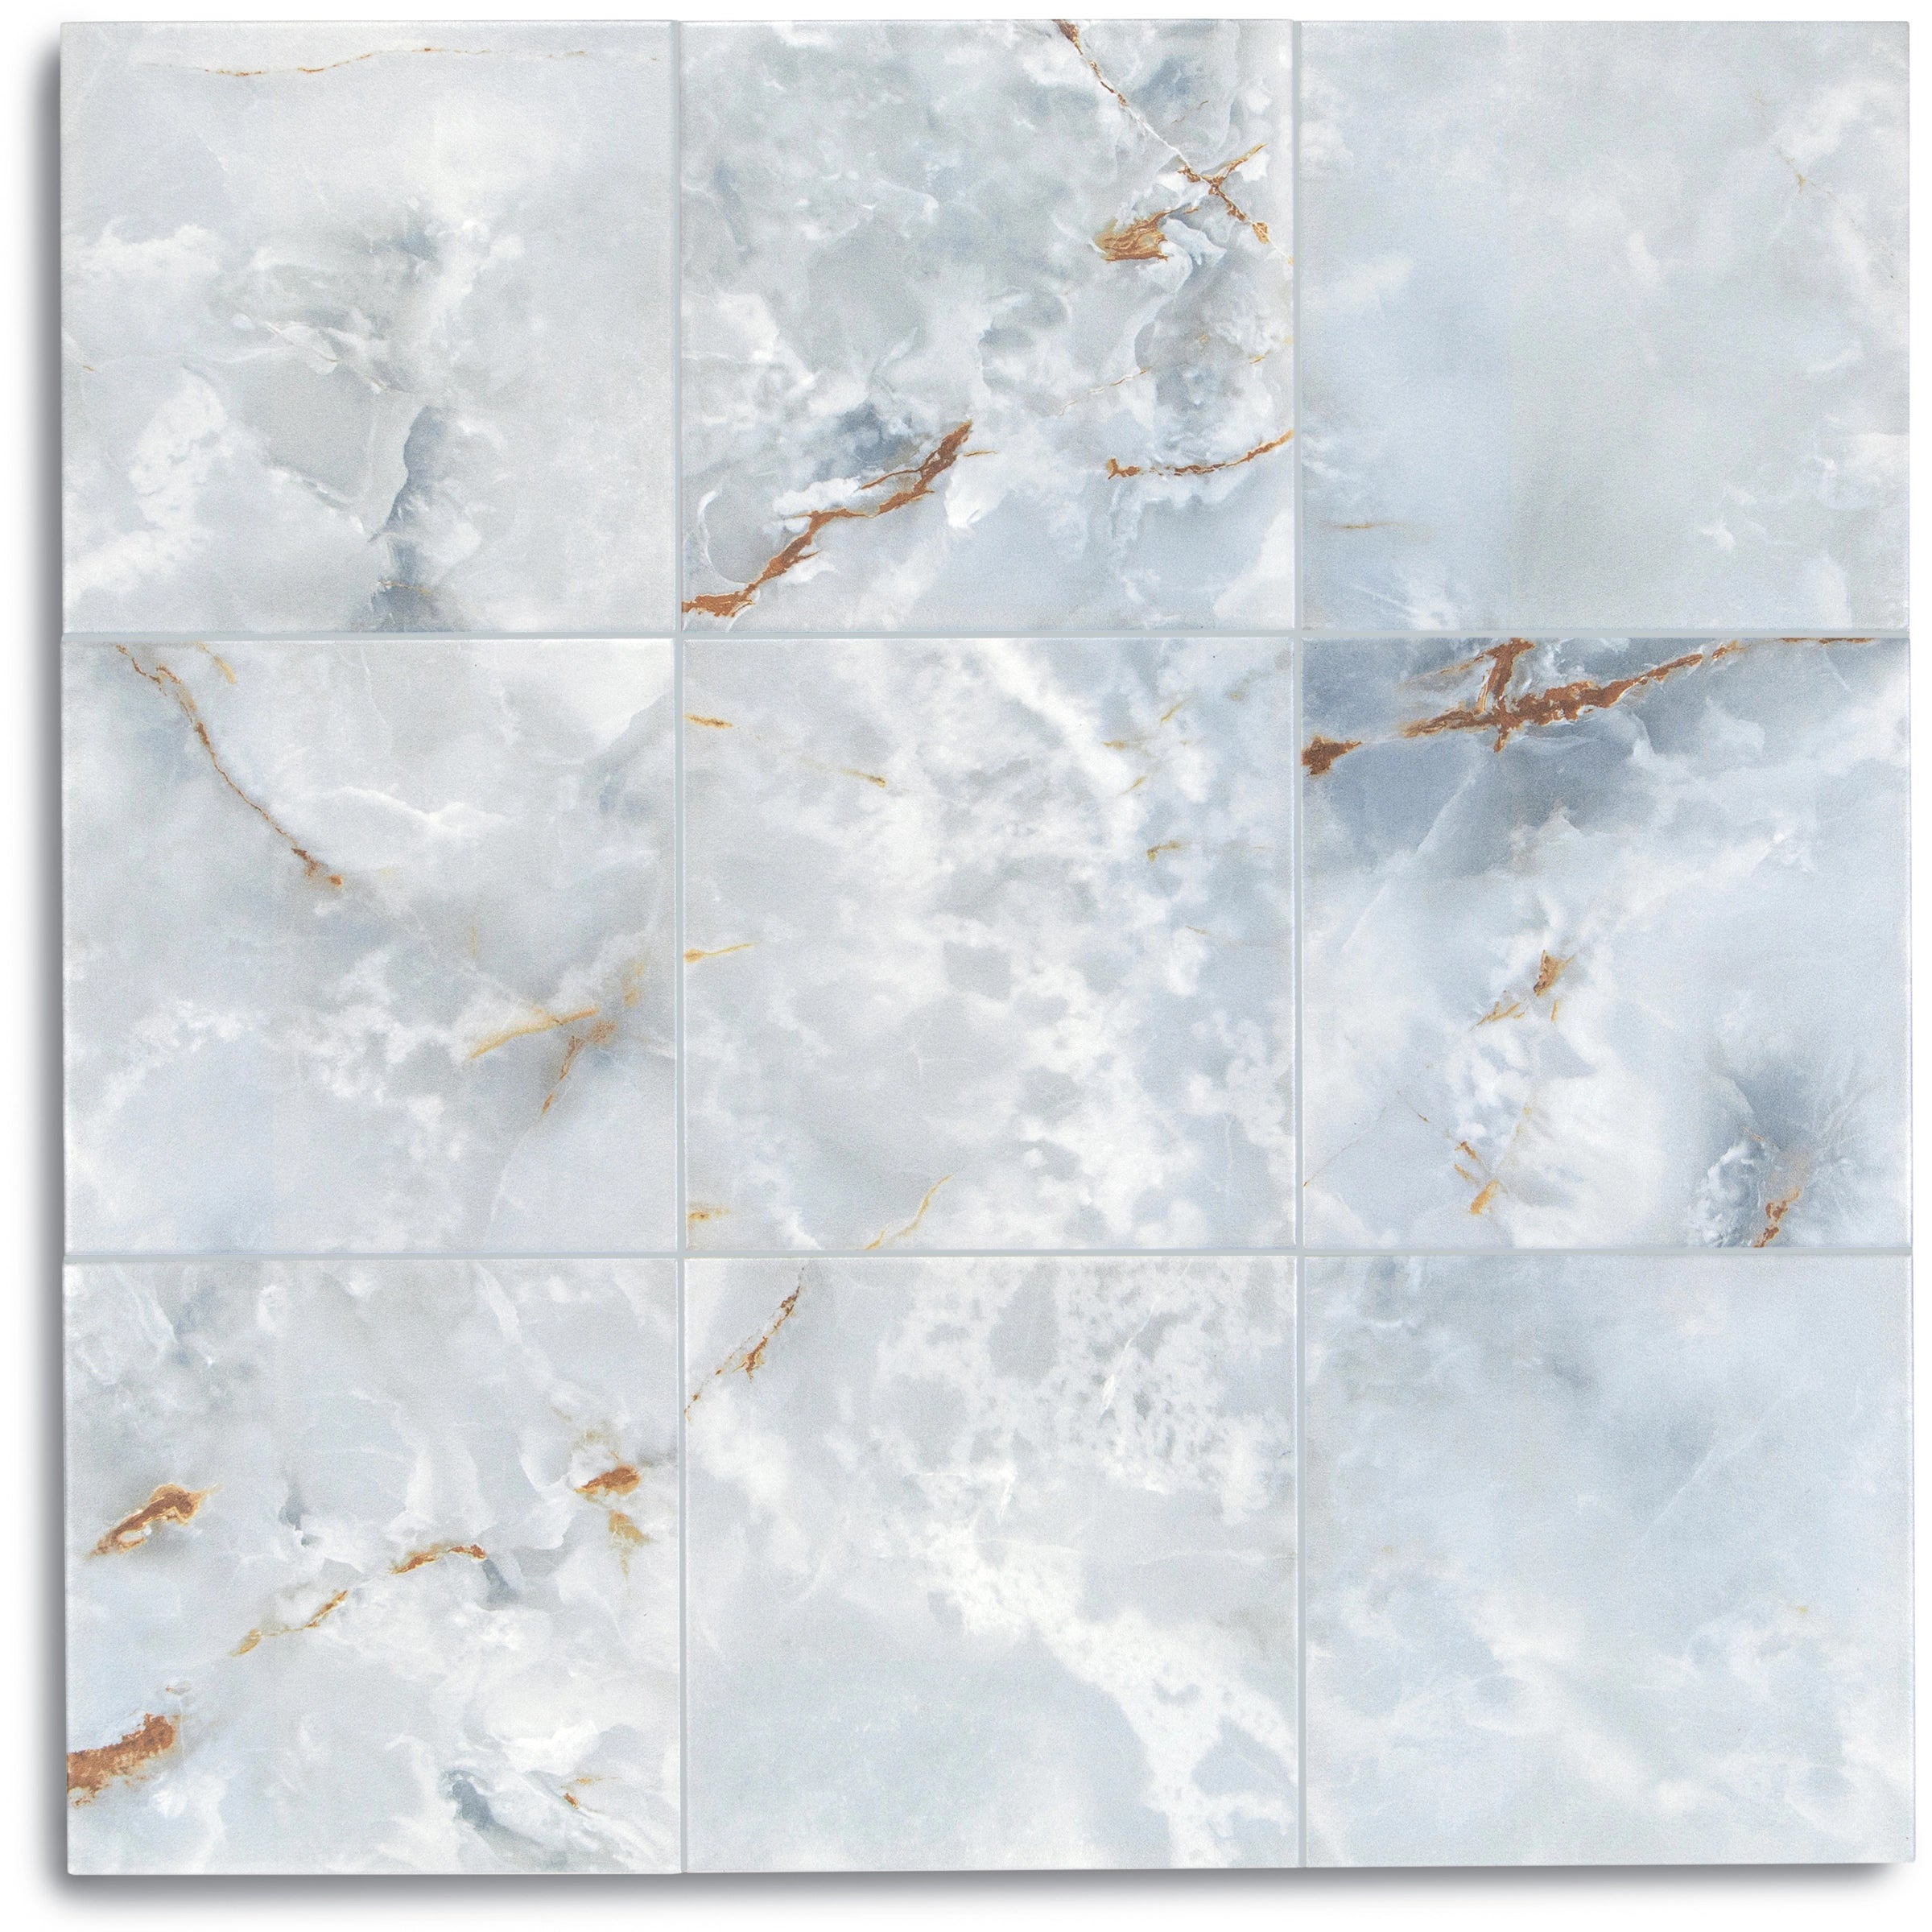
Belgian Blue Tumbled Marble Tile
Verde Guatemala Tumbled Marble Tile
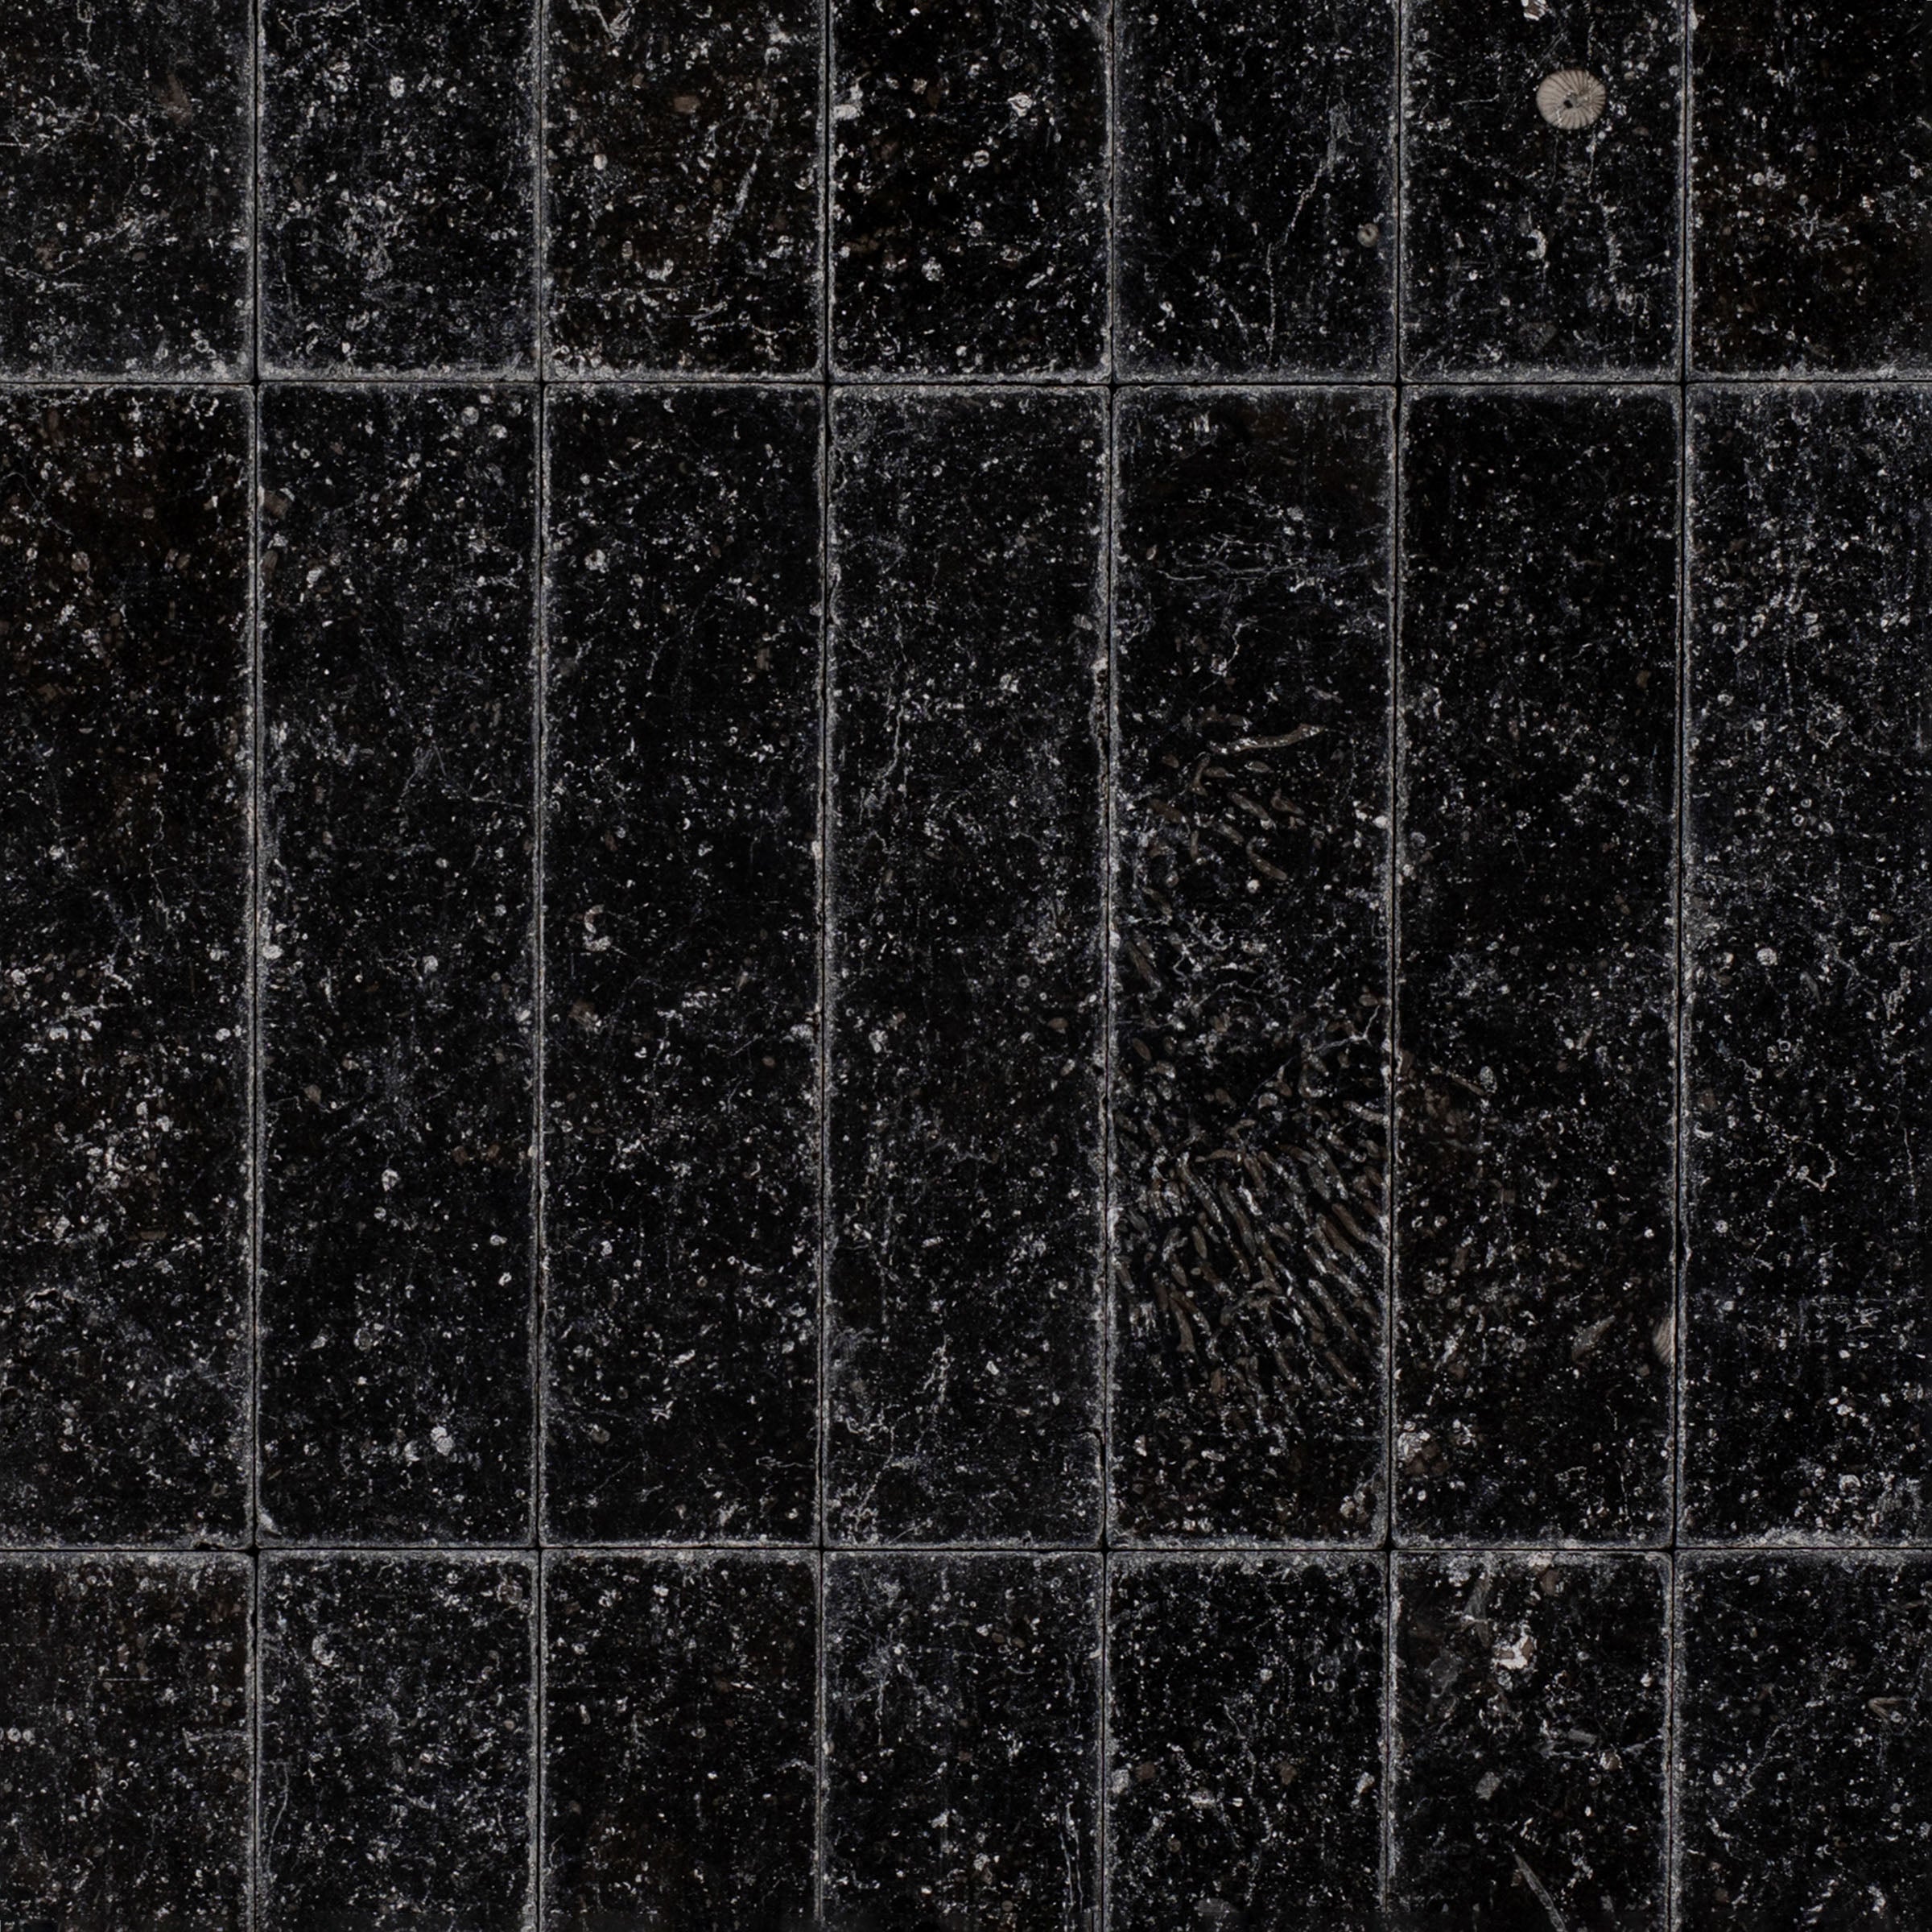
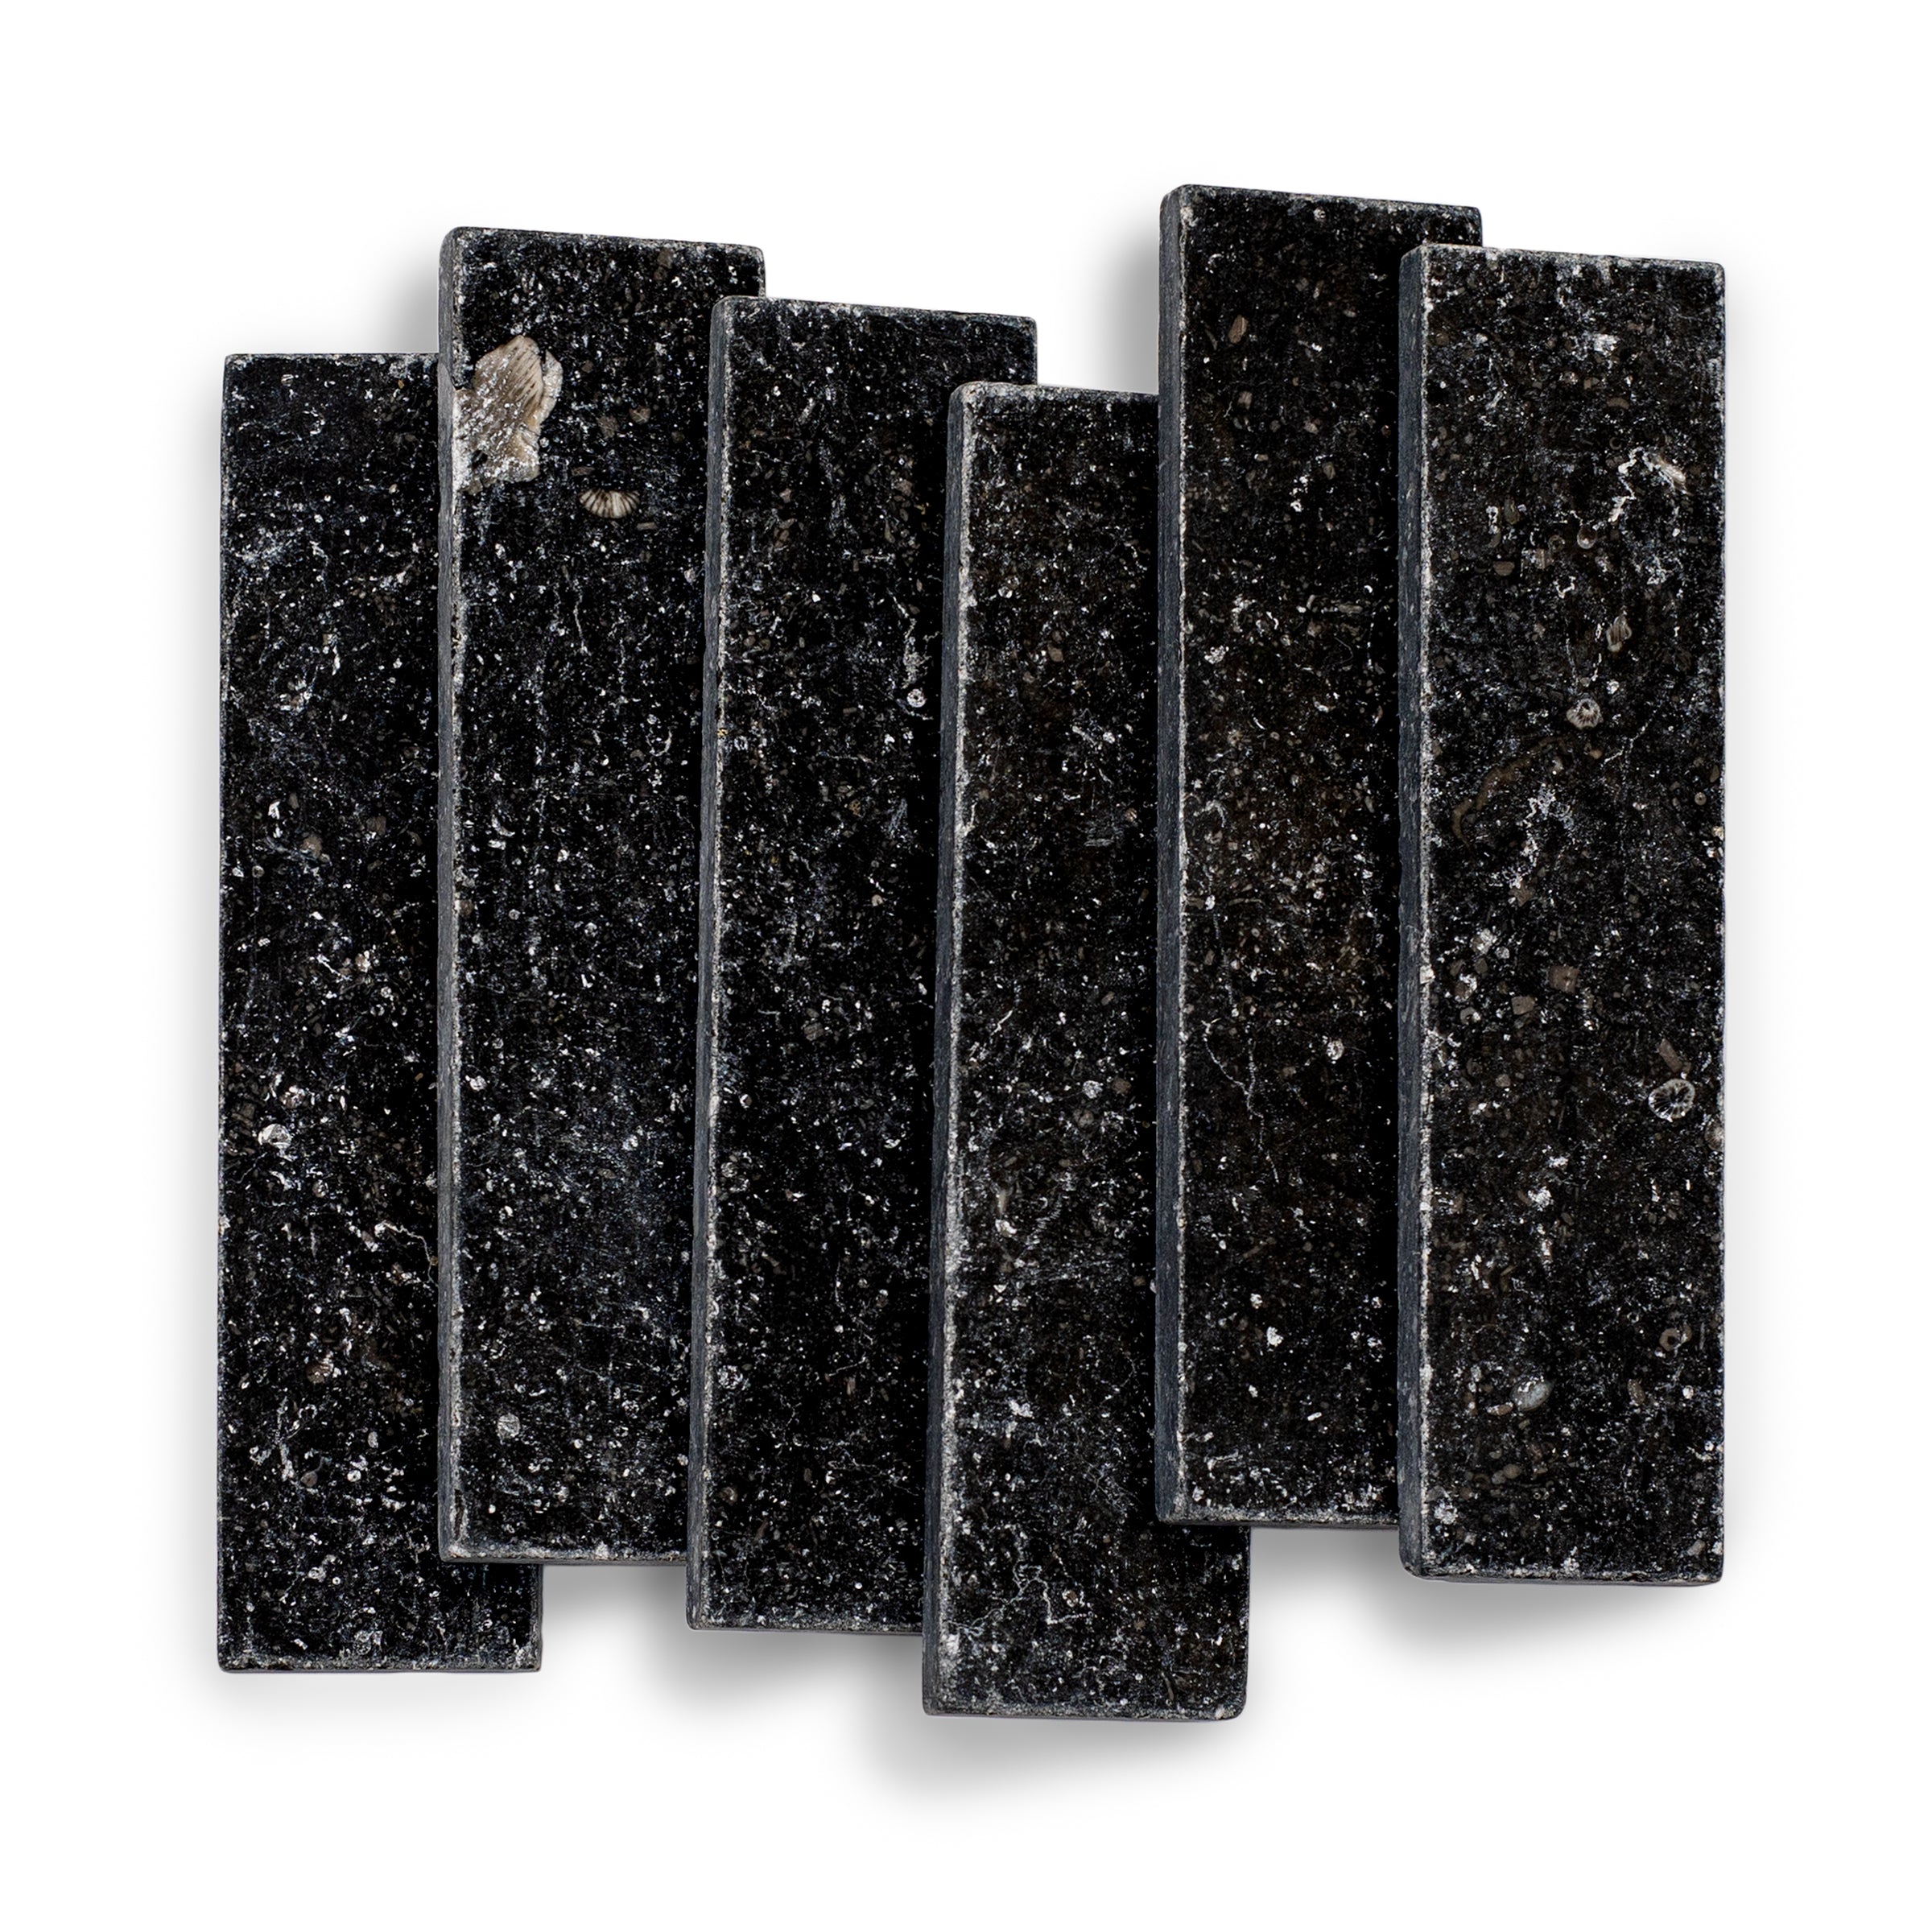
Belgian Blue Tumbled Marble Tile
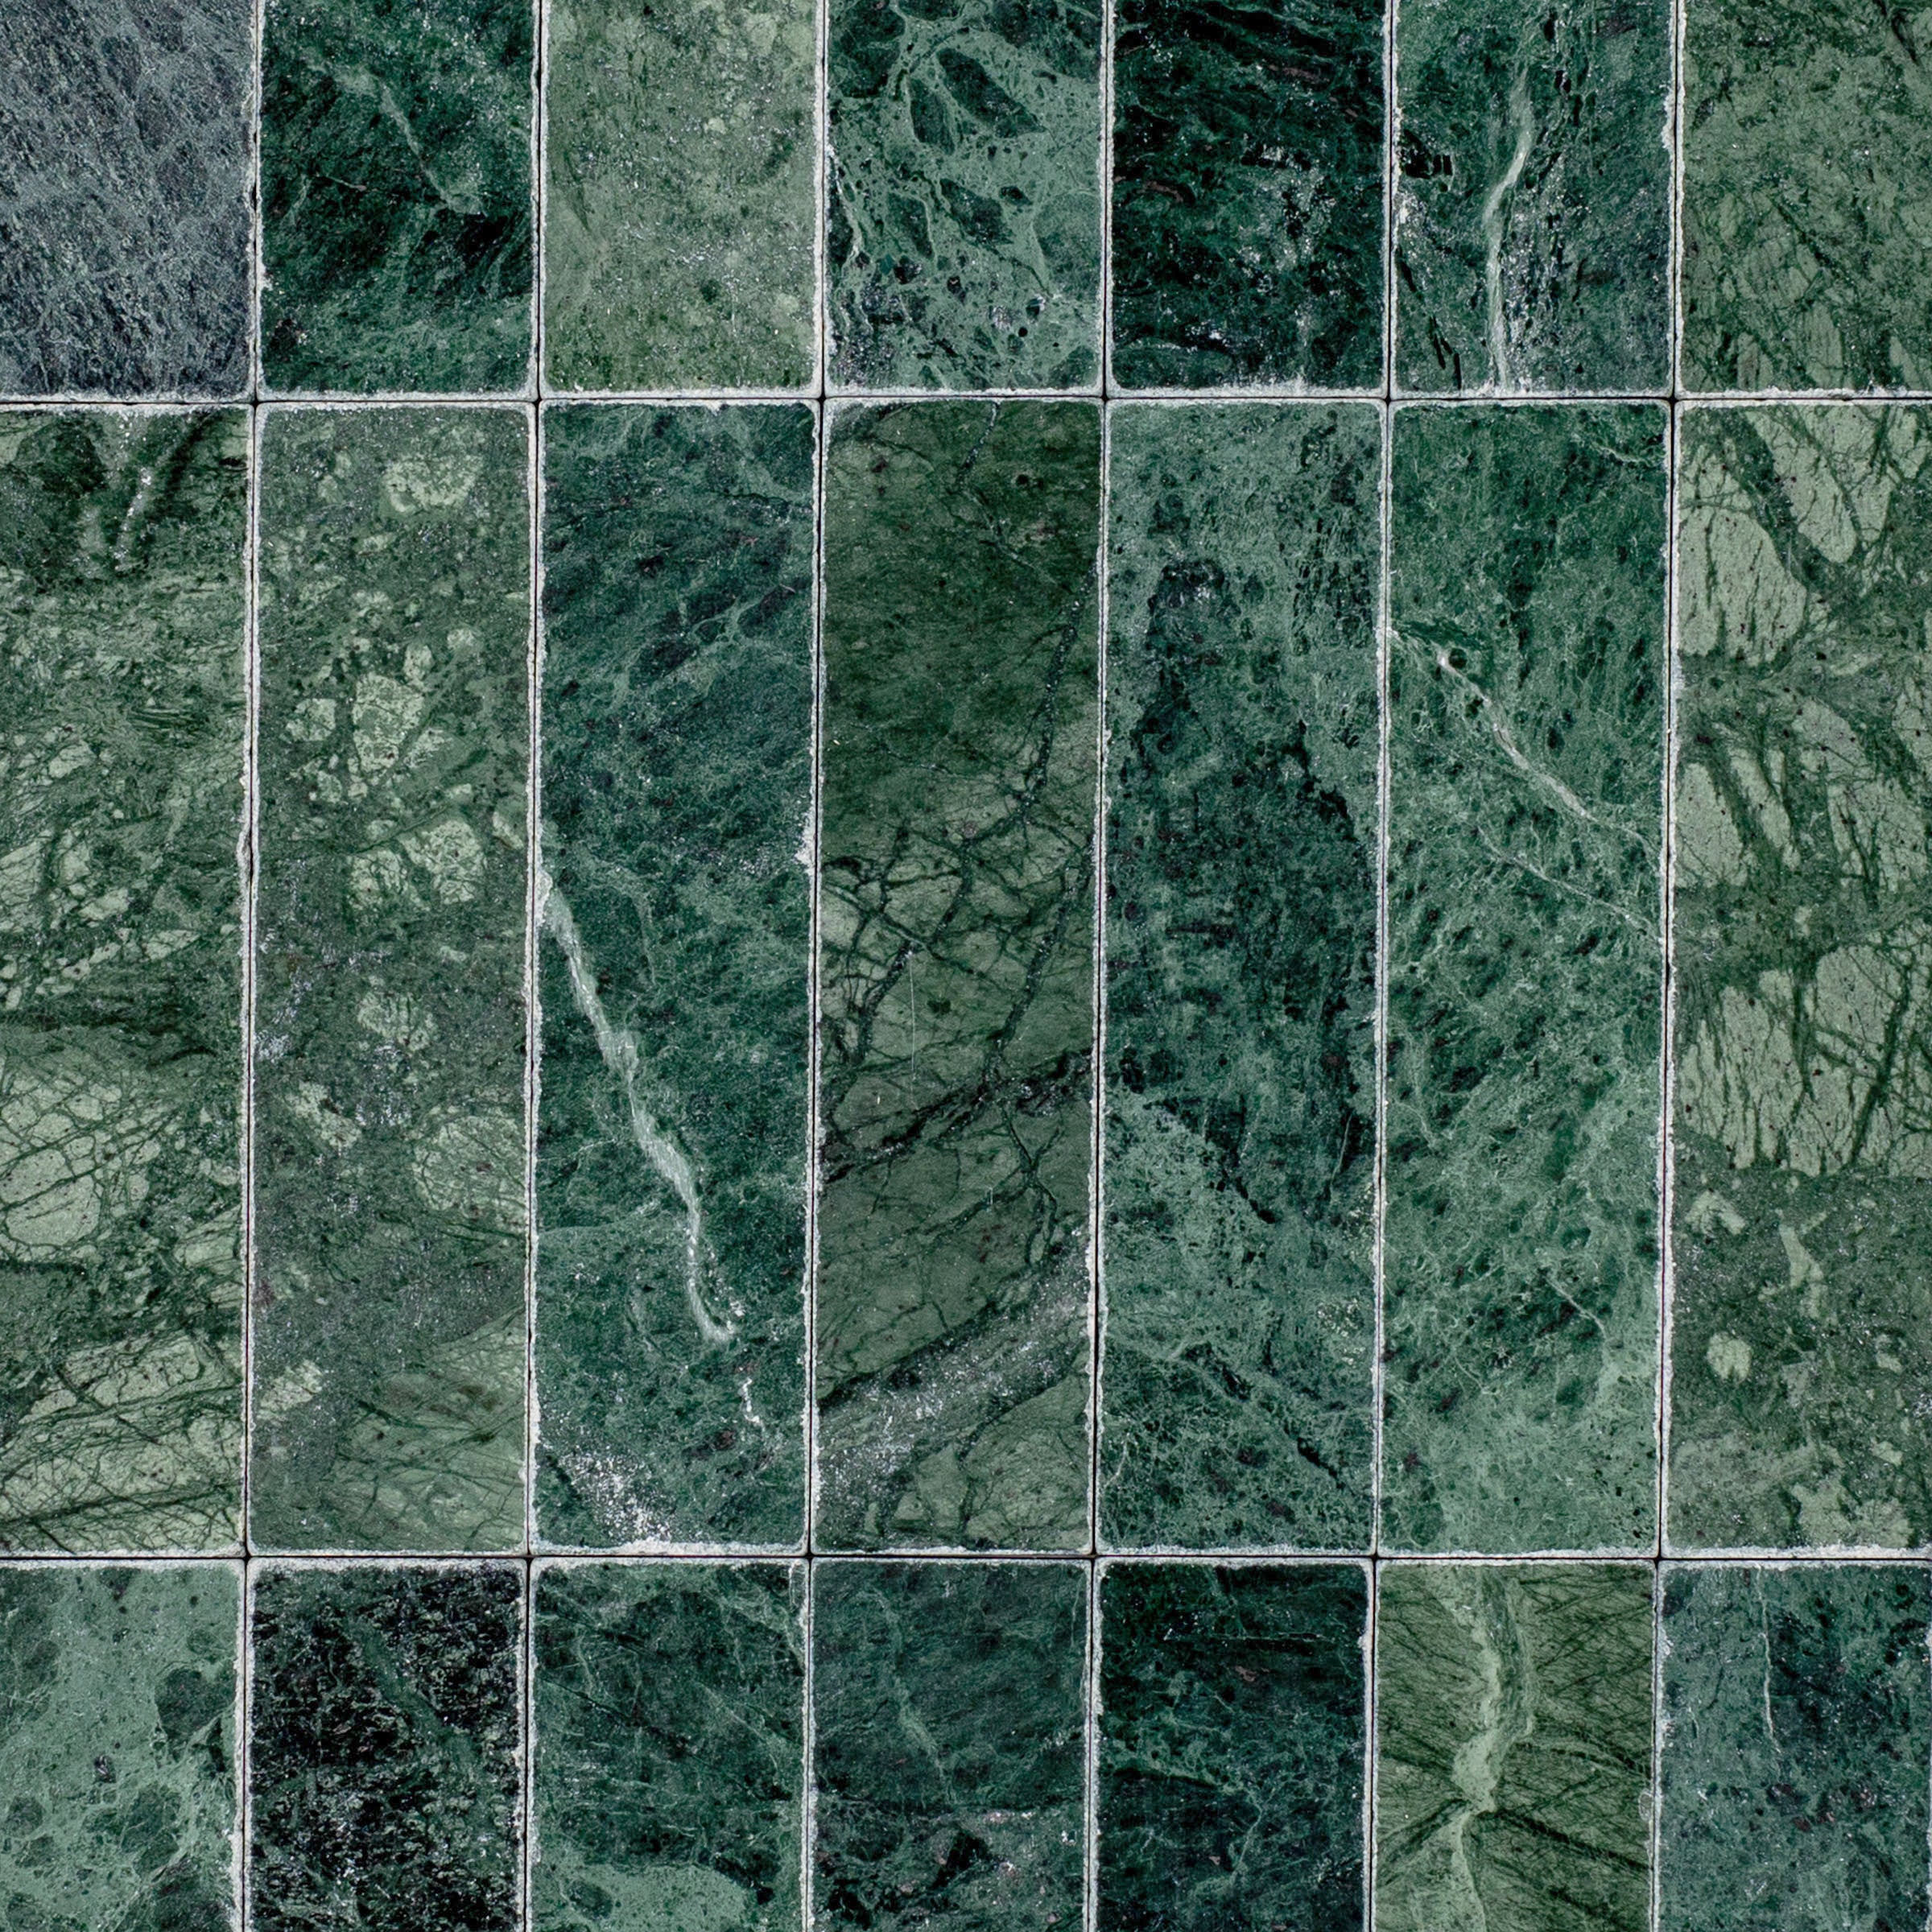
Verde Guatemala Tumbled Marble Tile
Desert Tea Tumbled Marble Tile
Taj Matte Marble Look Porcelain Tile
Breccia Capraia 3D Mable Look Porcelain Tile

Van Gogh 1 3D Marble Look Porcelain Tile
Terracotta Cross Statuario Inset Mosaic
Terracotta Cross Nero Marquina Inset Mosaic
Royal Grey Satin Marble Look Porcelain Tile
Paonazzo Matte Marble Look Porcelain Tile
Ivory Marble Look Matte Porcelain Tile
Amazzonite Matte Marble Look Porcelain Tile
Montblack Matte Marble Look Porcelain Tile
Spider Gold Matte Marble Look Porcelain Tile
Carrara Belgian Blue Tumbled Stone Checkerboard
Carrara Bardiglio Tumbled Stone Checkerboard


Bardiglio Desert Tea Tumbled Stone Checkerboard
White & Ecru Octagon Zellige Mosaic
Thassos, Carrara, Bardiglio Gingham Marble Mosaic
White & Ecru 2x2 Zellige Checkerboard Mosaic
Unglazed & White Octagon Zellige Mosaic
White & Black Octagon Zellige Mosaic
Rosso Verona 1x1 Hand Chipped Marble Mosaic
Bianco Carrara Octagon w/ Nero Marquina Dot Mosaic
Cream 2x2 Forma Porcelain Mosaic
Cotto 2x2 Forma Porcelain Mosaic


Cotto Cream Pink Forma Butterfly Porcelain Mosaic
Chocolate 2" Hexagon Textured Terracotta Mosaic
Carrara Running Bond Marble Mosaic
Van Gogh 1 3D Marble Look Porcelain Tile
Calacatta Running Bond Marble Mosaic


Pink 2x2 Forma Porcelain Mosaic

Almond 2x2 Cement Look Porcelain Tile Mosaic


White & Oxblood 2x2 Zellige Checkerboard Mosaic


Unglazed & Black Octagon Zellige Mosaic


Pearl Hammered Limestone Look Matte Porcelain Mosaic
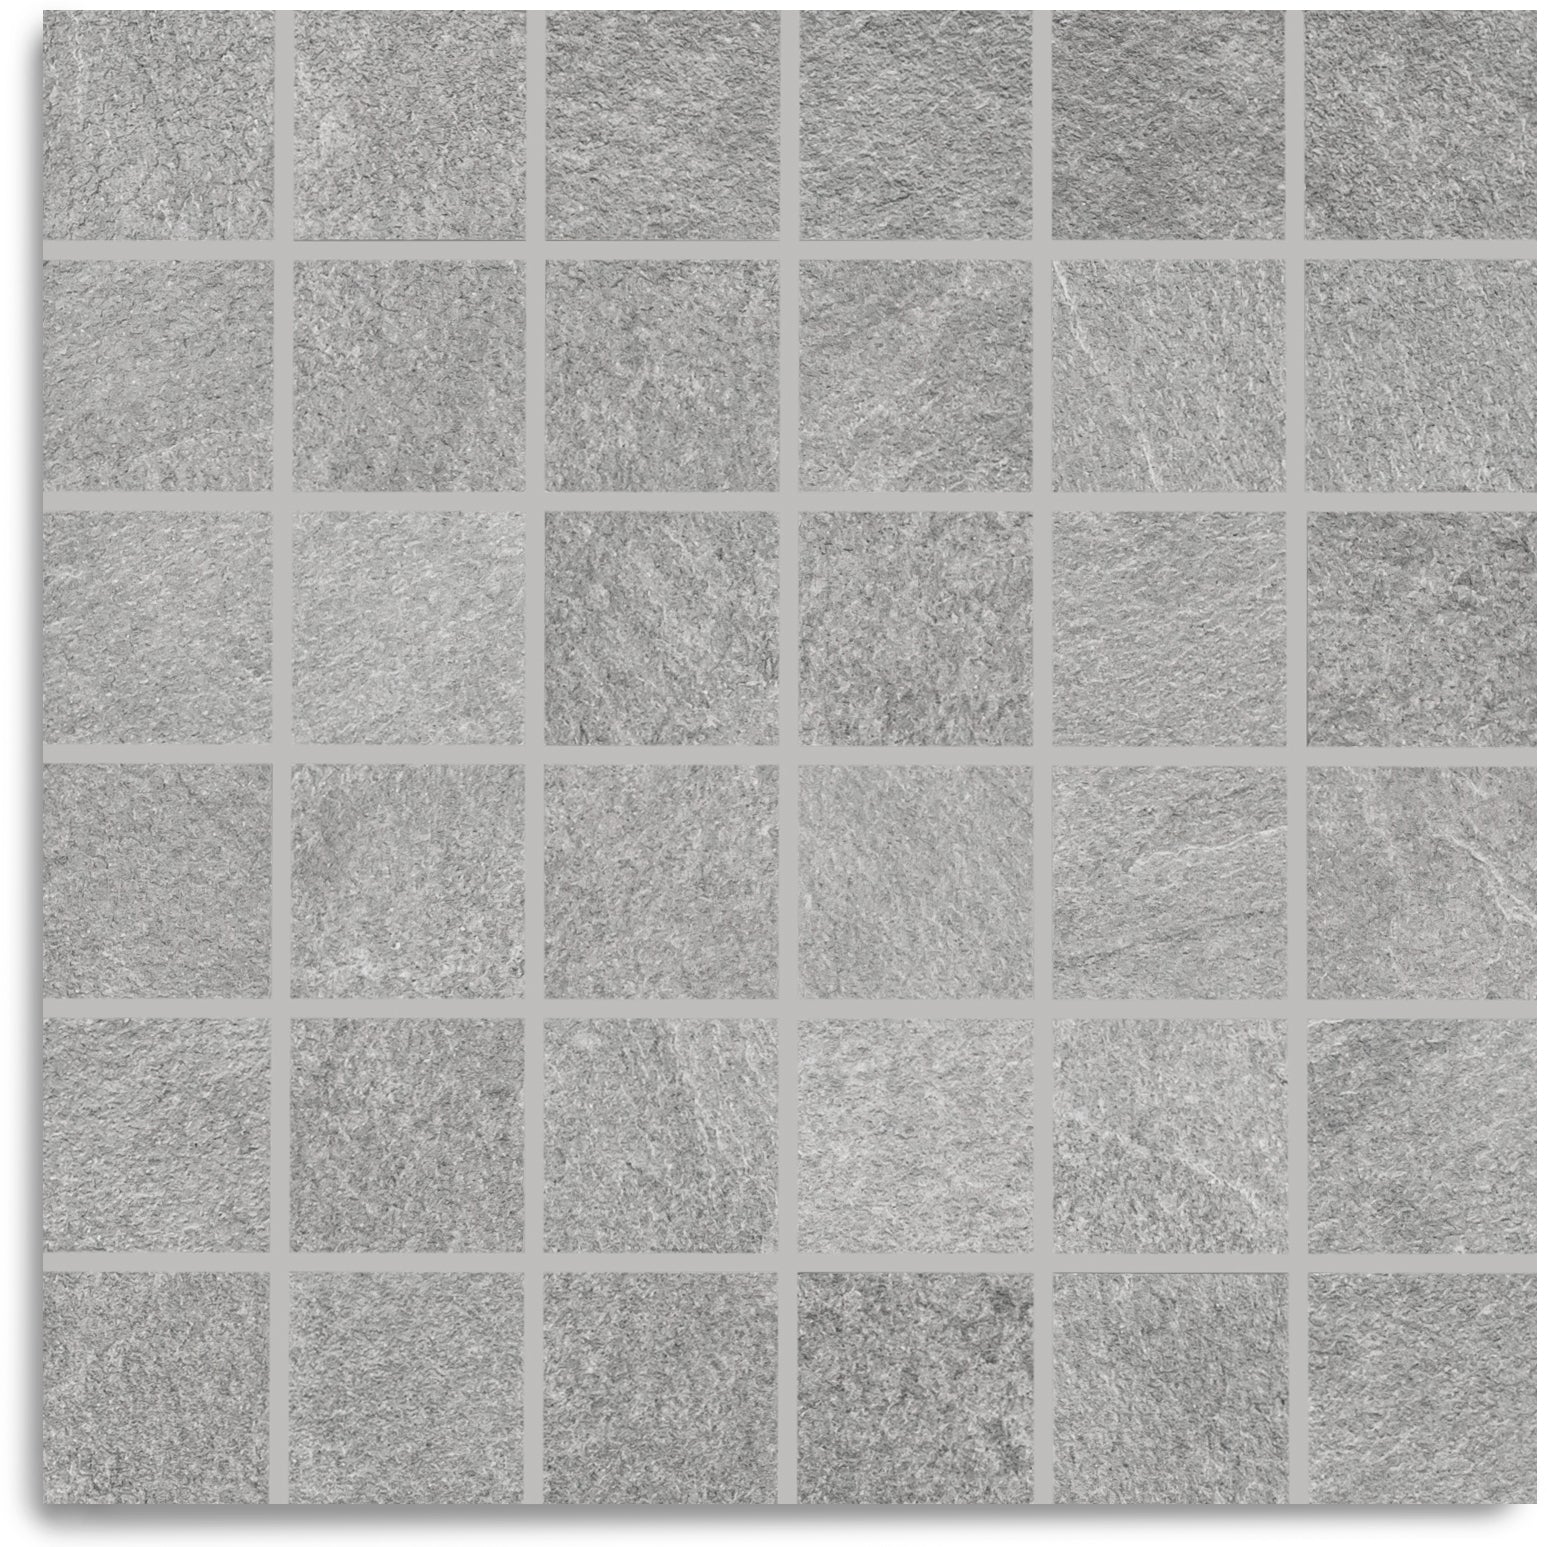
Grey Slate Look Porcelain Mosaic


Nuvola Gold 12x12 Porcelain Mosaic
Carrara 1x1 Hand Chipped Marble Mosaic


White & Jade 2x2 Zellige Checkerboard Mosaic


White 2x2 Forma Porcelain Mosaic


Sky & Cream Forma Octagon Porcelain Mosaic

Natural Stripes Textured Terracotta Mosaic


Green 2x2 Forma Porcelain Mosaic


Green & Cream Forma Octagon Porcelain Mosaic
Grigio Pearla 1x1 Hand Chipped Marble Mosaic
Pearl Slate Look Porcelain Mosaic
Nuvola Pearl 12x12 Porcelain Mosaic
Spider Gold 12x12 Matte Porcelain Mosaic
Montblack 12x12 Matte Porcelain Mosaic
Terracotta Cross Nero Marquina Inset Mosaic
Terracotta Cross Statuario Inset Mosaic

Ash 2x2 Cement Look Porcelain Mosaic
Grey 2x2 Cement Look Porcelain Mosaic
Carrara Honed Basketweave Marble Mosaic
Calacatta 1x1 Hand Chipped Marble Mosaic
Carrara, Crema, Bardiglio Tumbled Pebble Mosaic
Carrara, Nero, Bardiglio Tumbled Pebble Mosaic
Carrara, Verde, Bardiglio Tumbled Pebble Mosaic
Bardiglio Tumbled Pebble Mosaic


White & Black 2x2 Zellige Checkerboard Mosaic


Blue 2x2 Forma Porcelain Mosaic
Star & Cross Classic Terracotta Tile


Thassos, Carrara, Bardiglio Gingham Marble Mosaic
Carrara Bardiglio Tumbled Stone Checkerboard
Rosso Verona Tumbled Marble Tile
Bianco Carrara Honed Marble Tile
Amazzonite Matte Marble Look Porcelain Tile
Rosso Verona 1x1 Hand Chipped Marble Mosaic
Spider Gold Matte Marble Look Porcelain Tile
Bianco Carrara Octagon w/ Nero Marquina Dot Mosaic
White Paradise Marble Look Porcelain Tile
Breccia Capraia 3D Mable Look Porcelain Tile
Calacatta Honed Italian Terrazzo Tile
Verde Guatemala Tumbled Marble Tile
Bardiglio Desert Tea Tumbled Stone Checker Stripe

Fior de Bosco Marble Look Porcelain Tile
Desert Tea Tumbled Marble Tile
Carrara Running Bond Marble Mosaic
Bardiglio Desert Tea Tumbled Stone Checkerboard
Van Gogh 1 3D Marble Look Porcelain Tile
Taj Matte Marble Look Porcelain Tile
Calacatta Running Bond Marble Mosaic


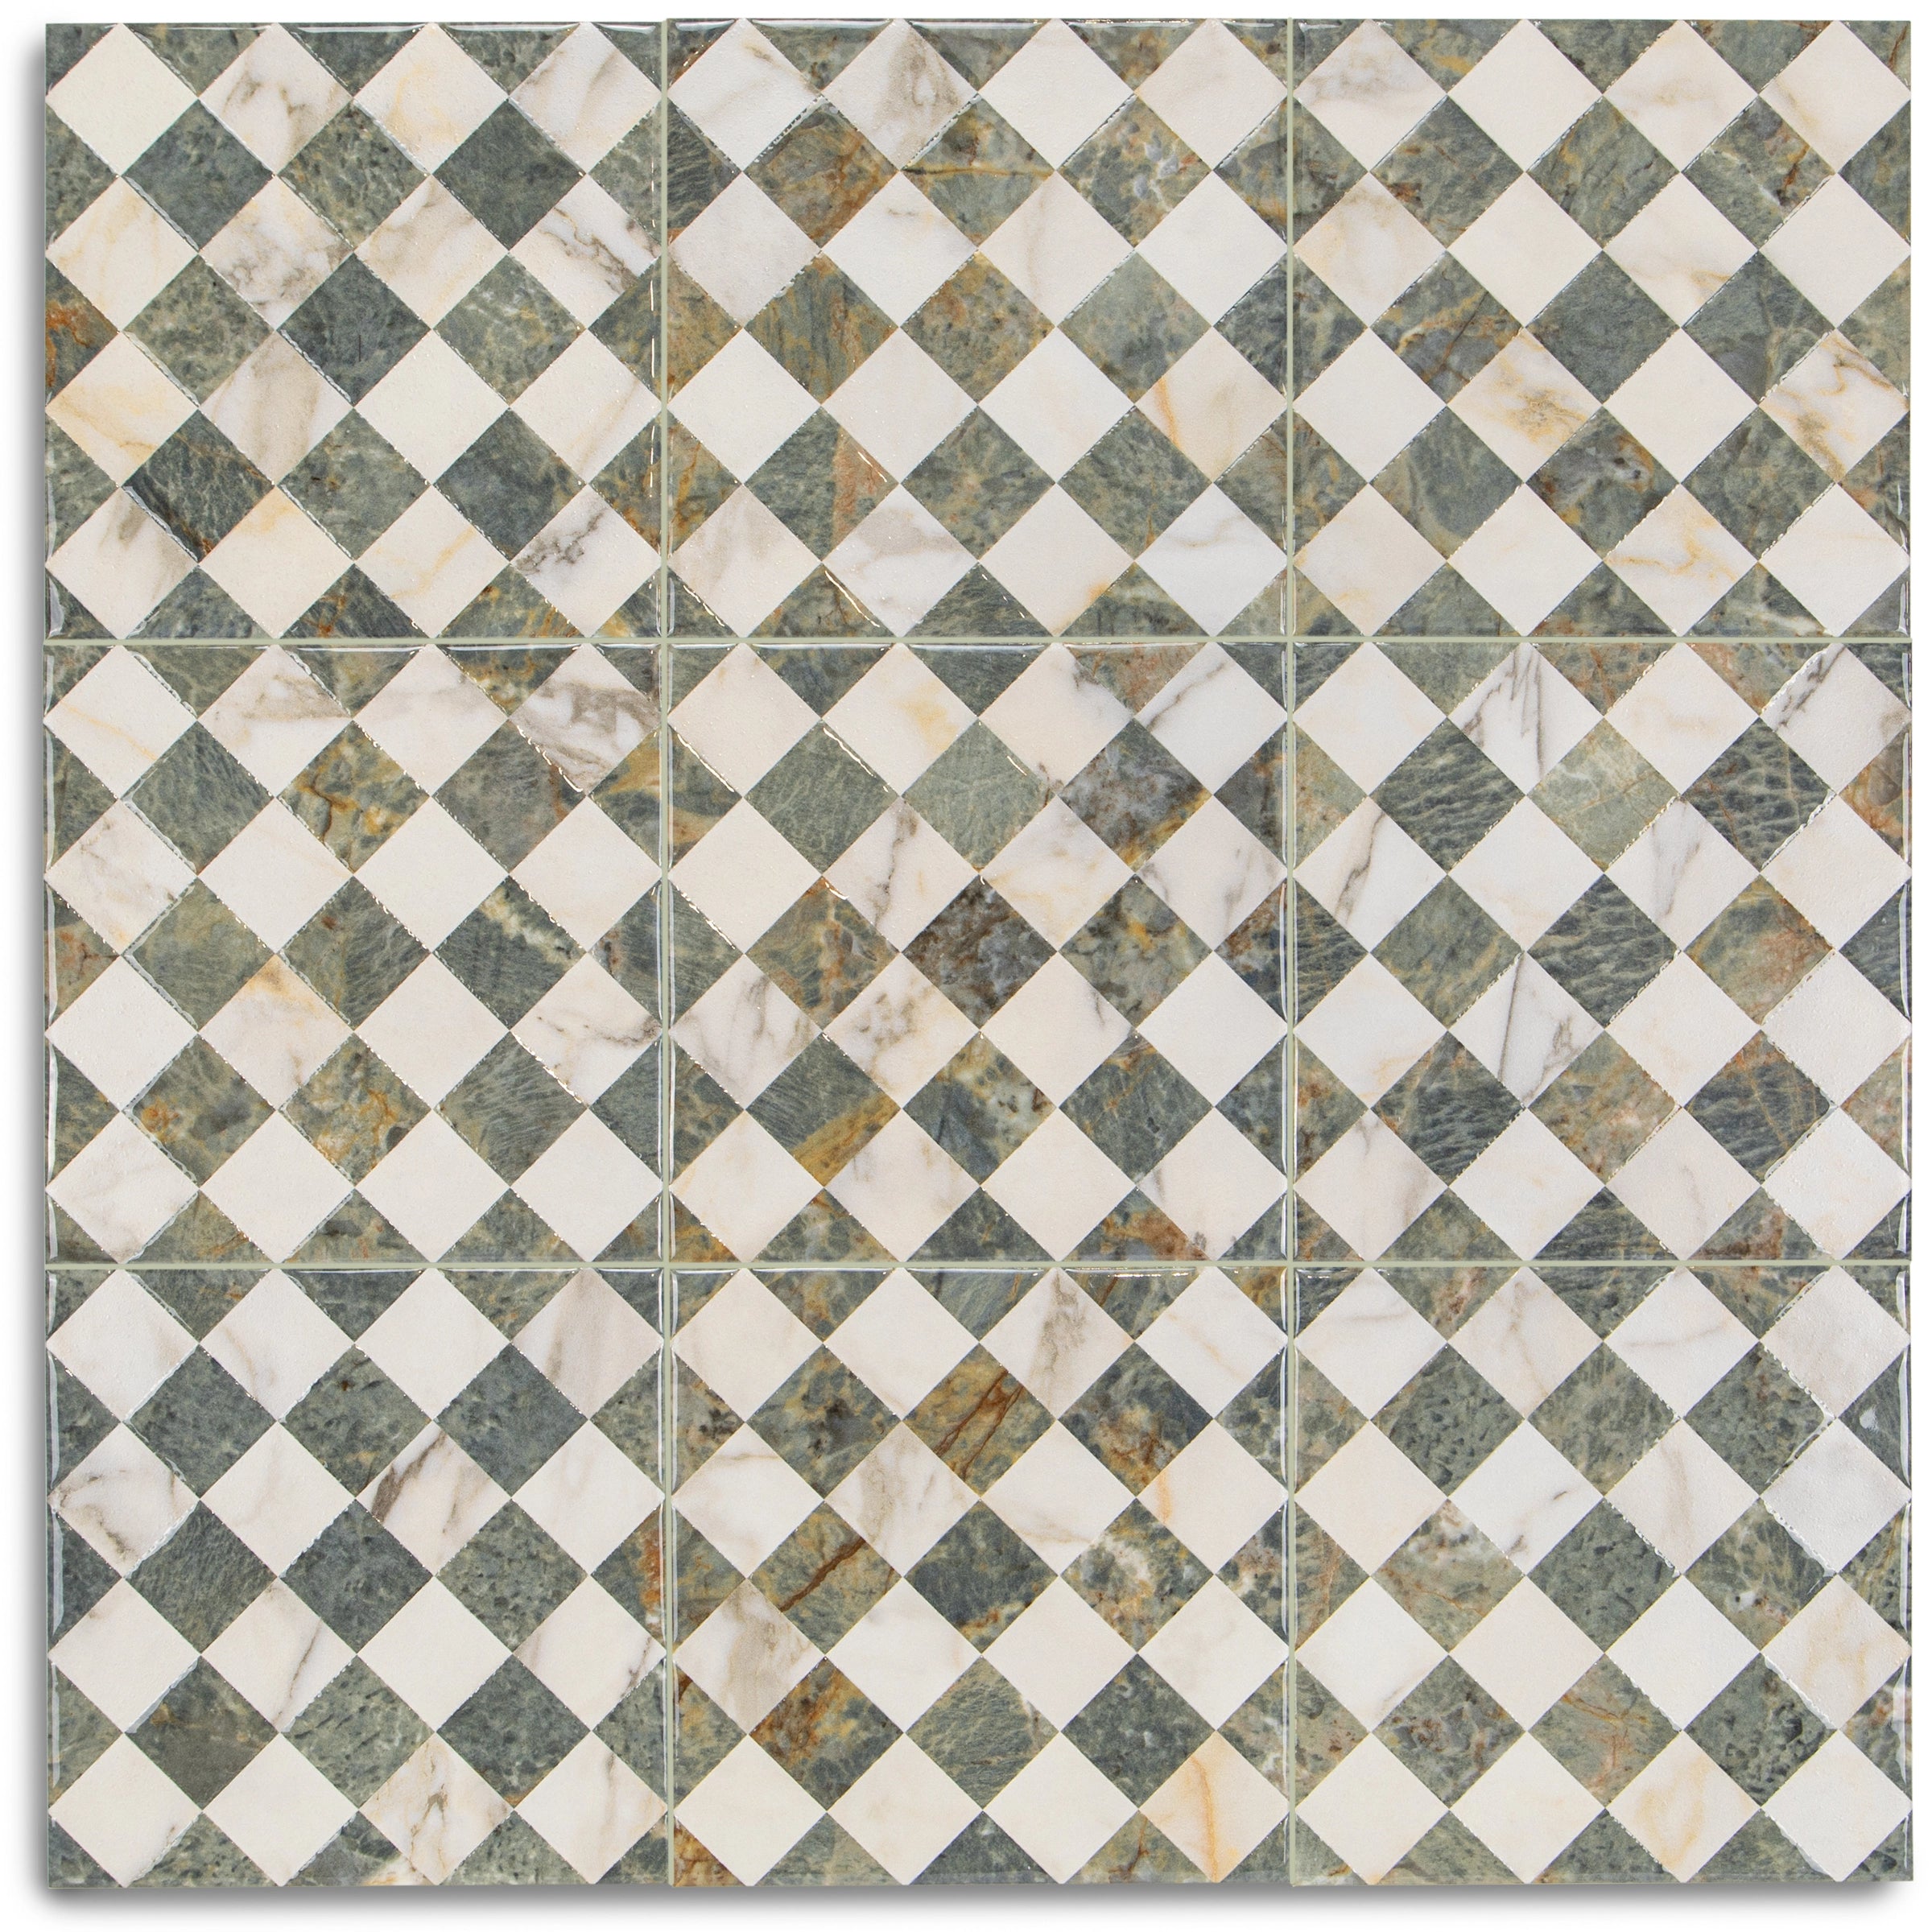
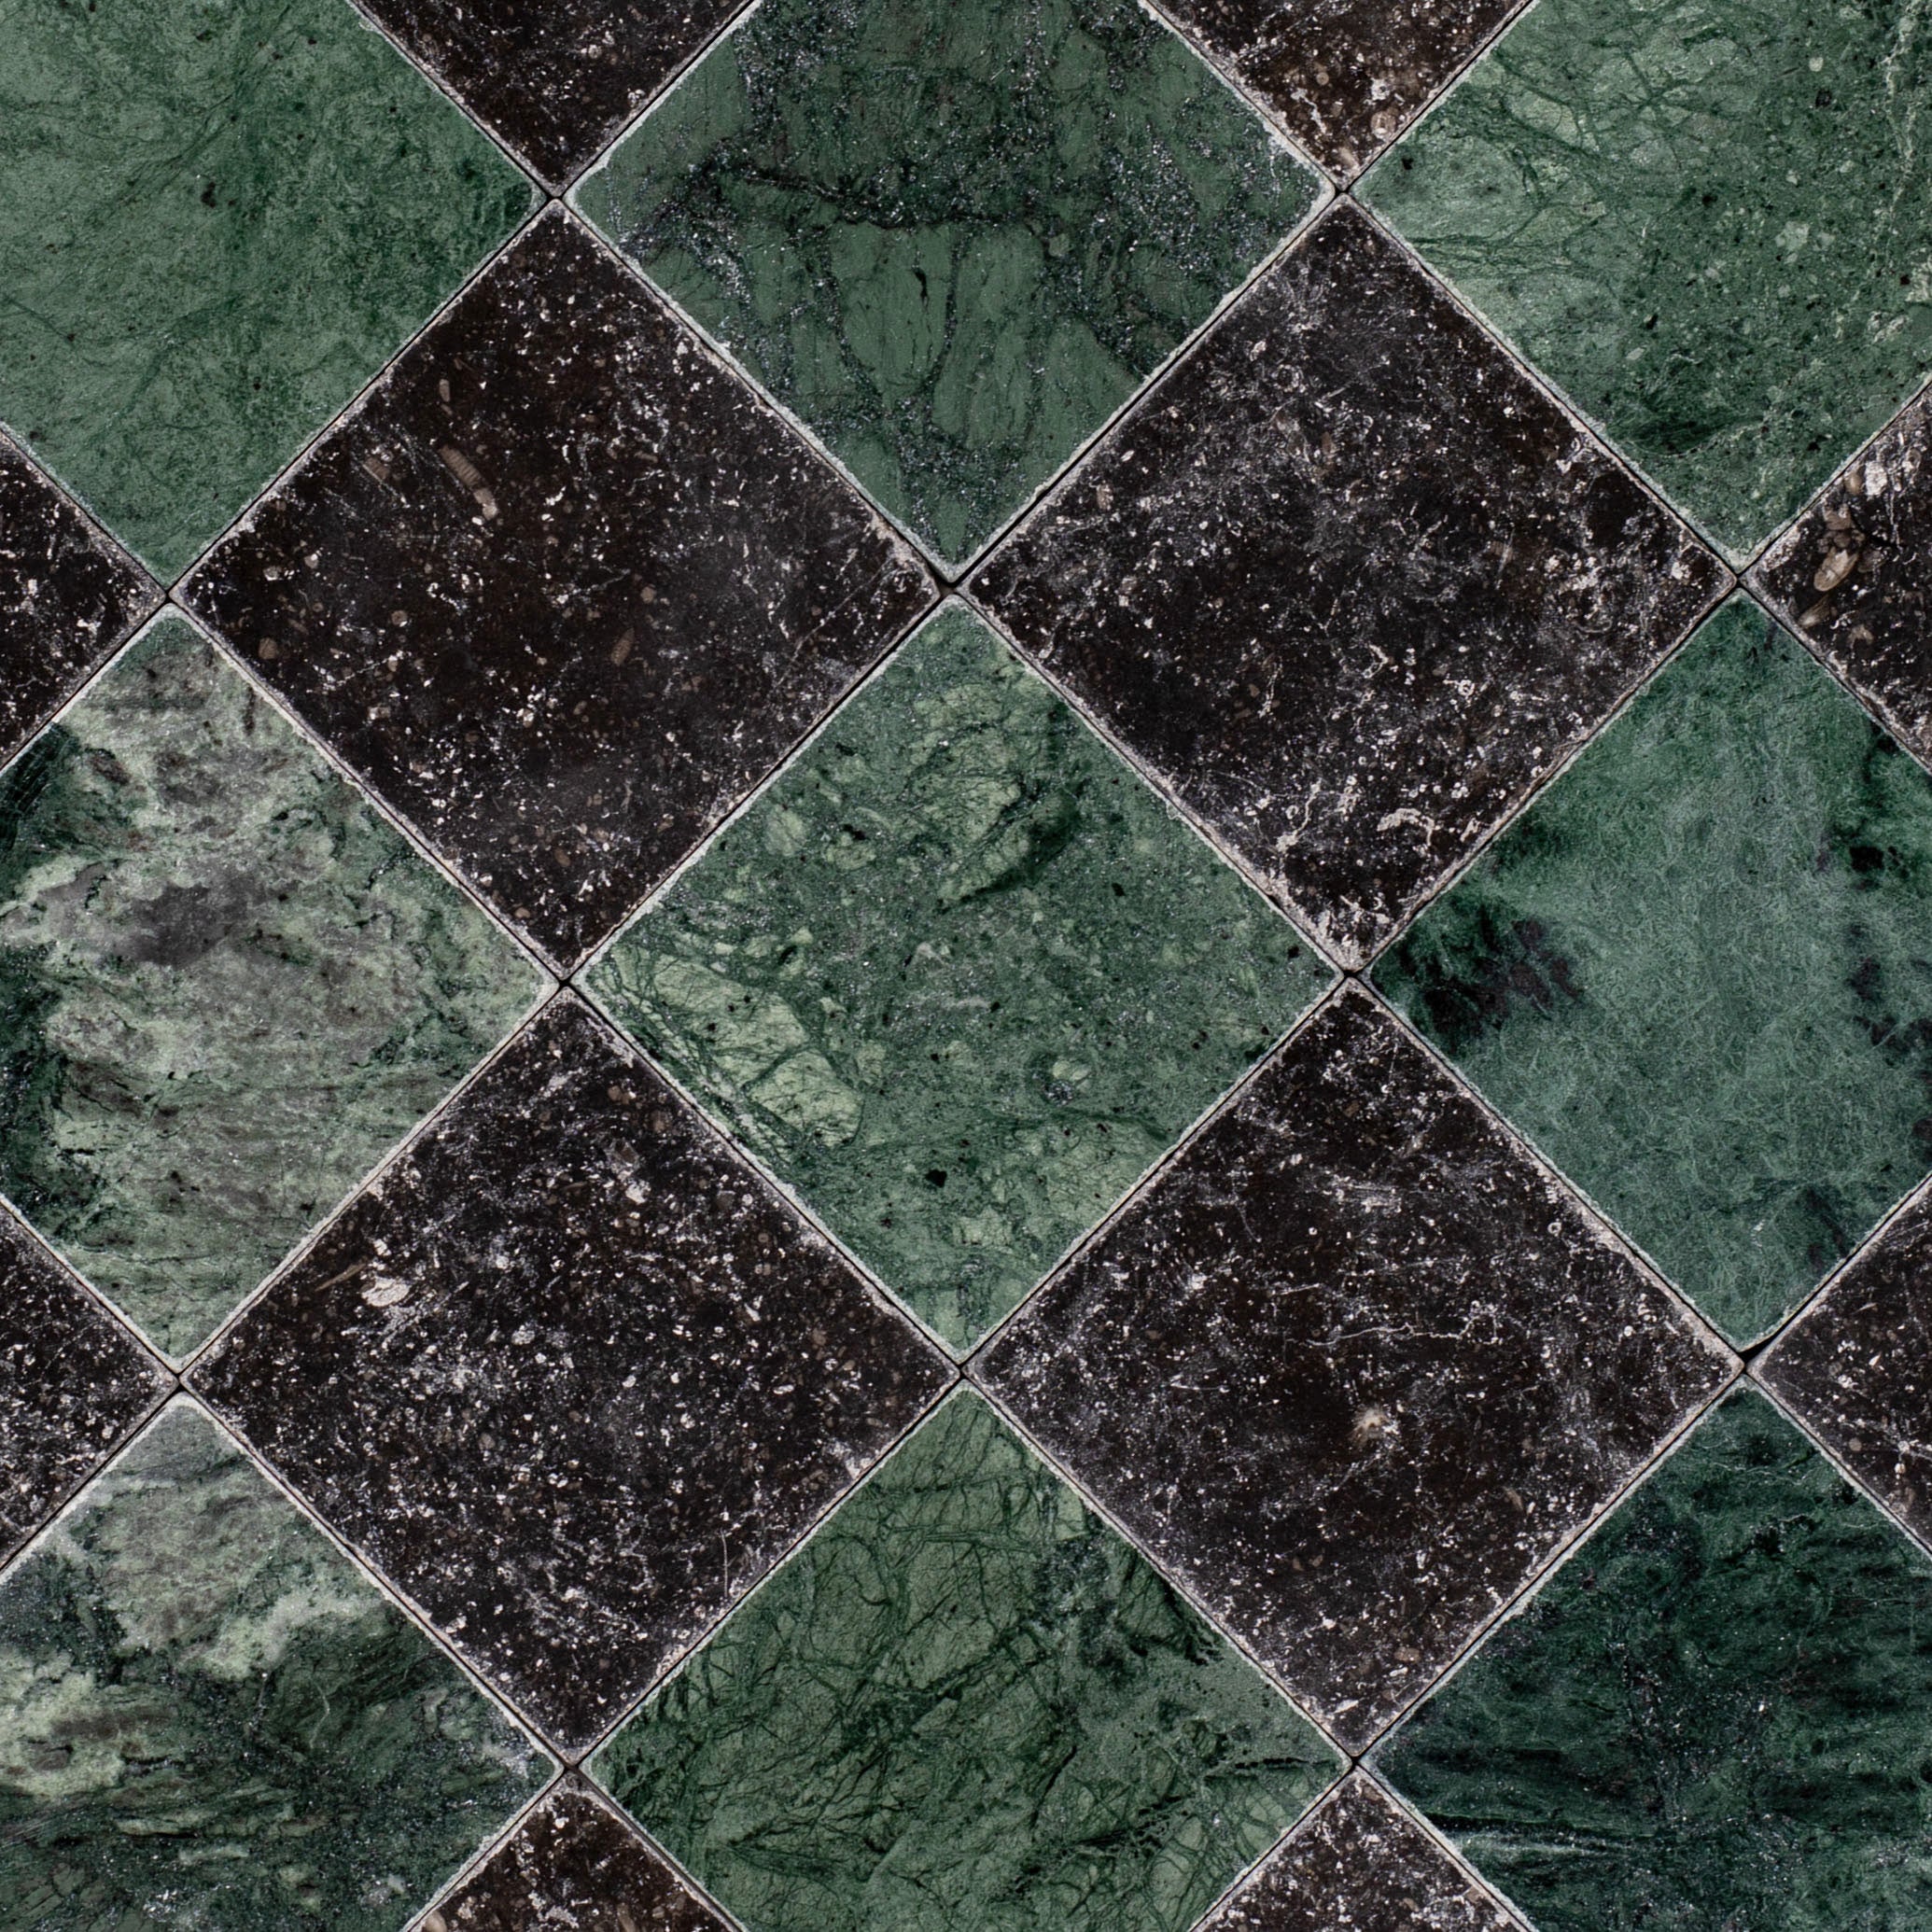
Carrara Verde Guatemala Tumbled Stone Checkerboard
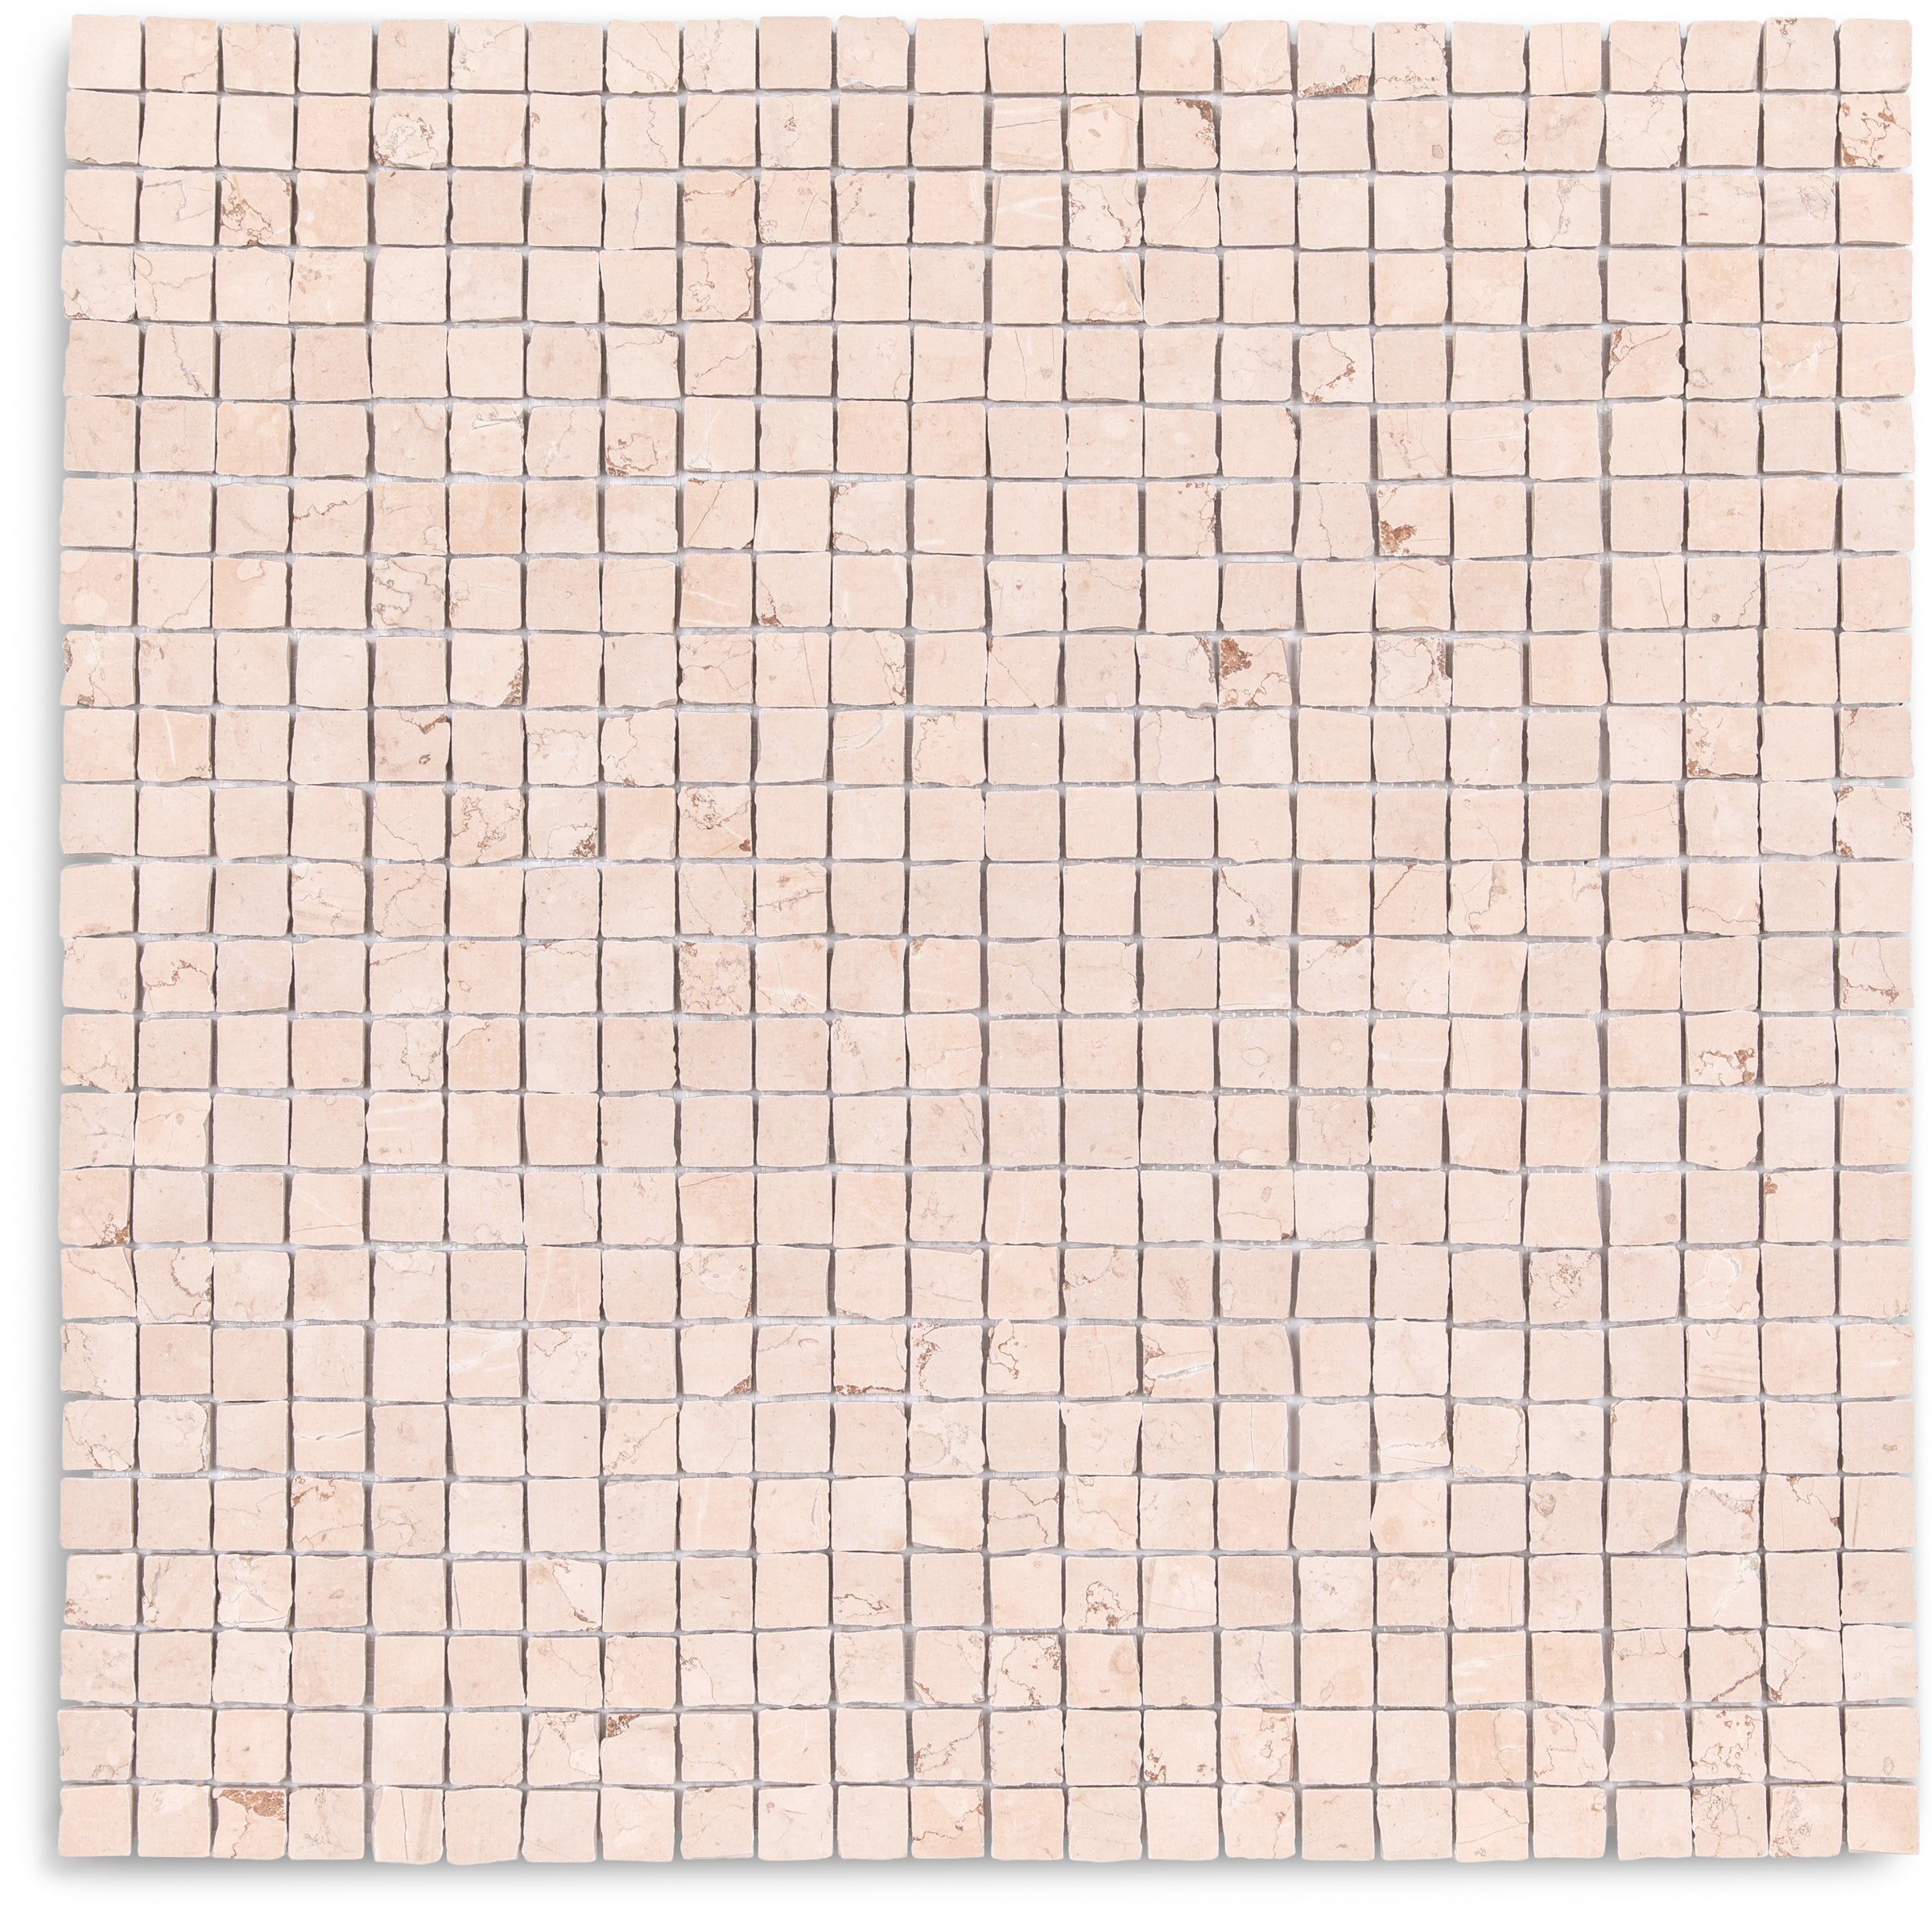
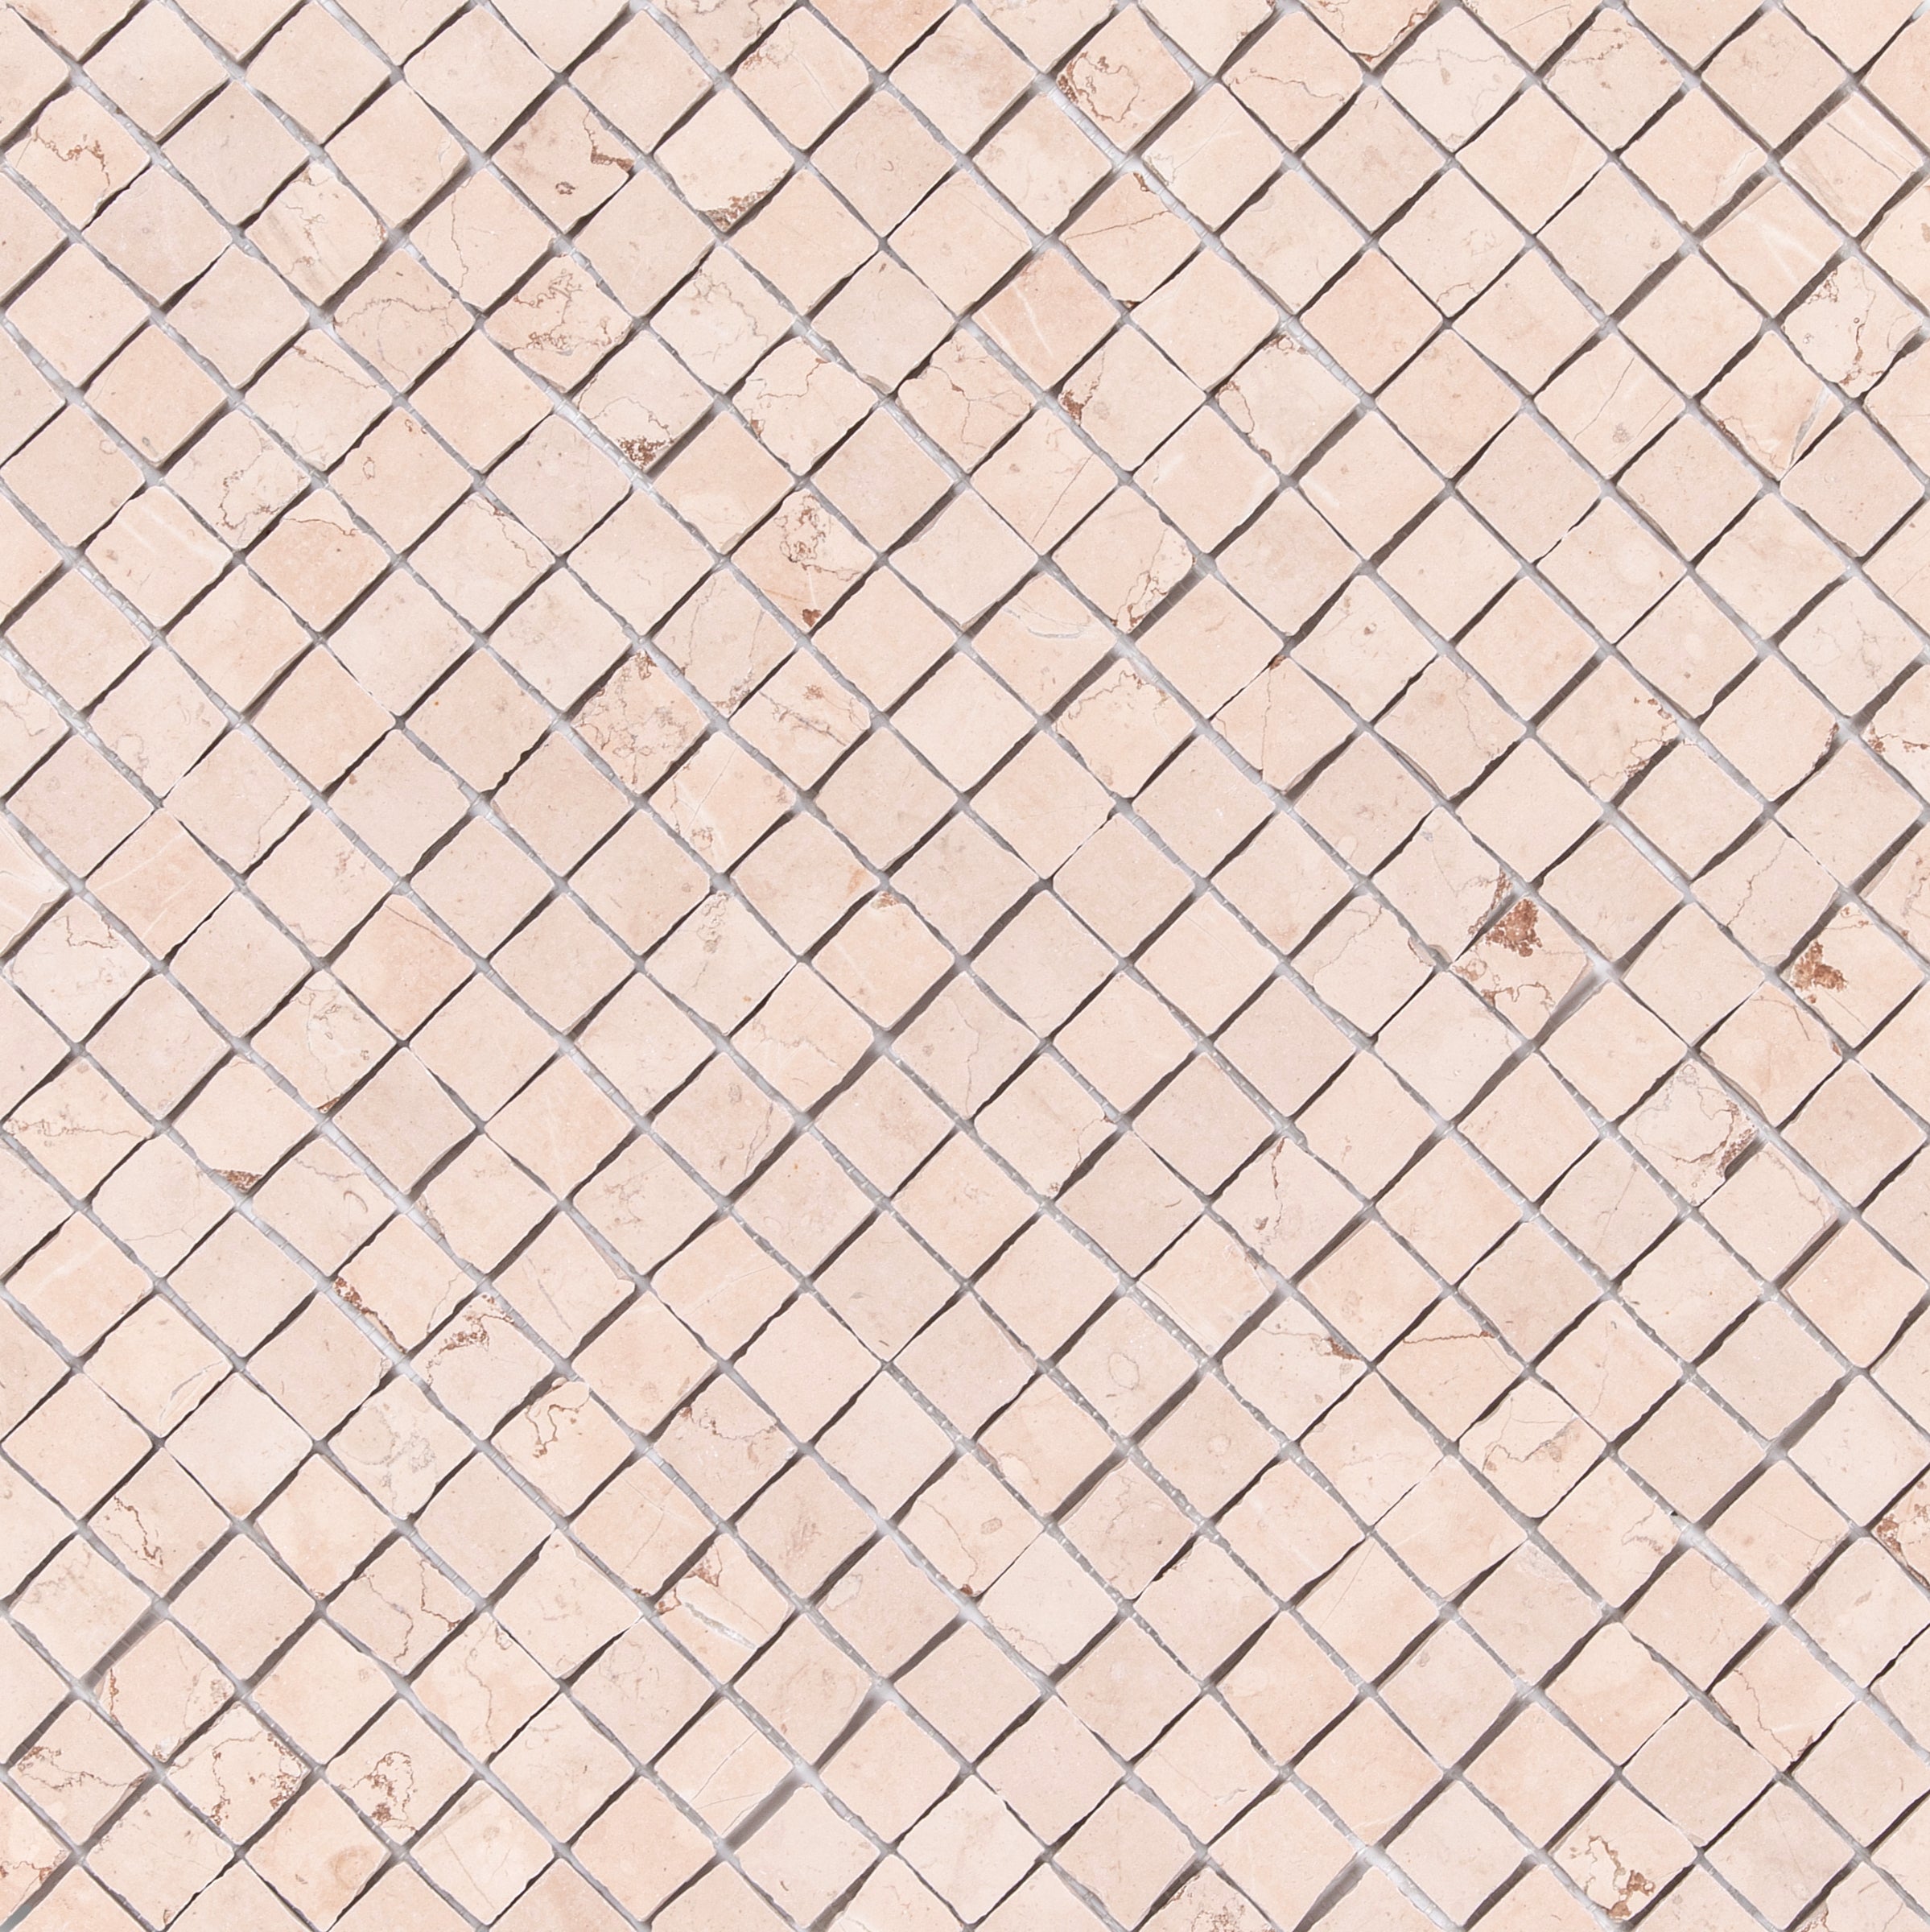
Rosa Perlino 1x1 Chipped Mosaic

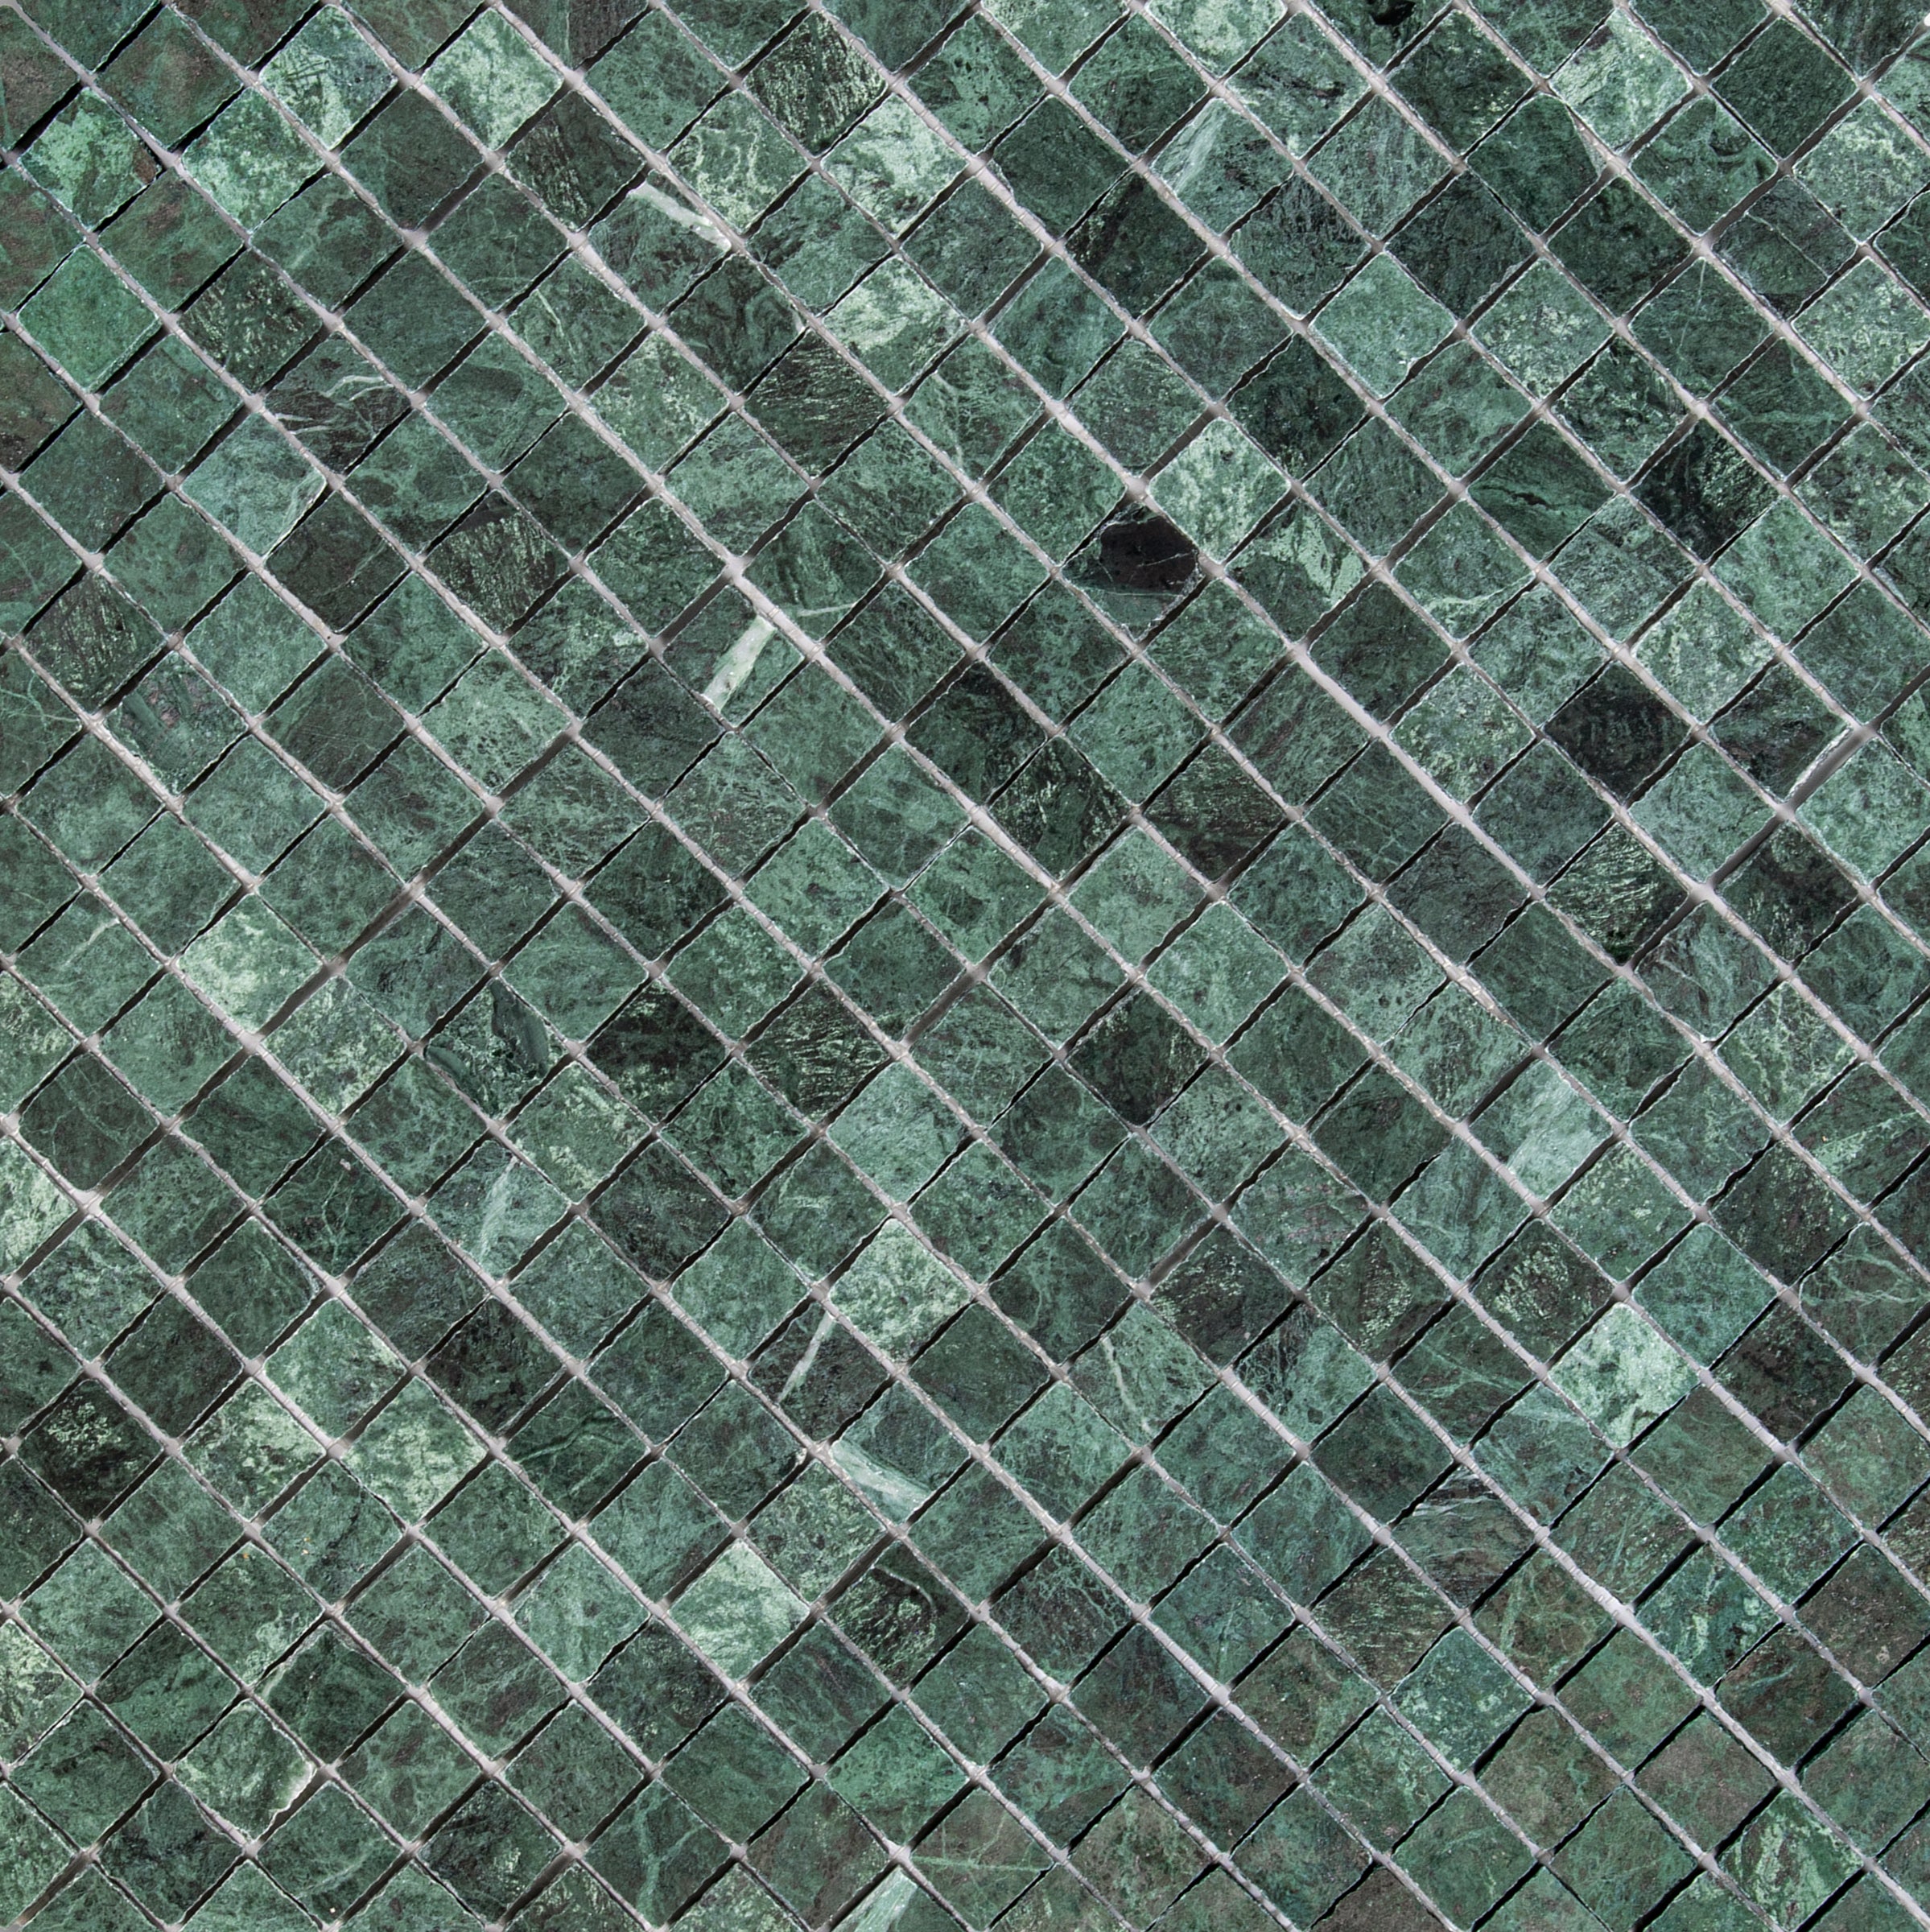
Verde Guatemala 1x1 Chipped Mosaic
Desert Tea Tumbled Marble Tile
Carrara Verde Guatemala Tumbled Stone Checker Stripe
Belgian Blue Tumbled Marble Tile
Montblack Matte Marble Look Porcelain Tile
Ivory Marble Look Matte Porcelain Tile
Torcello Honed Italian Terrazzo Tile
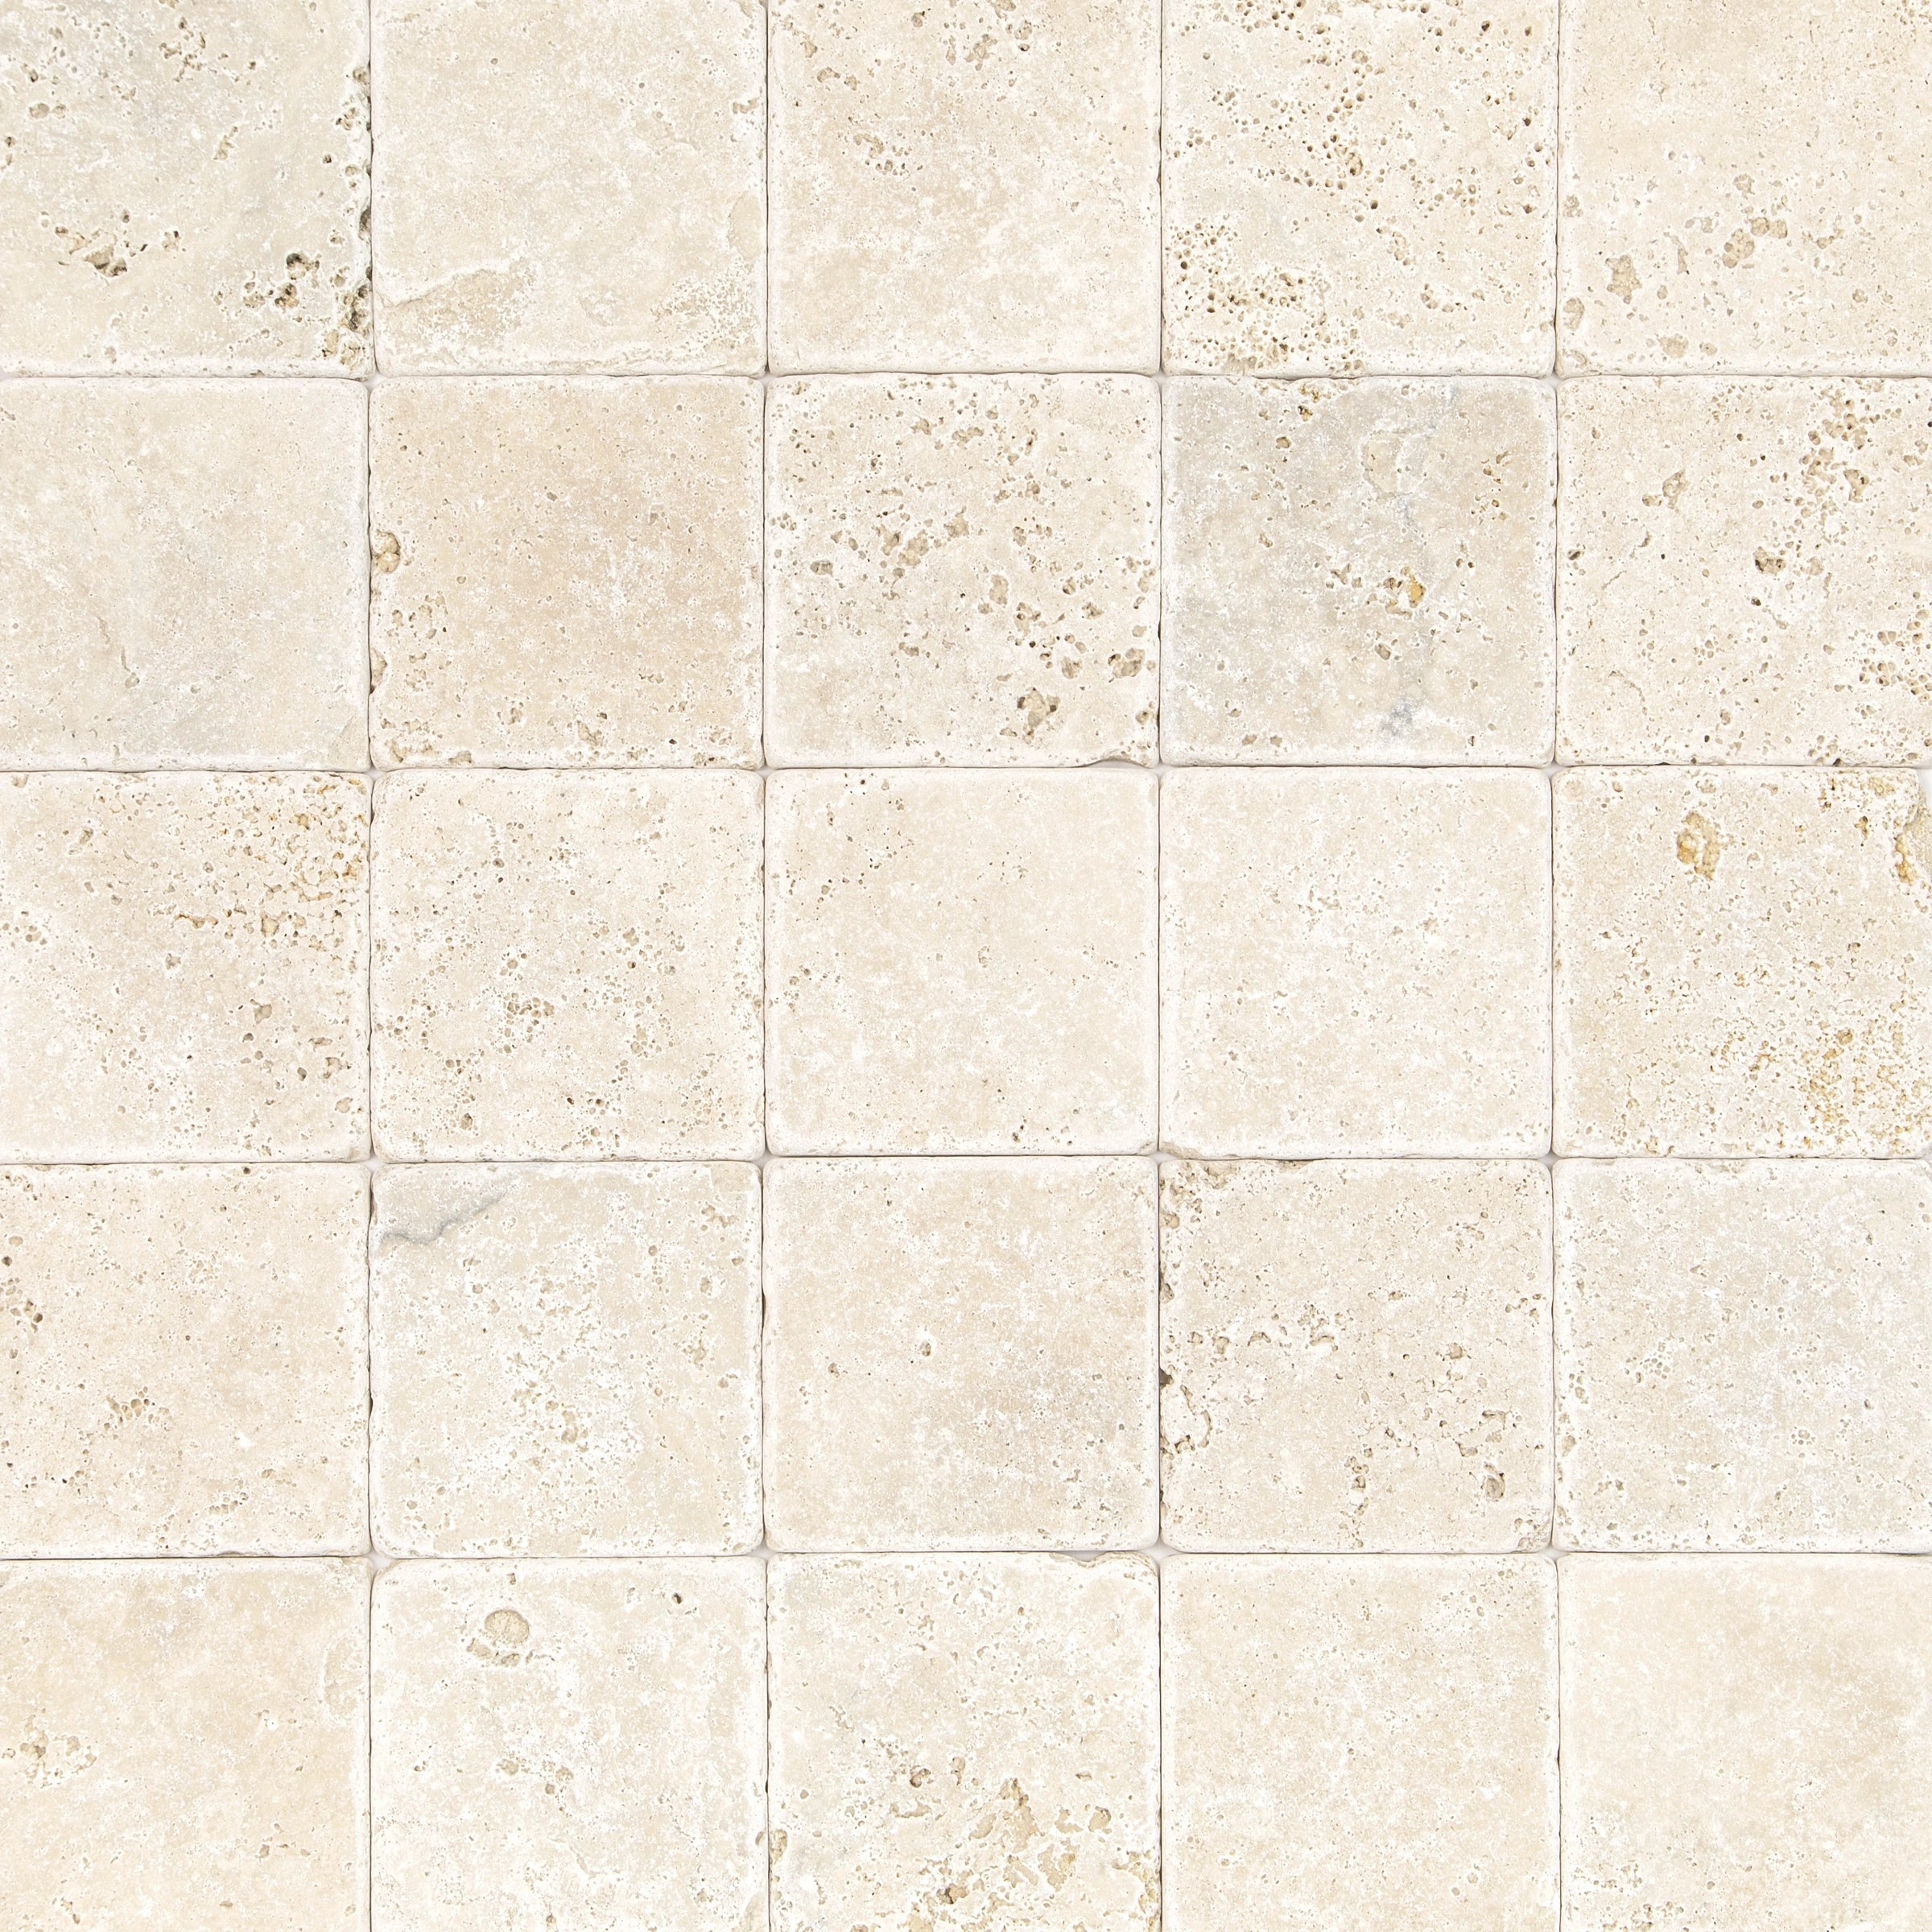
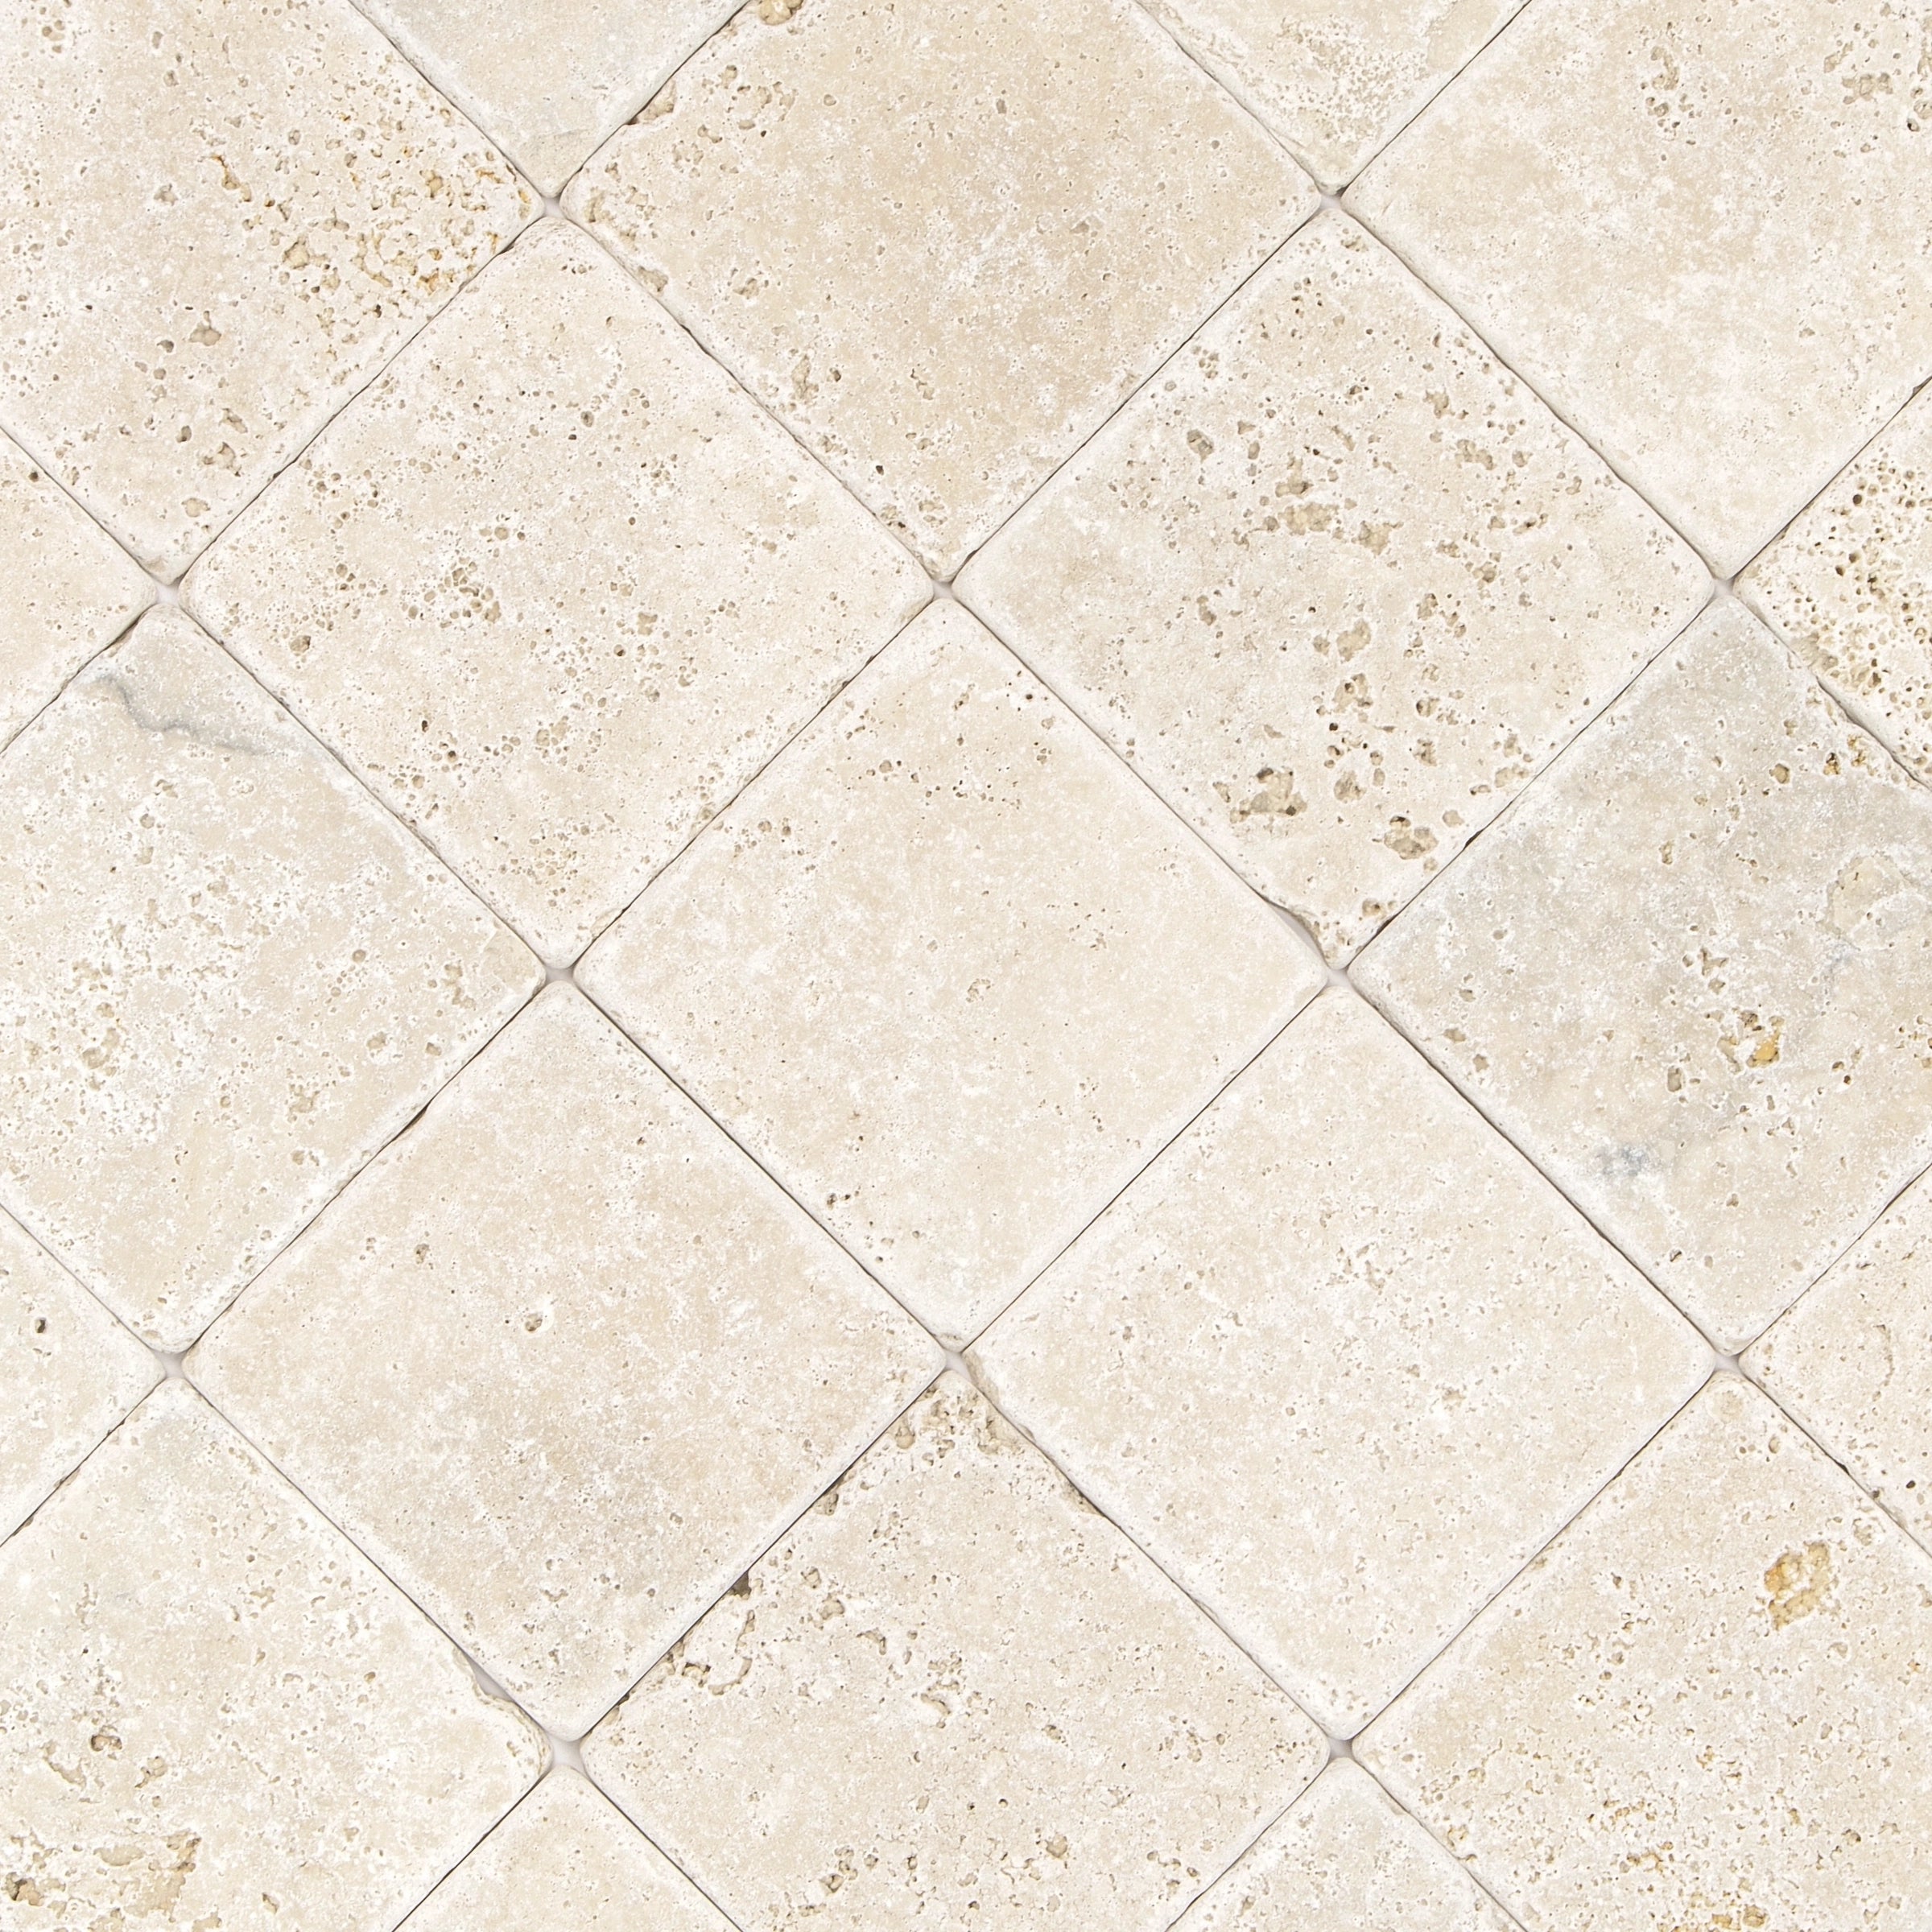
Travertino Chiaro Tumbled Stone Tile
Verde Guatemala Tumbled Marble Tile
Carrara 1x1 Hand Chipped Marble Mosaic